Transfer
The Transfer feature can be used to transfer funds between accounts. You can initiate a new fund transfer to your own account in the same bank, recipients in the same bank, recipients in other banks that you have added, recipients in international banks, and wire transfers.
A business user with necessary access permissions can transfer funds to any of the recipients - both personal and business. Accounts are segregated by personal and business type at all relevant places in the application during transfers and other flows and icons against each account indicates the type of account.
Menu path:
- On the top bar > Transfers > Transfer
- Side menu > Transfers > Transfer
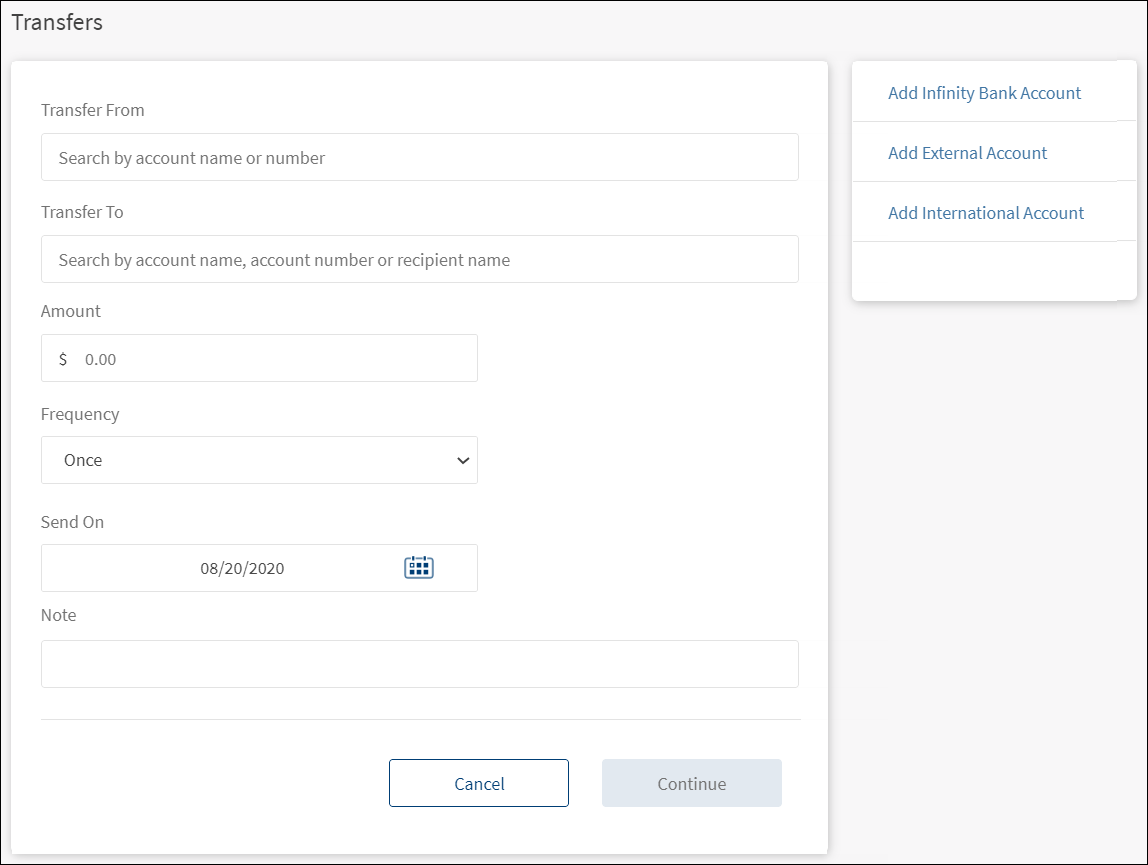
The application displays the Transfers screen.
Funds can be transferred to eligible accounts only. Eligibility is decided by the account type maintained by the bank and is controlled from the core banking system.
Make Transfer
Enter the information as applicable to initiate a fund transfer:
- Transfer From account. Select the account from the list. The application displays an appropriate message if the list is empty. The display of the accounts in the drop-down list depends on the permission given to the user, (a) for a user with access to only one Customer ID, the accounts are grouped by account type such as Savings, Checking and more, (b) for a user with access to personal accounts and multiple Customer IDs, the accounts are grouped by personal accounts followed by Customer ID names and their respective accounts, and (c) for a user with access to multiple Customer IDs, the accounts are grouped by Customer IDs.
- Transfer To account. Select the account from the list. The application displays an appropriate message if the list is empty. The display of the accounts in the drop-down list depends on the permission given to the user. For a user with access to personal accounts and multiple Customer IDs, the accounts except the account selected in the From field are displayed grouped by the personal accounts followed by Customer ID names and their respective accounts. For a user with access to multiple Customer IDs, the accounts except the account selected in the From field are displayed grouped by Customer IDs.
- Amount. Enter the amount to be transferred and click Continue.
- You cannot enter an amount greater than the available balance.
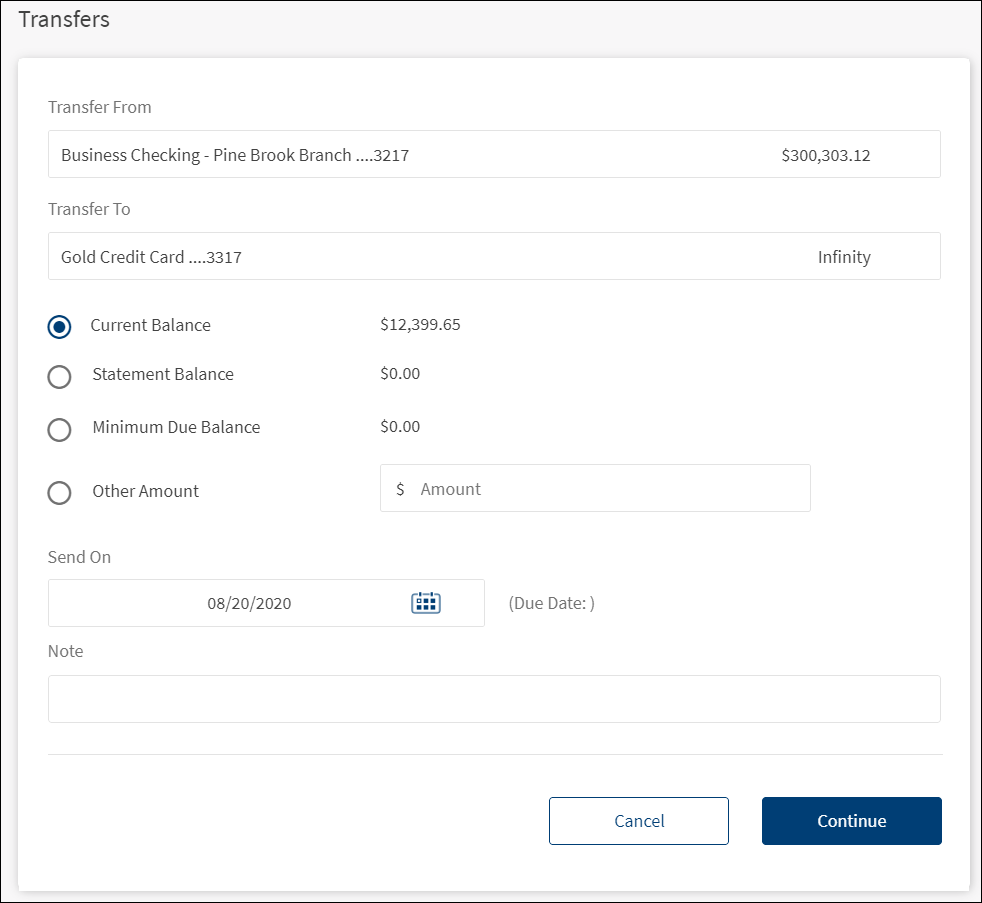
- This field is not applicable if you had selected a credit card account in the To account and after selecting the amount, you will be directed to the confirmation screen.
- For loan account, the Pay Due amount is pre-populated for the loan. You can select Pay Other Amount and enter the amount.
- Frequency. Select the frequency from the list.
- This field is not applicable if you have selected a credit card account in the To account field.
- By default, the application selects the frequency as Once.
- Change the frequency and the date if the transfer is a scheduled or a recurring transfer.
Scheduled Transfer or Recurring Transfer
You can choose to set the transfer as a recurring transfer (for example, daily, weekly, monthly). In that case, select if the recurrence has to be on a specific date and select a date from the calendar, or if it is the number of occurrences and enter the occurrence value (for example, 24 times). By default, the current date is selected as the recurring transfer start date. The other frequency options are:
- Daily
- Weekly (every 7th day from the selected start date)
- Every Two Weeks (every 14 days from the selected start date)
- Monthly (every month on the selected date, cannot select 31st of the month in this case)
- Quarterly
- Half Yearly
- Yearly
If you select any credit card account in To account, the application displays the Current Balance, Statement Balance, Minimum Due Amount, and Other Amount as payment options. Select the required option. If you select Other Amount, then enter the amount in the field provided.
- Send On. Select the transfer date from the calendar. By default, the current date is selected as the transfer date.
- Note. Add notes if required.
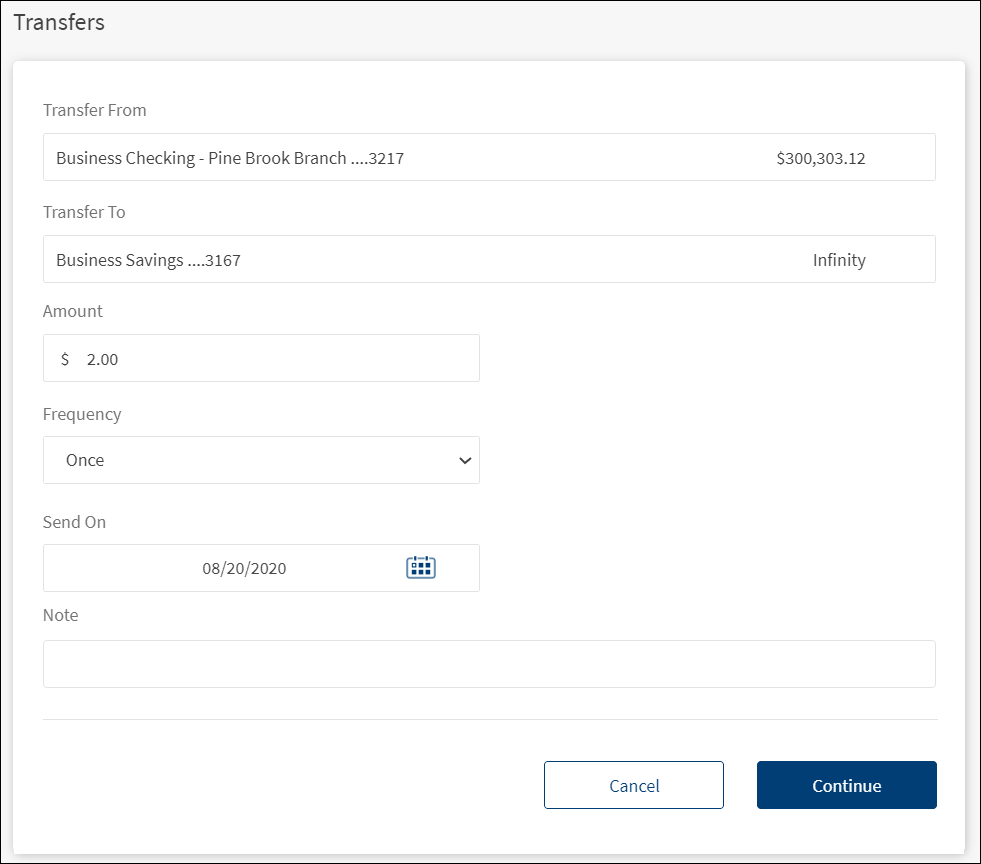
- Click Continue. If you have specified valid data in all the fields, the application displays the confirmation screen with provision to modify the details if required.
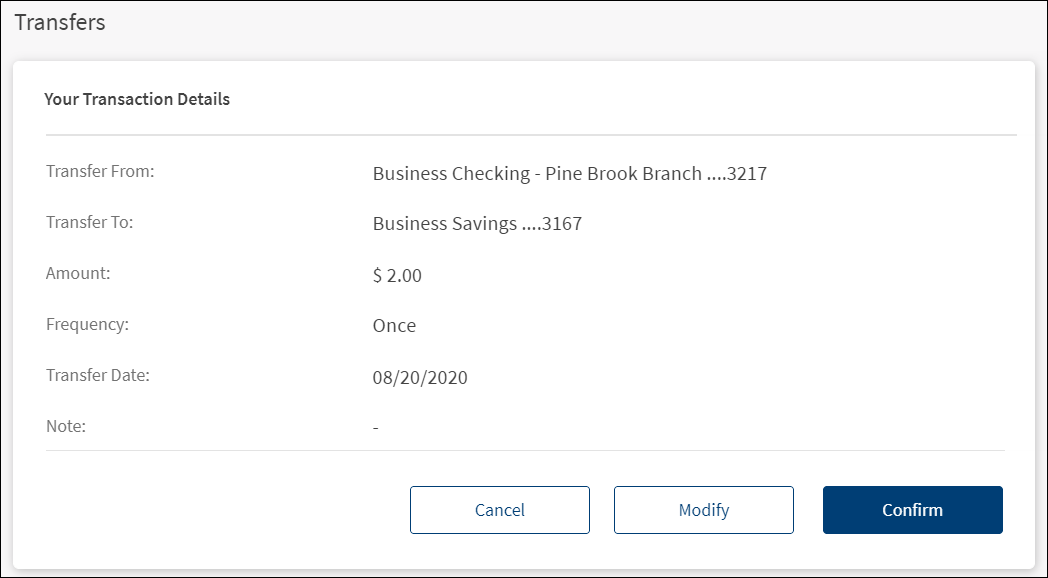
- Modify details if required. Click Confirm. The application displays an SCA screen.
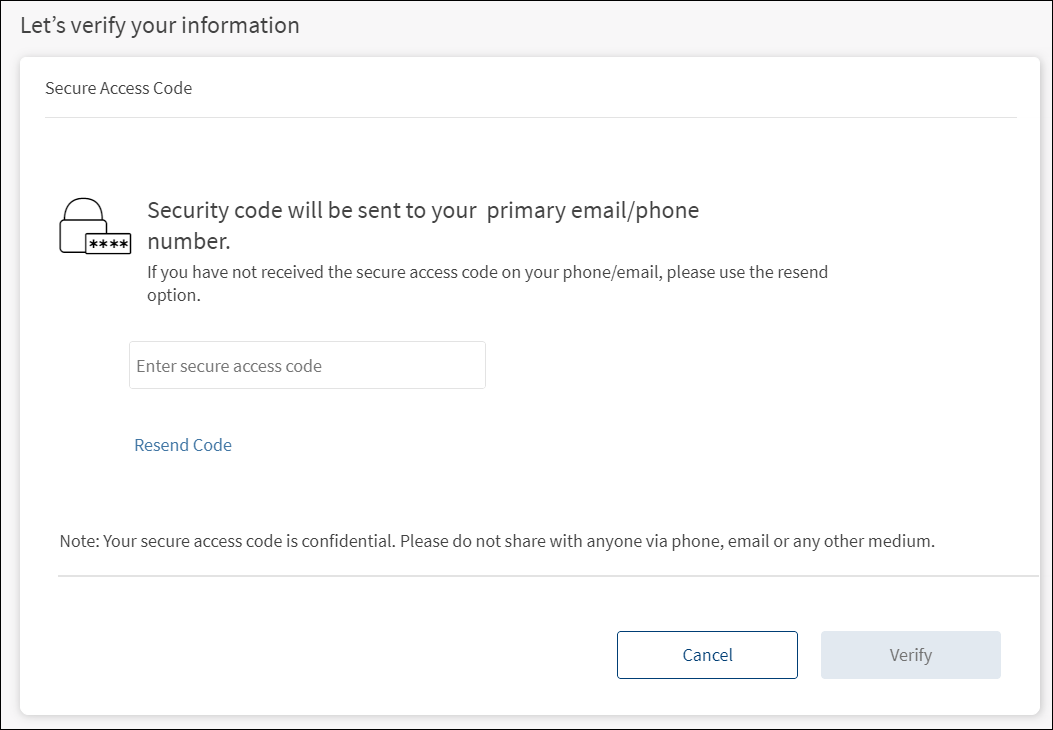
- Depending on the bank configuration, if Strong Customer Authentication(SCA) is enabled for the feature, SCA is triggered. The authentication type is configured and can be turned on or off in the Spotlight application. For more information see Push Notification.
- Once the authentication details are entered, click Verify.
- If the transfer fails due to some reason (for example, if you have insufficient funds in the selected account), the application displays an alert along with an appropriate message.
- If the session is timed-out during a transfer and leaves the window open, you have to initiate the transfer again.
- Straight-through Processing - Alerts for Transfers and Approval Flows: If the initiator is also the approver of the same transaction, the authorization on transaction is implicitly counted. In such cases, the initiator will not receive an Approver type alert. This applies to Euro payment flows as well. The following are the two scenarios for straight-through processing:
- There are other approvals required on that specific transaction: In such cases, all the other approvers receive the notification of the request and the initiator who is also an approver, receives only the Initiator type alert.
- There are no other approvals required on that specific transaction: In such cases, the transaction is directly submitted and neither the approver or the initiator (who are the same) receives any Approver type alerts. An alert that the request has been submitted only is triggered.
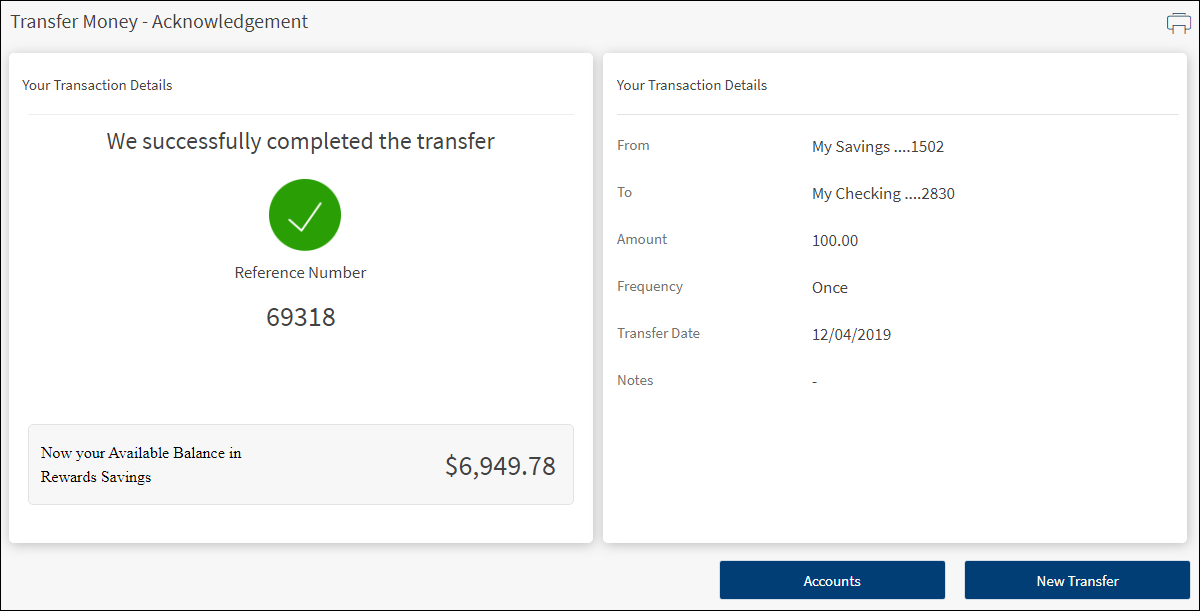
The application displays an acknowledgment screen with transaction details, unique reference number to the transaction, and provision to do the following:
- Make a new transfer
- View Accounts (Accounts Dashboard)
- Print the transfer acknowledgment
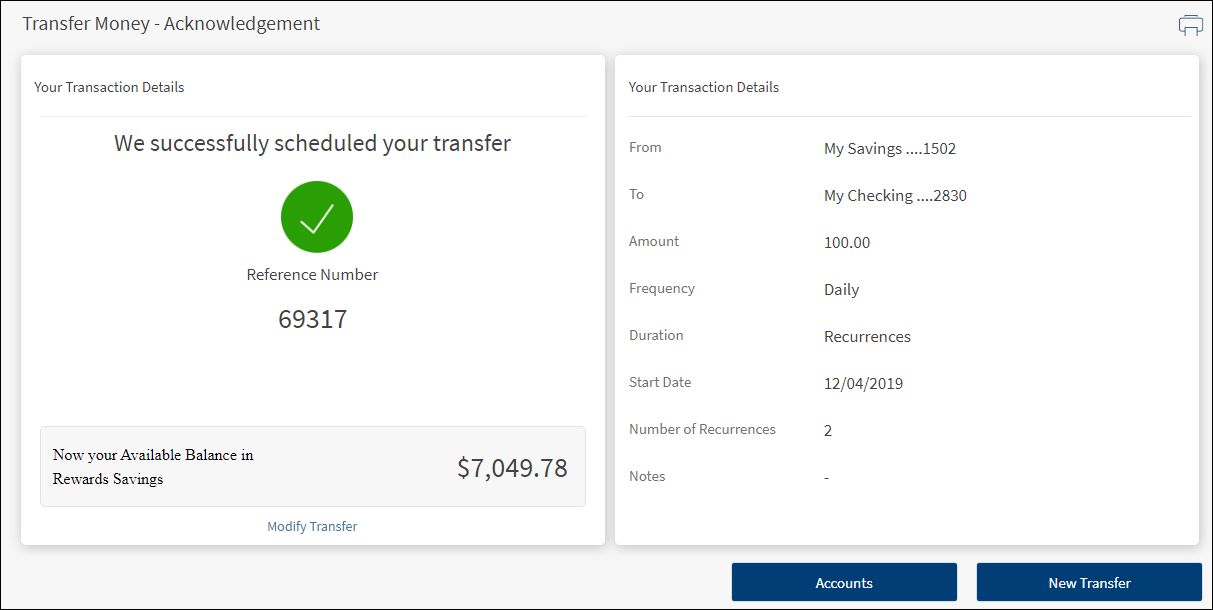
- Modify Transfer (for recurring transfers)
Acknowledgment Screens
Recurring Transfer
Beneficiary Management
A user can have access to multiple contracts and a contract can have single or multiple Customer IDs within it. Also, a contract can be a combination of single or multiple retail and business customer IDs. The beneficiaries are stored/associated at a customer ID level and all the actions of view, edit, and delete a beneficiary is controlled by the permissions the user has at the customer ID level. A user can share the beneficiary with other customer IDs (to which the user has permission) or associate with one or multiple customer IDs. In the "Manage Beneficiary" screen, the beneficiaries are listed based on the customer IDs to which the user has access. The beneficiaries are stored in the DBX DB.
A contract can have the following use cases and a user associated with the contract can be classified as:
- Single Retail Customer ID (Retail)
- Multiple Retail Customer IDs (Retail)
- Single Business Customer ID (Business)
- Multiple Business Customer IDs (Business)
- Multiple Retail & Business Customer IDs (Combined)
Key points:
- The beneficiaries created are associated with Customer ID.
- A logged-in user can create/edit a beneficiary only if the user has permission for Create Beneficiary feature action under any of the following: Transfer/Bill Payment/Bulk payment/Domestic and International Wire/P2P.
- If the logged in user has access to more than one Customer ID, the user will have an option to share the beneficiary with one or multiple Customer IDs (to which the user has permission).
- If the user has Edit permission, the user can edit the beneficiary also as stated above.
- In case of Delete, if the user deletes a specific beneficiary, it will be deleted against all the customer IDs linked to it.
- While making a payment, when a user selects a specific account based on the customer ID of the that account in the "To" field, all the beneficiaries are listed.
- The same logic is applied when making payment through "Send Money" option from the Manage Beneficiary screen. This is applicable only for transfers.
- In the "Manage Beneficiary" section, the beneficiaries are listed based on the customer IDs the user has access. Also, if the same beneficiary is available across multiple Customer IDs, the beneficiary appears once on the screen. On clicking the Beneficiary, the number of customer IDs with which it is associated are displayed.
- In addition to the customer ID level access, the beneficiary listing is based on the Feature level permission of the logged-in user.
- If a user tries to add a same beneficiary record which is already associated with that customer ID, the system will do a duplicate check and throw error.
Error and Validations
- When the transfer to a loan is initiated, the next due amount is pre-filled in the Amount field. You cannot modify the due amount.
- The Bank/FIs can add a limit on the number of transfers or maximum amount that can be made/transferred to a loan account in a month.
- The payment may not be reflected immediately in the loan details or transaction section. It may take 2-3 business days to reflect in the loan account.
- If the From account does not have the enough balance to make the payment, the following message is displayed, "Your account balance isn't sufficient to make this payment".
- In case the due amount is zero, the following message is displayed, "Currently there are no pending dues on your account".
- In case the selected date is later than the Next Payment Date associated with the loan account, the following message is displayed, "The scheduled date is later than the due date. Making payments after the due date may incur penalty. Do you wish to continue?".
- You cannot make a payment more than the total over due amount. If you select, Pay Other Amount and enter the overdue amount, the following message is displayed, "Your account balance isn't sufficient to make this payment".
Configuration
- The authentication type is configured in the Spotlight application.
- The visibility of each feature is controlled through the permissions defined for the user.
- The capability to revoke or restore the features is available in the Spotlight application.
-
The following configurations are applicable for Bulk Payments:
- The visibility of each feature is controlled through the permissions defined for the user.
- This feature is applicable only in online banking application and integrated with Transact directly. The request is created in Transact and the Transact application processes the payments.
- Depending on the bank configuration, if Strong Customer Authentication(SCA) is enabled for the feature, SCA is triggered. The authentication type is configured and can be turned on or off in the Spotlight application. See Push Notifications for more information.
- The Feature/Role/Company level transaction limits for recurring, nonrecurring, non-scheduled, and scheduled transactions are managed in the Spotlight application. User level limits can be managed in Spotlight and the customer-facing application.
- The display of the accounts in the drop-down list depends on the permission given to the user.
- The
 retail/personal or
  business icons against the accounts to indicate whether the accounts belong to a Retail or a Business CIF are shown at all relevant places in the application based on the contracts the logged-in user has been given access.
- When the user has access to only one Customer ID, no personal or business indication is shown at any place in the application.
- When the user has access to only one type of Customer ID (Business/Retail) - this may be through access to a single contract or a mix of contracts, then no personal or business indication is shown at any place in the application.
- A user having access to multiple CIFs either through a single contract or multiple contracts sees the icons representing retail/personal or business accounts against the accounts across the application.
- Person icon: Accounts belong to a CIF where the user is the account holder in core banking. This CIF is marked as the primary CIF in the contract.
- Person icon: Accounts belong to a CIF of type Retail. The user is not an account holder in the core Banking but has been given access through the contract.
- Business icon: Accounts belong to a CIF of type Business.
Approval Alert Notification for transaction
Applies to transfer, bill payment, wire transfer, ACH collection/payment request, or an ACH file.
- The initiator is notified whenever a transaction is submitted for approval through a Global type of alert. Bank agents can configure the Alerts from Spotlight for this specific event.
- The initiator receives a Global type of alert whenever an approval is received on a transaction that the initiator has initiated and submitted for approvals. The use case is providing an alert notification to the initiator when a user approves a transaction, but transaction is not submitted for execution. Bank agents can configure the Alerts from Spotlight for this specific event.
- The initiator receives a Global type of alert whenever a transaction that the initiator has initiated has received the requisite number of approvals and it is submitted for execution. All the approvers receive an alert notification indicating that the transaction that was in their bucket for approval has now been authorized and is submitted for execution. Bank agents can configure the Alerts from Spotlight for this specific event.
- The initiator receives a Global type of alert whenever a transaction that the initiator has initiated has been rejected by any one of the approvers. Bank agents can configure the Alerts from Spotlight for this specific event.
- A Global type of alert notification is sent to all the approvers of a specific transaction when the transaction has been rejected by any one of the approvers. The approver who has rejected a transaction, receives an alert indicated that the specific transaction has been rejected.
In this topic