Payments
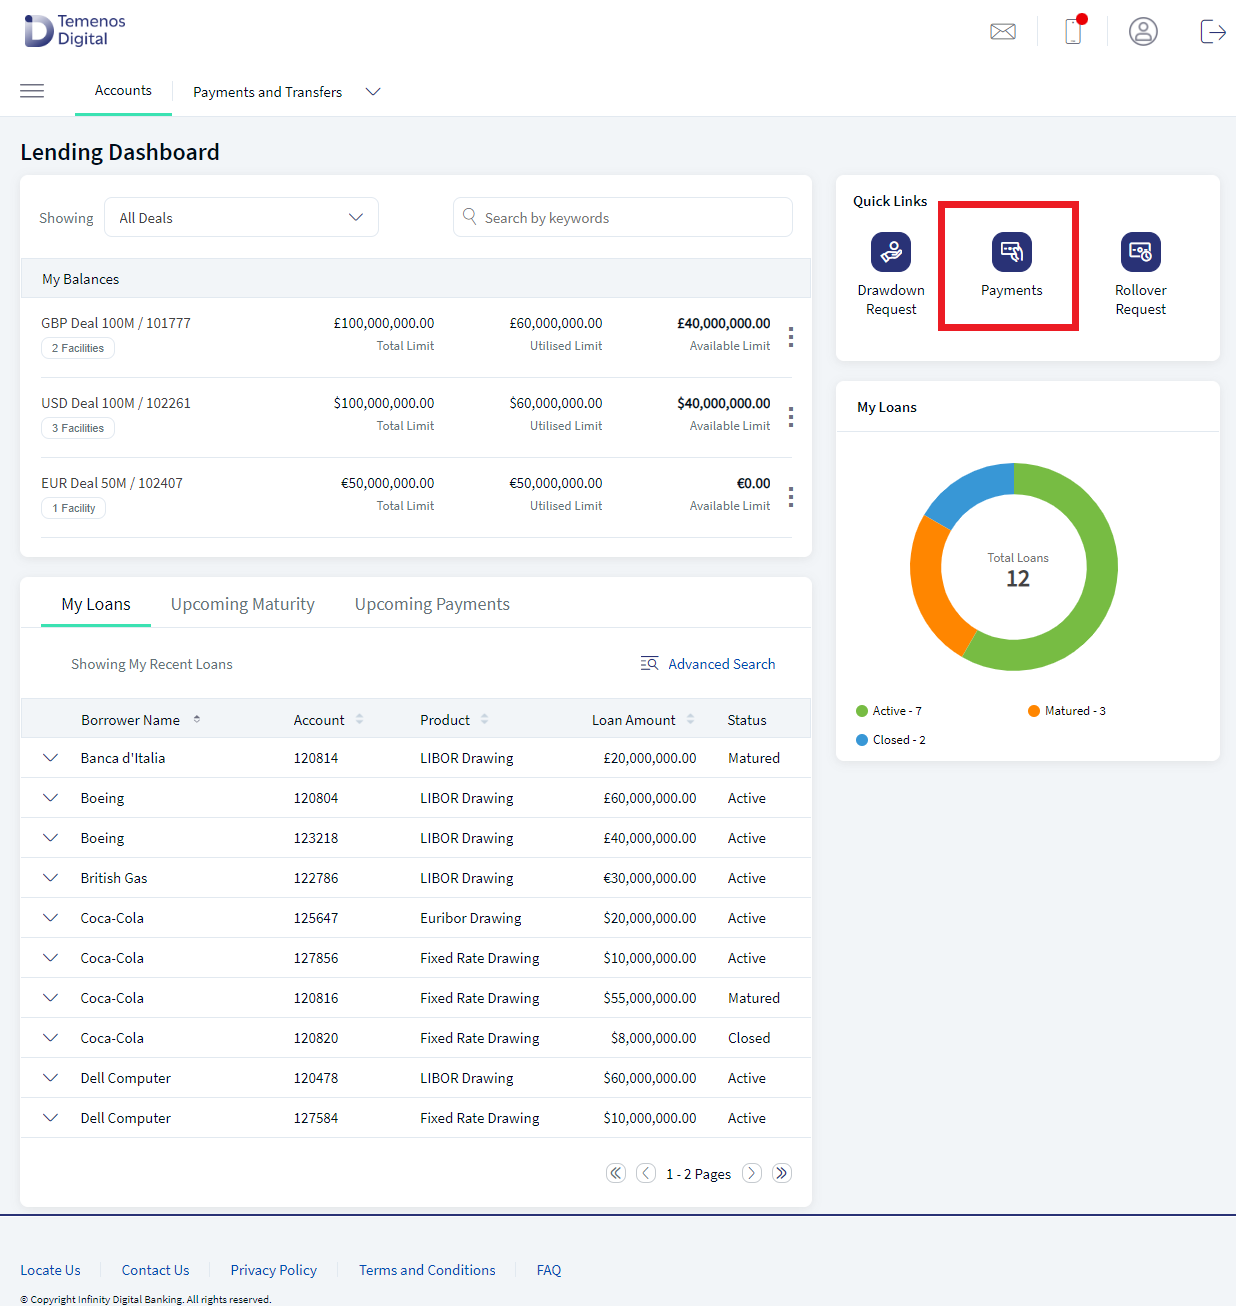
The customer who activated Web Channel access and is successfully enabled for Business or Corporate banking service (ex: Corporate Online Banking) which has the feature Lending Dashboard and action View Quick Links - Payment Request enabled, then Lending Dashboard and a quick link Payment is shown to make payments due against his existing facility or loan. The user can initiate payments towards the loan or facility applicable to the user. Once the bank reviews the payment request and approves, the record status will be settled and moved out of the queue.
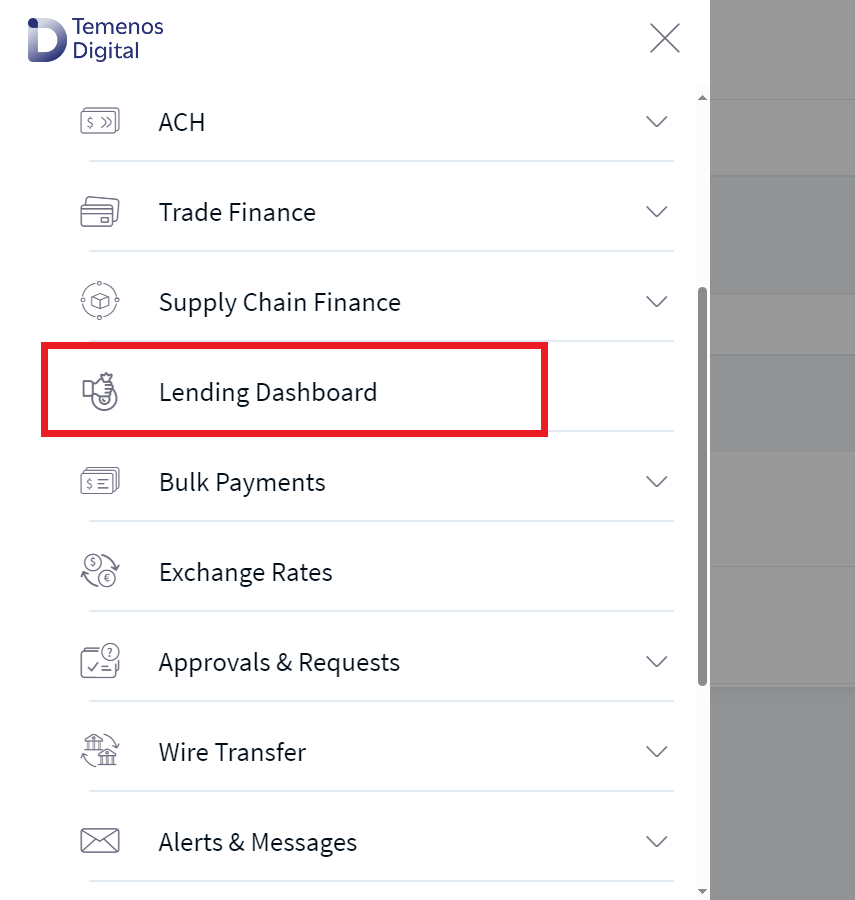
Navigation Path: Web Channel > Menu > Lending Dashboard > Quick Links > Payments
UX Overview
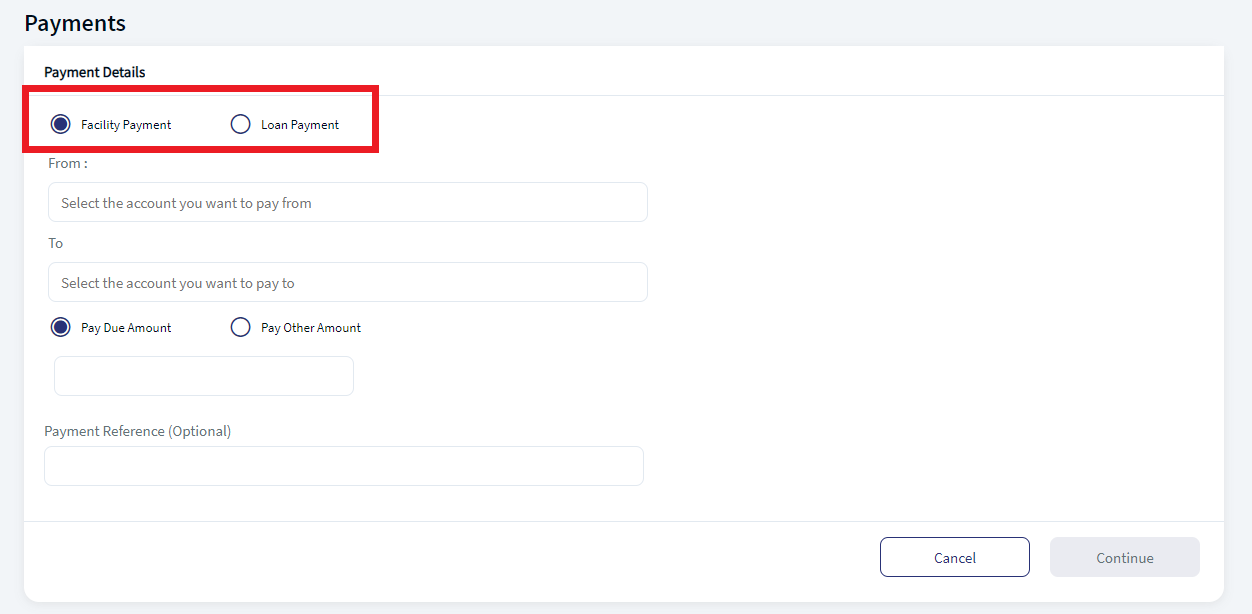
The following is the screen users can see when creating a Payments request.
Payments
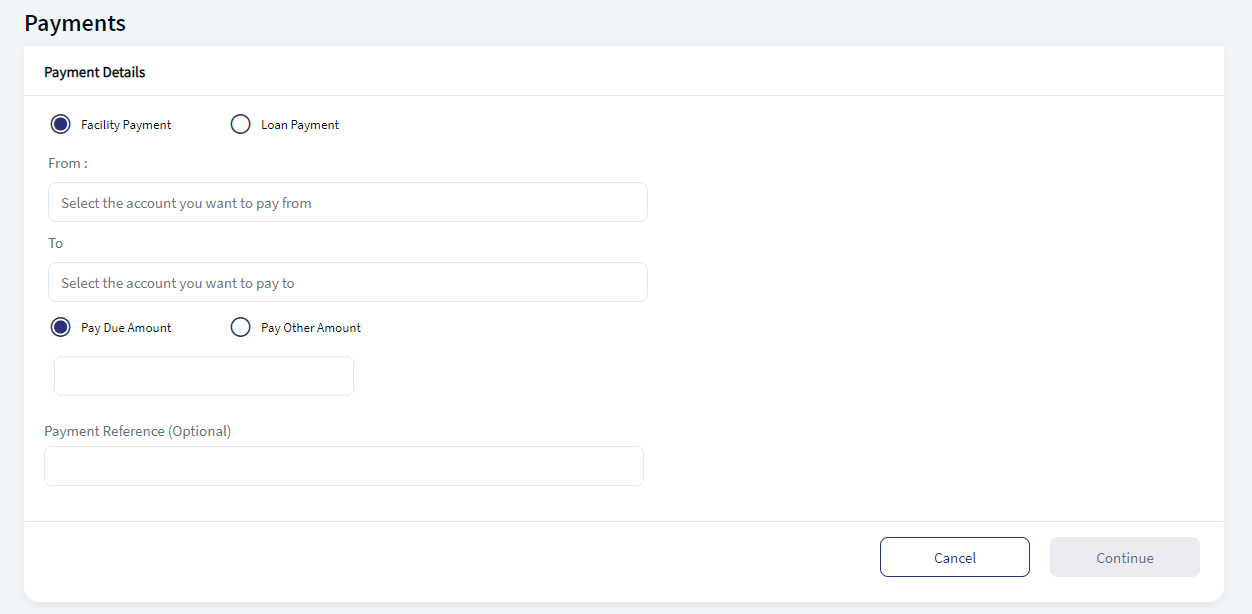
- Payment type. There are two options for the user to pay
- Facility Payment
- Loan Payment
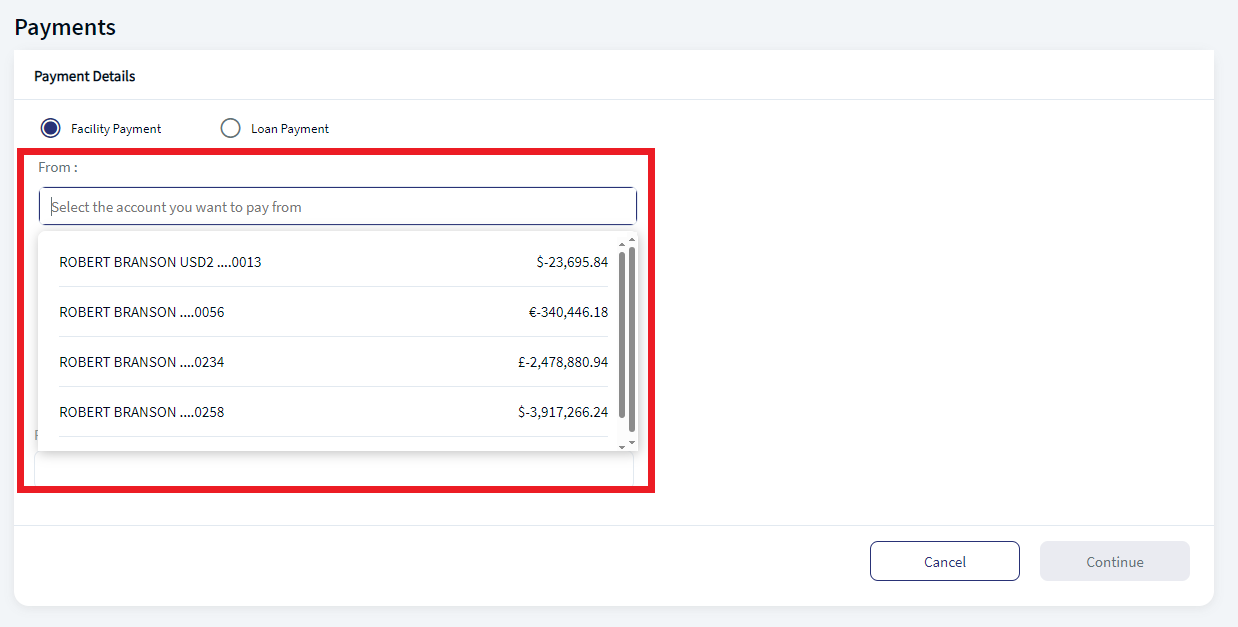
- From. The debit account information.
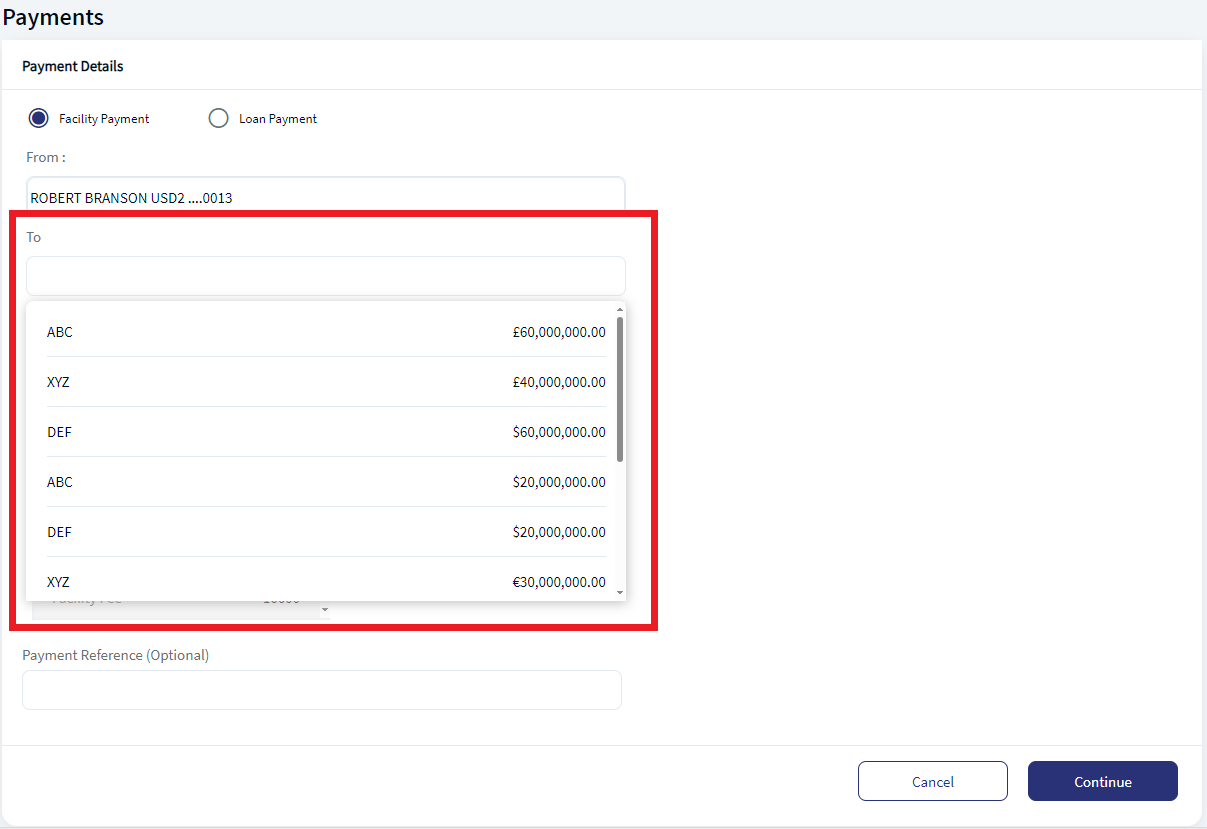
- To. The credit account information.
- Payment Due Amount. This auto populates the amount due for the current payment.
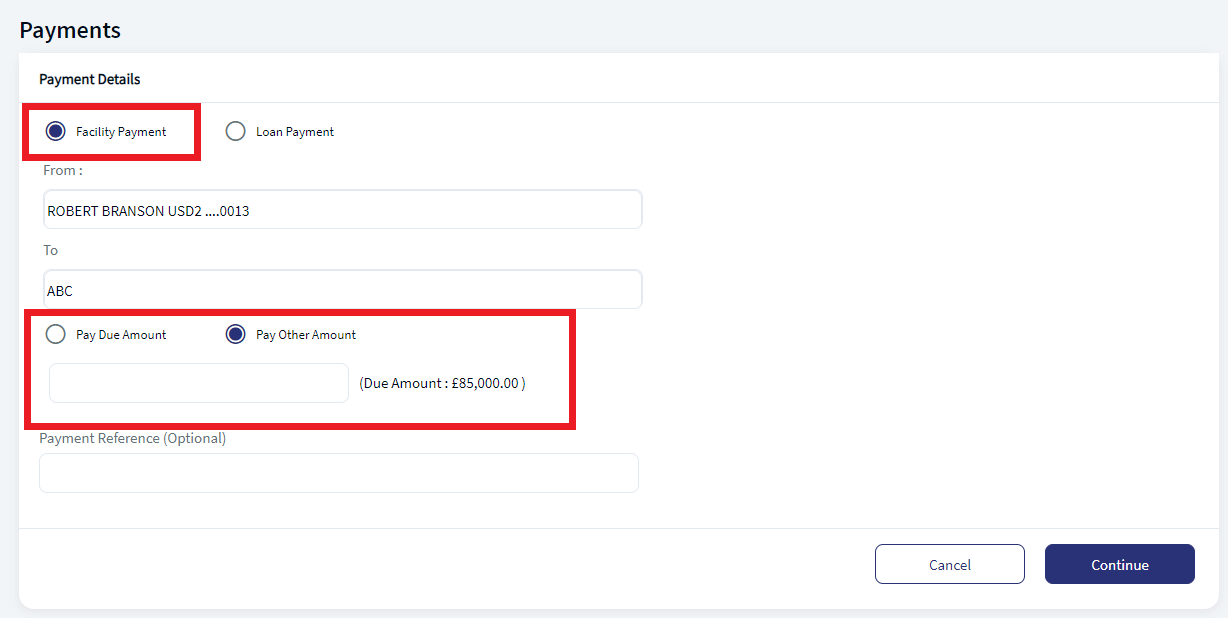
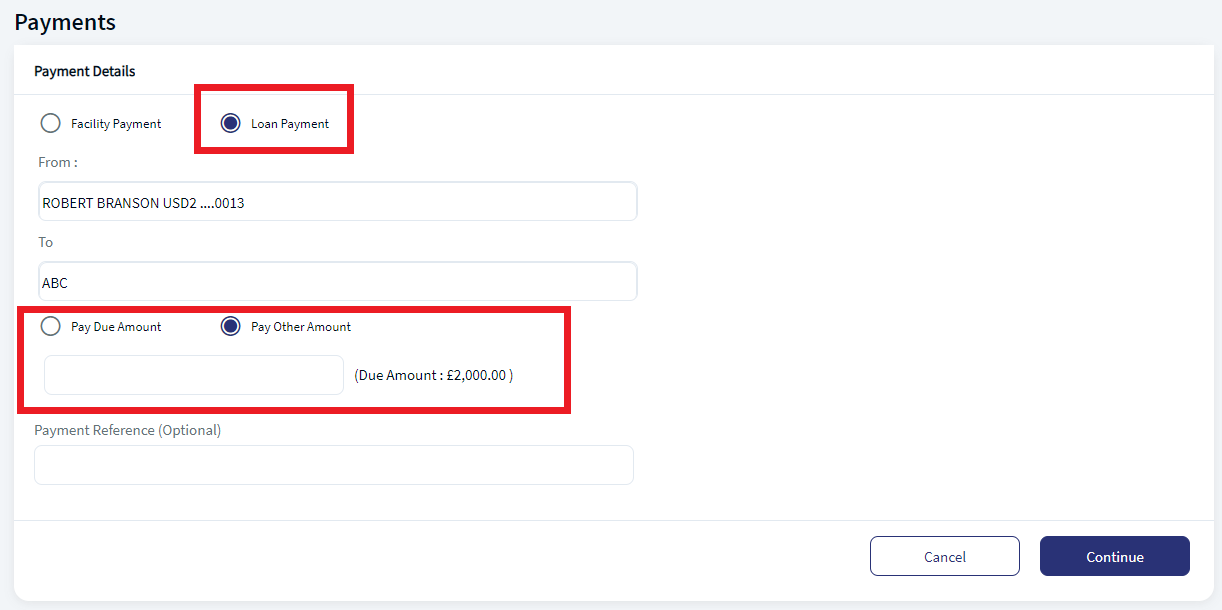
- Pay Other Amount. The user needs to enter the amount. Use this option to pay any other amount other than payment due amount. The enter amount cannot be more than total due amount.
- Payment Reference. Enter the comments or future reference for the current payment. This is an optional field.
Initiate Payment
The following is the procedure to initiate a payment.
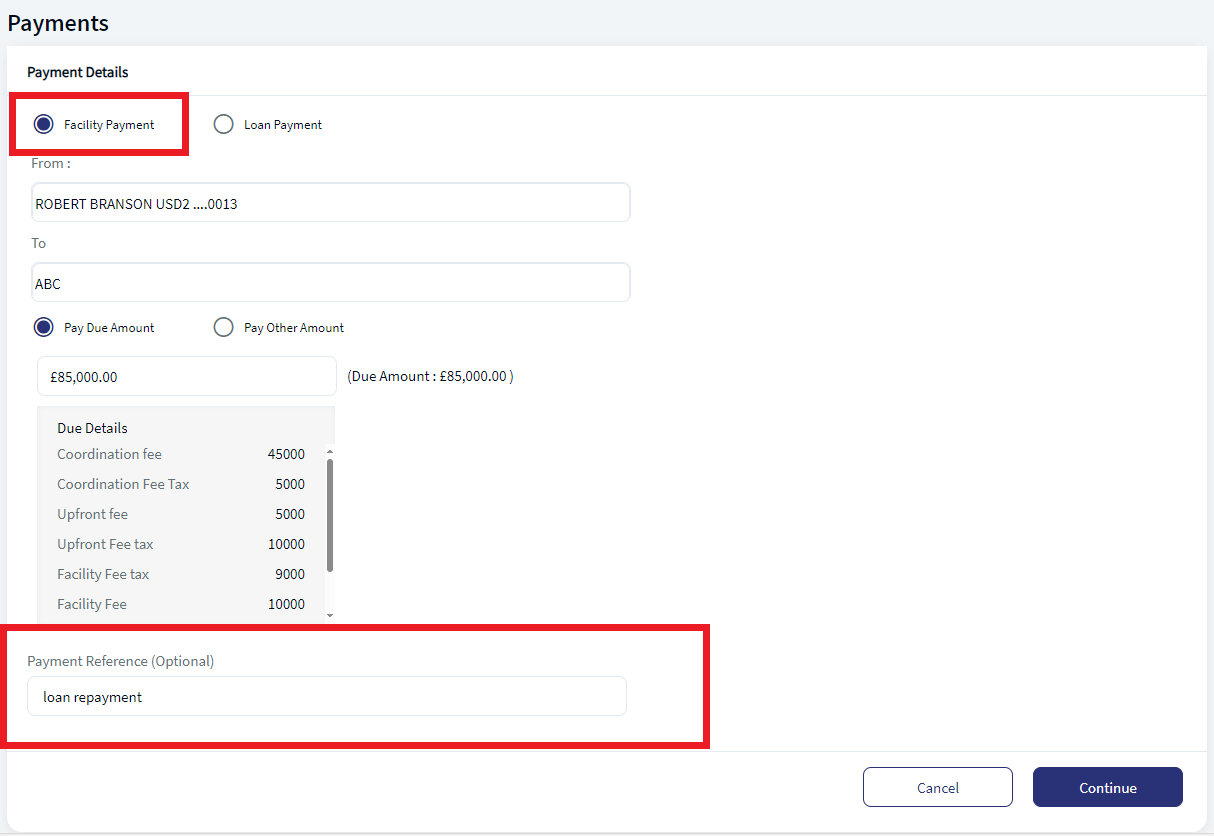
- Click Payment in the Quick Links section. This displays the Payment Details page.
- Select either Facility Payment or Loan Payment. This fetches the credit account details of the facility or loan payment details.
- Select the From account. The user can search or enter the details of the debit account.
- Select the To account. The user can search or enter the details of the credit account.
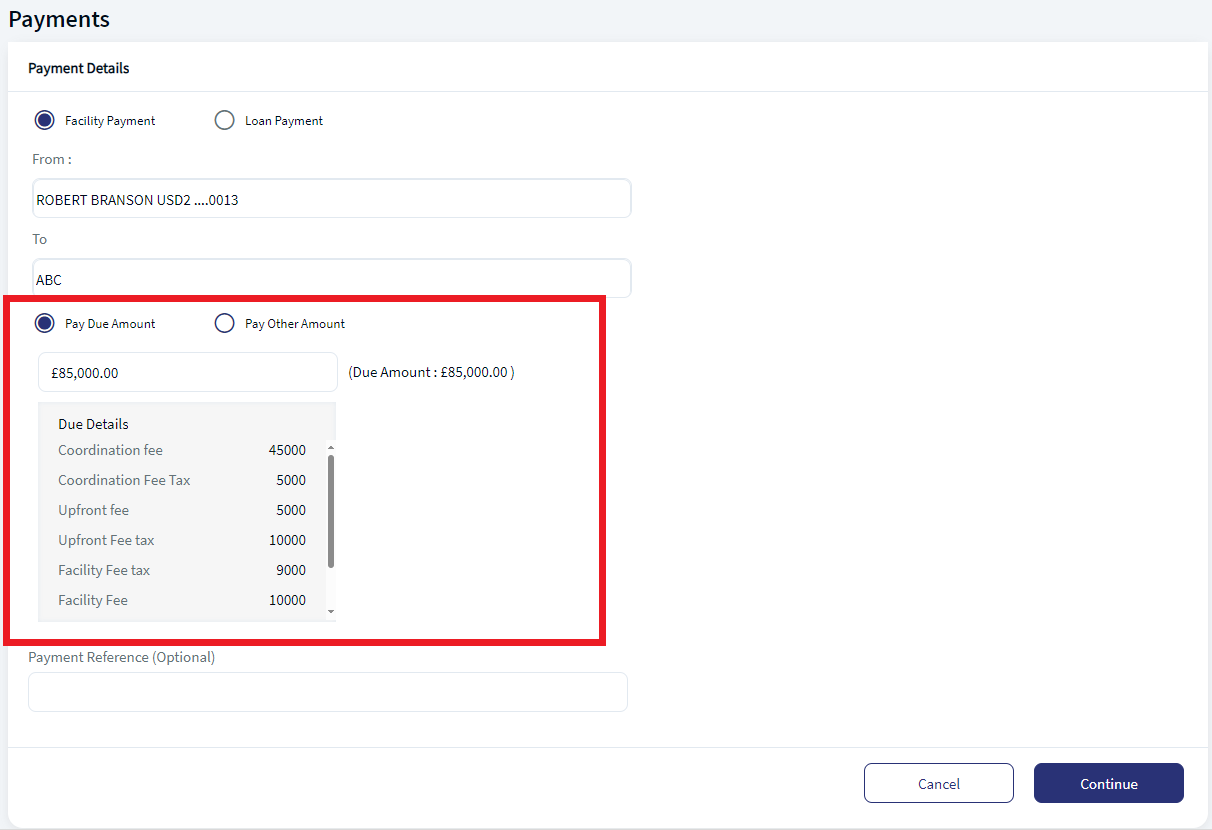
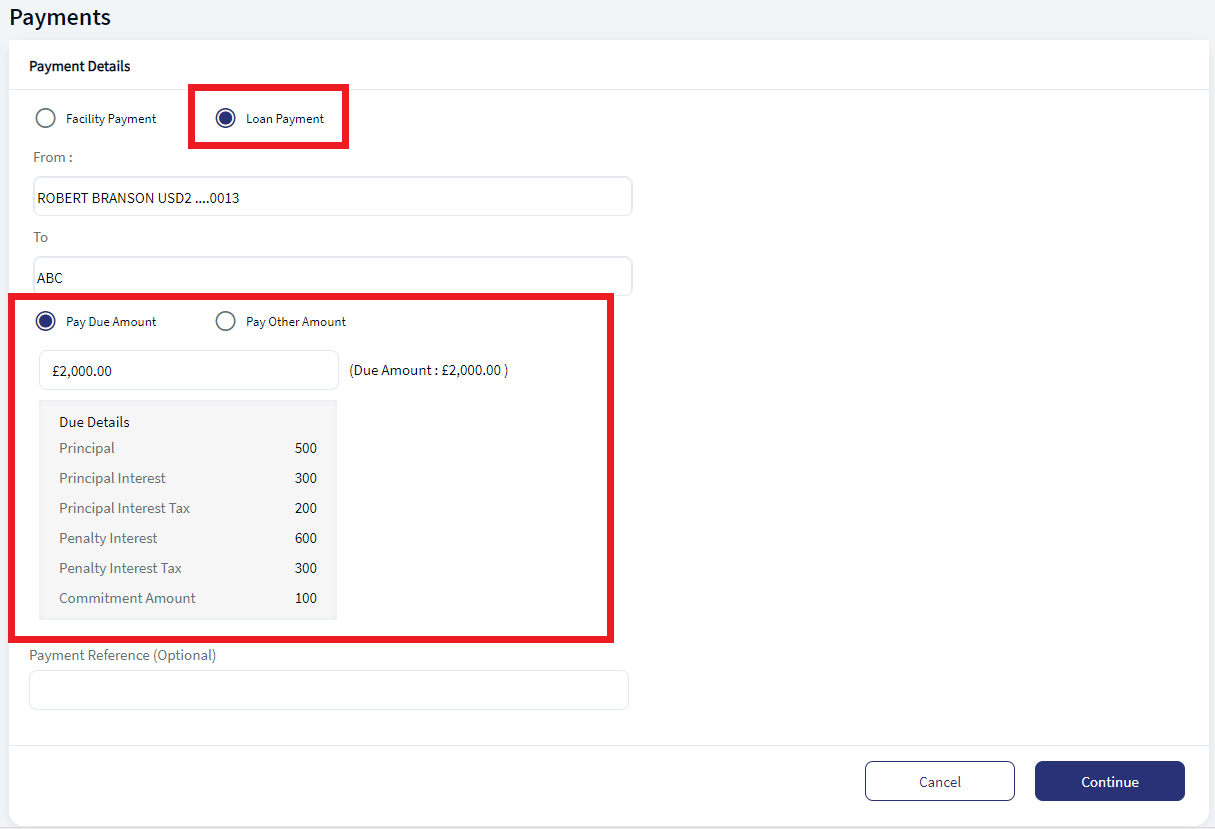
- The user can either select Pay Due Amount or Pay Other amount.
- If user selects pay due amount, the application auto populates the due amount for the Facility or Loan.
- For Facility payment, the application displays all the due amount for the selected facility and also displays the breakup of the due amount as applicable for the facility like:
- Co-ordination fee
- Co-ordination fee tax
- Upfront fee
- Upfront fee tax
- Facility fee
- Facility fee tax
- Utilized commitment fee tax
- Overdrawn limit fee tax
- For Loan payment, the application displays all the due amount for the selected loan and also displays the breakup of the due amount as applicable for the facility like:
- Principle
- Principle interest
- Principle interest tax
- Penalty interest
- Penalty interest tax
- commitment amount
- For Facility payment, the application displays all the due amount for the selected facility and also displays the breakup of the due amount as applicable for the facility like:
- If user selects the pay other amount, the user needs to enter the desire amount. Use this option if user wants to pay other than due amount. The user cannot enter more than the due amount. The application displays the due amount.
- If user selects pay due amount, the application auto populates the due amount for the Facility or Loan.
- Enter the Payment Reference details and click Continue. This is an optional field.
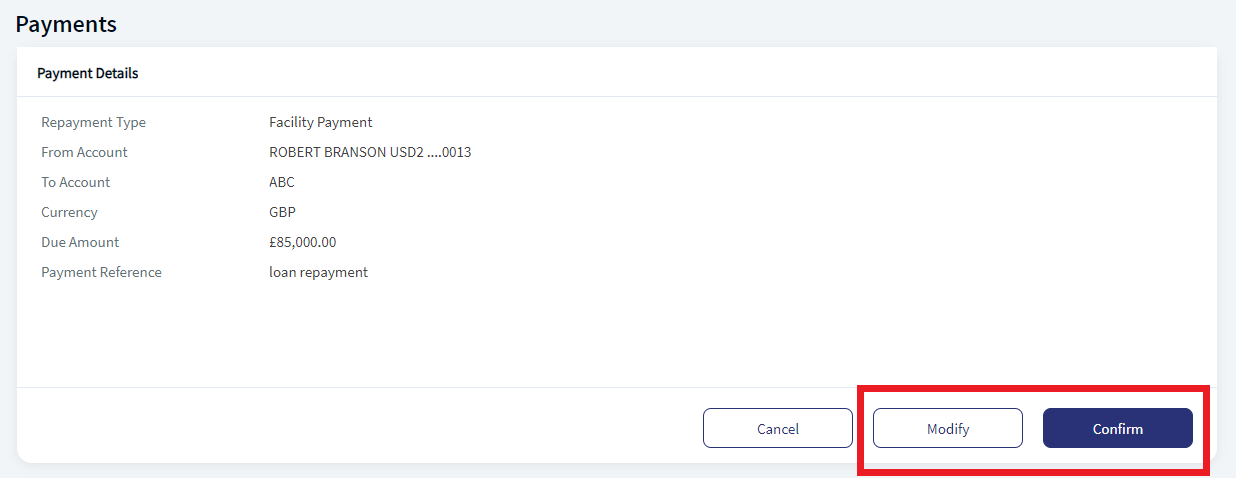
- In the Payment Confirmation page, verify the details. Click Confirm to proceed with the payment, or click Modify to edit the details.
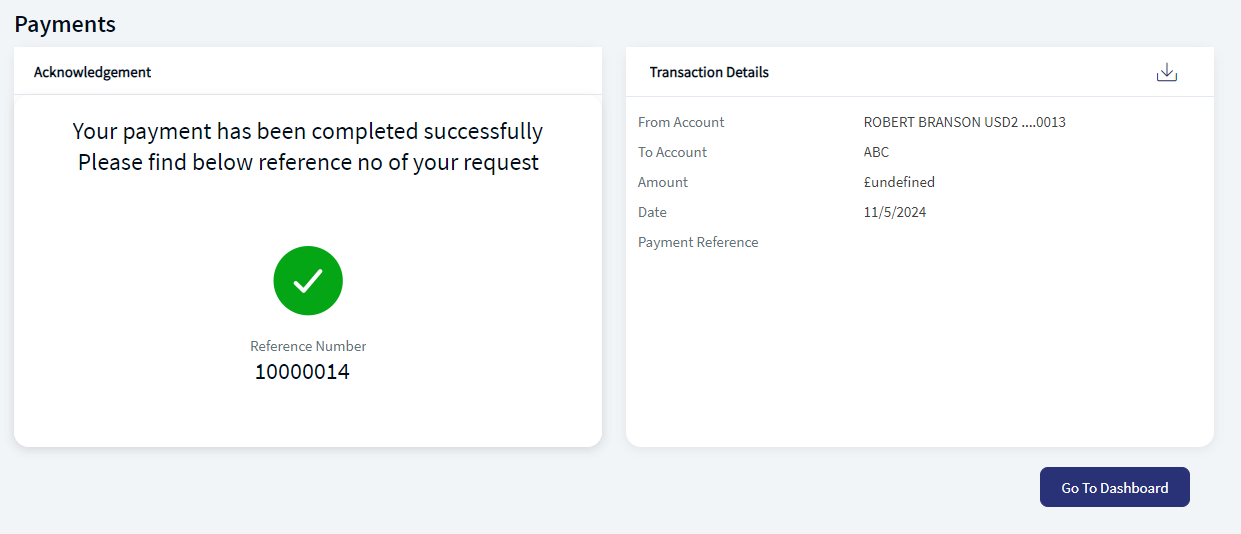
- The application displays a acknowledgement page with success message.
Experience API
The following are the experience API for Payments:
| Name | Description | Introduced In |
|---|---|---|
| submit | This API submits a Payment Request. | 2024.04 |
| generatePdf | This API generates a pdf with the details of a given Payment request . | 2024.04 |
In this topic
