Integrating UXPB with External Document Management System
This section describes how the UXPB can be integrated with any external Document Management System(DMS). It now offers search, download, generate and upload features thereby minimising the number of components to be used during integration.
To enable integration with UXPB, specify the following in the BRPRuntimeProperties.properties file available under {TEMENOS_HOME}\properties.
browser.options.externalDMS.enable=Y
browser.options.externalDMS.baseUrl=http://localhost:9089/irf-document-services/v1.0.0
browser.options.externalDMS.documentSearchApiPath=/documents
browser.options.externalDMS.documentDownloadApiPath=/documents/{id}/download
browser.options.externalDMS.documentUploadApiPath=/documents
browser.options.externalDMS.documentDefinitionApiPath=/document-definitions/
browser.options.externalDMS.documentGenerateApiPath=/documents/generation
browser.options.externalDMS.enquiriesEnabledForDocumentGenerate=SECTOR|CUSTOMER.INFO|CUSTOMER.SCV|CUSTOMER.LIST
browser.options.externalDMS.targetMVDelimiterForDocumentGenerate=##
browser.options.externalDMS.targetSVDelimiterForDocumentGenerate=??
The following section helps you to enable the document search, download, generate and upload features.
Document Search
To enable document search,
- Copy the NOFILE.UXPB.EXTERNAL.DMS.SEARCH Nofile routine class and component class files into the Transact library files available in the environment.
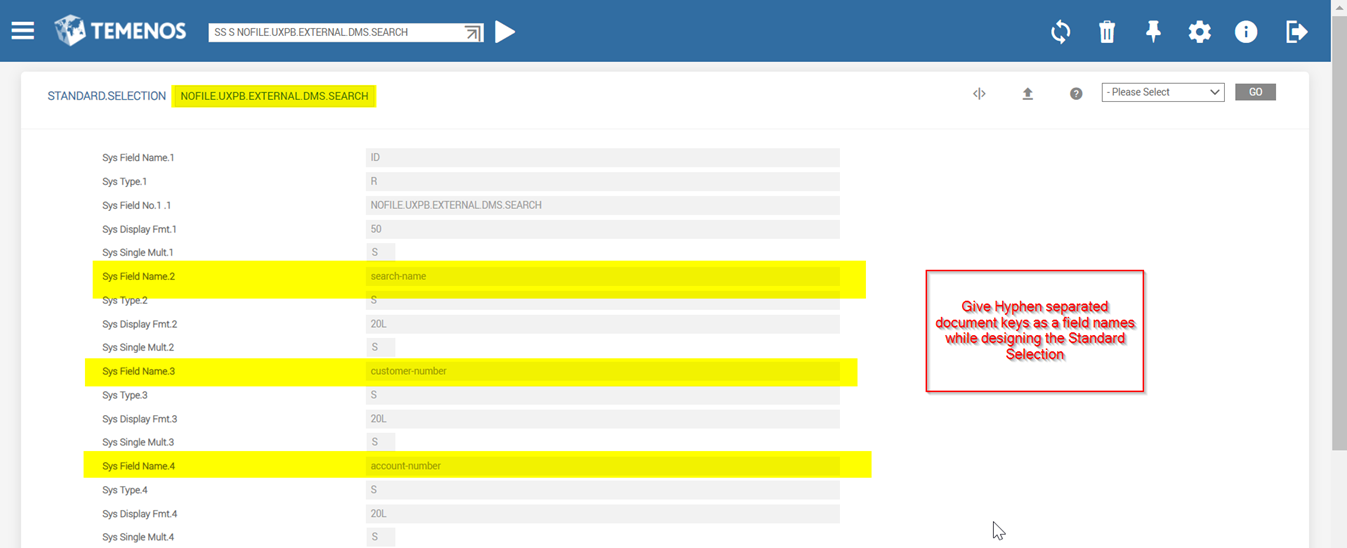
- Create a STANDARD.SELECTION record with field names as documentKeys available in the external DMS. The application name should be: NOFILE.UXPB.EXTERNAL.DMS.SEARCH.
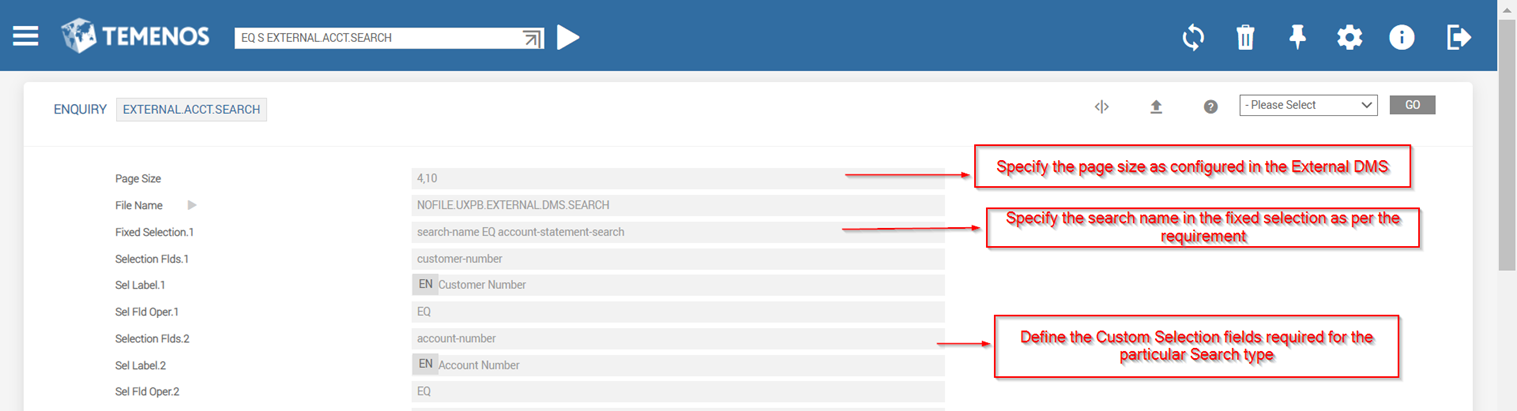
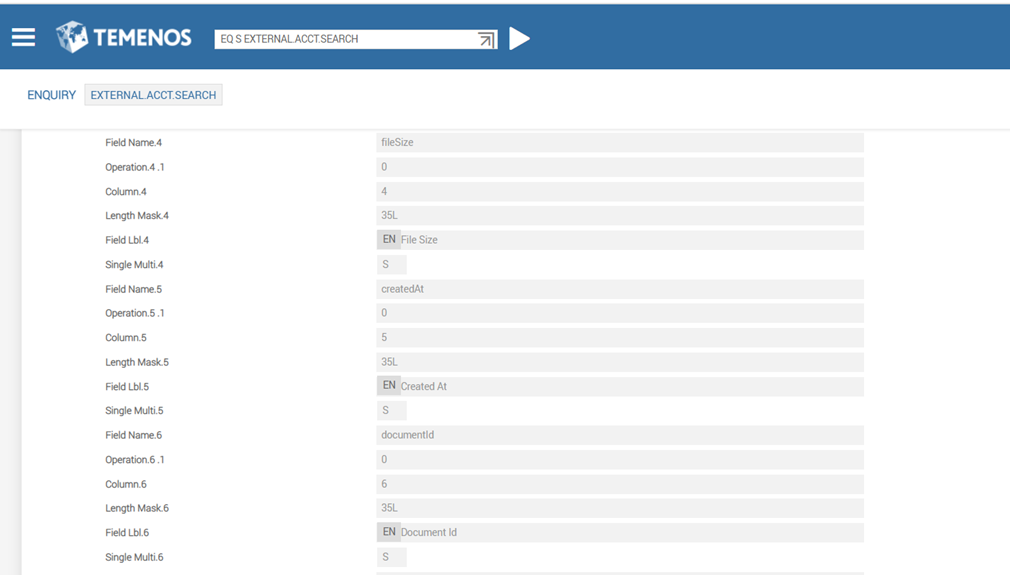
- Create an enquiry based on the NoFile application created above, specific to the search type available in the external DMS.
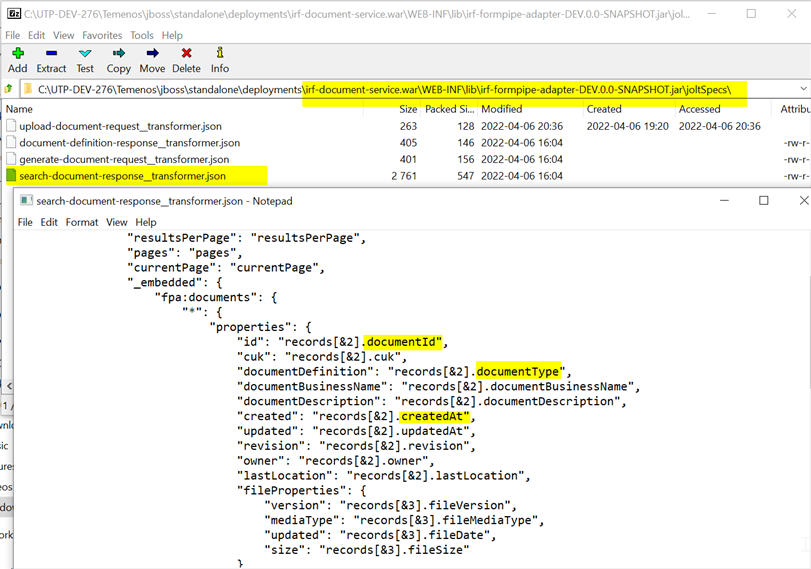
- The field names in the enquiry definition should be the same as the field names in the search-document-response_transformer.json in irf-document-services.war as highlighted below.
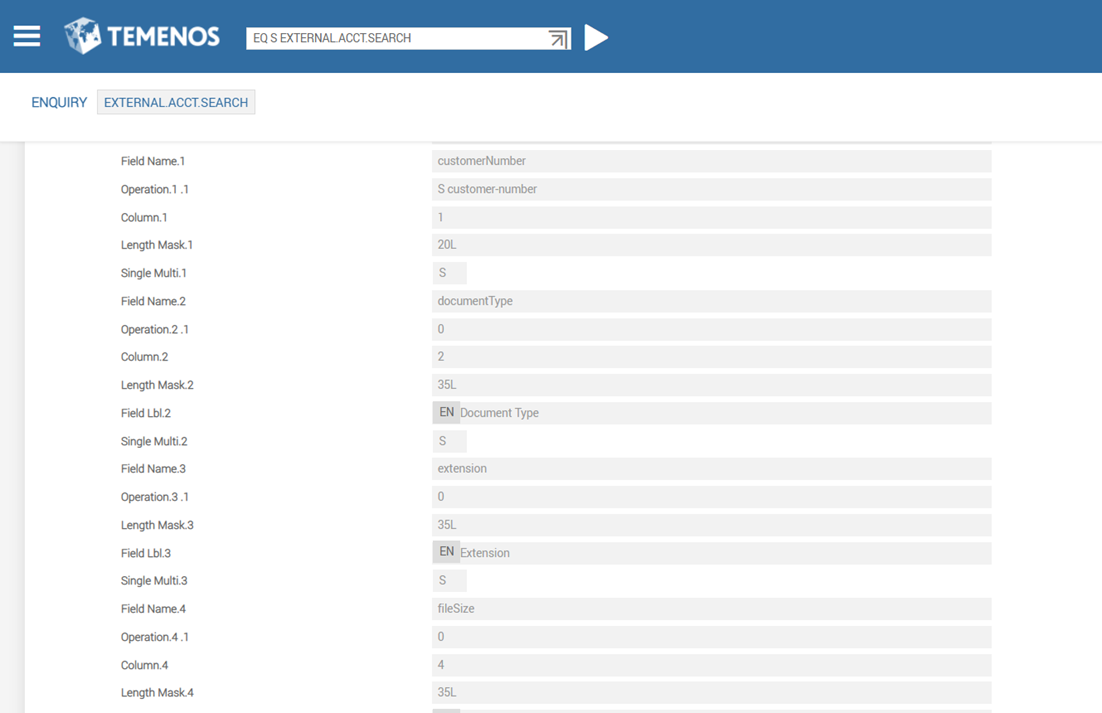
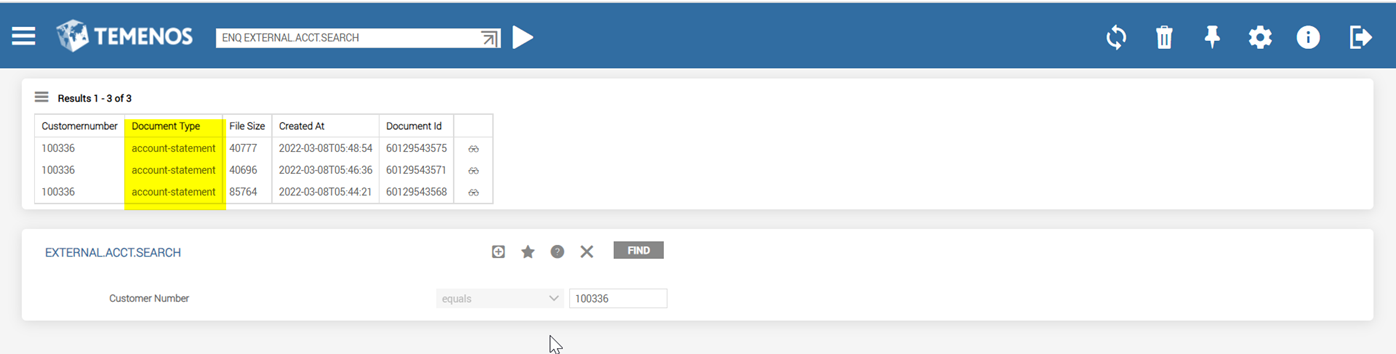
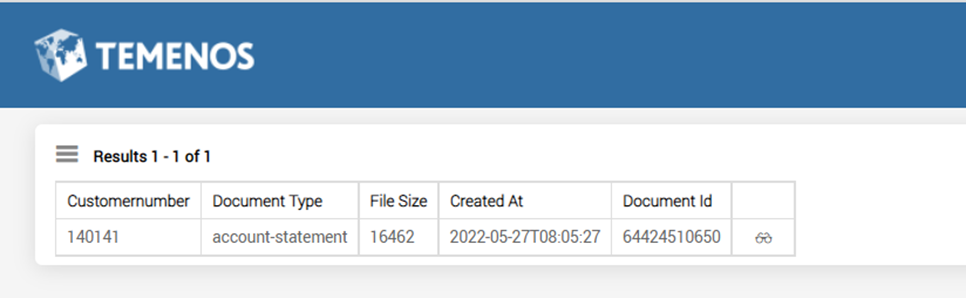
- Launch the newly created enquiry in UXPB (ENQ EXTERNAL.ACCT.SEARCH) to verify the results. It retrieves only the account statements as shown below.

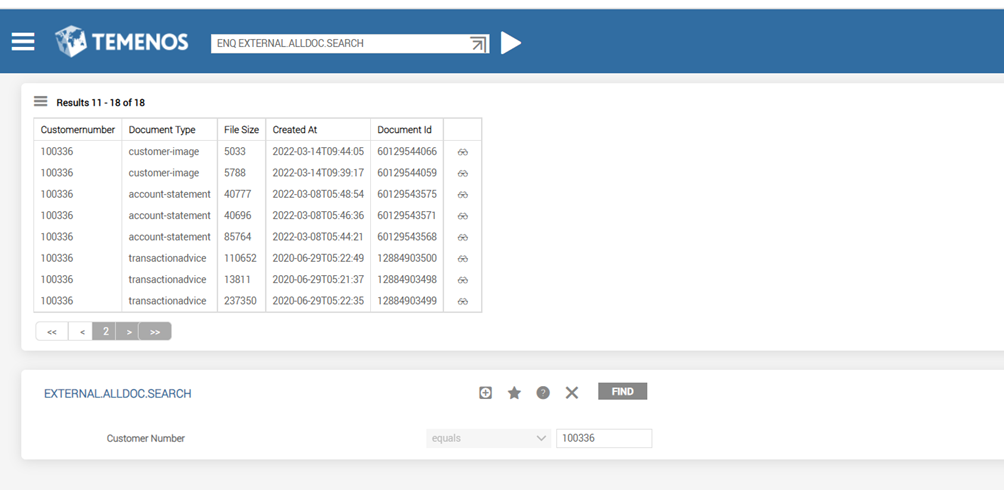
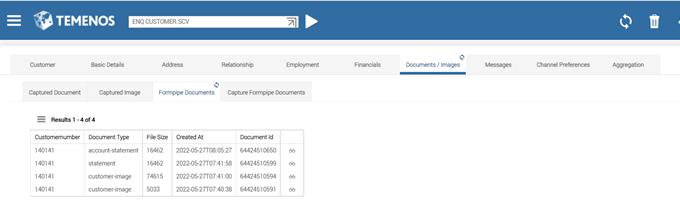
Similarly create enquiries for other search names, as ENQUIRY I EXTERNAL.ALLDOC.SEARCH. And on launching the same (ENQ EXTERNAL.ALLDOC.SEARCH) , it retrieves all the documents.

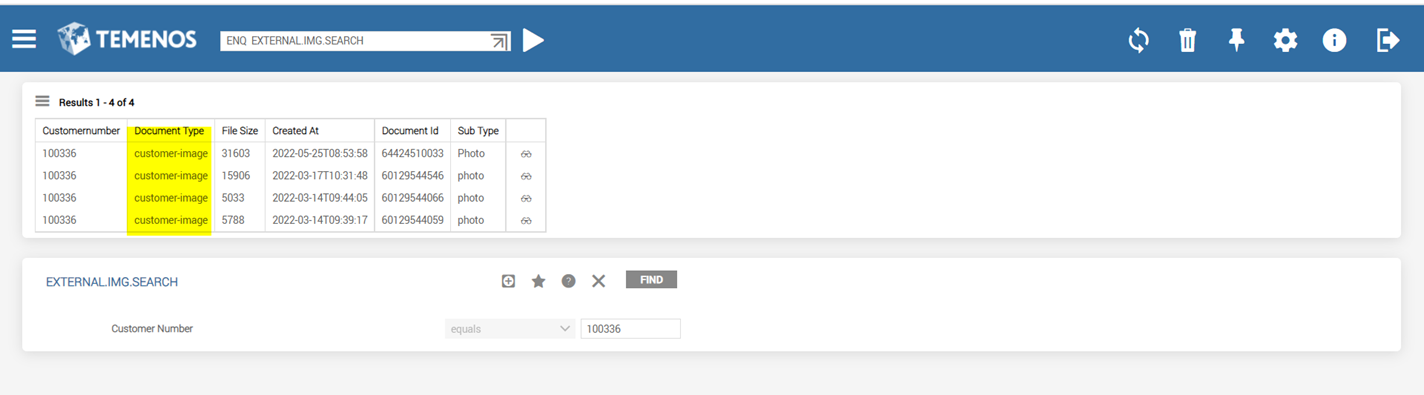
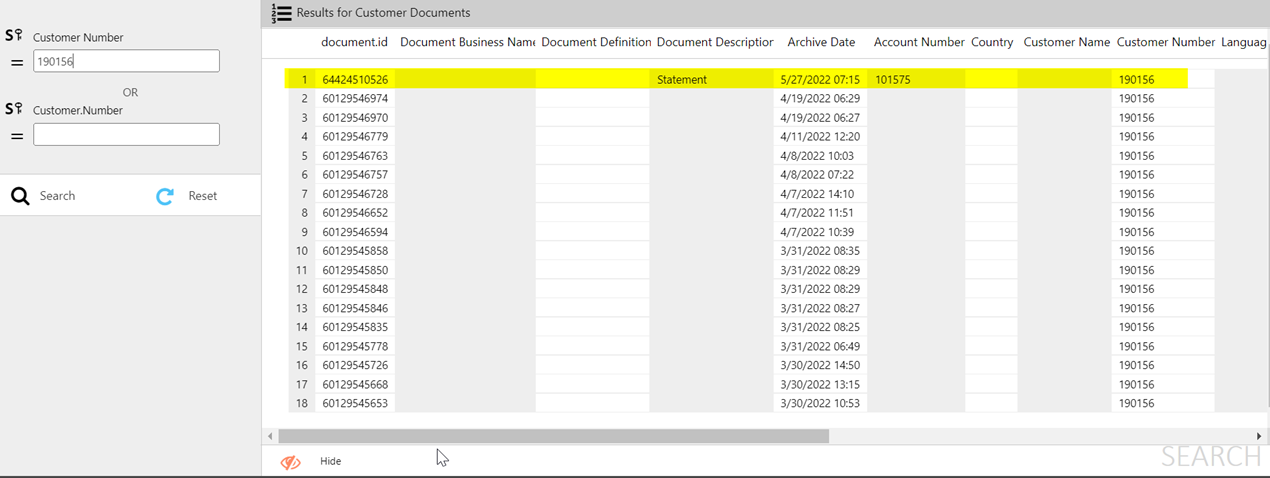
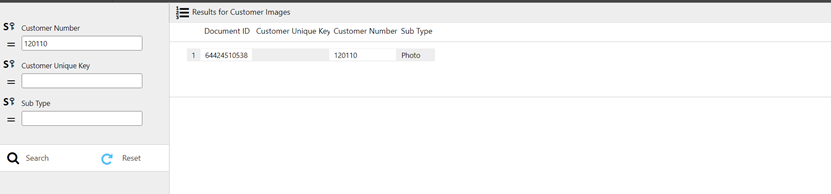
Create ENQUIRY I EXTERNAL.IMG.SEARCH for customer images. On launching the same (ENQ EXTERNAL.IMG.SEARCH), it retrieves only the customer images as shown below.
Document Download
To download a document, perform the following steps:
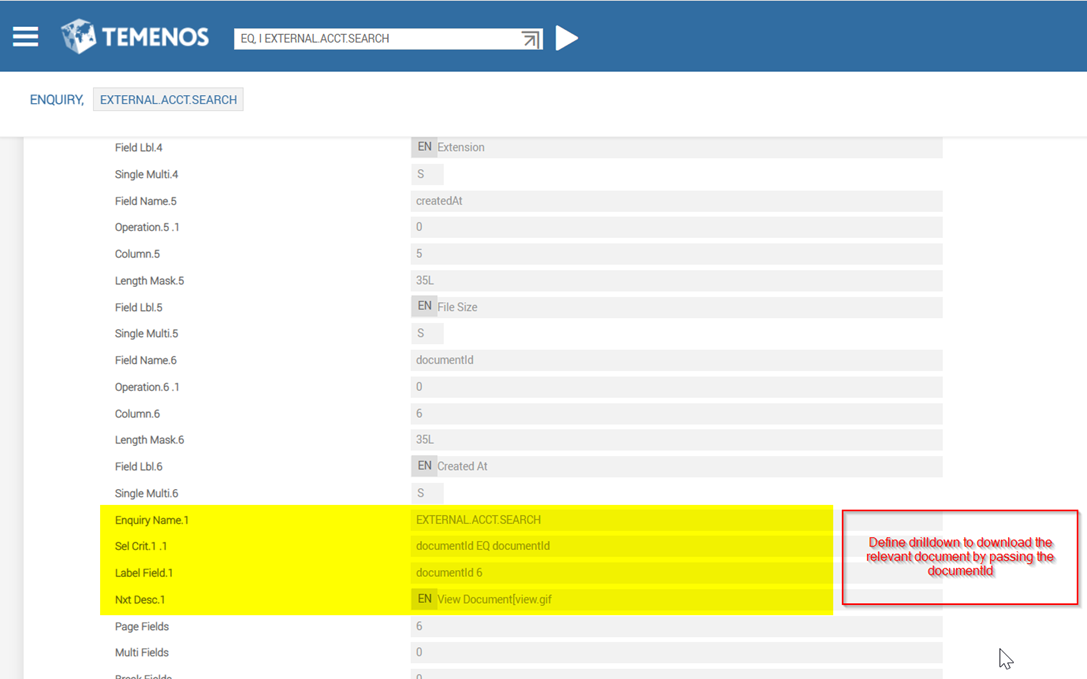
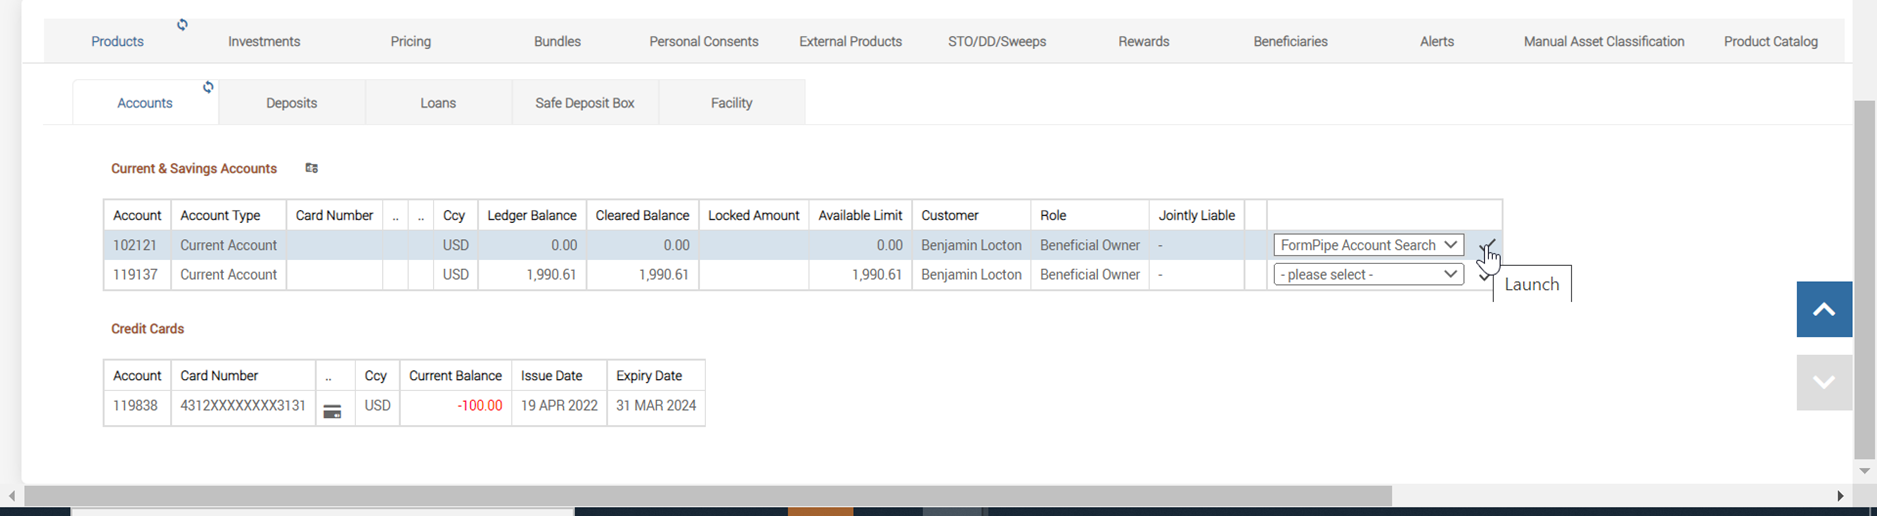
- Define a drill down as shown below for the EXTERNAL.ACCT.SEARCH enquiry.
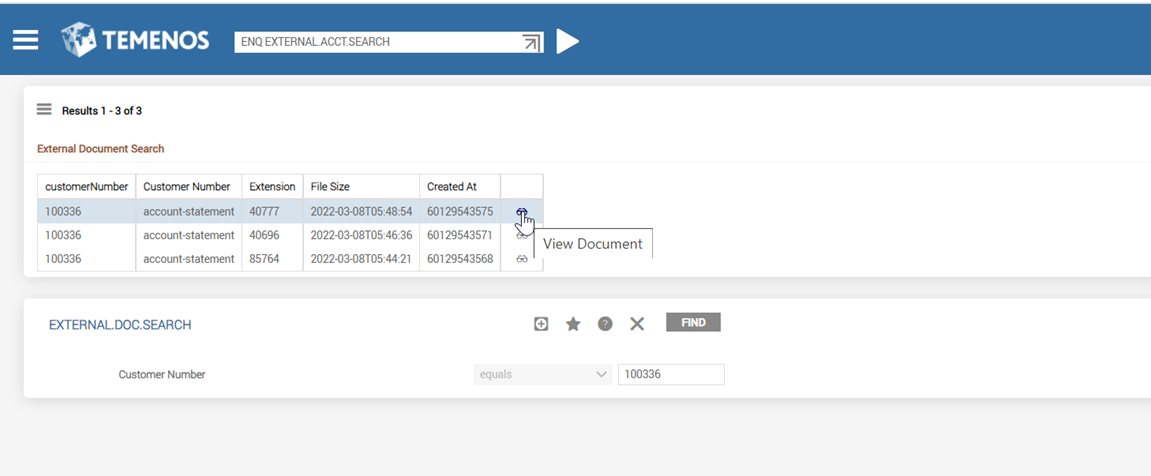
- Launch the enquiry (ENQ EXTERNAL.ACCT.SEARCH) and verify if the drill down is available in the page.
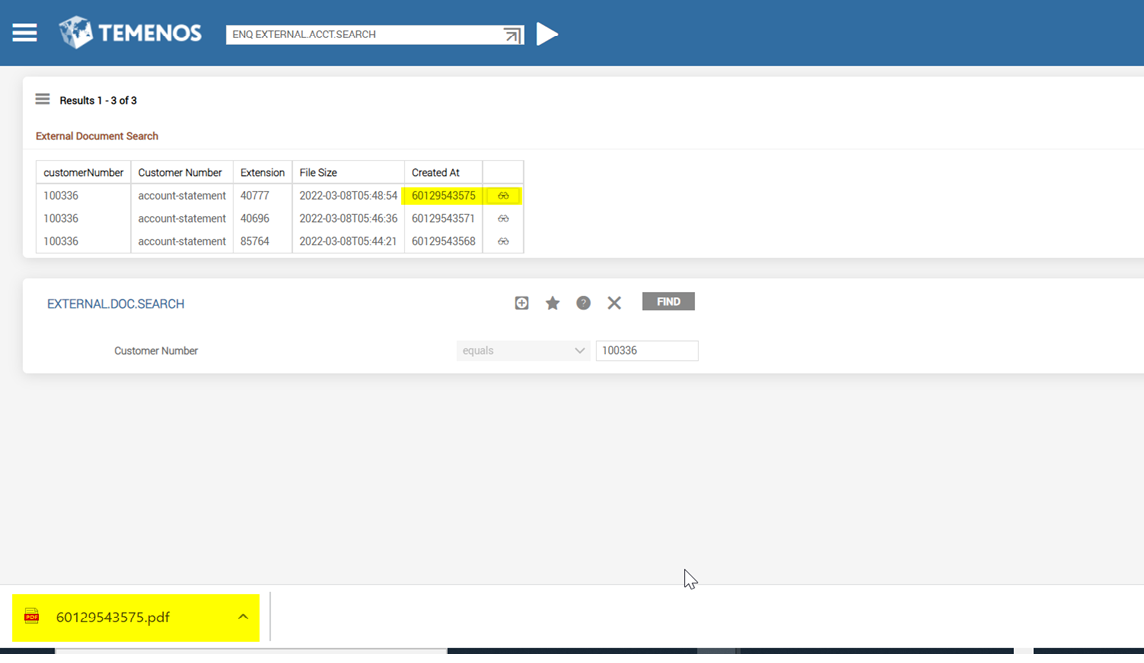
On clicking the drilldown, the document gets downloaded within the same page as shown below.
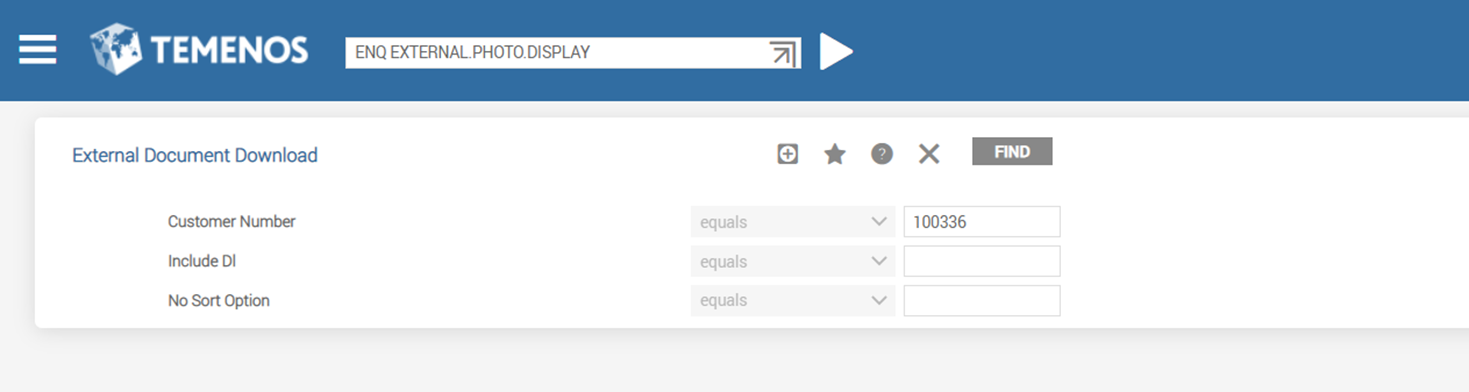
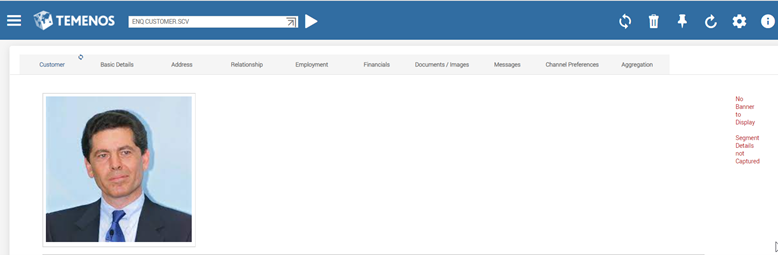
- To display images in UXPB from the external DMS, create ENQUIRY I EXTERNAL.PHOTO.DISPLAY.
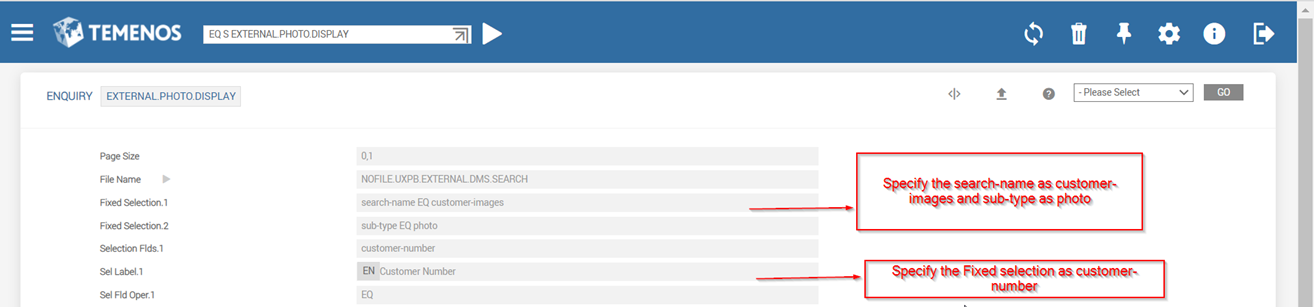
- On launching the image enquiry (ENQ EXTERNAL.PHOTO.DISPLAY) , it displays only the customer photo.

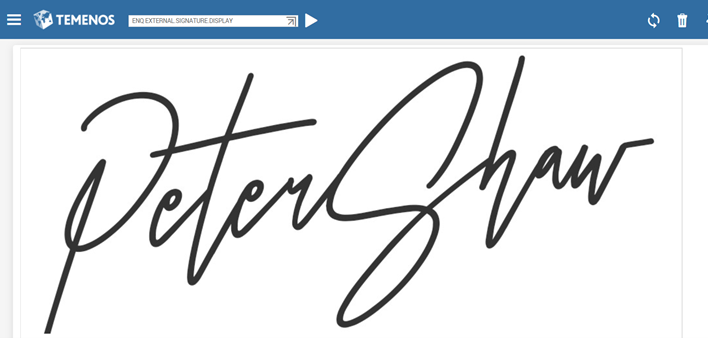
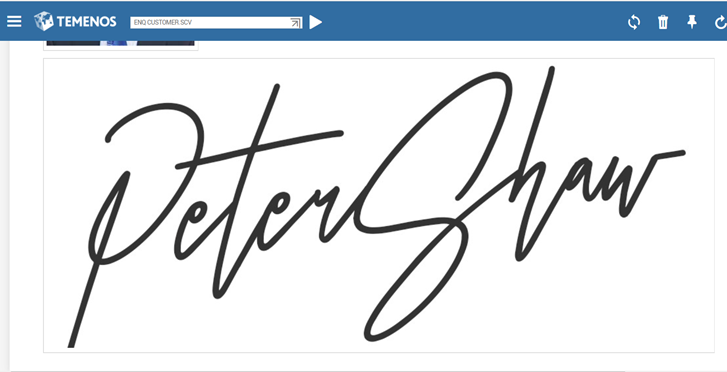
- To display the signature, create ENQUIRY I EXTERNAL.SIGNATURE.DISPLAY.
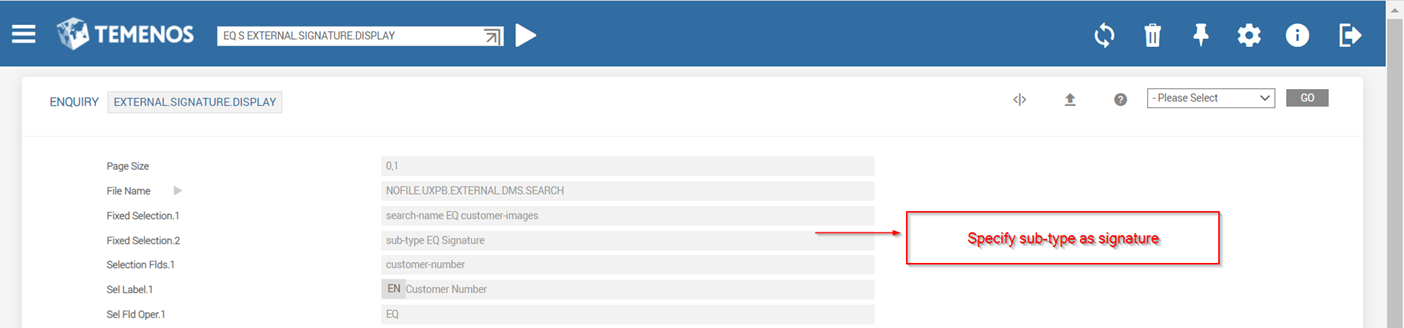
- On launching the signature enquiry (ENQ EXTERNAL.SIGNATURE.DISPLAY) the system displays the customer signature.
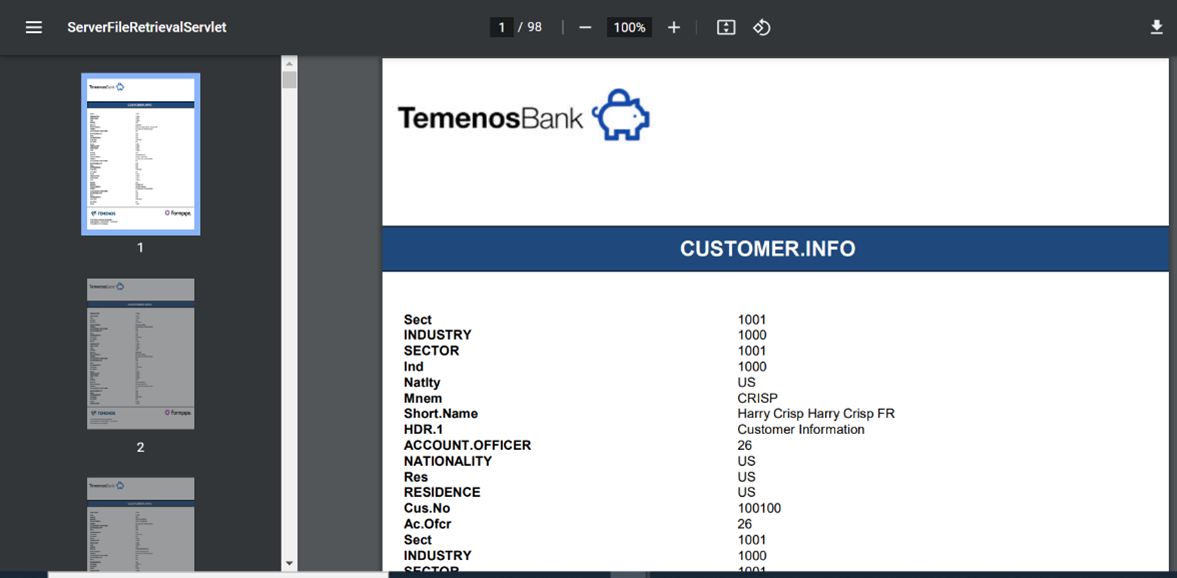
Document Generate
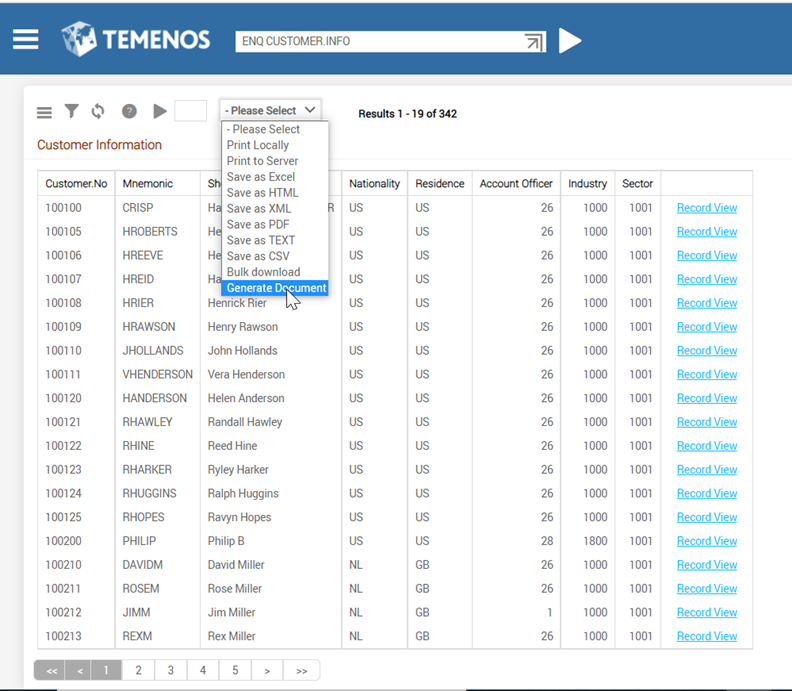
Configure the BRPRunTimeProperties.properties such that Document Generate option in the Enquiry Results Toolbar becomes available for those enquiries specified in the properties file.
- For specific enquiries, mention the enquiry names by using the pipe symbol (|)separated as shown below:
browser.options.externalDMS.enquiriesEnabledForDocumentGenerate=SECTOR|CUSTOMER.INFO|CUSTOMER.SCV|CUSTOMER.LIST
- For all enquiries, specify as shown below:
browser.options.externalDMS.enquiriesEnabledForDocumentGenerate=ALL
Document Upload
To enable the document upload feature,
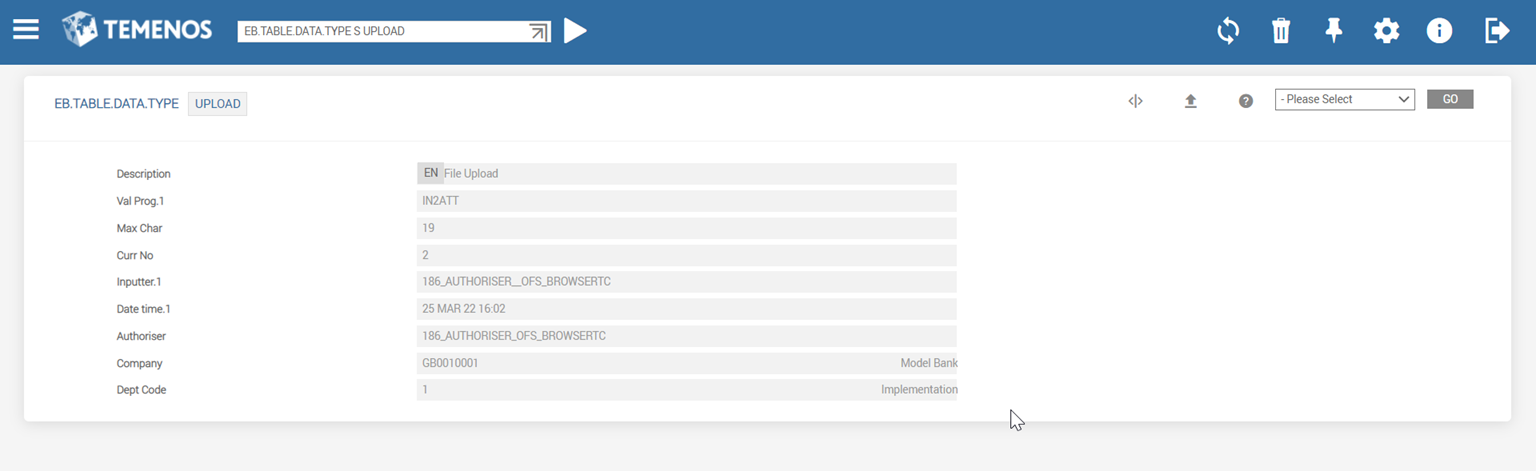
- Create a new datatype for upload as shown below and attach it the File field while creating an application.
- Create a new application for uploading documents into external DMS using EB.TABLE.DEFINTION. The application name should be UXPB.EXTERNAL.DMS.UPLOAD and Product should be EB. Define the fields as document-keys available in the external DMS.
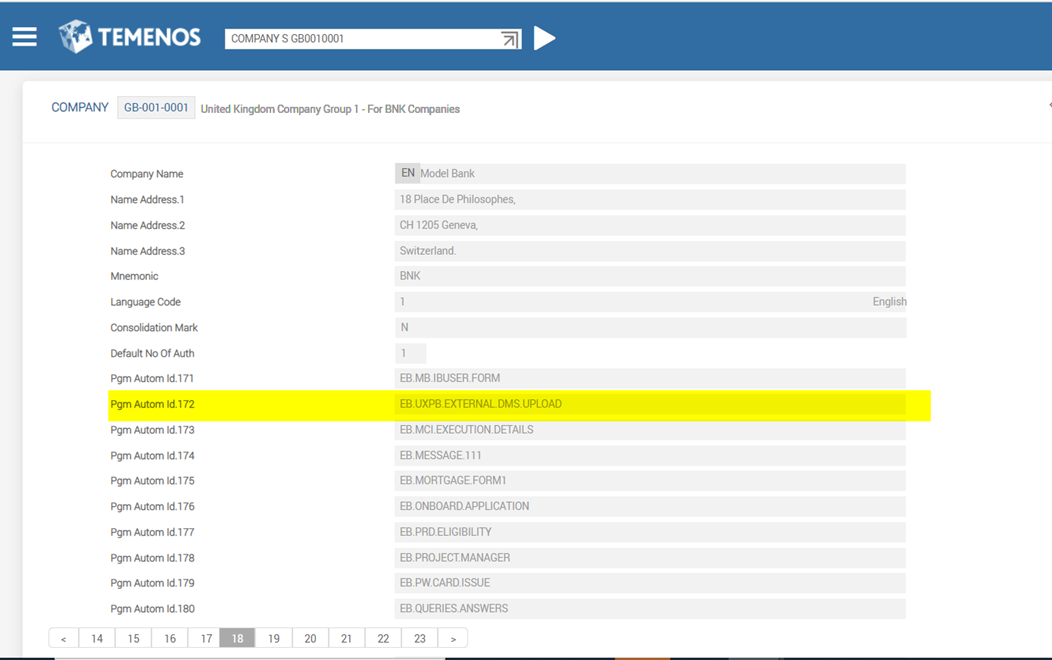
- Update the application name created above in the COMPANY record for Auto Id population while launching an application or version.
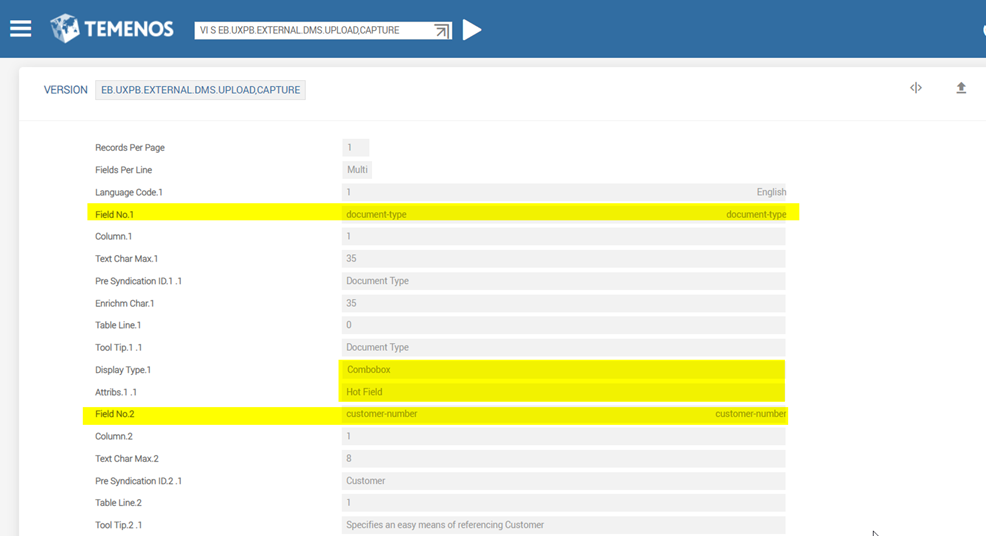
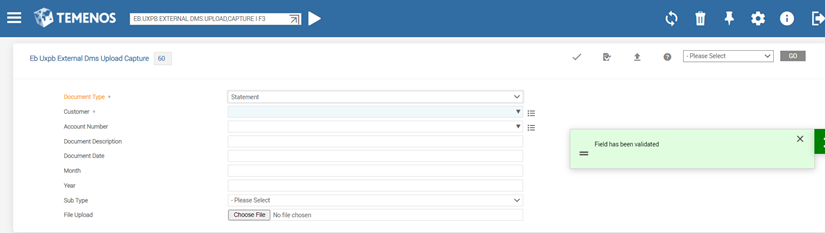
- Create a version based on the new application and make the document-type field as a hotfield where the validation occurs automatically (VERSION I EB.UXPB.EXTERNAL.DMS.UPLOAD,CAPTURE).
- Launch the version created above using EB.UXPB.EXTERNAL.DMS.UPLOAD,CAPTURE I F3.
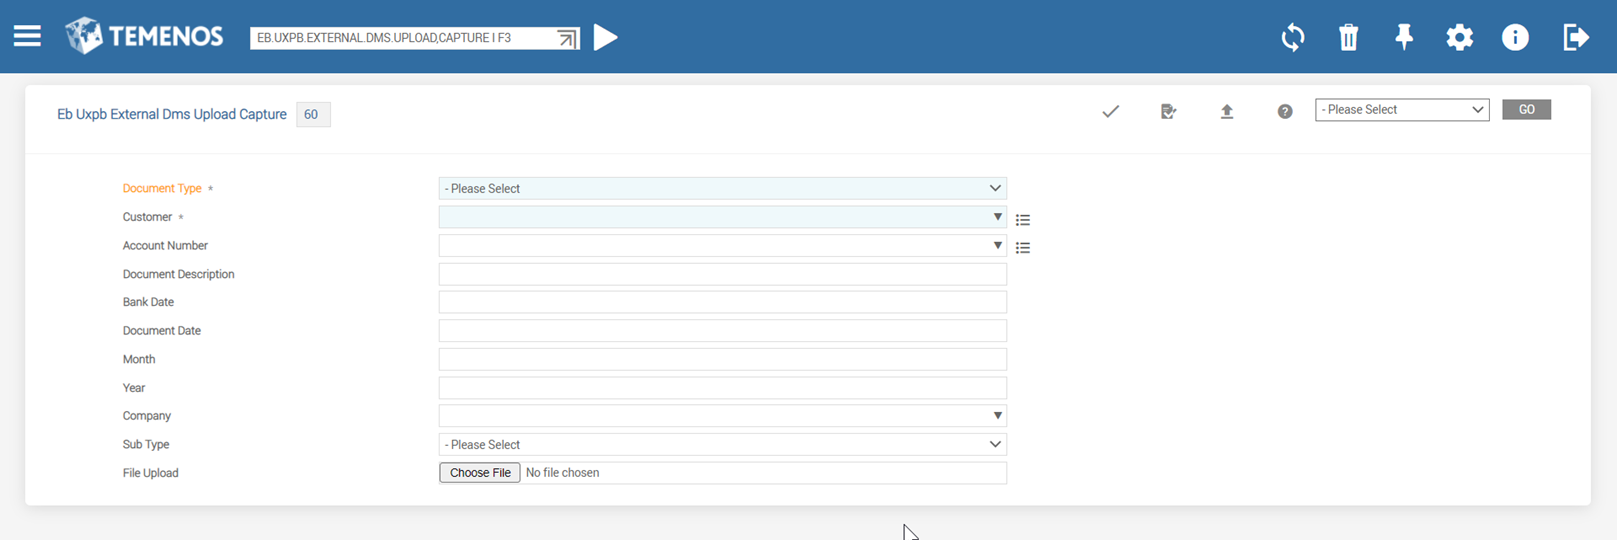
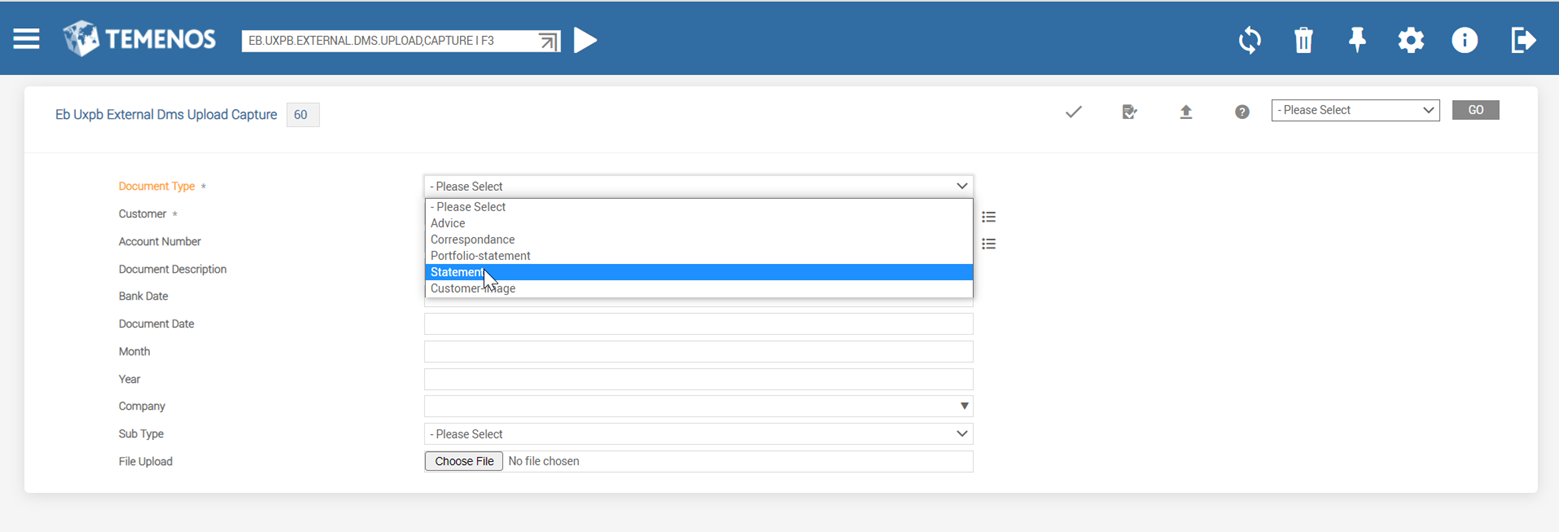
- Select any document-type, and the required fields are made visible.
- Fill the required details and upload the files and commit the record.
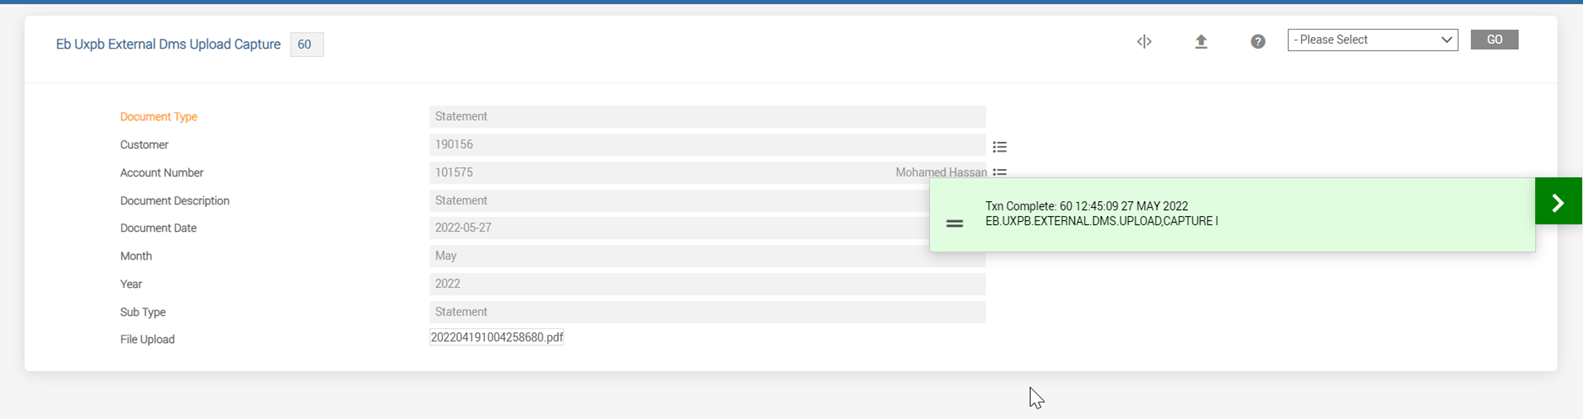
- Verify that the document is moved to the external DMS.
Alternatively,
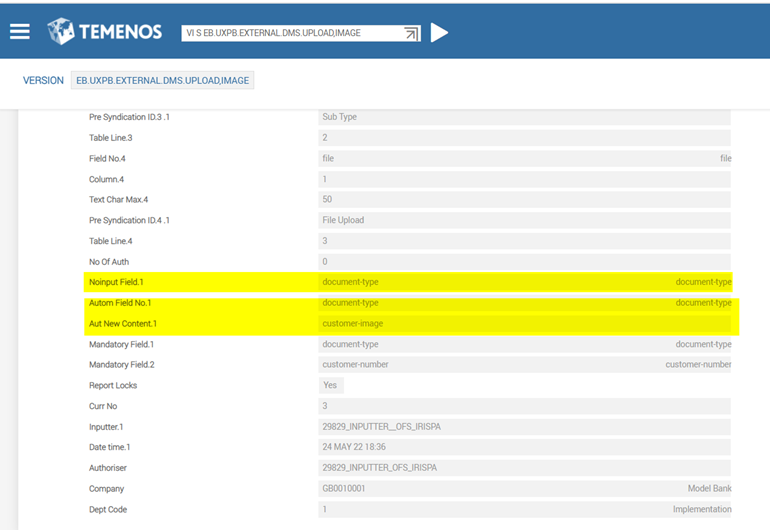
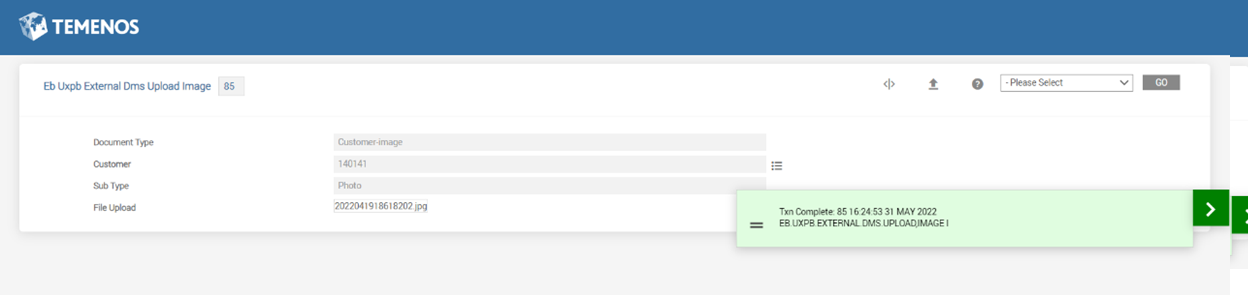
- Create a version and default the document-type field as customer-image/statement/portfolio-statement and upload documents specific to that type.(VERSION I EB.UXPB.EXTERNAL.DMS.UPLOAD,IMAGE)
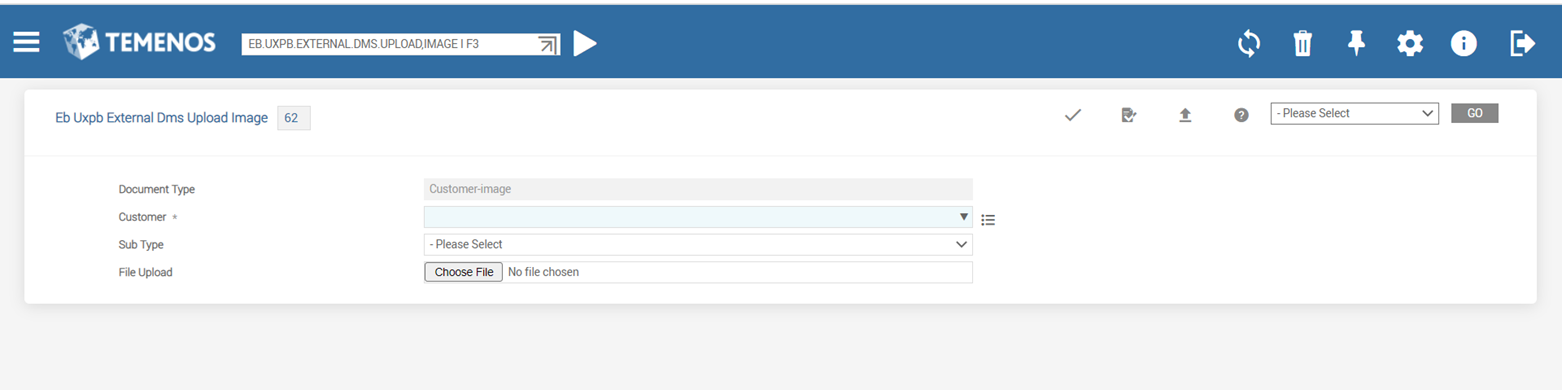
- Launch the version created above (EB.UXPB.EXTERNAL.DMS.UPLOAD,IMAGE I F3 ) to upload customer images only.
- Fill the required details and commit the record.
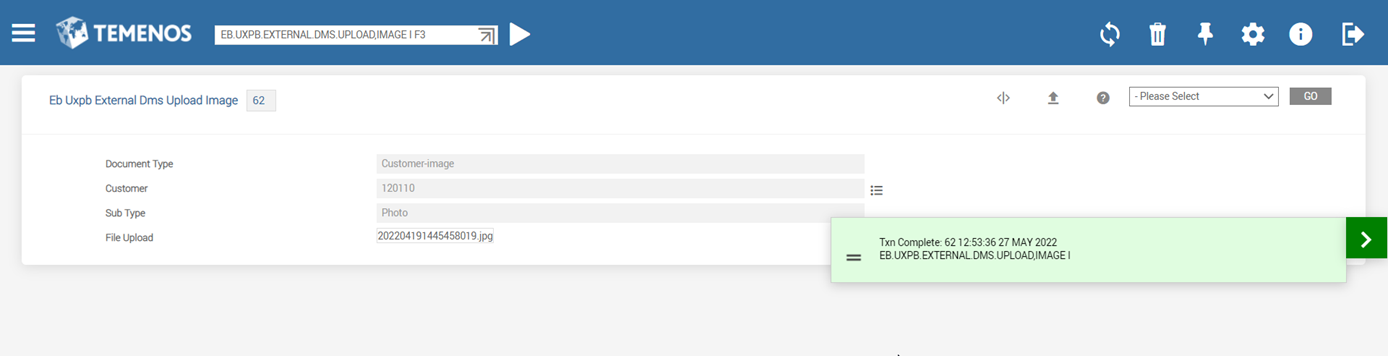
- Verify if the image is moved to the external DMS.
Integration of UXPB and DMS within COS
Integrate the version and enquiry created previously into the Customer Overview (COS) page instead of using the standard model bank enquiry.
- Check if the image and signature belong to the specific customer.
- Check if the account statement is related to this particular account or not.
- View the account statement related to that particular account from the external DMS.
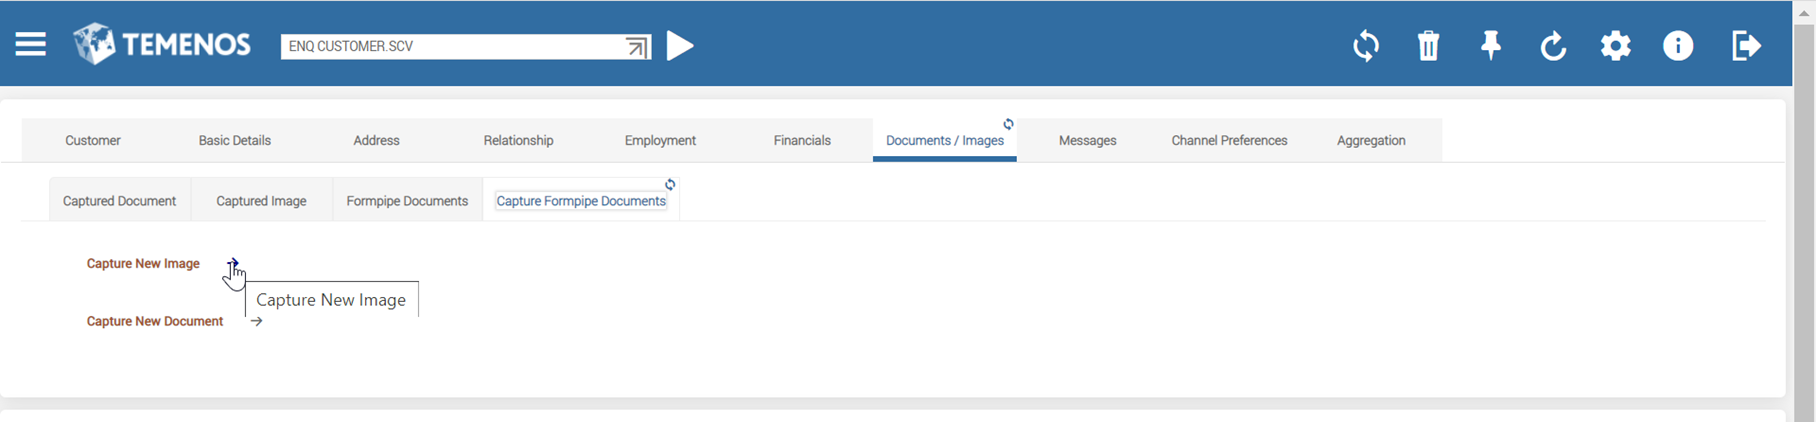
- Check if you can move either images or any documents to the external DMS, using the options below in the Customer Overview page.
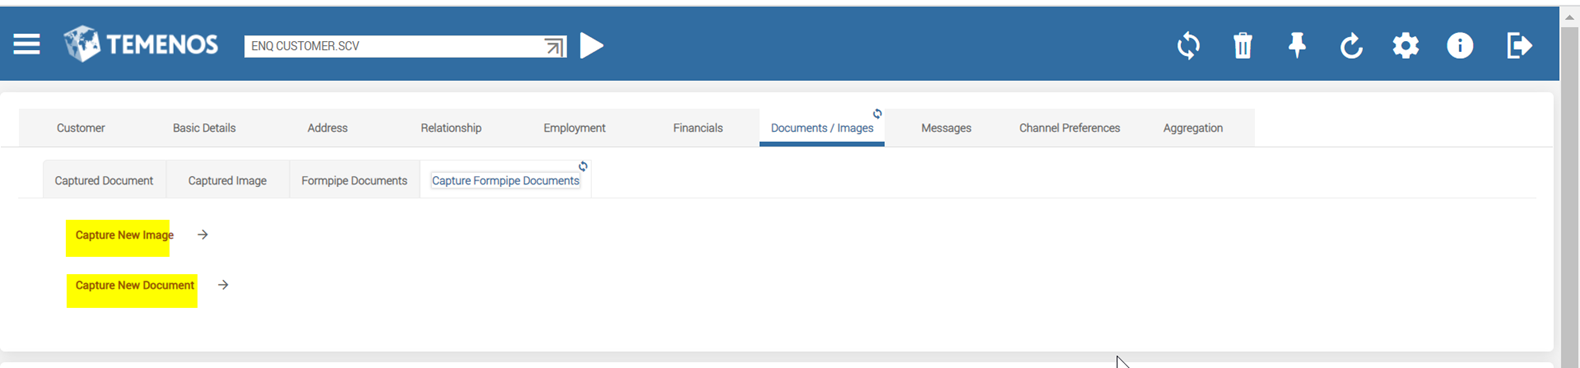
- Use the Capture New Image icon and check if the version(EB.UXPB.EXTERNAL.DMS.UPLOAD,IMAGE) launches, to upload customer images.
- Fill the required details and commit the record to move the uploaded images to the external DMS.
Configuring IRIS R18 Document Service
The following are the configurations required for IRIS R18 document service.
Formpipe endpoints is configured using JVM level system property "formpipe.adapter.base.url" for the service to load.
Formpipe headers are configured using JVM level system property "formpipe.adapter.api.headers" as specified below,
 formpipe.adapter.api.headers=<header_name_1>,<header_name_2>,…,<header_name_n>

formpipe.adapter.api.headers.<header_name_1>=<header_value_1>

formpipe.adapter.api.headers.<header_name_2>=<header_value_1>

…

formpipe.adapter.api.headers.<header_name_n>=<header_value_n>
The following are the two types of security authentication that are supported between IRF document service and formpipe server.
- Mutual TLS (mTLS) through exchange of certificates between IRF document service and formpipe server
- API key provided by formpipe as a Bearer token
Formpipe endpoints is protected by an authentication mechanism implemented through mTLS. This mechanism involves exchange of certificates between the server (Formpipe) and client (irf-document-service) to trust each other.
To configure mTLS connection,
- Export the certificate of client and add the same in server trust store.
keytool -v -exportcert -file /path/to/client.cer -alias client -keystore /path/to/identity.jks -storepass secret -rfc
- Export the certificate of server and add the same in client trust store.
keytool -v -exportcert -file /path/to/server.cer -alias server -keystore /path/to/identity.jks -storepass secret -rfc
- Configure the below JVM level system properties on client side with the trust store and key store details.
What For Parameter Name Trust Store Path javax.net.ssl.trustStore Trust Store Password javax.net.ssl.trustStorePassword Trust Store Type javax.net.ssl.trustStoreType Key Store Path javax.net.ssl.keyStore Key Store Password javax.net.ssl.keyStorePassword Key Store Type javax.net.ssl.keyStoreType Protocol https.protocols  Example
-Djavax.net.ssl.trustStore=/path/to/truststore.jks
-Djavax.net.ssl.trustStorePassword=<truststore_password>
-Djavax.net.ssl.trustStoreType=jks
-Djavax.net.ssl.keyStore=/path/to/keystore.jks
-Djavax.net.ssl.keyStorePassword=<keystore_passowrd>
-Djavax.net.ssl.keyStoreType=jks
-Dhttps.protocols=TLSv1.2
Formpipe API Key is configured using the environment properties for HTTP headers as specified below,
formpipe.adapter.api.headers=AccessKey formpipe.adapter.api.headers.AccessKey=<access_key_value>
In this topic