Enabling SSO between Keycloak and Transact Explorer
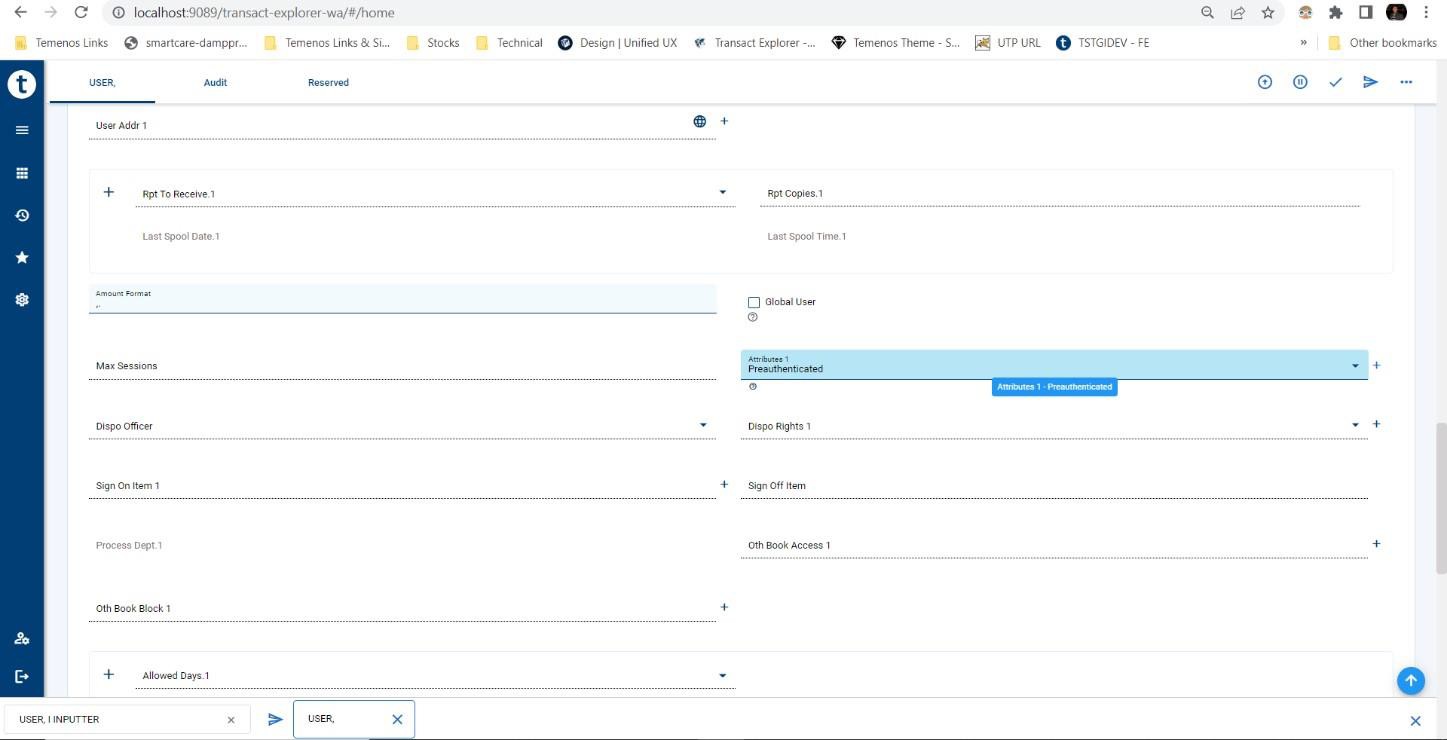
Transact Explorer is integrated with Keycloak for Single Sign-On (SSO), which also supports user externalisation. You can configure a user in the external system instead of configuring them in Transact, enabling Transact Explorer to support both Transact and Non-Transact user configurations. For a Transact user, you need to set the Pre-authenticated attribute in the USER application in Transact.
If the user needs to externalise, enable the user externalisation attribute in Transact during deployment.
This guide provides detailed steps to configure Keycloak, TB-server, and Transact Explorer to enable the SSO feature.
Configuring Keycloak Server
To configure the Keycloak server, ensure that you have access to the Keycloak admin console.
To add a Realm,
- Log in to Keycloak admin console using the default credentials.
- Enter the necessary details and create a realm named ‘transact’ (or create it with any name but make sure it is used in all other places in the below sections appropriately).
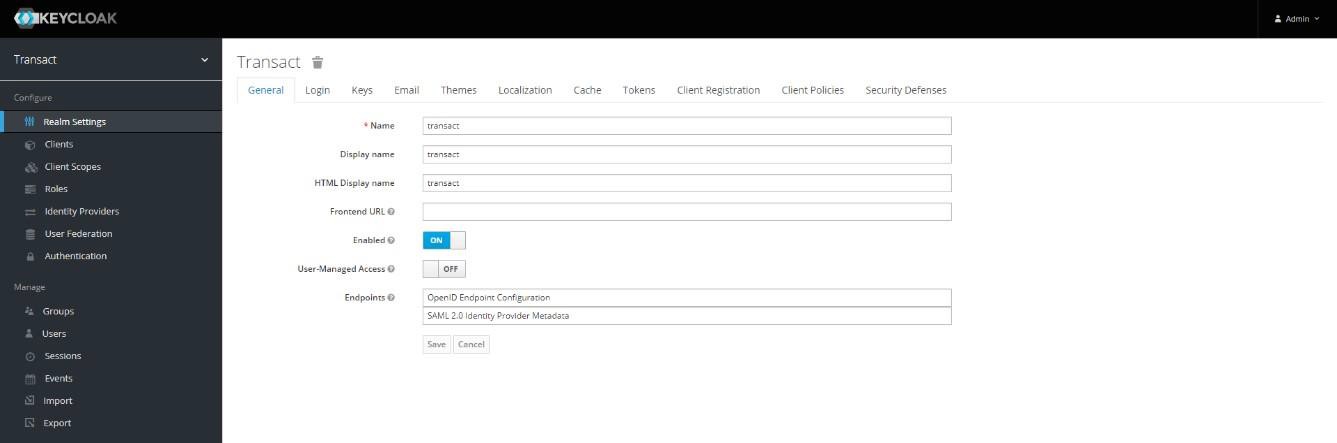
- After creating the realm, go to the Keys tab and note down the Public Key text for the RS256 algorithm.
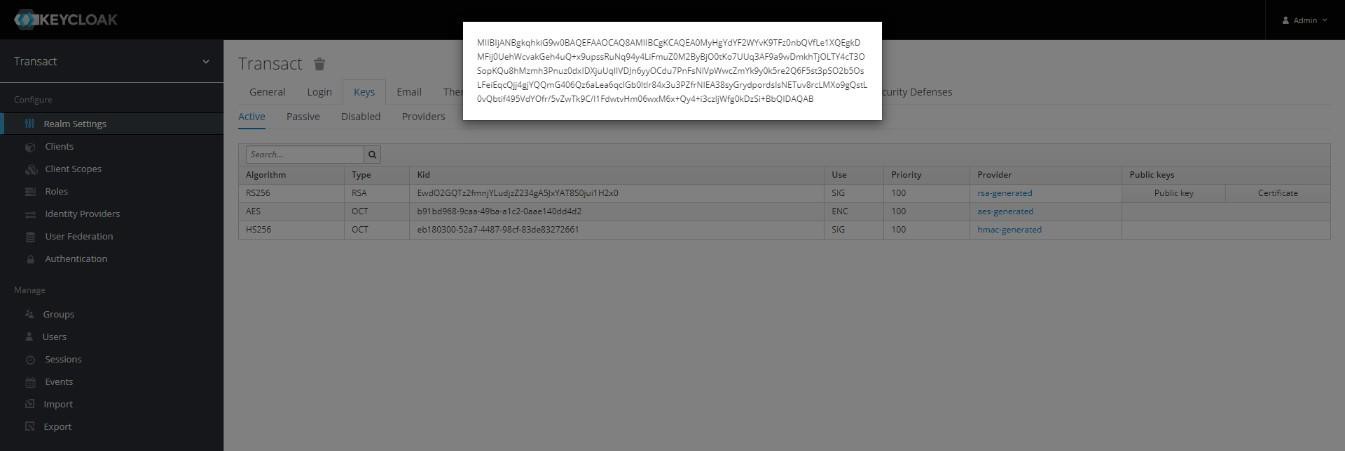
You have now successfully added a Realm.
Copy the above RSA Public Key and follow the below instructions:
- Go to http://www.utilities-online.info/base64/#.X5ay8m5uJpw.
- Paste the copied RSA Public Key in the left textbox and click Encode. On right side, you could see base64 encoded key generated.
- Note down this encoding public key, which needs to be placed in the XML files of WARs.
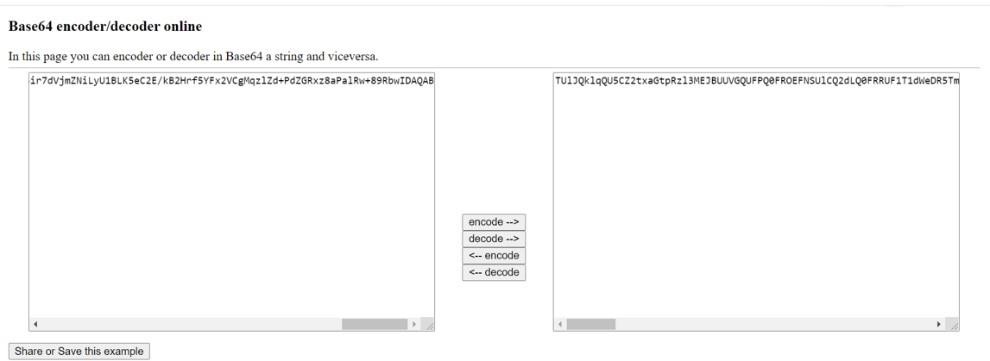
You have now successfully generated an encoded public key.
To add a client to the created realm,
- On the left-navigation pane, select Transact > Clients.
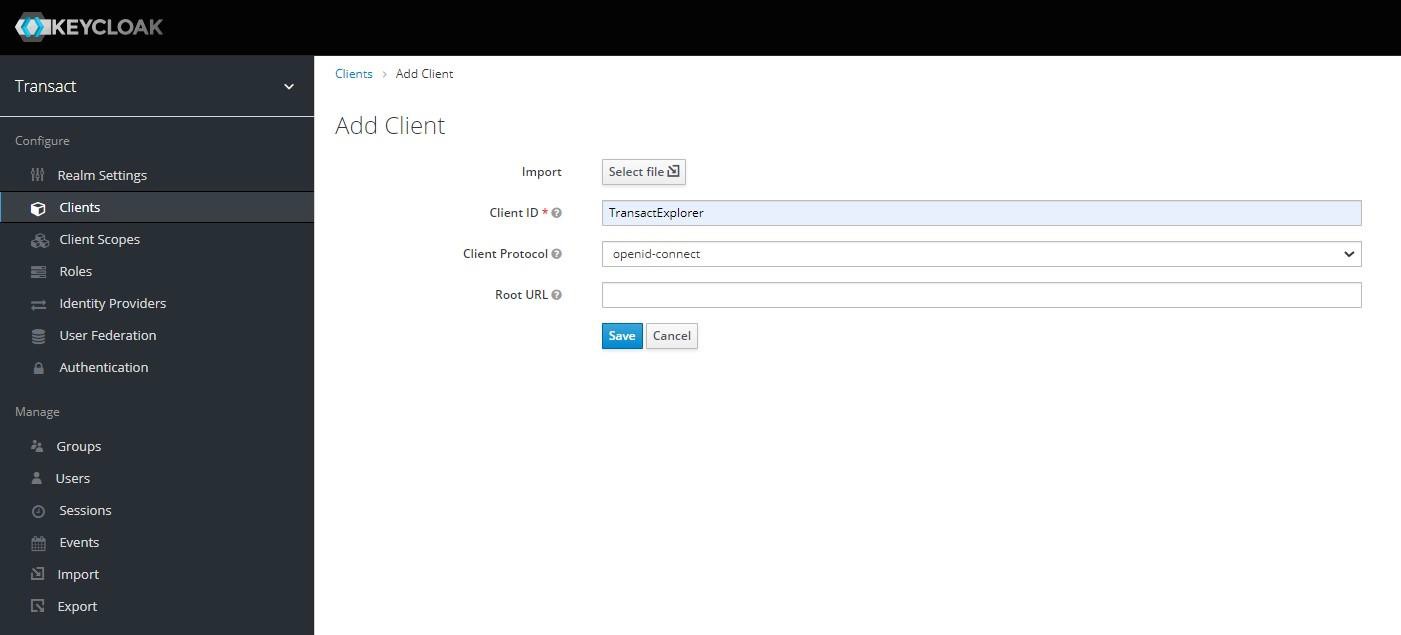
- On the Clients pane, click Create. The Add Client page appears.
- Enter the following details and click Save:
- Client ID as TransactExplorer.
- Client Protocol as openid-connect.
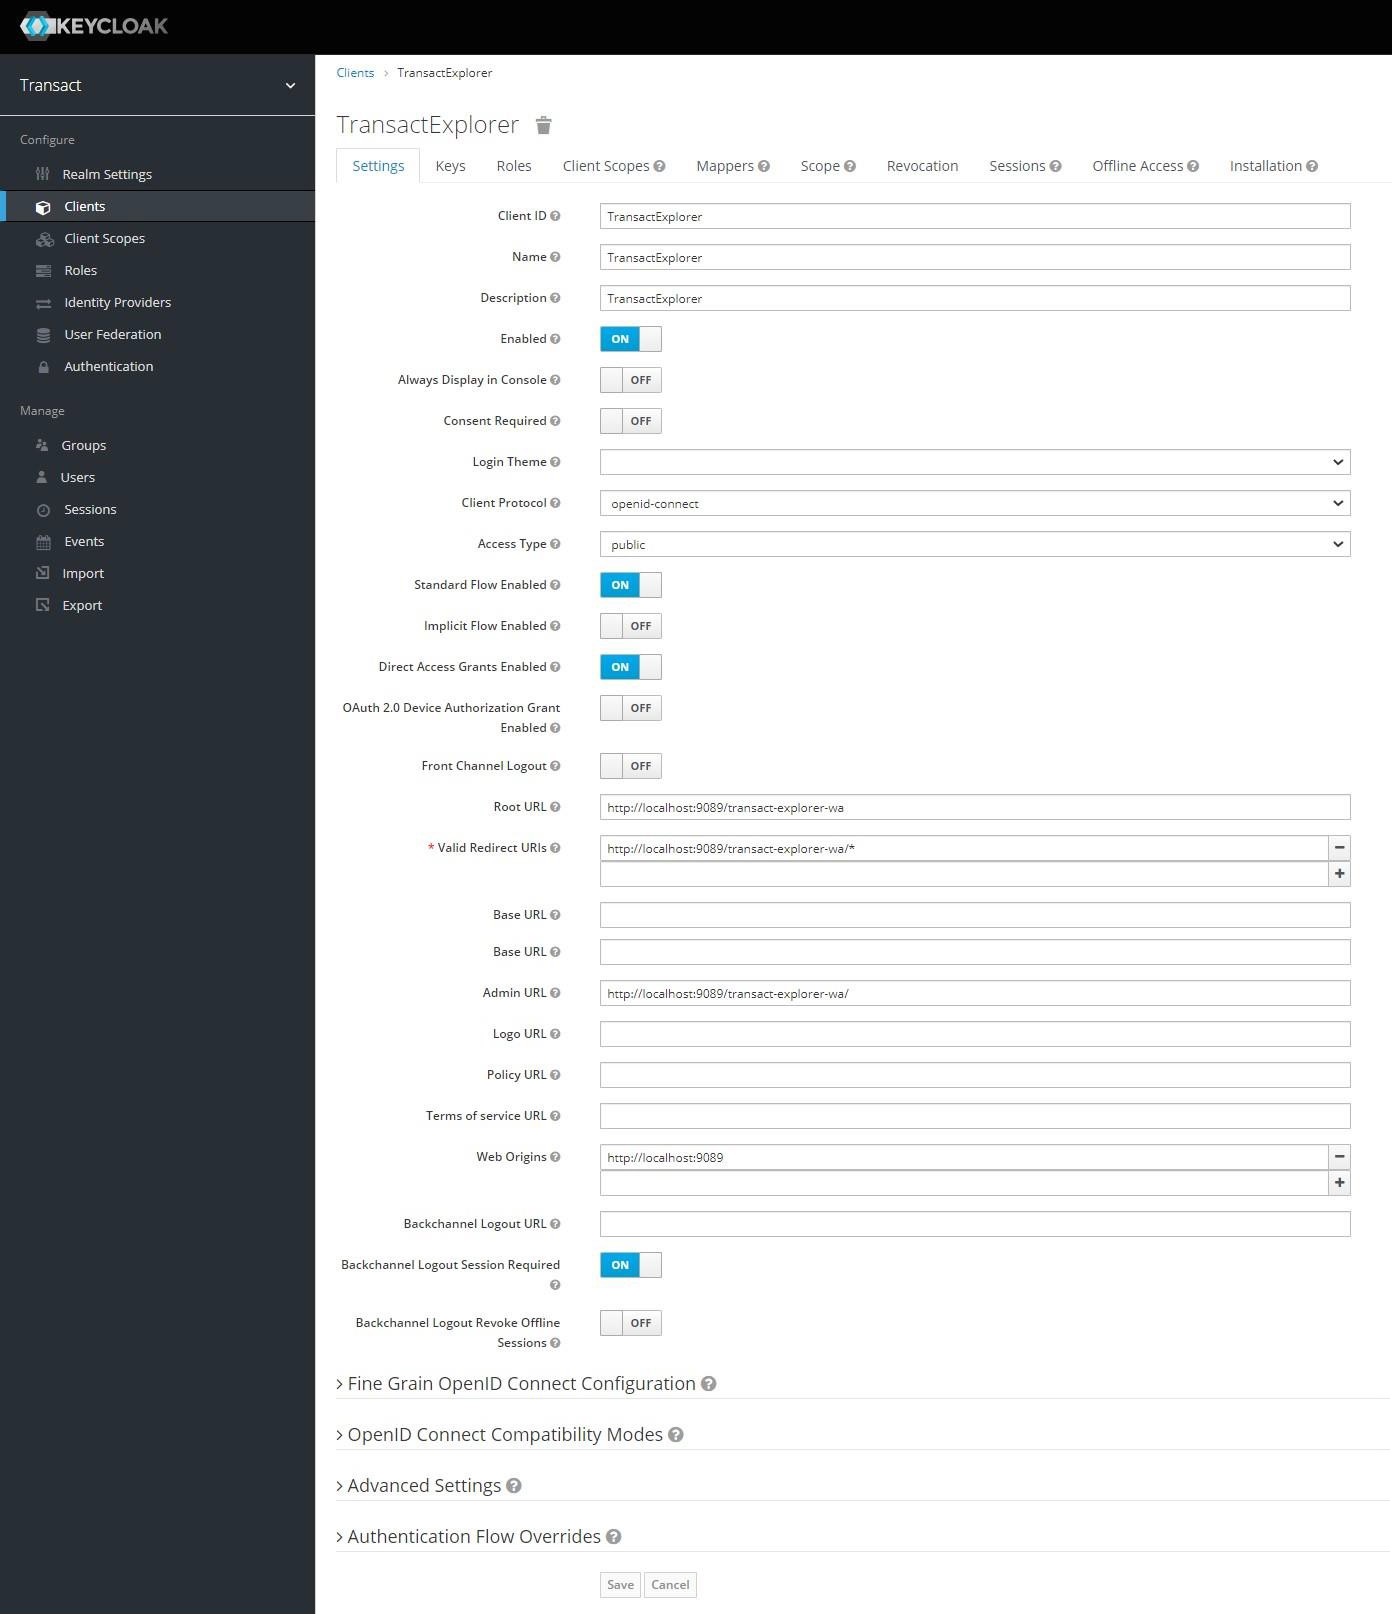
- On the TransactExplorer page, navigate to the Settings tab, enter the details (shown in the screenshot), and click Save.
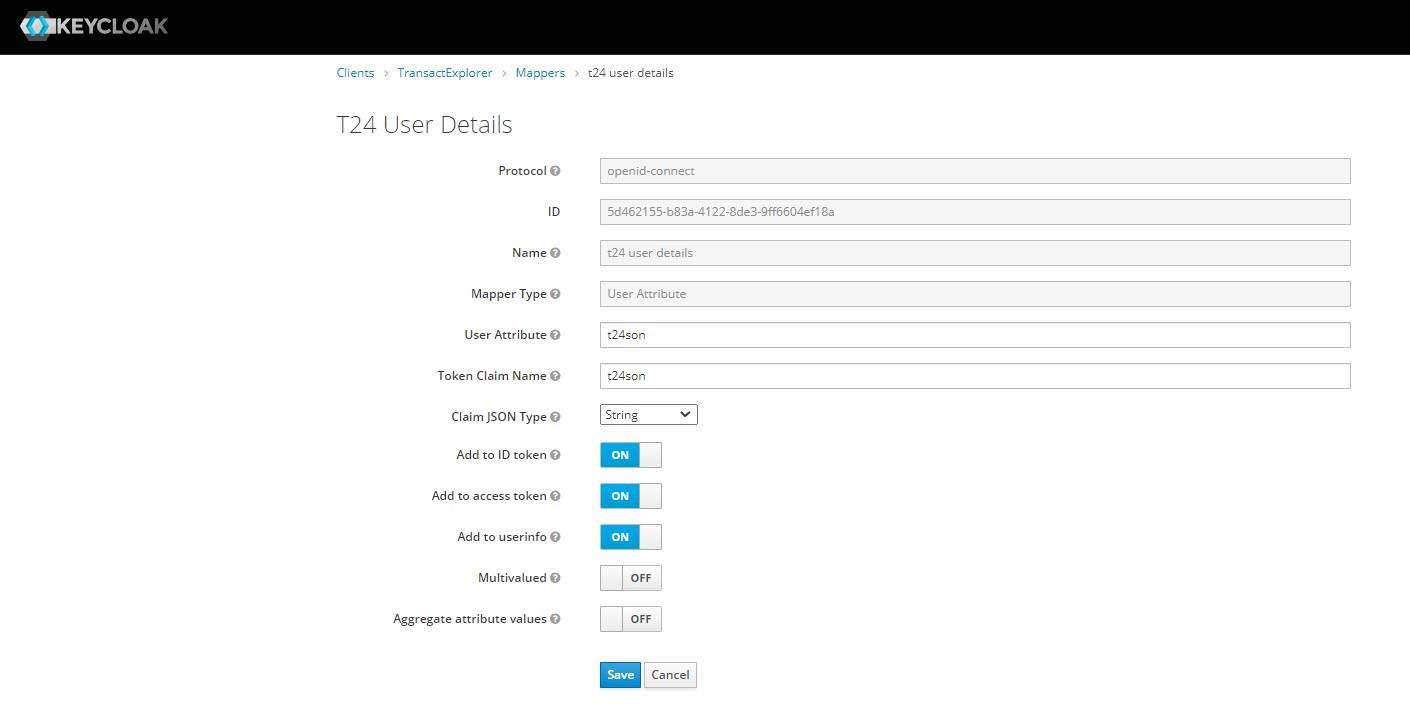
- Navigate to the Mappers tab to create a new mapper with ‘t24son’ as a user attribute.

You have successfully created the Transact Explorer client.
You have successfully created the Transact Explorer client and added the user attribute.
To add users in Keycloak,
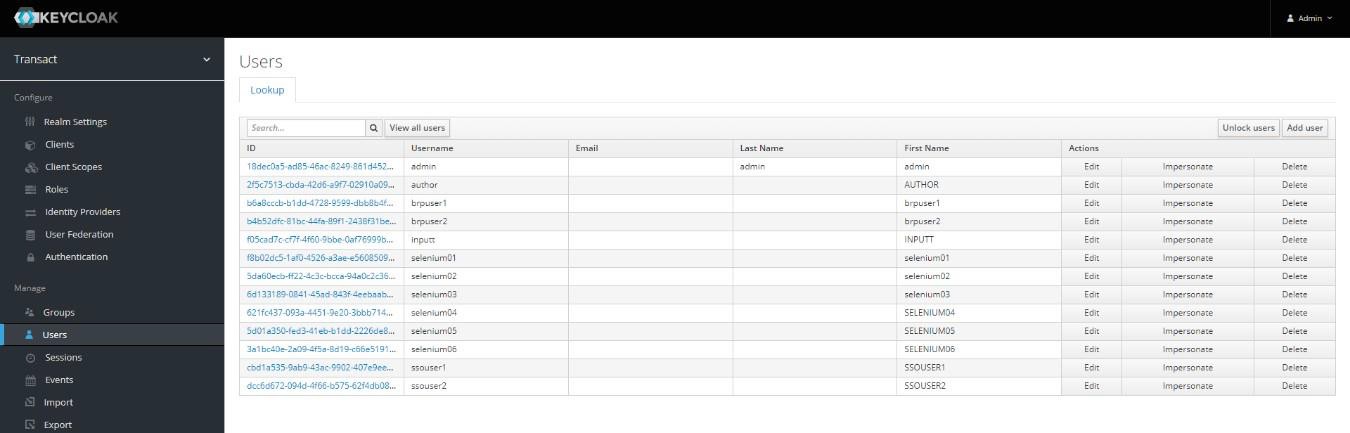
- On the left-navigation pane, select Users. The User pane appears.
- Click Add user to create new users.
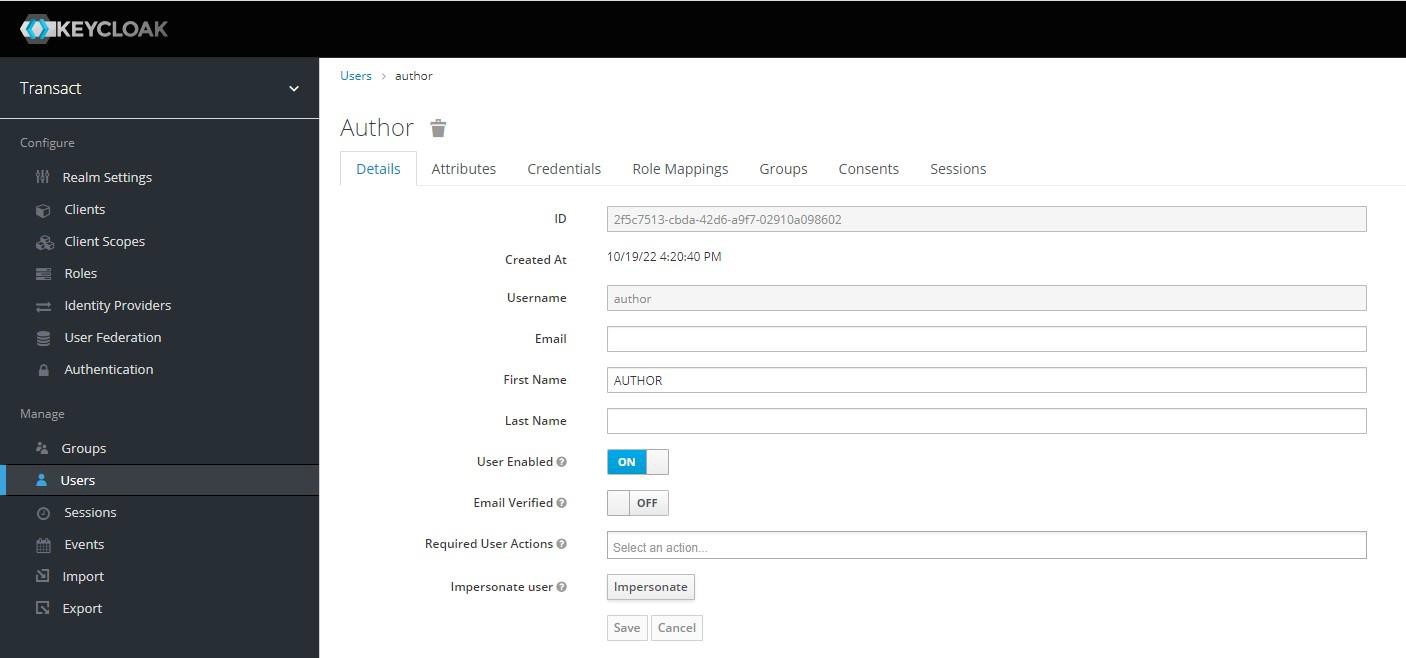
- In the Author page, enter the username and first name, and Click Save.
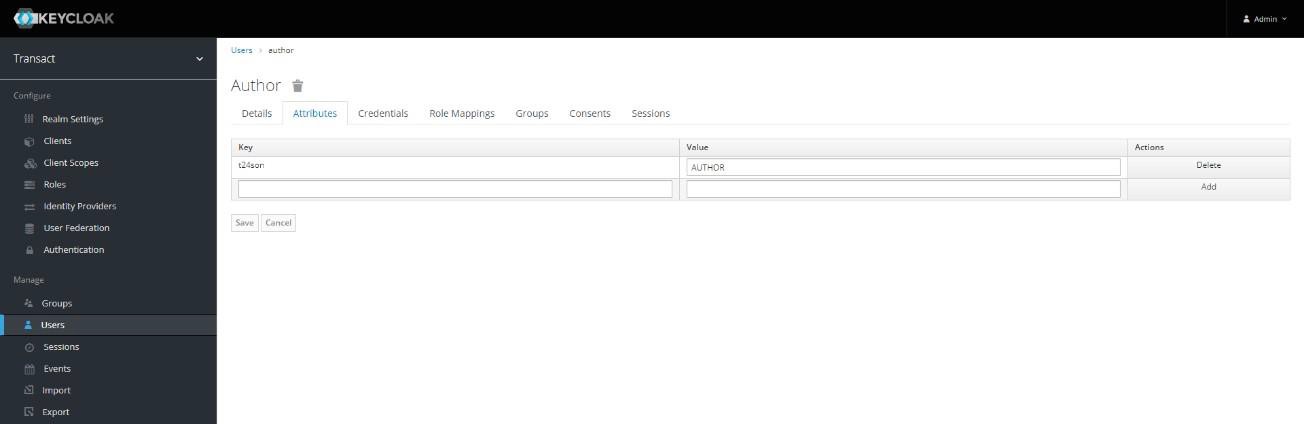
- Edit the user and go to the Attributes tab to add the t24son attribute. T24son name should be same as the sign-on name of the USER applications in Transact.
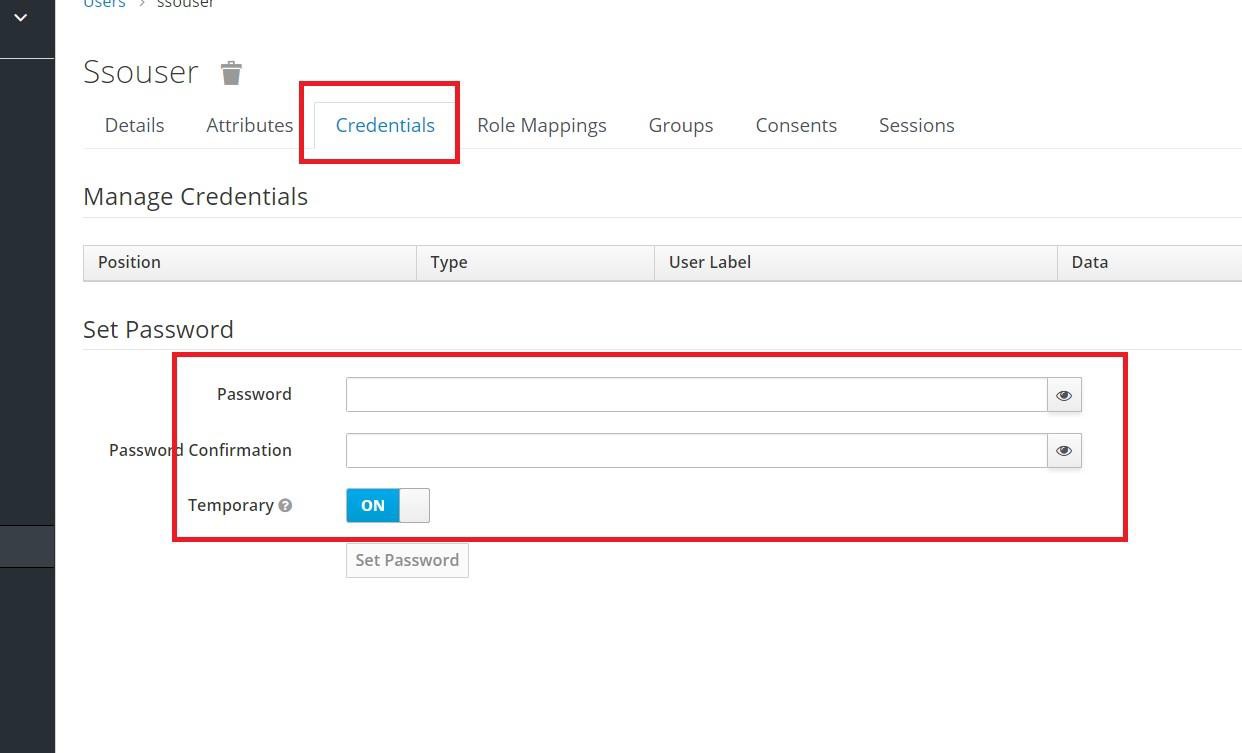
- Navigate to the Credentials tab and set the password for the user. Keep the Temporary toggle ON to enable the user to reset the password on first login.
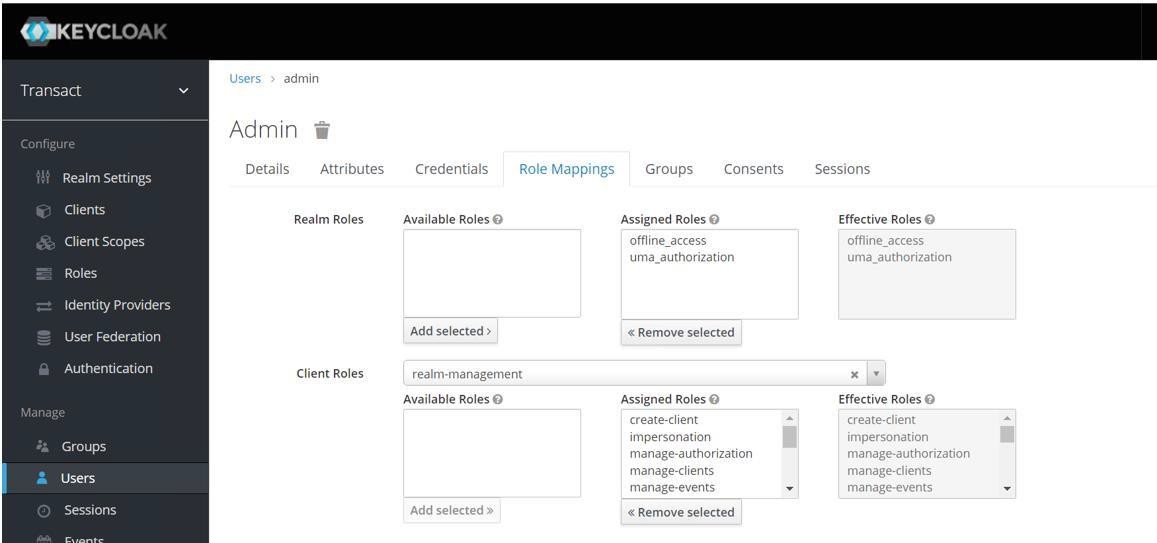
- Navigate to the Role Mappings tab and add all the Available Roles into Assigned Roles.
After saving the changes, the Credentials tab appears.
You have now successfully created a user, added the attribute, and assigned necessary roles to the user.
You can customize the theme of the login page. The themes directory is located in /keycloak-6.0.1/themes/. You can make a copy of the existing theme and edit it based on the branding changes.
The branding logo is available in the /keycloak-6.0.1/themes/TemenosKeycloak/login/resources/img/ location.Configuring API war (tb-server.war)
Transact Browser uses IRIS framework internally to connect with Transact. Configuration of JWT is almost same as IRIS framework.
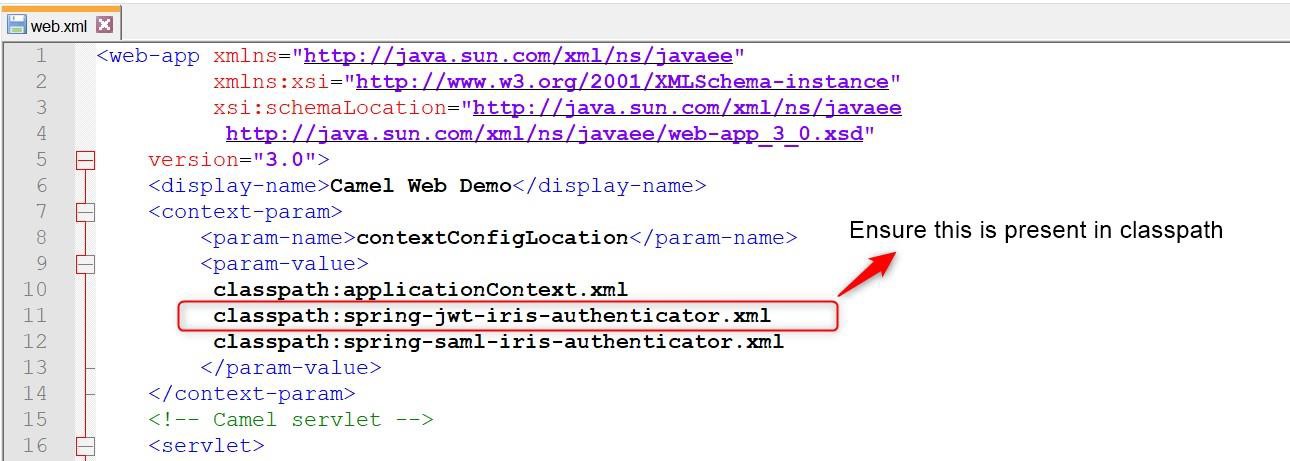
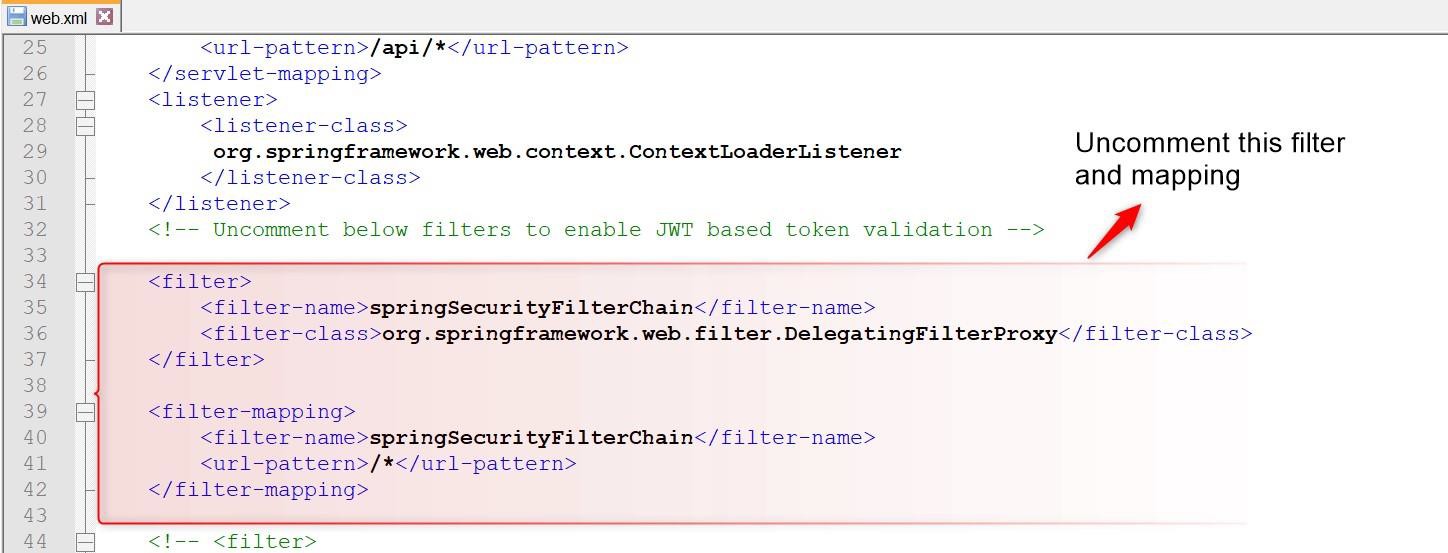
Perform the following modifications in the web.xml file:
- Enable the Spring security filter and mapping.
- Ensure that spring-jwt-irisauthenticator.xml is available in classpath.
The Spring filter is necessary for JWT token authentication. Without this filter enabled in web.xml, the JWT authentication does not work in Transact Browser Server.
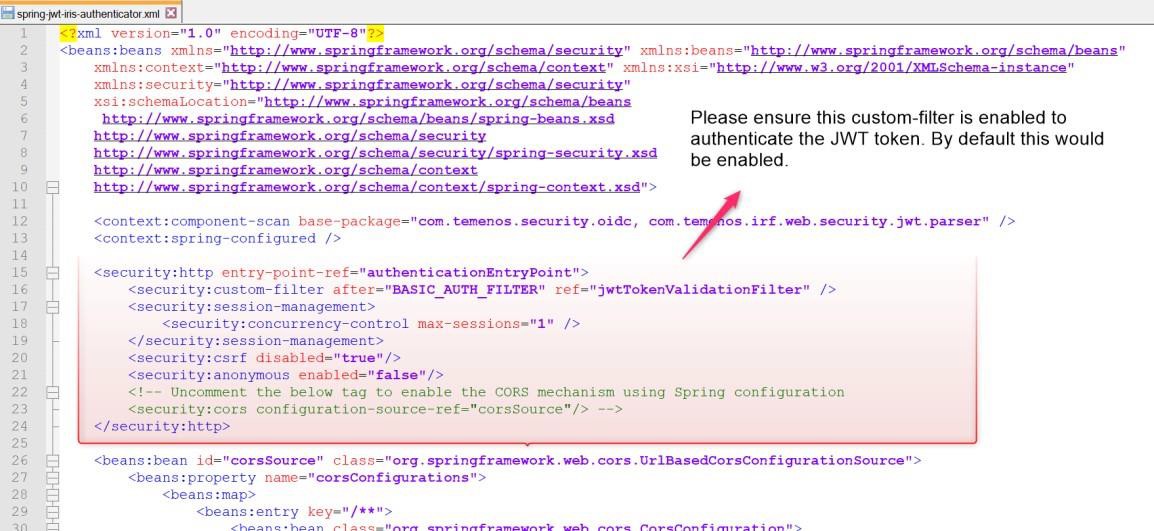
The following sections describe the changes that need to be made in tb-server.war\WEB-INF\classes\spring-jwt-iris-authenticatior.xml.
Enable the JWTTokenValidator filter.
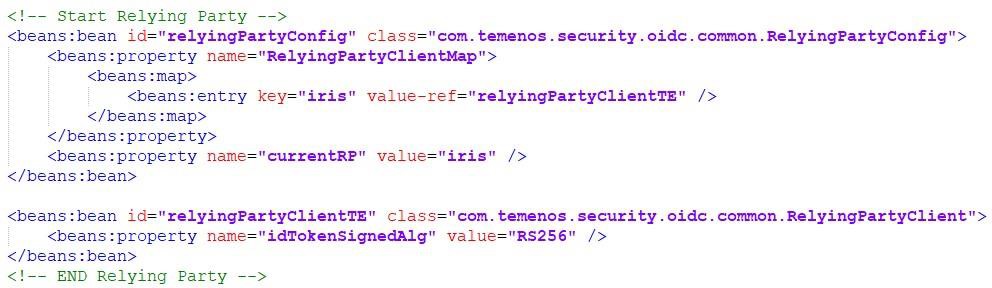
Add the idTokenSignedAlg property.
The token is validated against the algorithm provided in the configuration and the original value available in the JWT token. If the two values mismatch, Transact browser server ignores the request and sends unauthorized response back.
It is assumed that the token is having the RS256 algorithm and value is updated accordingly.
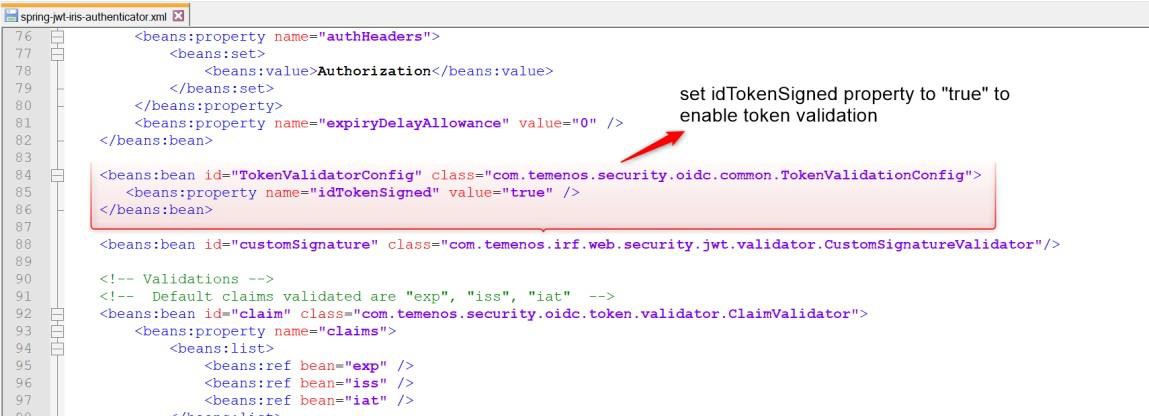
You can enable or disable the signature validation feature using the below property. By default, this property is set to False. To enable the signature validation, set the below property to true.
You can validate the claims that are present in the JWT token. ClaimValidator is a generic validator for various claims available in the token, where each instance of the ClaimValidator would validate one specific claim. The claim that needs to be validated is injected into the instance.
The following are the claims' default validators are supported for.
- exp
- iss
- iat
Add the claims in the below section to validate them.

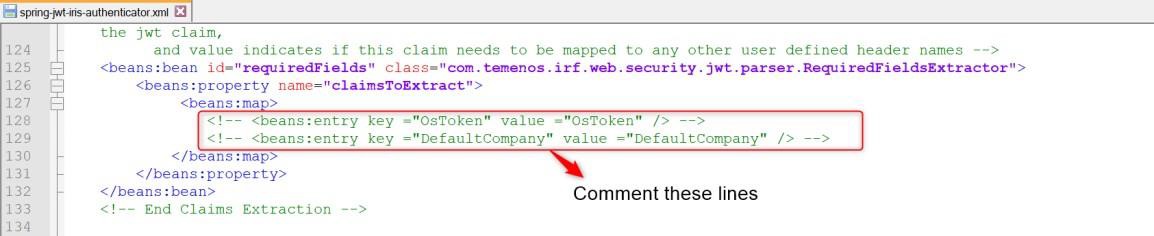
Comment the claims mentioned in the below screenshot.
Claims specified in the below highlighted section are extracted from JWT token and set in request header. Transact Browser does not require any such token to be extracted and set in request header.
There are cases where time difference (in seconds advanced or delayed) can occur between the JWT token provider and the server in which Transact Browser Server is deployed. You can configure the Transact Browser Server to ignore a specific amount of time difference (in seconds). You can configure this using the below property (in seconds). The default value is zero.

The token providers sign every JWT token using their own private key. This signature can be validated only with the public key provided by the token provider. You must configure the public key for enabling the Transact Browser Server to validate the signature of the JWT token. Transact Browser Server supports four ways to obtain the public key, in which anyone of the below four properties is mandatory for Transact Browser Server to validate the signature.
|
Property |
Description |
|---|---|
| <beans:property name="pkEncoded" value="" /> | Use this property, if the client has the public key as a String, which can be base64 encoded and added here. |
|
<beans:property name="pkCertEncoded" value="" /> |
Use this property, if the client has the key certificate as a String, which can be base64 encoded and added here. |
|
<beans:property name="pkCertFilePath" value="" /> |
Use this property, if the client has the key certificate as a certificate file (.cer or .pem), that location can be directly configured here. |
|
<beans:property name="pkJwksUri" value="" /> |
Use this property, if the client can expose the JWKS URI to obtain the public key. |
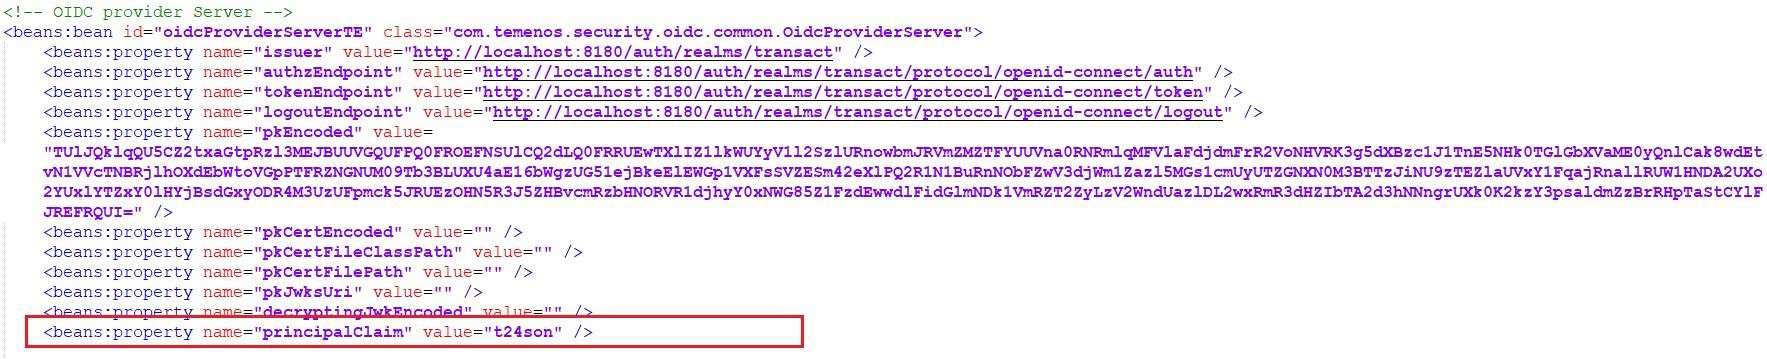
Transact Browser Server requires a SIGN.ON.NAME to connect with Transact. You can specify the claim name, in which the sign-on name of Transact is available. Here, you have specified the ‘t24son’ claim, where Transact sign-on name is available.
Sign-on name and username are different in Transact. Principle claim should hold the sign-on name of the Transact user instead of the username.
Configuring UI war (transact-explorer-wa.war)
Configuring the transact-explorer-wa.war file involves the below-mentioned changes in the web.xml and spring-oidc-authenticator.xml files.
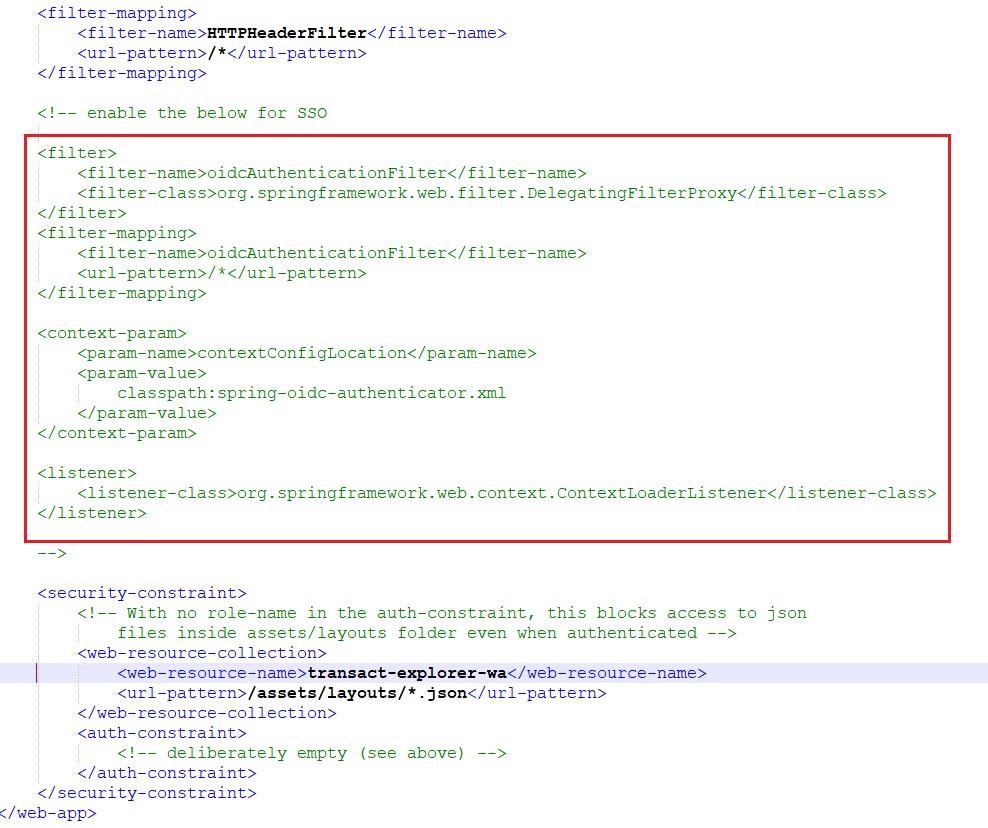
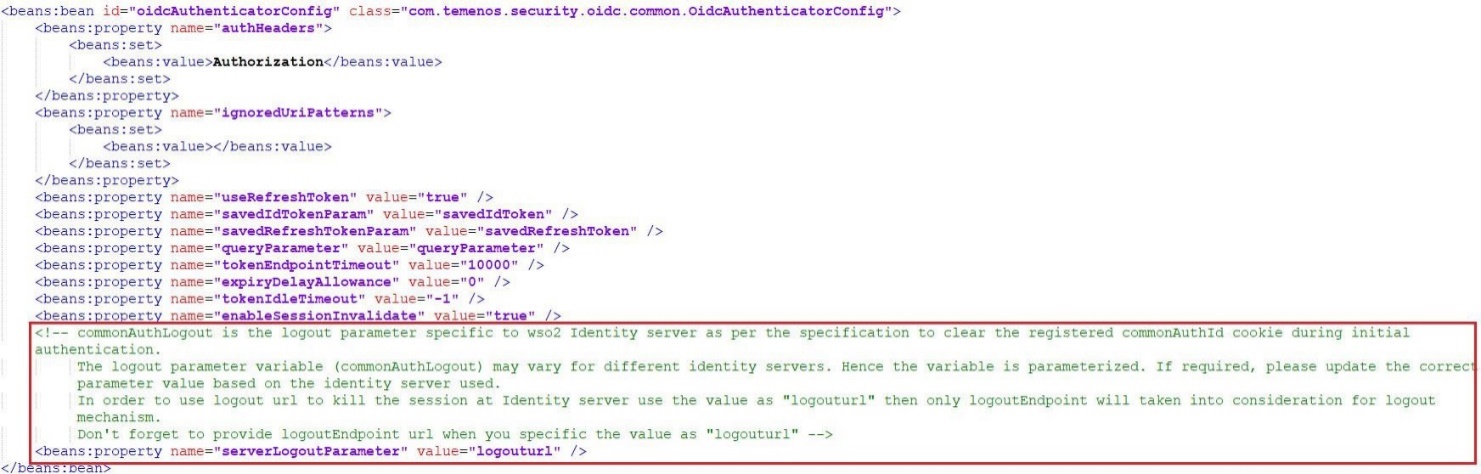
Enable the ‘oidcAuthenticationFilter’ tag in the WEB-INF/web.xml file. By default, this tag is disabled in the UI war.
If WEB-INF folder is not present, then UI war was built only with transact-explorer-angular (UI) component. Execute the Maven builds script to include transact-explorer-server component in UI war.
Perform the below configurations:
- Set the serverLogoutParameter tag to ‘logouturl’ in case of SSO. By default, this tag is set to ‘commonAuthLogout’.
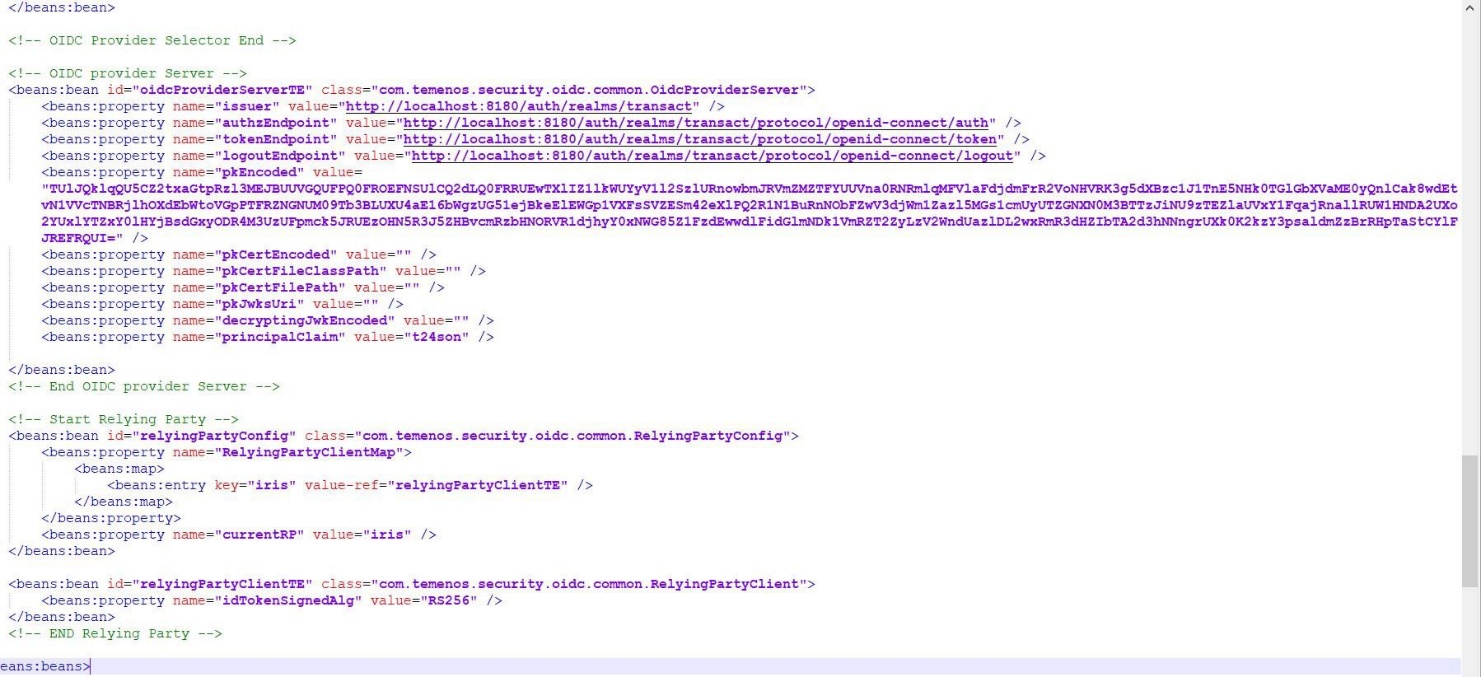
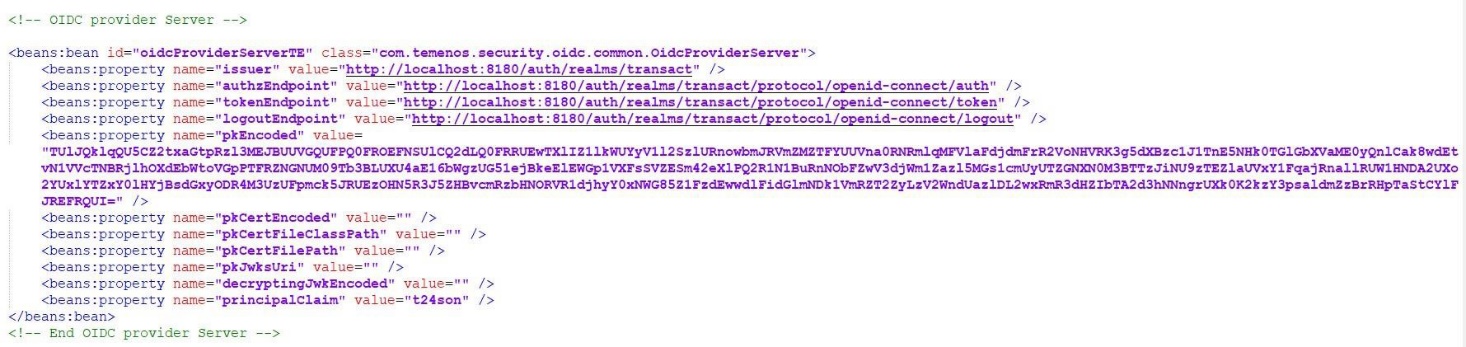
- Set the properties under ‘oidcProviderServerTE’ as shown in the below screenshot. You can get the Issuer and Endpoints URL from the metadata file.
- Set the value of the pkEncoded property to the encoded public key. Refer to the Generating Encoded Public Key section.
- Set the principalClaim property to t24son.
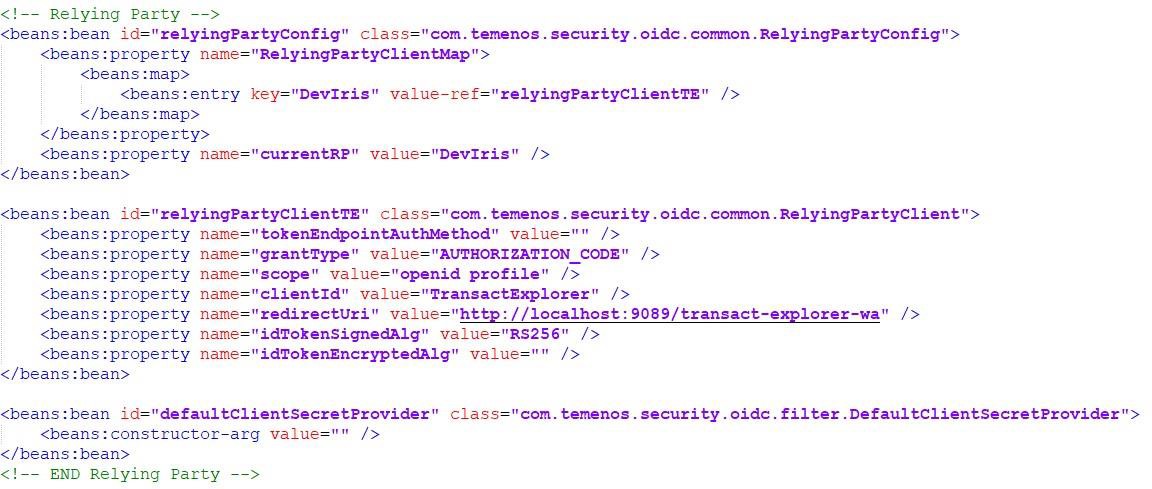
- Under relyingPartyClientTE, set the following properties:
- clientId as TransactExplorer (this is the name of client created under Keycloak).
- redirectUri as http://<host>:<port>/transact-explorer-wa.
- idTokenSignedAlg as R256.
Configuring Users in Transact
Transact must know that authentication is performed outside Transact, that is in IDP or Web service layer, so that Transact does not perform the usual credential validation for the user. You need to set the PREAUTHENTICATED attribute for the user in Transact. The T24son user attribute set to Keycloak users should match with the Sign-On name in Transact.
Transact Sign-On name is obtained from the claim in JWT token and the claim is configurable under the User Principal Configuration section.
After successfully performing the configurations, Transact Browser Server is ready to authenticate the JWT token. Transact Browser Server (tb-server) requires an OS token to communicate with Transact. After successful authentication, tb-server requests Transact to provide an OS token for the current authenticated user. This OS token and company information of current user are returned to the caller in the login response body. Caller may send this OS token and company values in the ‘OsToken’ and ‘DefaultCompany’ request headers respectively in sub-sequent requests. Thus, tb-server does not request Transact again to provide the OS token and it re-uses the OS token passed in the request header (by the caller) to improve the performance.
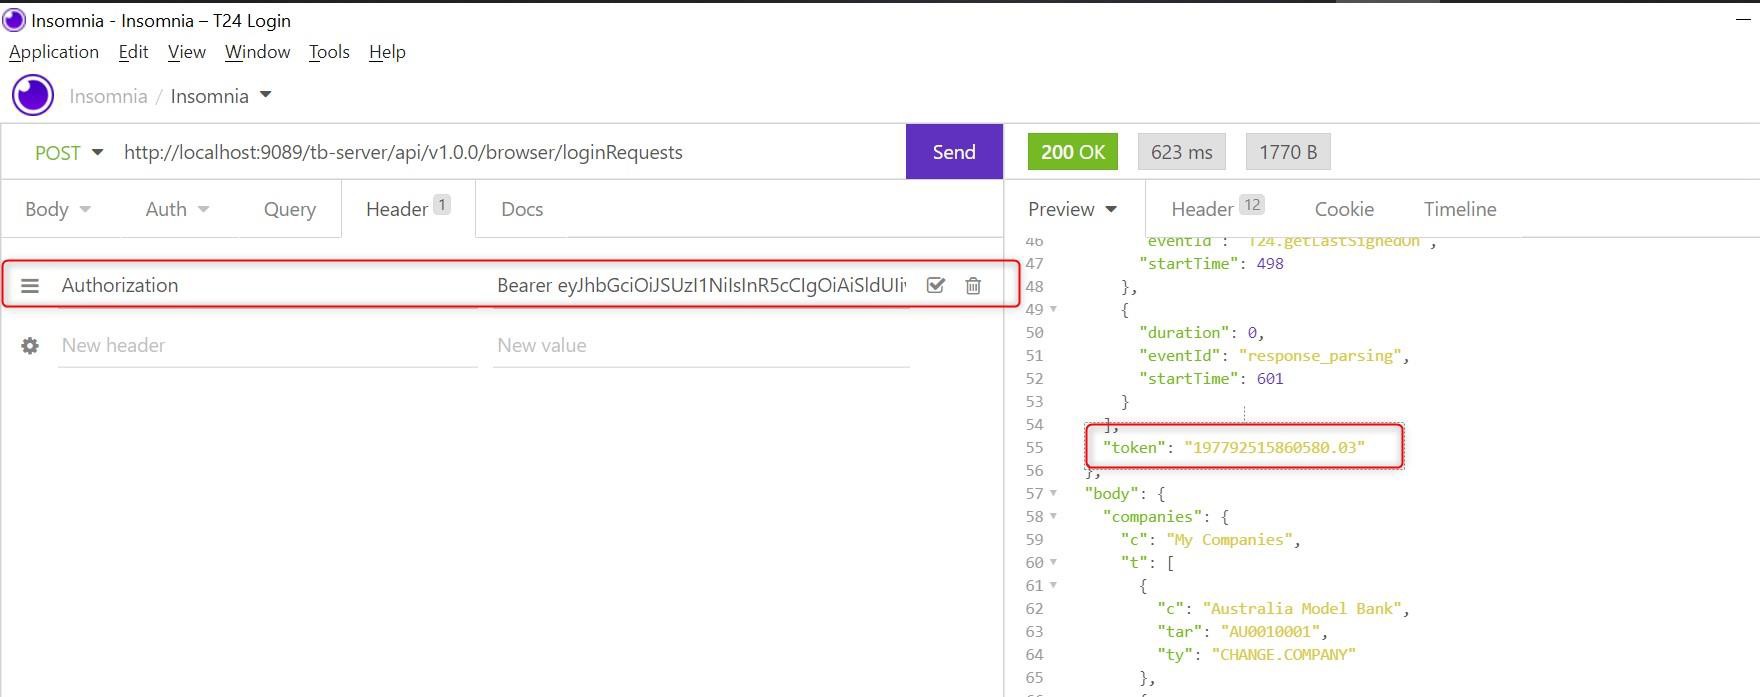
‘Bearer’ should be added in authorization header before the JWT token to access tb-server APIs when JWT SSO is configured.Testing with Valid Token
You need to get a valid JWT token from the IDP server to access the tb-server APIs. The below screenshot shows the valid Keycloak JWT token in authorization header and the success response from the tb-server API.
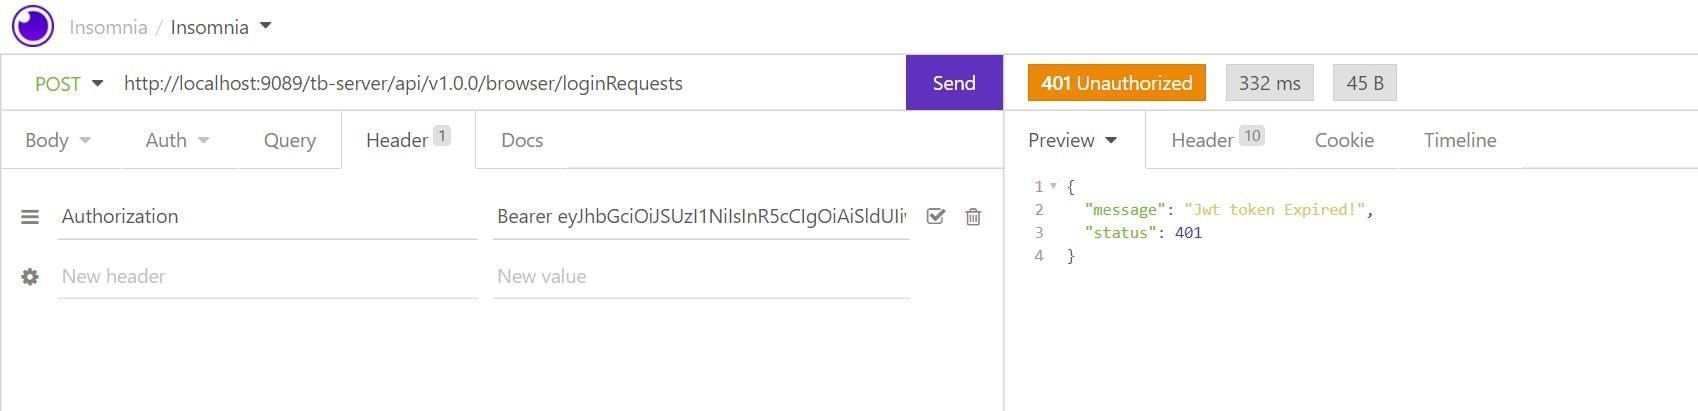
Testing with Invalid Token
When you supply expired JWT token, Transact Browser Sever API returns the 401 status with the ‘Jwt token Expired’ message.
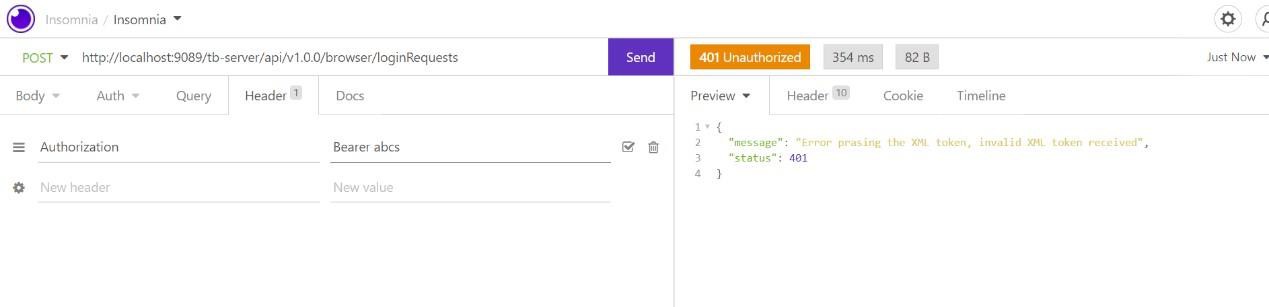
When you supply an invalid JWT token, Transact Browser Server API returns the 401 status with the ‘Error parsing the XML token received’ message.
Verifying Keycloak Integration
To verify the Keycloak integration,
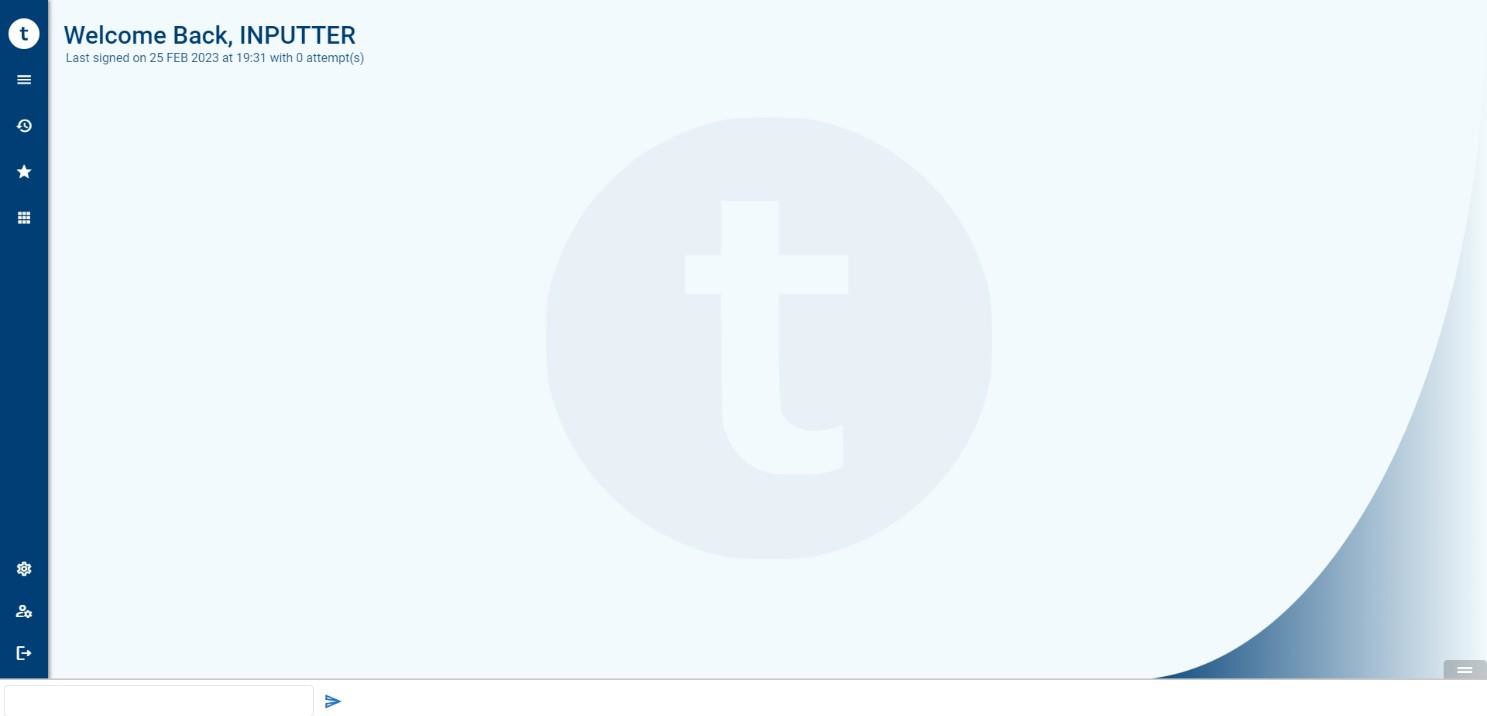
- Launch http://localhost:9089/transact-explorer-wa. The Keycloak realm login page appears.
- Enter the credentials of the user created in the Keycloak server.

After successful login, Transact Explorer home page for the AUTHOR user whose sign-on name is the Keycloak login user appears. Refer to the Configuring Users in Transact section for more information.
In this topic