Database Functions
This section shows the Database functions that are supported by TAFJ.
SQL
To execute SQL statements, you need to switch to SQL mode by typing the SQL command on the command line or by prefixing your SQL command with the SQL keyword.

This activates the SQL mode in the header panel and the auto-commit status.

The console is now ready to execute SQL statements.
You need to ensure that the statement should start with one of the following keywords in uppercase:
- SELECT
- INSERT
- UPDATE
- DELETE
- CREATE
- ALTER
- DROP
- COMMIT
- ROLLBACK
- DESCRIBE
Once your statement is executed, the result is displayed on the console. If the statement has a result set, the result gets displayed else it will display the number of rows affected.

In case of an SQL Exception, the related message will be displayed on the console.

To avoid an excessive memory usage when retrieving important set of data, by default only the first 200 rows will be displayed. You can change this parameter to the value you want.
JQL
To execute JQL statements, you need to switch to JQL mode by typing the JQL command on the command line or by prefixing your JQL command with JQL keyword.

This activates the JQL mode in the header panel.

You need to ensure that the statement must start with one of the following keywords in uppercase:
- COPY <<Source Table Name>> <<Destination Table Name>> <<RecId optional>>
- COUNT <<VOC File name>>
- GETDBNAME <<VOC File name>>
- LIST-ITEM <<VOC File name>> <<WITH clause>>
- DESCRIBE <<View or Table Name Pattern>> <<Column Name Pattern (optional)>>...ie. TAFJV_FBNK_CURR% %CURR%
- LOCATE-TABLE <<Table Name>> (zOS only)
- CLEAR-FILE <<VOC File name>>
- CREATE-FILE <<VOC File name>> - You can use several syntaxes. To create a table with a particular table type (XML, CLOB, BLOB, MULTI-COLUMN, VARCHAR), use the CREATE-FILE F.TESTROFILE TYPE=<<TYPE>> syntax.
- CREATE-FILE F.TESTROFILE TYPE=XML ASSOCIATE="YES" - Creates the table in the transactional database and sets it up for a read-only pair.
- CREATE-FILE F.TESTROFILE$RO TYPE=XML DATABASE="TESTRODB" SCHEMA="TAFJRO" READONLY="YES"
- DELETE-FILE <<VOC File name>>
- SHOWDICTS <<TYPE= (I|D|PH>> <<ATTRIBUTE= (ALL| Attribute Number to Search>> <<(STARTSWITH|ENDSWITH|CONTAINS)="Search String">> <<FILE= FileName to log.>>
- DELETE <<VOC Filename>> <<recordname>>
For read-only and $DIM files, two commands are needed to create new Temenos Transact archive tables:
To specify MULTI-COLUMN file creation, an existing dictionary is needed, that is CREATE-FILE FBNK.CURRENCY.2 TYPE=MULTI-COLUMN DICT=D_F_CURRENCY
SHOWDICTS allows you to search all dictionary items. Logs show up in $TAFJ_HOME/log. If the FILE parameter is not specified, then the default ShowDicts.txt is used.
The example below shows a dict item of I type with attribute 2 containing the search ENQ.TRANS:
DBTools>SHOWDICTS TYPE=I ATTRIBUTE=2 CONTAINS="ENQ.TRANS" FILE=enqtrans.txt
Below will be the content of the $TAFJ_HOME/log/enqtrans.txt output file.
FMF1.MD.DEAL	FMF1_MD_DEAL	D_F_MD_DEAL	CUST.SECTOR	I?CUSTOMER; SUBR("ENQ.TRANS","CUSTOMER", @1, "SECTOR")??CUST.SECTOR?4R?S????????CUSTOMER; SUBR("ENQ.TRANS","CUSTOMER", @1, "SECTOR")
FMF1.MD.DEAL	FMF1_MD_DEAL	D_F_MD_DEAL	INDUSTRY	I?CUSTOMER; SUBR("ENQ.TRANS","CUSTOMER", @1, "INDUSTRY")??INDUSTRY?4R?S????????CUSTOMER; SUBR("ENQ.TRANS","CUSTOMER", @1, "INDUSTRY")
FMF1.MD.DEAL	FMF1_MD_DEAL	D_F_MD_DEAL	RESIDENCE	I?CUSTOMER; SUBR("ENQ.TRANS","CUSTOMER", @1, "RESIDENCE")??RESIDENCE?2L?S????????CUSTOMER; SUBR("ENQ.TRANS","CUSTOMER", @1, "RESIDENCE")
FMF1.MD.DEAL	FMF1_MD_DEAL	D_F_MD_DEAL	SECTOR	I?CUSTOMER; SUBR("ENQ.TRANS","CUSTOMER", @1, "SECTOR")??SECTOR?4R?S????????CUSTOMER; SUBR("ENQ.TRANS","CUSTOMER", @1, "SECTOR")
FMF1.MD.DEAL	FMF1_MD_DEAL	D_F_MD_DEAL	TARGET	I?CUSTOMER; SUBR("ENQ.TRANS","CUSTOMER", @1, "TARGET")??TARGET?4R?S????????CUSTOMER; SUBR("ENQ.TRANS","CUSTOMER", @1, "TARGET")
This format is easily imported into excel with tab delimiters.
OFS
To execute OFS statements, you need to switch to OFS mode by typing the OFS command on the command line or by prefixing your OFS command with OFS keyword.

This activates the OFS mode in the header panel.

The default OFS source is GCS.

The ^ (Caret Symbol) is primarily used as a replacement character for the Transaction ID part of the OFS string. For windows, you need to add escape character ^ with "^" as shown in the example below.
BATCH,/I/PROCESS//0,INPUTT/123456,BNK"^"LIST.ACCOUNT,BATCH.ENVIRONMENT=F,JOB.NAME=LIST.ACCOUNT,FREQUENCY=D
MOVE-TABLE
The MOVE-TABLE statement allows you to move tables from one schema to another schema within the same database. Both the table and view is moved. Both schemas must already exist. If the table is part of a JOIN view, then that view becomes invalid.
MOVE-TABLE TABLE=<<J4FileName>> FROM=<<SCHEMA>> TO=<<SCHEMA>>
CHANGE-TABLETYPE
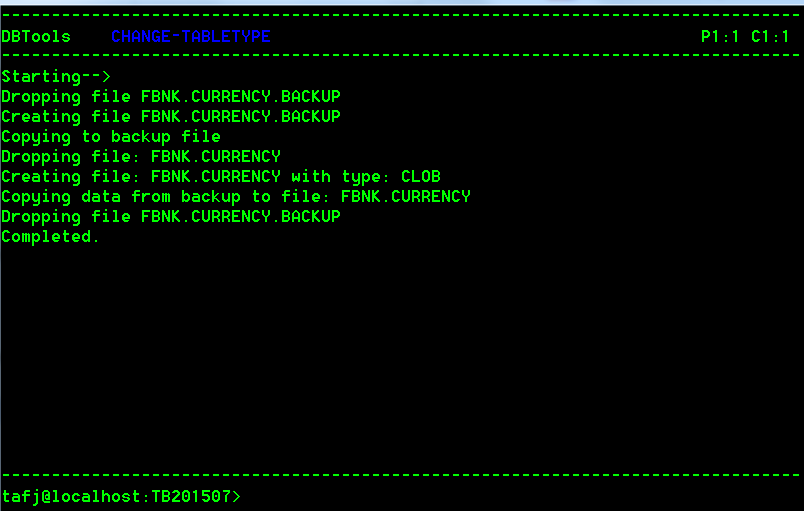
The CHANGE-TABLETYPE statements allow you to change a table type from one type of data storage to another (for example, from XML to CLOB, or vice-versa) while moving the existing data to the new format. A backup file is created with the original data named with the suffix. BACKUP of the target file. This backup file is deleted by default.
CHANGE-TABLETYPE [options] TABLE=<<J4FileName|ALL(only valid when FROM is type=DIRECTORY, to push all UD's into DB)>> FROM=<<CLOB|BLOB|XML|VARCHAR|MULTI-COLUMN|DIRECTORY >> TO=<<CLOB|BLOB|XML|VARCHAR|MULTI-COLUMN>>
CHANGE-TABLETYPE TABLE=FBNK.CURRENCY FROM=XML TO=CLOB
The resulting output looks like this:
DBCHECK
You can execute the following commands to do checks on your database by typing DBCHECK to switch DBTools in DBCHECK mode.
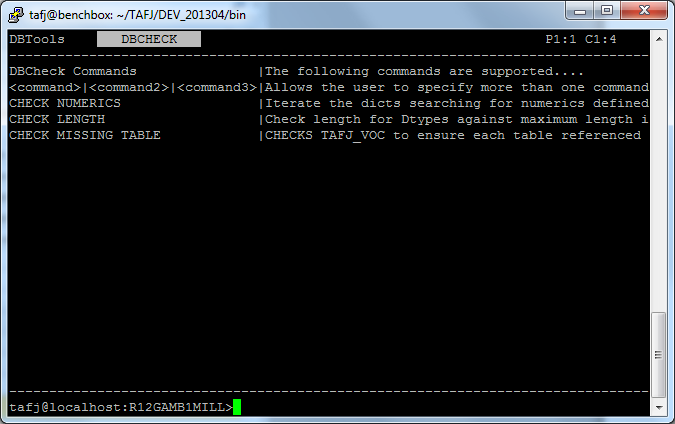
- CHECK NUMERICS - Iterates the dictionary items where dictionary items are defined as numeric. Tests are performed to ensure the data is numeric. Also, it tests those VOC items that are defined rightJustified to see if the data is numeric.
- CHECK LENGTH - Iterates the dictionary items, gathers defined lengths, and checks each against the maximum length stored in the column. It reports anything that is incorrectly defined. This command takes a long time to run (more than three hours depending on the size of the database).
- CHECK MISSING TABLE - Iterates VOC items and tests if the tables exist in the database.
JED
You can call JED console to display and edit database records by using the JED <<FILE NAME>> <<RECORD KEY>> command.

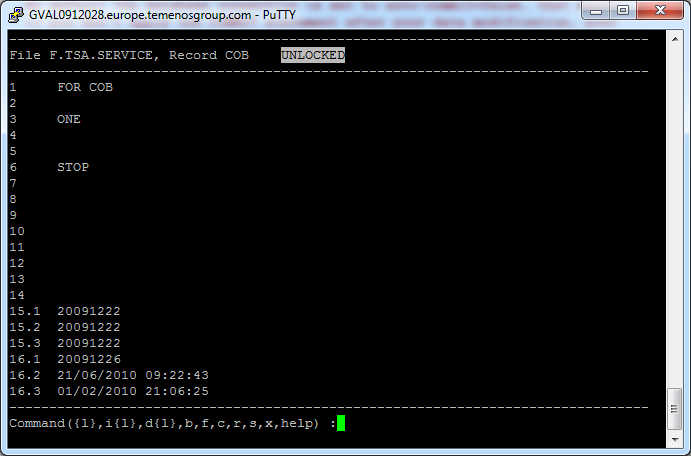
You can also call JED -s <<FILE NAME>> <<RECORD KEY>> <<FIELD NUMBER>>=<<VALUE>>; to directly update a record without opening JED console.

For multiple attributes, separate them with ;.

Depending on the operating system, you may need to escape the part of command after -s option (JED -s ‘F.TSA.SERVICE COB 6=START;’).
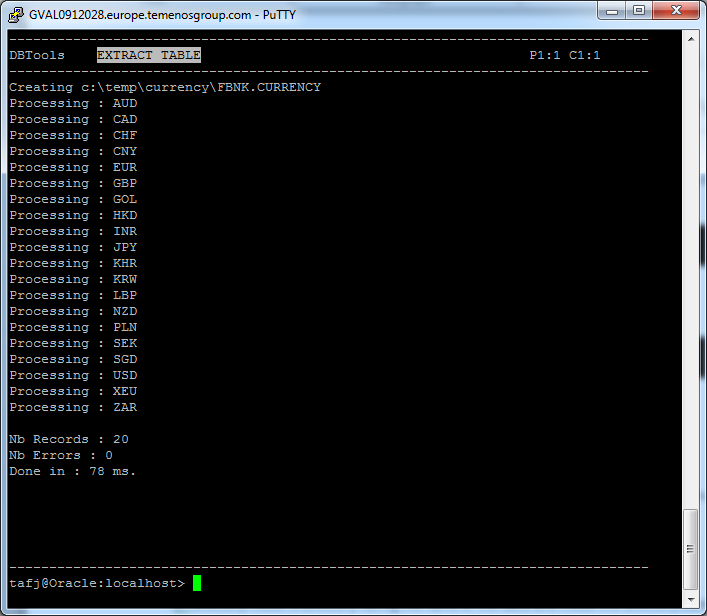
Extract Table
This command allows extracting the records from a table and writing them on the local file system. Depending on the option you choose, the result will be:
- -f - File mode (default). A set of distinct file, one per record, the name of the file has the format <filename>-<recordId>.
- -d - Directory mode. A directory having the name of the table and inside this directory each record will be stored in a distinct file. The name of this last file will be the actual record ID.
If any file or directory already exists, then they will be overridden.
The following are the other options that you can use for extracting records from a table:
- -h: Displays help
- -recId: Specifies a single record
- -dict : Loads dictionary
- -cf: Configuration file
- -sb : Forces to single byte separator file mode
- -db : Forces to double byte separator file mode
- -ef : Specifies Temenos Transact DEV format with ! and .d extension.
- -fe : Specifies file encoding. If double byte separator, then the file encoding is force to UTF-8.
- -split: Specifies split mode. Each attribute is a new line.
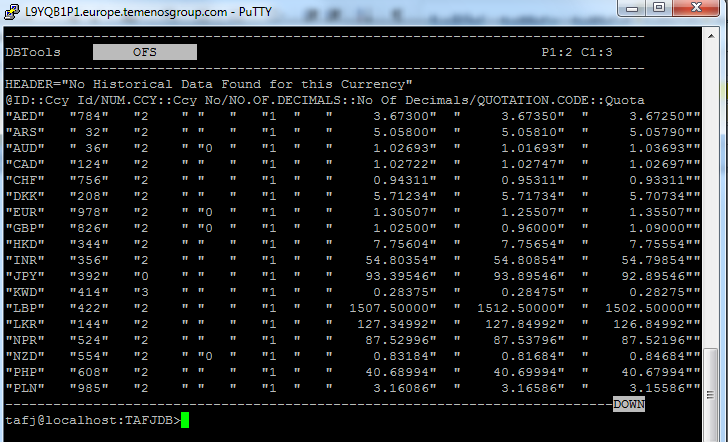
To extract the CURRENCY table as a set of records, enter the following command.

This will result in a directory structure shown below:
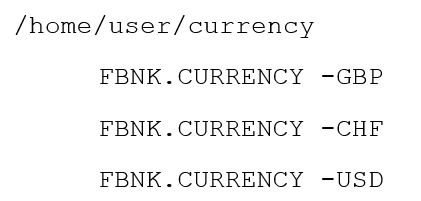
Where FBNK.CURRENCY -GBP, FBNK.CURRENCY -CHF are files containing the record.
All extracted files extracted and eventually raised exceptions will be shown in the console as result.
To extract the CURRENCY table as a set of records in their own directory, enter the following command.

This will result in a directory structure like this one:
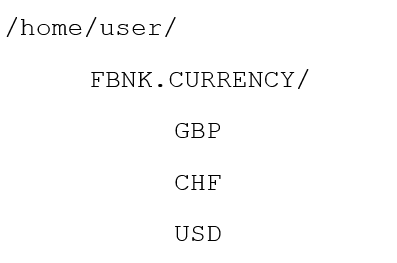
Where GBP, CHF ... are files containing the record.
All extracted files extracted and eventually raised exceptions will be shown in the console as result.
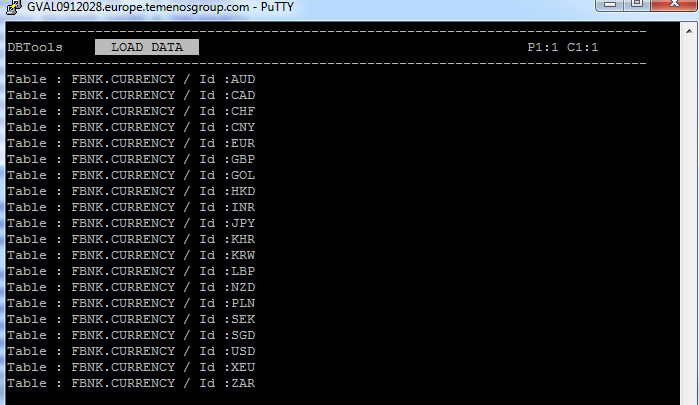
Load Data
This command loads data from your file system into your database. You can provide a file as parameter to load a single record, or a directory to load a set of records.
- -f - File mode (default). The file name has the format <filename>-<recordId>. If the file passed is a directory, then all files having the previous format will be processed.
- -d - Directory mode. The parameter must be a directory. This directory will be recursively processed until a file is found. The parent directory of this file represents the file name. Here, file name itself is the record ID.
The following are the other options that you can use to load data:
- -h: Displays help
- -dict : Loads dictionary
- -cf: Configuration file
- -sb : Forces to single byte separator file mode
- -db : Forces to double byte separator file mode
- -fe : Specifies file encoding. If double byte separator, then the file encoding is force to UTF-8.
- -ar: Loads as unauthorized record. Record moves to $NAU table and requires a manual authorization.
- -lr: Loads as live record. Record does not require manual authorization.
To load a single record from a file on your file system.

The following result is displayed in the console where it shows the table impacted and the record ID inserted.

To load a set of records from a directory on your file system.

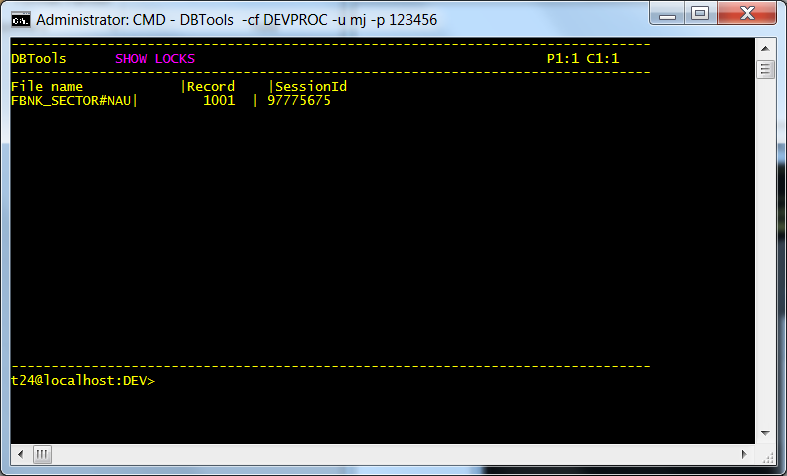
Show Locks
The LOCKS command allows you to see all records locked on the database. It monitors locks managed by tLockManager, TAFJ_LOCKS table (JDBC Locking), or ORCL, or MSQL, or DATABASE internal locking on the database. Below is a screenshot from tLockManager.

The following result is displayed.
This is different than what you might see with DATABASE locking. When issuing the LOCKS command, non-existent rows will appear as NonExist*<<TAFJ Session Unique ID>> for the Session Id column, whereas one that was taken via SELECT FOR UPDATE, will show the Oracle Session ID for the Session Id column. One cannot release locks with SELECT FOR UPDATE. The Oracle session must be either committed, rolled back, or killed. Also, tables with more than 25,000 rows will show up as F_PGM_DATA_CONTROL *UNKNOWN, if F_PGM_DATA_CONTROL had more than 25,000 rows. This is because Oracle has no way to report row level locking except by iterating all of the rows and attempting to lock them. This is very costly in terms of performance, and hence, why TAFJ caps the number of rows.
--------------------------------------------------------------------------------
DBTools      SHOW LOCKS                                            P1:1 C1:1
--------------------------------------------------------------------------------
LOCK ID                                |Session Id
FBNK_CURRENCY*ZZZ                      |NonExist*1193893622
FBNK_CATEG_ENTRY*169376209561194.050001|128
This is also different than what you might see with ORCL or MSSQL locking. Below is a screenshot of ORCL locking. The 53 below denotes the database session id that called the lock. 205121125 represents the TAFJ unique session for a thread. So now TAFJ can match a java thread with the database session that locked it.
----------------------------------------------------------------------------DOWN
tafjuser@10.41.5.54:TESTDB>LOCKS
--------------------------------------------------------------------------------
DBTools      SHOW LOCKS                                            P1:1 C1:1
--------------------------------------------------------------------------------
LOCK ID          |Session Id
FBNK_CURRENCY*USD|2051521125*53
[DEBUG] 2015-04-02 15:18:40,656 [main] LOCKING - LOCKING FBNK_CURRENCY*USD / 2051521125*53...
[DEBUG] 2015-04-02 15:18:40,661 [main] LOCKING - LOCK FBNK_CURRENCY*USD / 2051521125*53 -> OK
Release Locks
The release locks command is specially designed for tLockManager. It is used to release the Locked record from tLockManager.
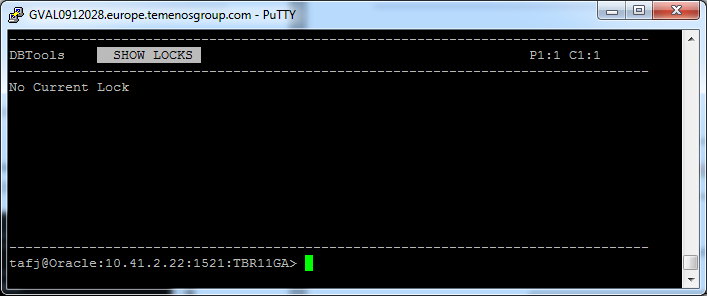
You can check which records are currently locked by launching the LOCKS command and then release the record you want by typing RELEASE <<FILE NAME>> <<RECORD ID>>.
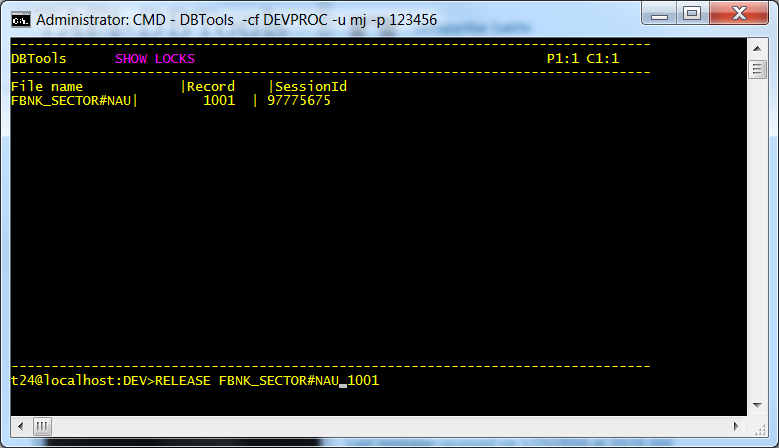
The following result is displayed.

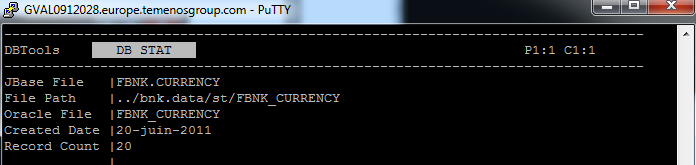
Database Statistics
This command allows provides information about your JBase file, JBase file path, JBase equivalent database filename, created date and record count.
To get information about the file you have configured, type STAT <<FILE.NAME>>.

The following result is displayed.
In this topic