Configuring WebLogic Script (single server) for Temenos Transact Java Deployment
This section describes the TAFJ properties setup, one-step and multiple steps configurations.
Setting up Properties
To complete the setup automatically, you need to use the procedure shown below.
Update the TAFJ_HOME\appserver\weblogic\tafj.properties file for WebLogic with your value. For example:
Below is the syntax.
############################################################
# Node details
#
weblo_user=[user]
weblo_password=[password]
weblo_hostname=[hostname]
weblo_port=[port]
############################################################
# Path details
#
tafjHome=[TAFJ root folder]
t24Home="[T24 lib folder]"
############################################################
# database details
#
dbDriver=[oracle11g,oracle-12c,db2_v10.1,h2-1.x.x]
dbHostName=[hostname]
dbPort=[port]"
dbName=[sid]"
dbUser=[user]
dbPassword=[password]
#dbROHostName=[hostname]
#dbROPort=[port]
#dbROdbName=[sid]
#dbROdbUser=[user]
#dbROPassword=[password]
############################################################
# Browser details
#
# path of your BrowserWar file
browserWebHome=[BrowserWar path]
Below is an example:
############################################################
# Node details
#
weblo_user=weblogic
weblo_password=Temenos@T24
weblo_hostname=localhost
weblo_port=7001
############################################################
# Path details
#
tafjHome=C:/Temenos/Reference/Temenos/TAFJ
t24Home=C:/Temenos/Reference/Temenos/T24/lib/t24lib
############################################################
# database details
#
dbDriver=h2-1.3.176
dbHostName=localhost
dbPort="[port]"
dbName=T24
dbUser=mbtafj
dbPassword=[password]
#dbROHostName="[hostname]"
#dbROPort="[port]"
#dbROdbName="[sid]"
#dbROdbUser="[user]"
#dbROPassword=[password]
############################################################
# Browser details
#
# path of your BrowserWar file
browserWebHome=C:/Temenos/Reference/Temenos
To generate password for datasource,
- Run the following commands from %WEBLOGIC_HOME%\user_projects\domains\%domain_name%\bin
- setDomainEnv.cmd
- java weblogic.security.Encrypt [password]
- Change the password in tafj.properties. That is
…\wls1213\user_projects\domains\T24>java weblogic.security.Encrypt mbtafj
{AES}tINJG+Muoi6YYHIkq6oNcss4qQPbvukK6Ra8U7EjPZo=
dbHostName=localhost
dbPort="[port]"
dbName=T24
dbUser=mbtafj
dbPassword={AES}tINJG+Muoi6YYHIkq6oNcss4qQPbvukK6Ra8U7EjPZo=
#dbROHostName="[hostname]"
#dbROPort="[port]"
#dbROdbName="[sid]"
#dbROdbUser="[user]"
Configure the jboss-web.xml file with the correct parameter.
<resource-description>
        <res-ref-name>jms/jmsConnectionFactory</res-ref-name>
        <jndi-name>jms/ConnectionFactory</jndi-name>
    </resource-description>
    <resource-description>
        <res-ref-name>queue/t24OFSQueue</res-ref-name>
        <jndi-name>jms/t24OFSQueue</jndi-name>
    </resource-description>
    <resource-description>
        <res-ref-name>queue/t24OFSReplyQueue</res-ref-name>
        <jndi-name>jms/t24OFSReplyQueue</jndi-name>
    </resource-description>
    <container-descriptor>
        <show-archived-real-path-enabled>true</show-archived-real-path-enabled>
    </container-descriptor>
	<jsp-descriptor>
        <encoding>utf-8</encoding>
    </jsp-descriptor>

</weblogic-web-app>
Working with One-step Configuration
This section describes about one-step configuration and how to execute it.
To have a working deployment you need to configure:
- Environment variables and shared libraries (TAFJ and T24 libraries)
- JMS resources (Communication channels between applications )
- JDBC data sources (Database connectivity)
- Applications deployment (TAFJ ear file, BrowserWeb, etc.)
You can find the script of the complete configuration in %TAFJ_HOME% \appserver\weblogic\ \T24Setup.py. You need to edit the file and comment and uncomment based on your requirements:
print "Setup Environment"
execfile('environmentConfiguration.py')


print "JMS Environment"
execfile('jmsConfiguration.py')
execfile('queuesConfiguration.py')
#or
#execfile('jmsConfiguration-Distribued.py')
#execfile('jmsConfiguration.py')


print "Setup Database"
execfile('ORACLEConfiguration.py')
#or
#execfile('DB2Configuration.py')
#or
#execfile('H2Configuration.py')

print "Setup TAFJ EE (MDB & EJB)"
execfile('TAFJEEapplicationDeployment.py')

print "Setup Browser"
execfile('BROWSERWEBapplicationDeployment.py')
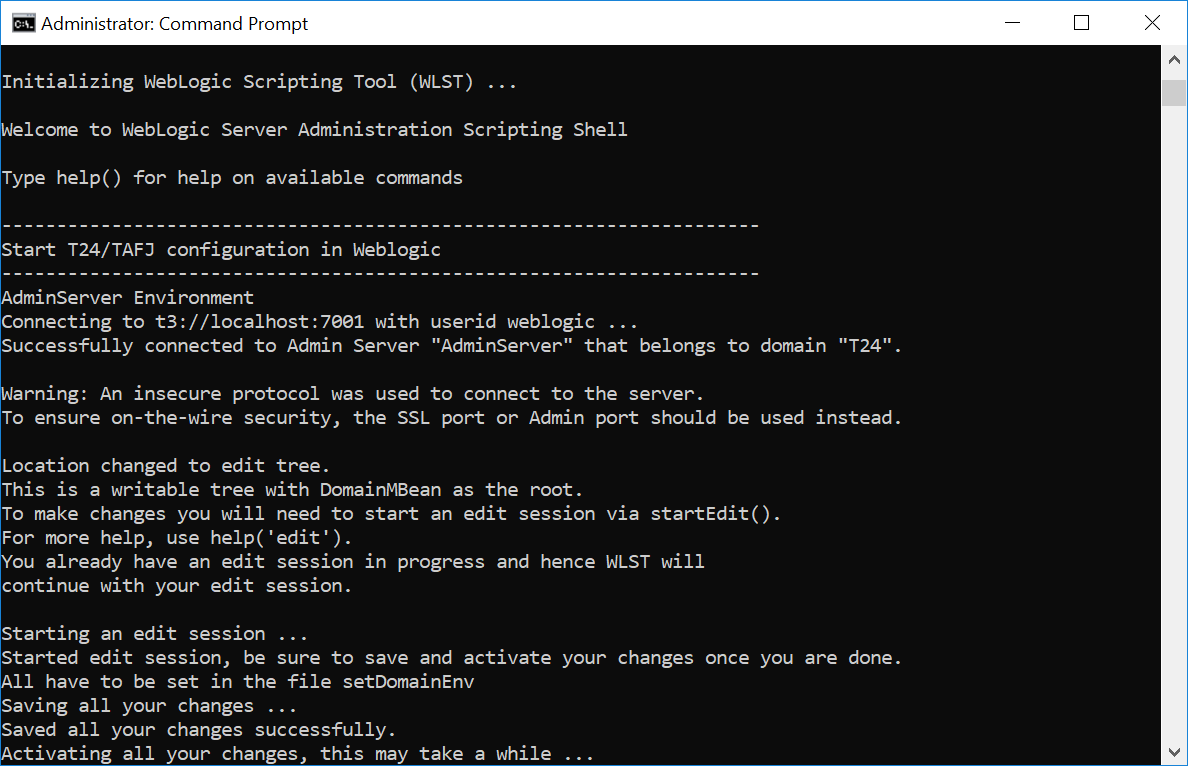
Launch the following command from %TAFJ_HOME%\appserver\weblogic dir on the command line for one-step installation.
%WEBLOGIC_HOME%\wlserver\common\bin\wlst -loadProperties tafj.properties T24Setup.py
Working with Multiple Steps Configuration
This section describes about JMS connection factories, JMS resources, JDBC resources and JDBC locking mechanism.
A JMS connection factory is used to create connections to JMS destinations. The associated JMS provider creates the JMS connection factory.
Launch the following command from %TAFJ_HOME%\appserver\weblogic dir on the command line for one step installation.
%WEBLOGIC_HOME%\wlserver\common\bin\wlst -loadProperties tafj.properties jmsConfiguration.py
This script creates JMS server and connection factory.
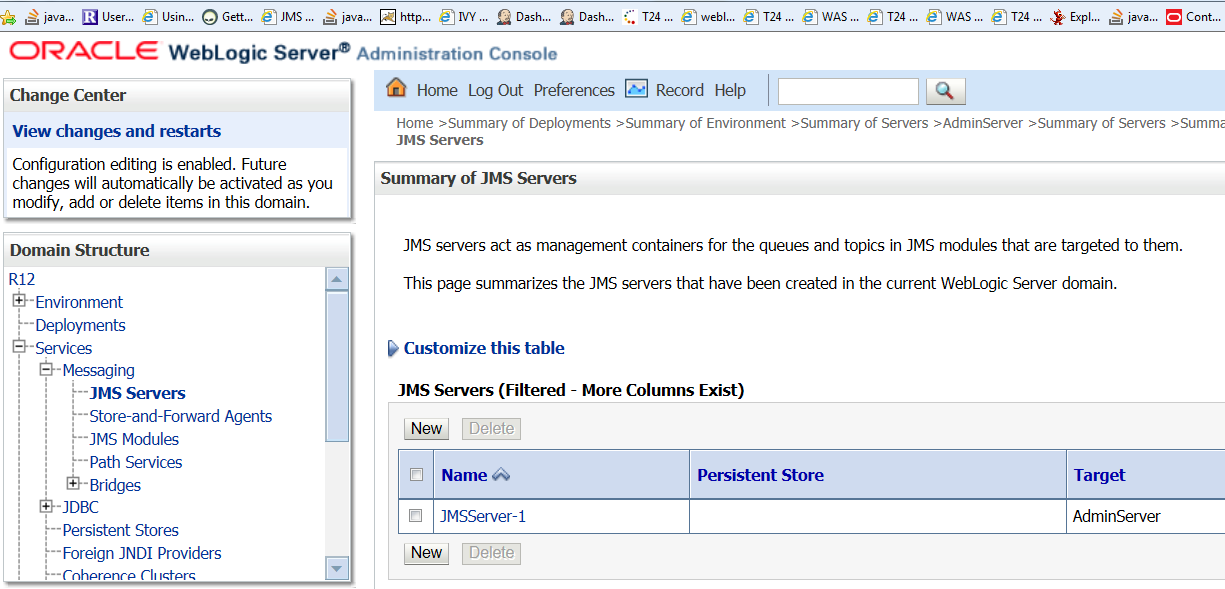
Validating the Created JMS Server and Connection Factory
To validate the created JMS server and connection factory,
- In the WLS admin console, click TAFJ > Services > Messaging > JMS Servers. You can see JMSServer-1.
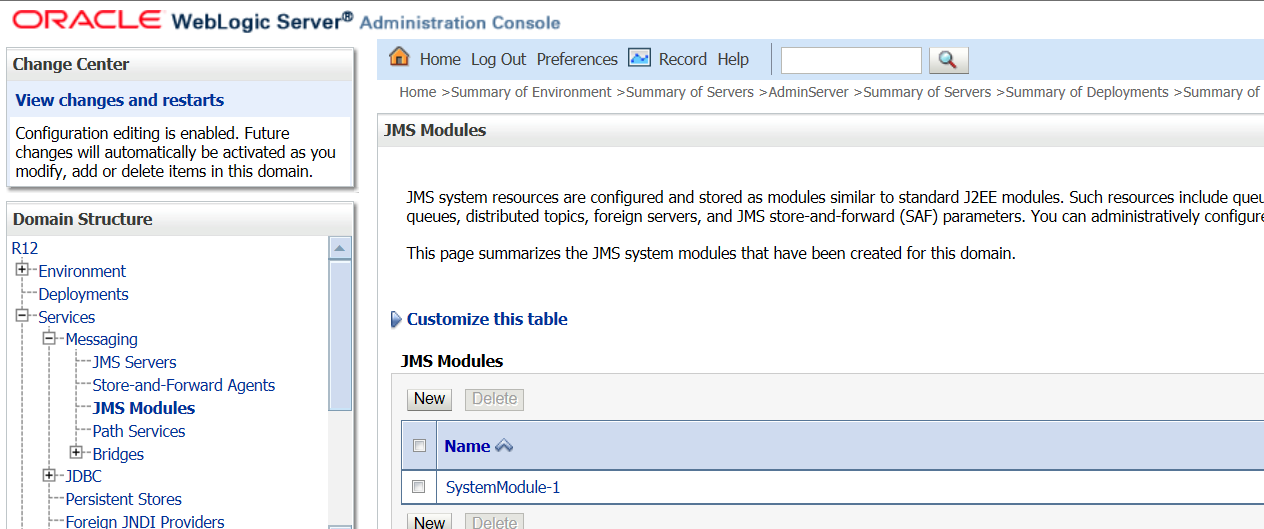
- Click TAFJ > Services > Messaging > JMS Modules. You can see SystemModule-1.
- Click SystemModule-1. You can see ConnectionFactory-1.
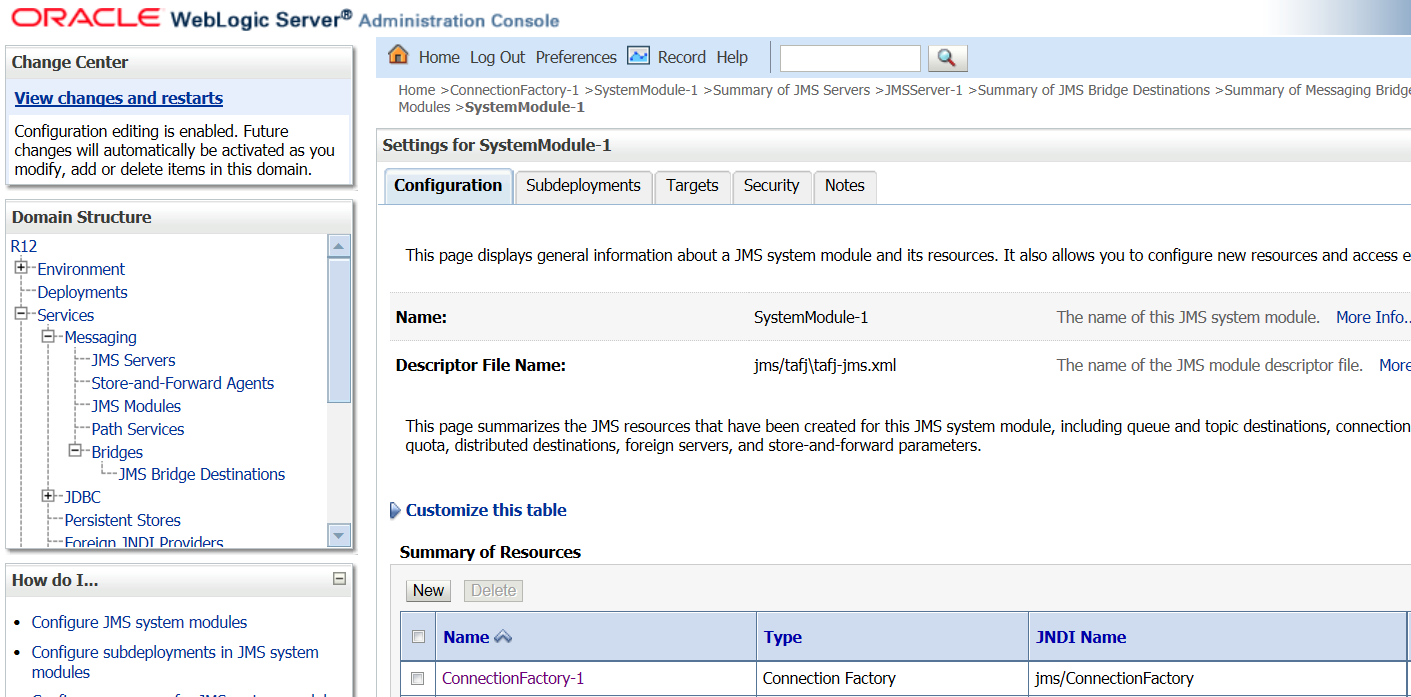
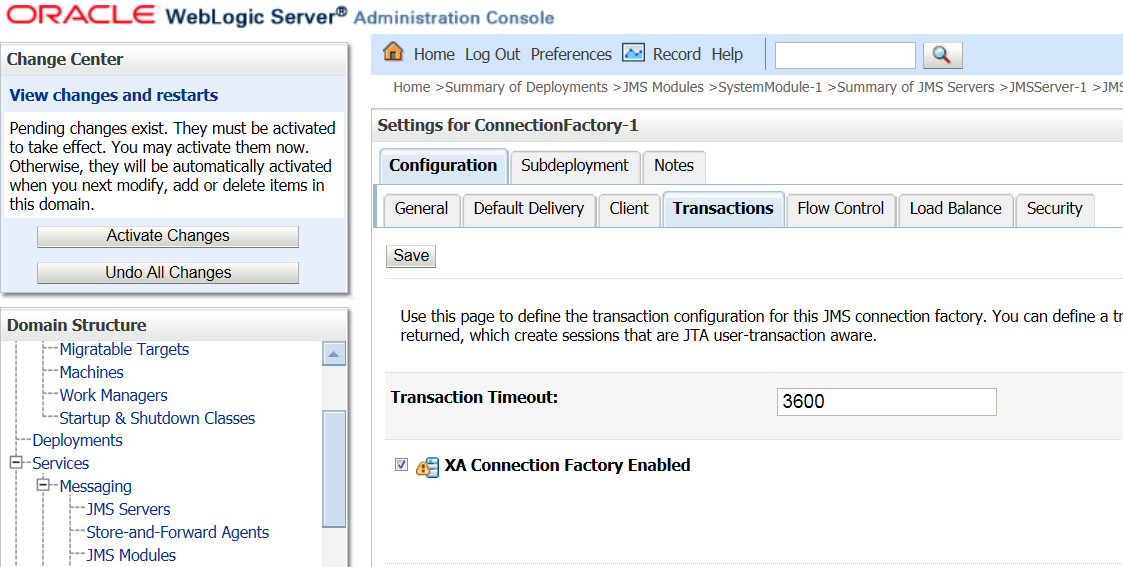
Fixing the WebLogic issue BEA 169822
This error stops you to use a wrapped JMS session in the transaction because two-phase commit is not available. You need to apply the following change to the connection factory:
Click ConnectionFactory-1 > Transactions tab. Select the XA Connection Factory enabled check box.
Launch the following command from %TAFJ_HOME%\appserver\weblogic dir on the command line for one step installation.
%WEBLOGIC_HOME%\wlserver\common\bin\wlst -loadProperties tafj.properties queuesConfiguration.py
This script creates JMS Queue.
Validating the created JMS Queue
To validate the created JMS queue,
- Click TAFJ > Services > Messaging > JMS Modules.
- Click SystemModule-1. You will be able to view the JMS resources.

You may have to use a third party JMS provider or to deploy Browser and TAFJ in different WebLogic server instance. Thus, Browser will need to reach Temenos Transact queues on remote WebLogic instance.
Please refer to the following documentation to do it:
Example
This example shows the configuration where Browser and TAFJ are deployed on different server instance. Assume you have done the above mentioned steps to configure JMS on the server which is hosting TAFJ deployment.
The steps below apply to the server instance where Browser is deployed.
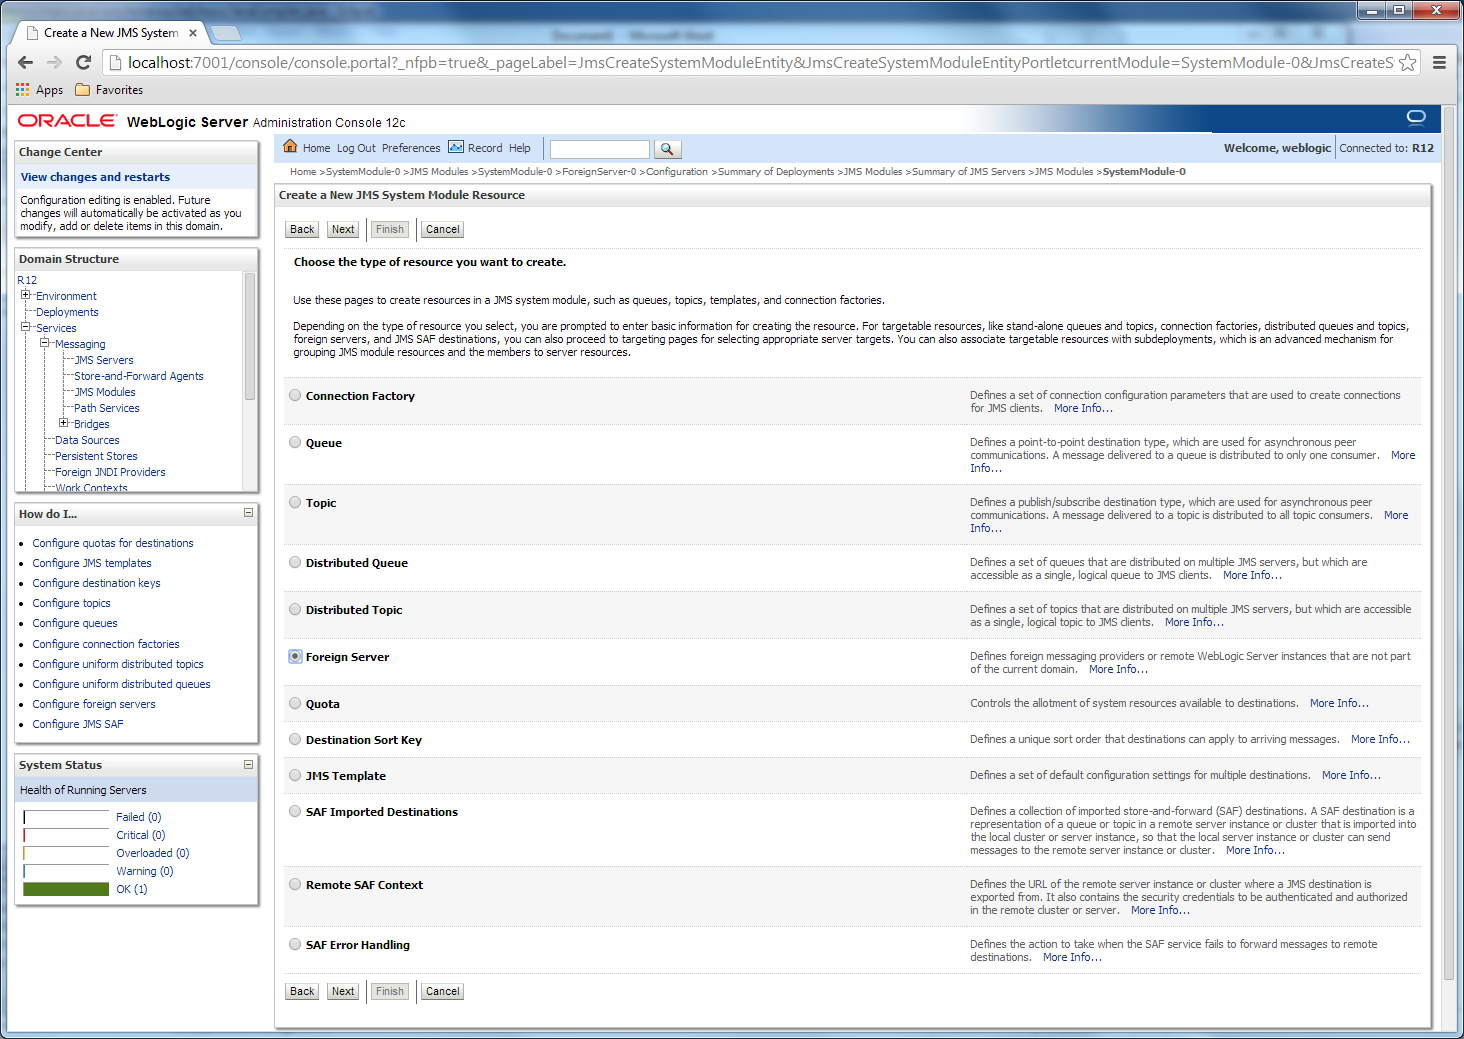
- From the Messaging or JMS Modules section, create a new JMS module.
- Click the module you created and create a new resource Foreign Server.
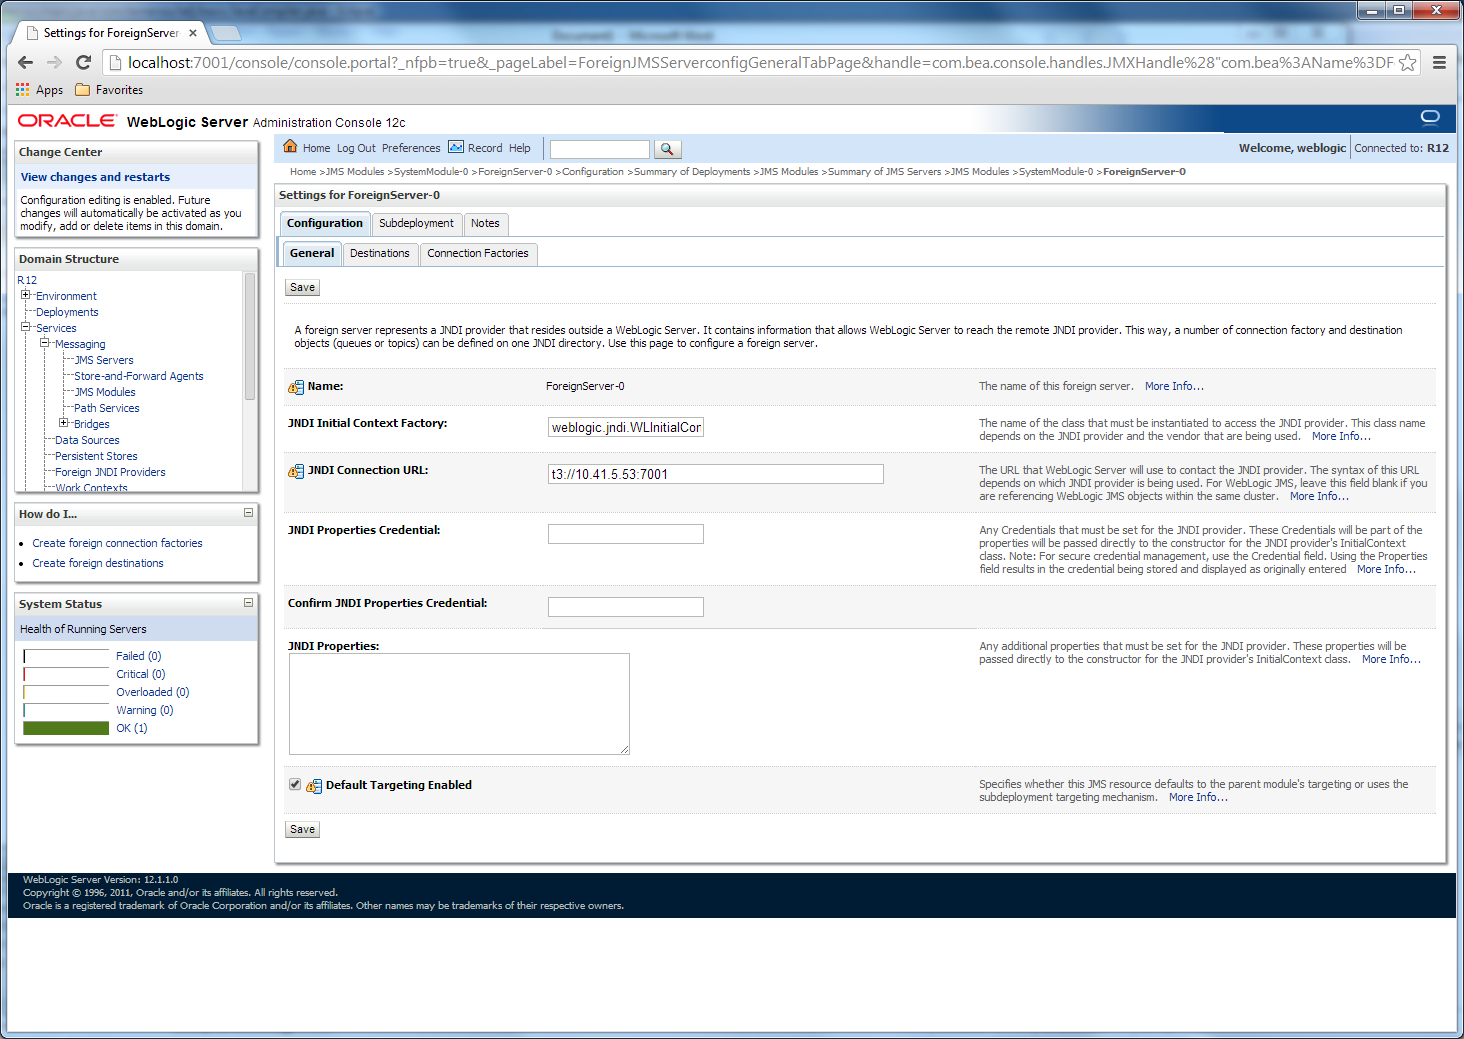
- Configure the foreign server by specifying the JNDI connection URL property. This should point on the remote WebLogic instance.
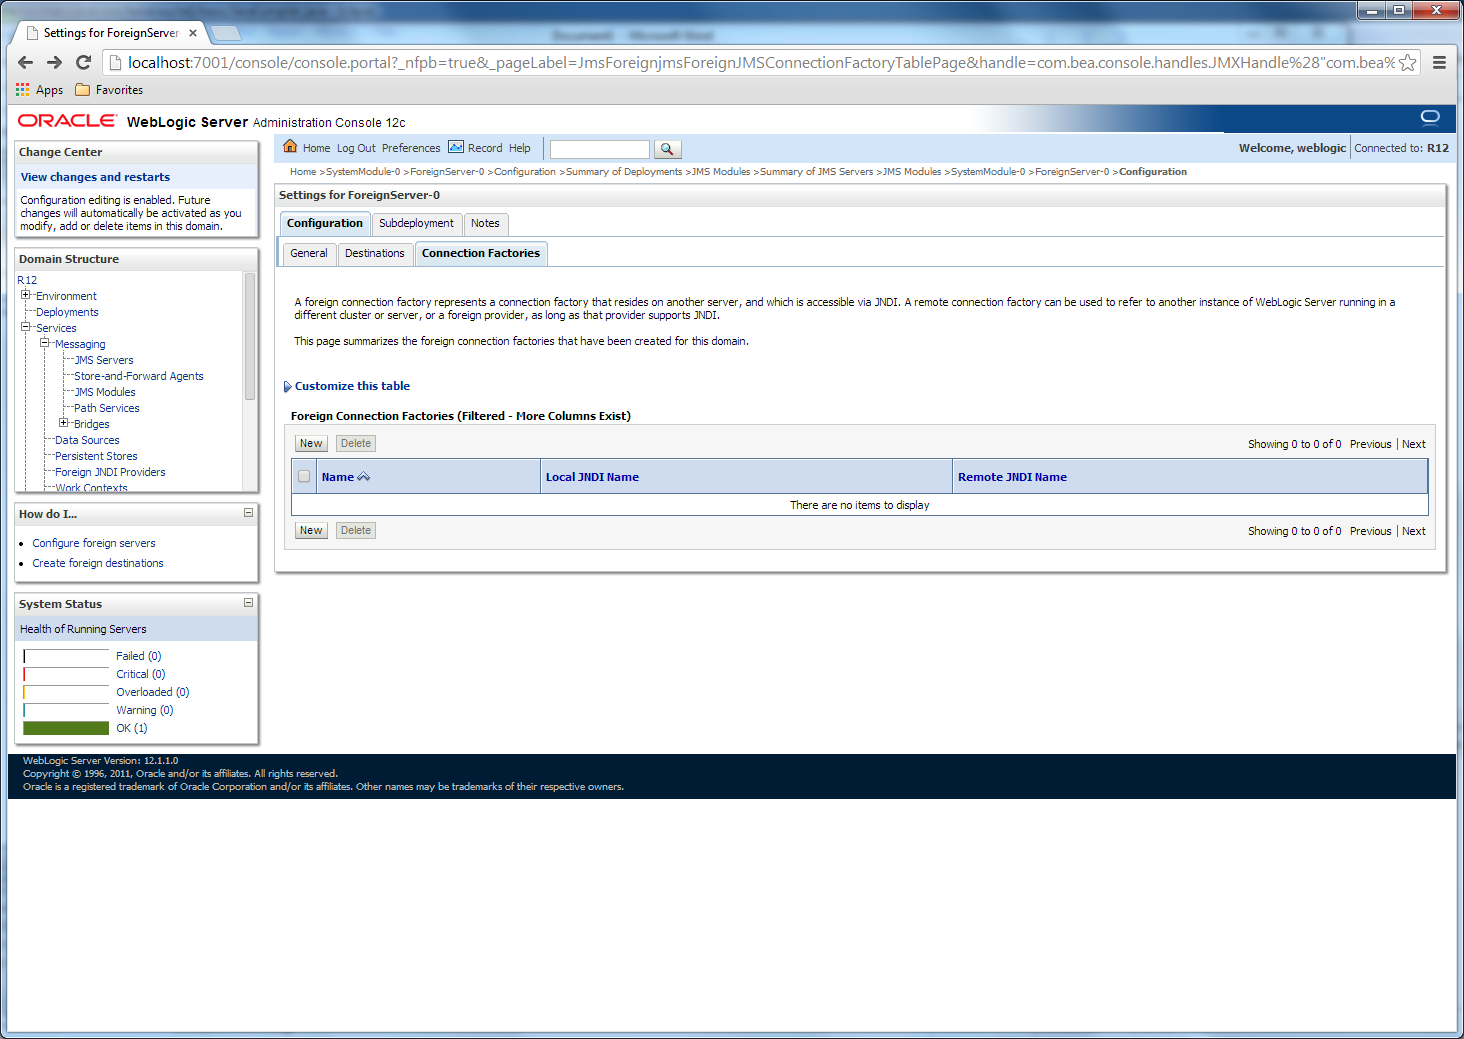
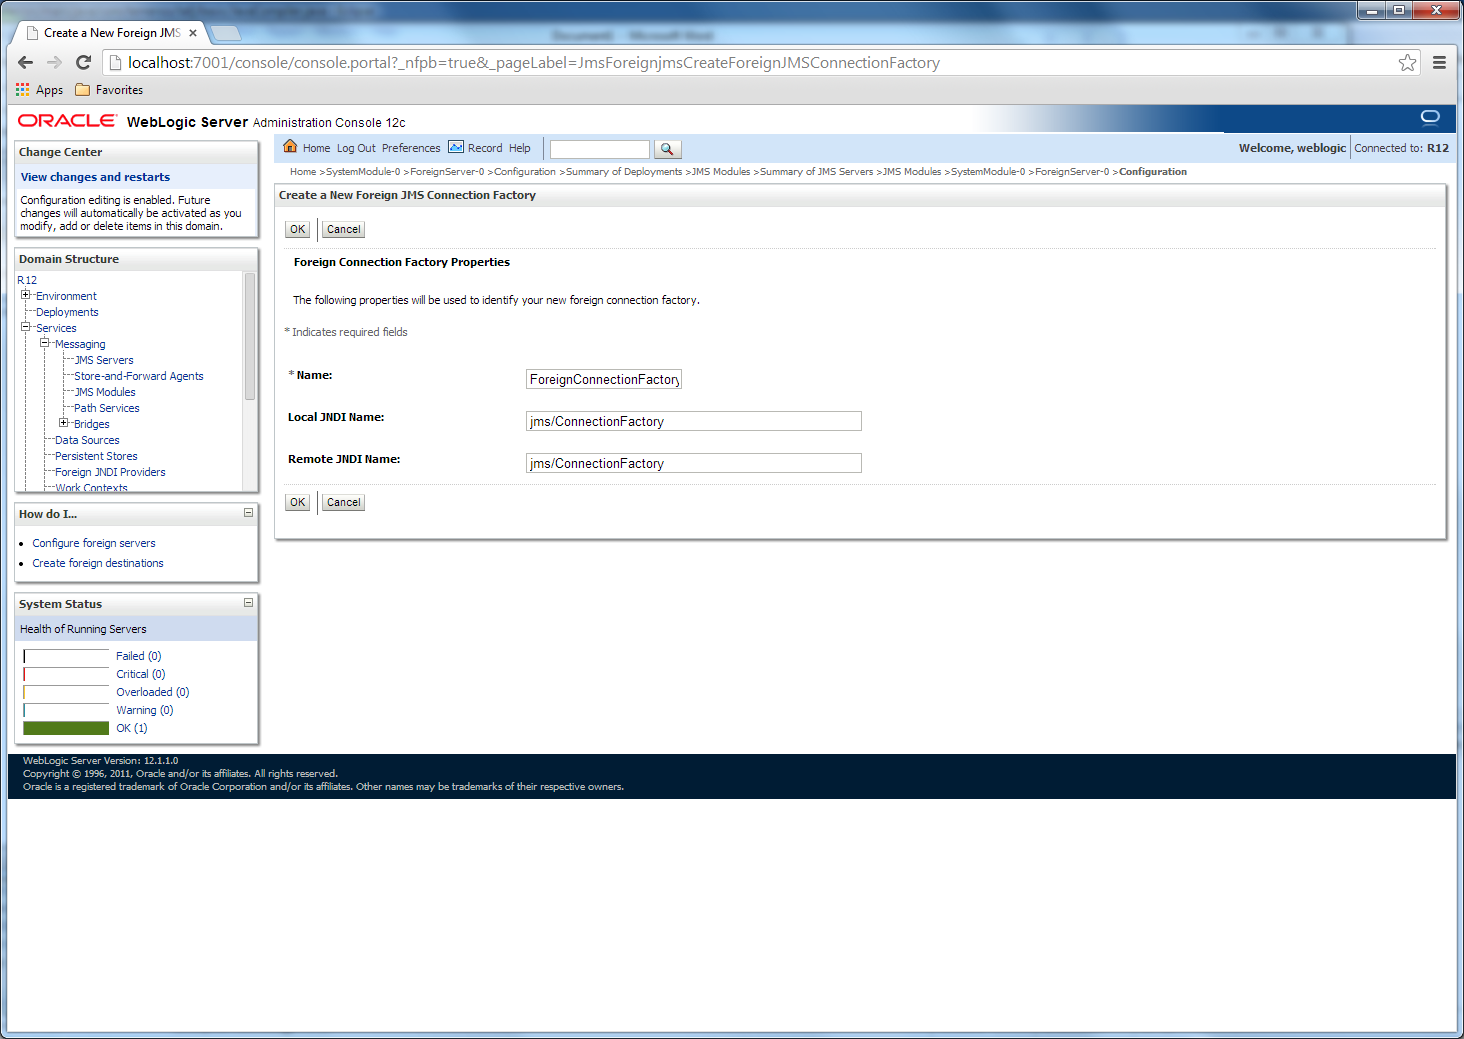
- Save the change and click the Connection Factories tab to create a connection factory.
- Map the connection factory attributes Local JNDI Name and Remote JNDI Name to your expected values.
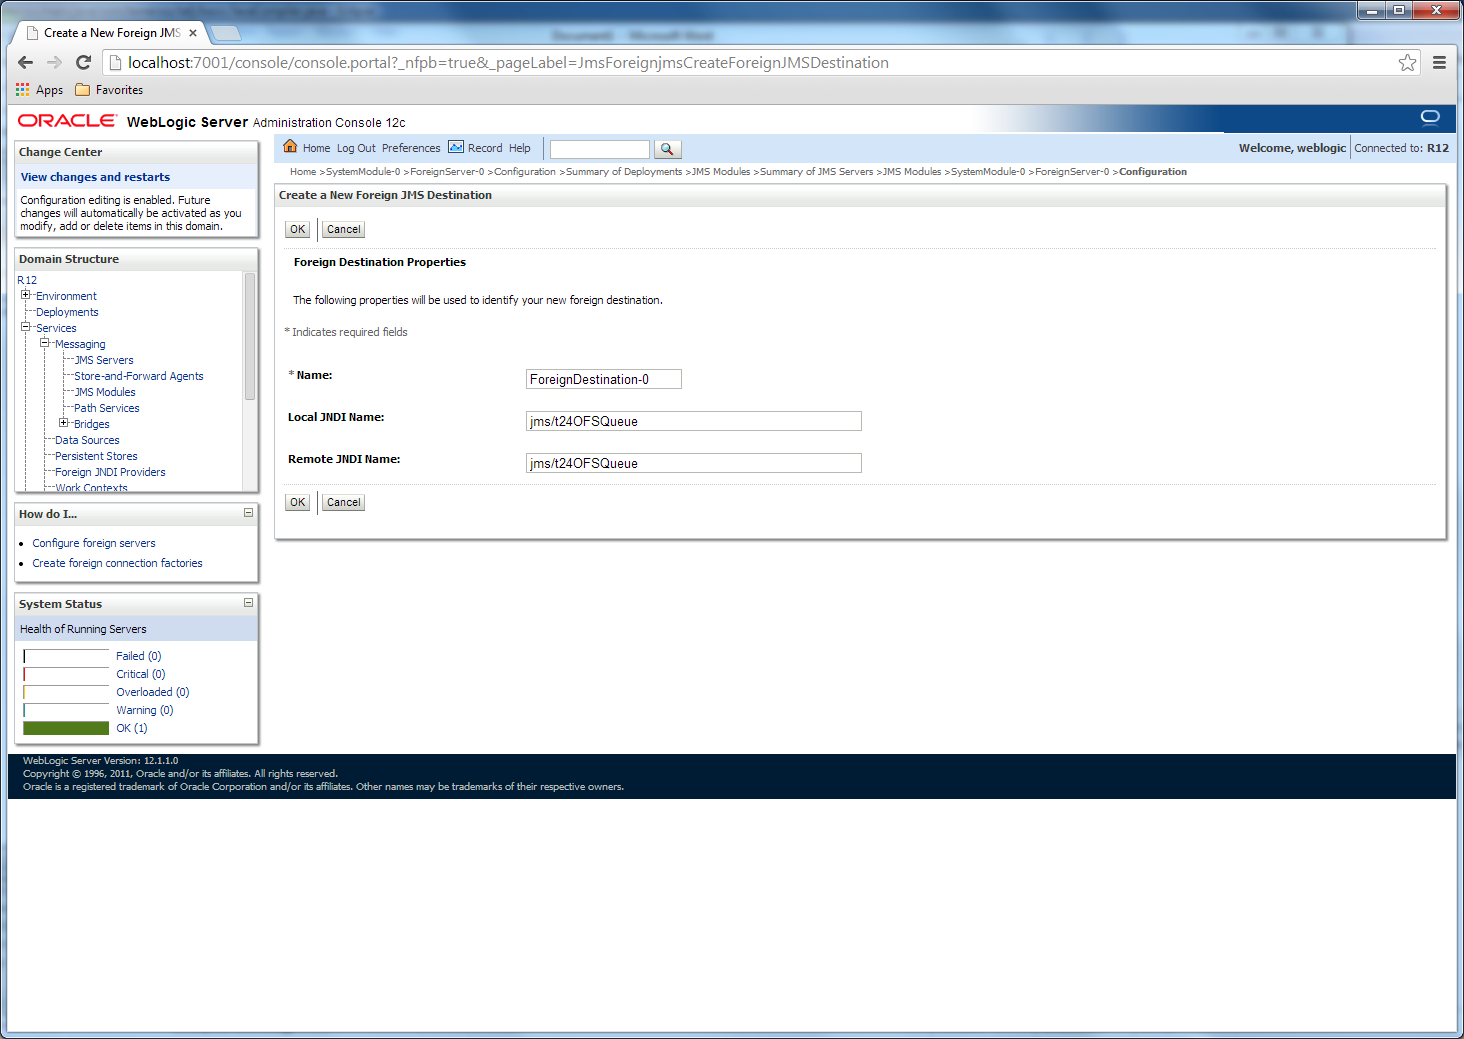
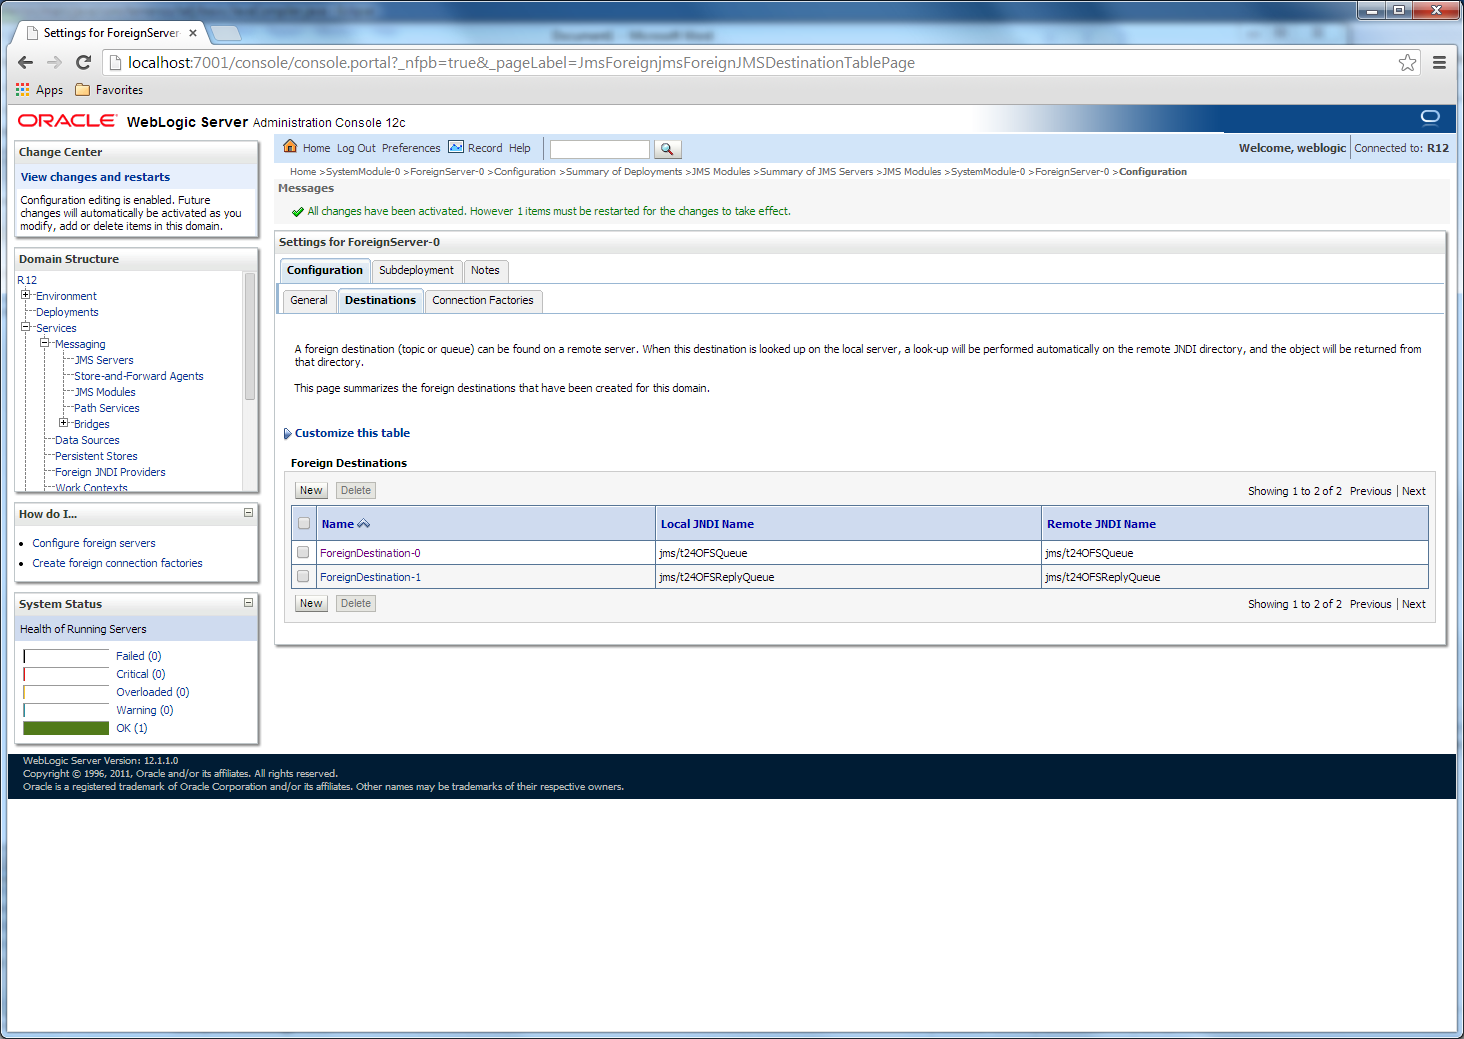
- Save your change and repeat the same steps for the Destinations tab to create Browser queues, t24OFSQueue and t24OFSReplyQueue with the appropriate local and remote JNDI mapping.
- Deploy browser on this WebLogic instance and it will use connection factory and queues from remote WebLogic instance.

You should have the following destinations created.
You need to create a connection to the database. The database can have different providers (Oracle, Db2, etc.).
When you setup datasource you have to use the drivers provided by the database. The %TAFJ_HOME%\dbdrivers is just a helper. It is not confirmed that the drivers provided with TAFJ will work for all versions of database.
If you want to use the JDBC locking mechanism instead of the default TAFJ locking mechanism and you want another datasource to control this (recommended), then you must add tafjt24_dataSourceName=t24LockingDS using the following procedure.
- Open command prompt and go to the cd %WEBLOGIC_HOME%\wlserver_12.1\common\bin directory.
- For MSSQL, run the wlst -loadProperties %TAFJ_HOME%\appserver\weblogic\tafj.properties %TAFJ_HOME%\appserver\weblogic\MSSQLConfiguration.py command.
- For Oracle, run the wlst -loadProperties %TAFJ_HOME%\appserver\weblogic\tafj.properties %TAFJ_HOME%\appserver\weblogic\ORACLEConfiguration.py command.
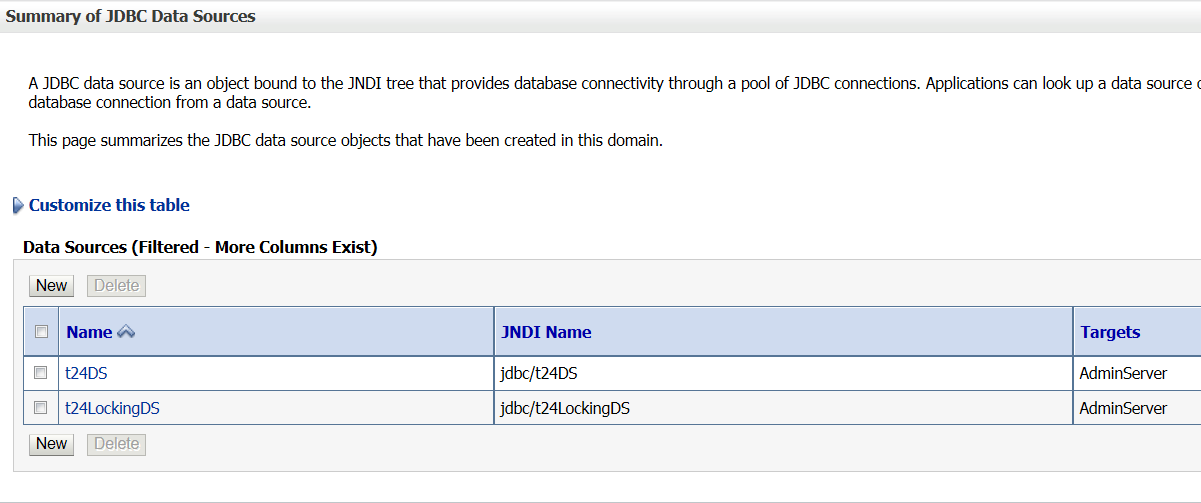
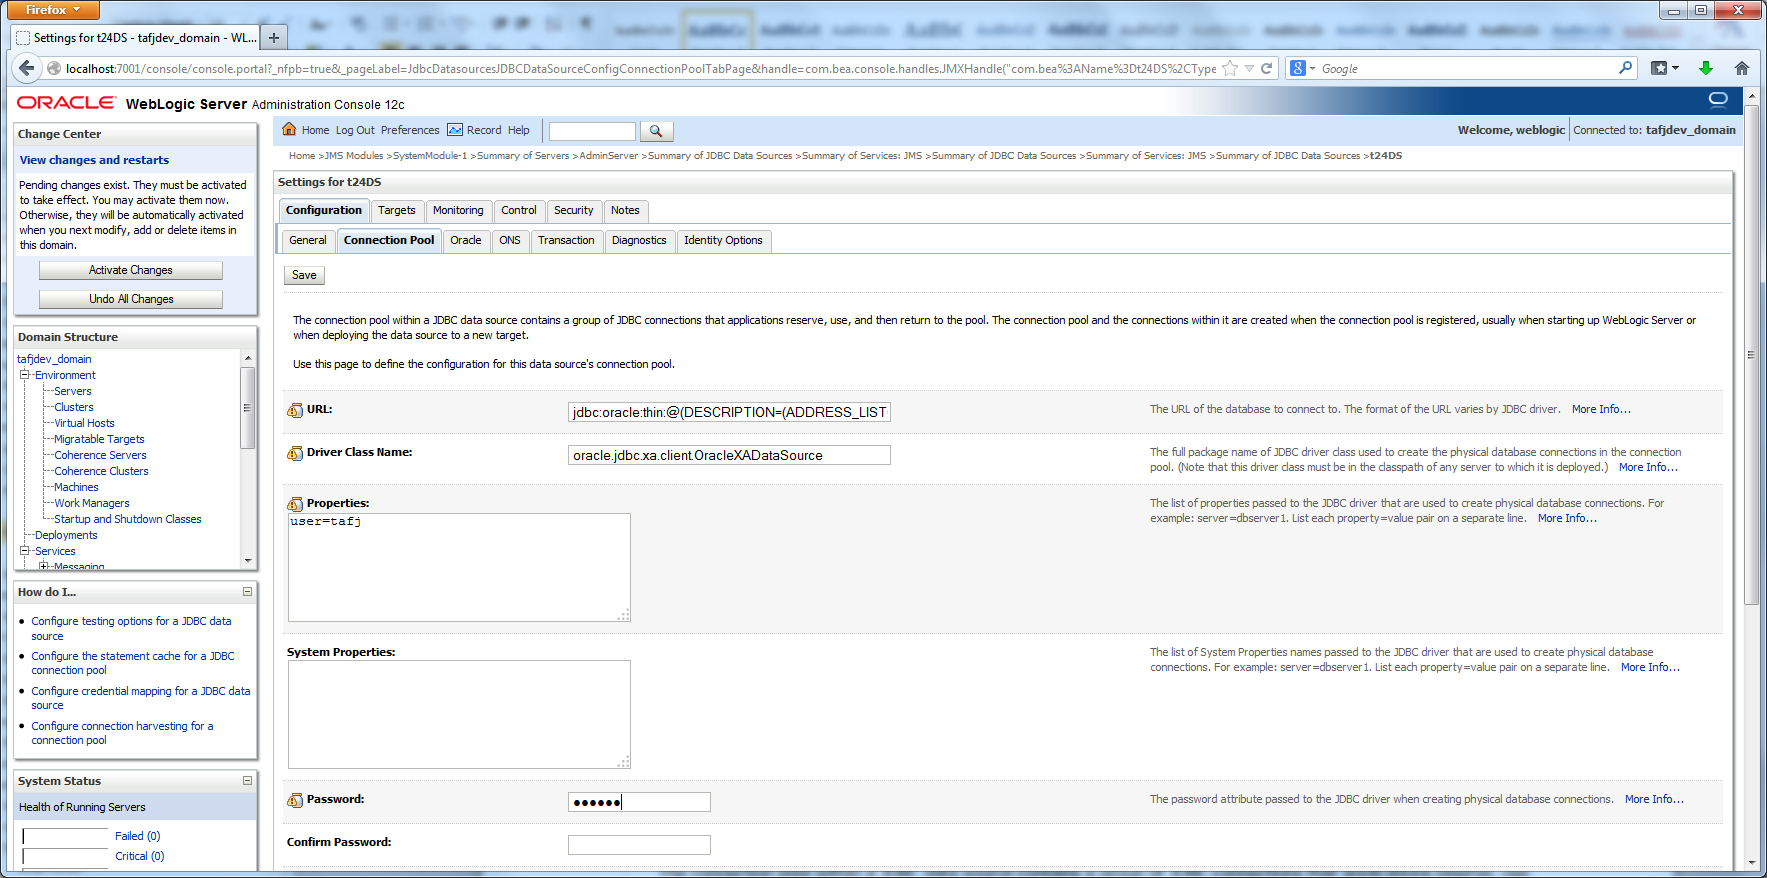
- Set the datasource password in the admin console by navigating to TAFJ > Services > Datasources.
- Click the t24DS datasource and click the Connection Pool tab.
- Specify a password and click Save.
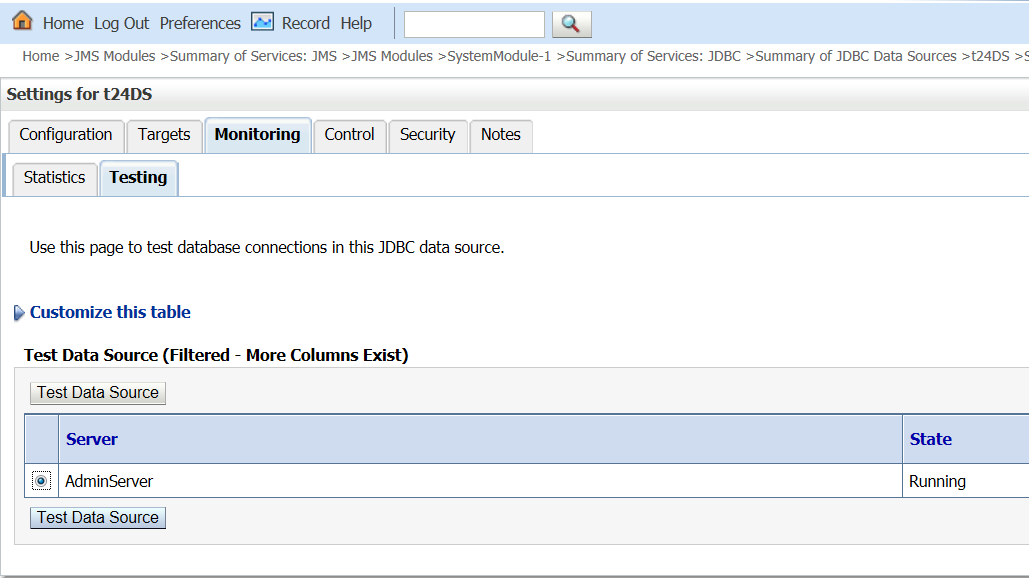
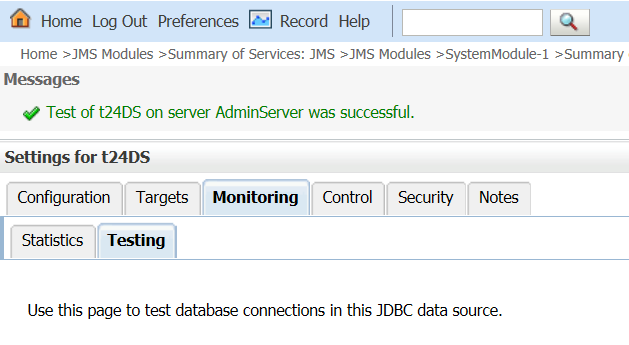
- Click the Monitoring > Testing tab to validate the datasource.
- Select AdminServer and click the Test Data Source button.
- Repeat step 8 for all your data sources.

Class Cast Exception
Depending on your driver version (ojdbc6 or xdb(6) ), you might encounter the error below when manipulating XML record.
java.lang.ClassCastException: weblogic.jdbc.wrapper.WrapperSQLXML_oracle_xdb_XMLType cannot be cast to oracle.sql.OPAQUE
To overcome it, you will need to untick the following property at T24DS level > connection pool > advanced properties.

Class Not Found Exception
java.lang.NoClassDefFoundError: oracle.xdb.XMLType
or
java.lang.NoClassDefFoundError: oracle/jdbc/internal/XMLTypeIntf
This is because of a driver mismatch between ojdbc6.jar embedded in WebLogic and the xdb(6).jar added to the classpath.
Check the ojdbc6.jar version and use the appropriate xdb.jar.
|
WLS 10.3.6 – 12.1.1 – 12.1.2 |
ojdbc6.jar 11.2.0.3 |
xdb.jar |
|
WLS 12.1.2 – 12.1.3 |
ojdbc6.jar 12.1.0.X.0 |
xdb6.jar |
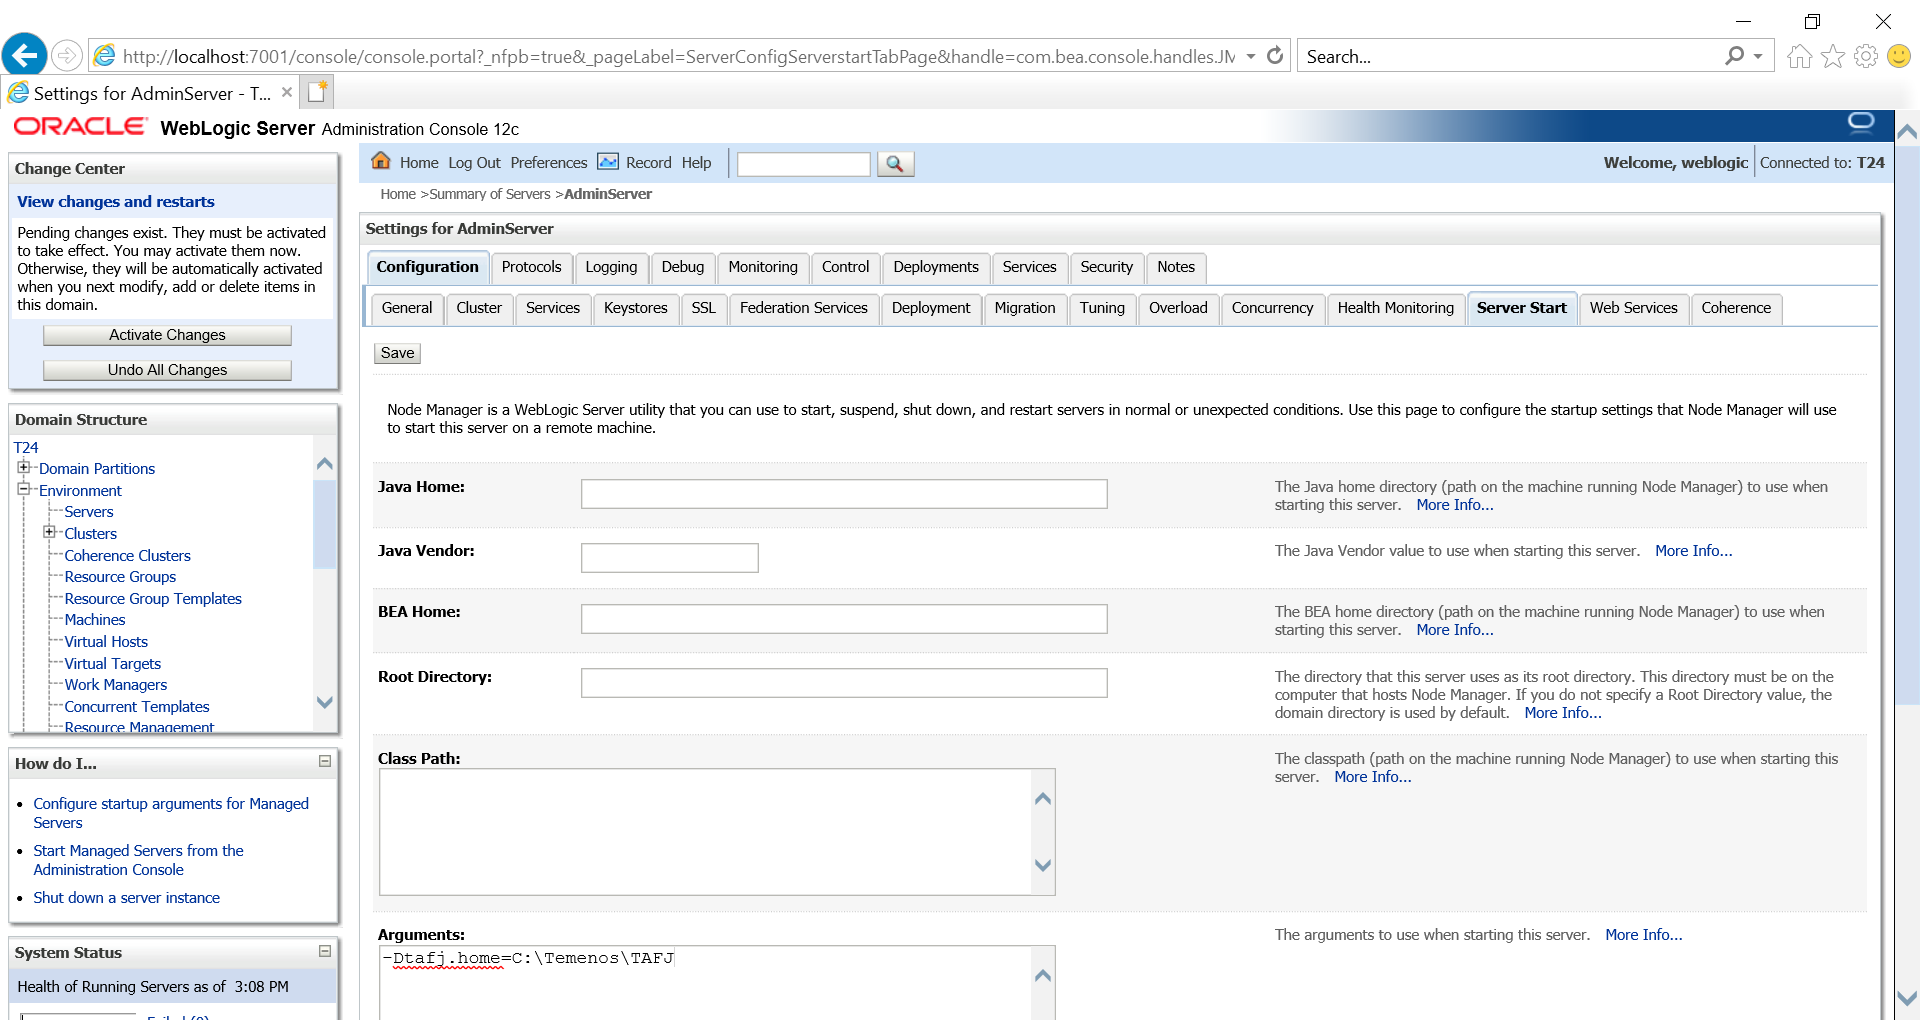
You can setup TAFJ home in WebLogic using the following procedure.
- In the WebLogic admin console, click Servers.
- Click Adminserver(admin).
- Click the Configuration > Server Start tab. Specify -Dtafj.home=c:\Temenos\TAFJ as arguments and reboot WebLogic.

This section describes the deployment of TAFJ EAR file by using the default method and by using shared libraries.
Deploying TAFJJEE_EAR.ear File (Normal way)
To deploy TAFJJEE_EAR.ear in a normal way,
- In the WLS admin console, click Deployments.
- Choose Install.
- Select TAFJJEE_EAR.ear (ensure it is intended for Oracle 12c).
- Click Next. Repeat this step until TAFJJEE_EAR.ear file is installed.
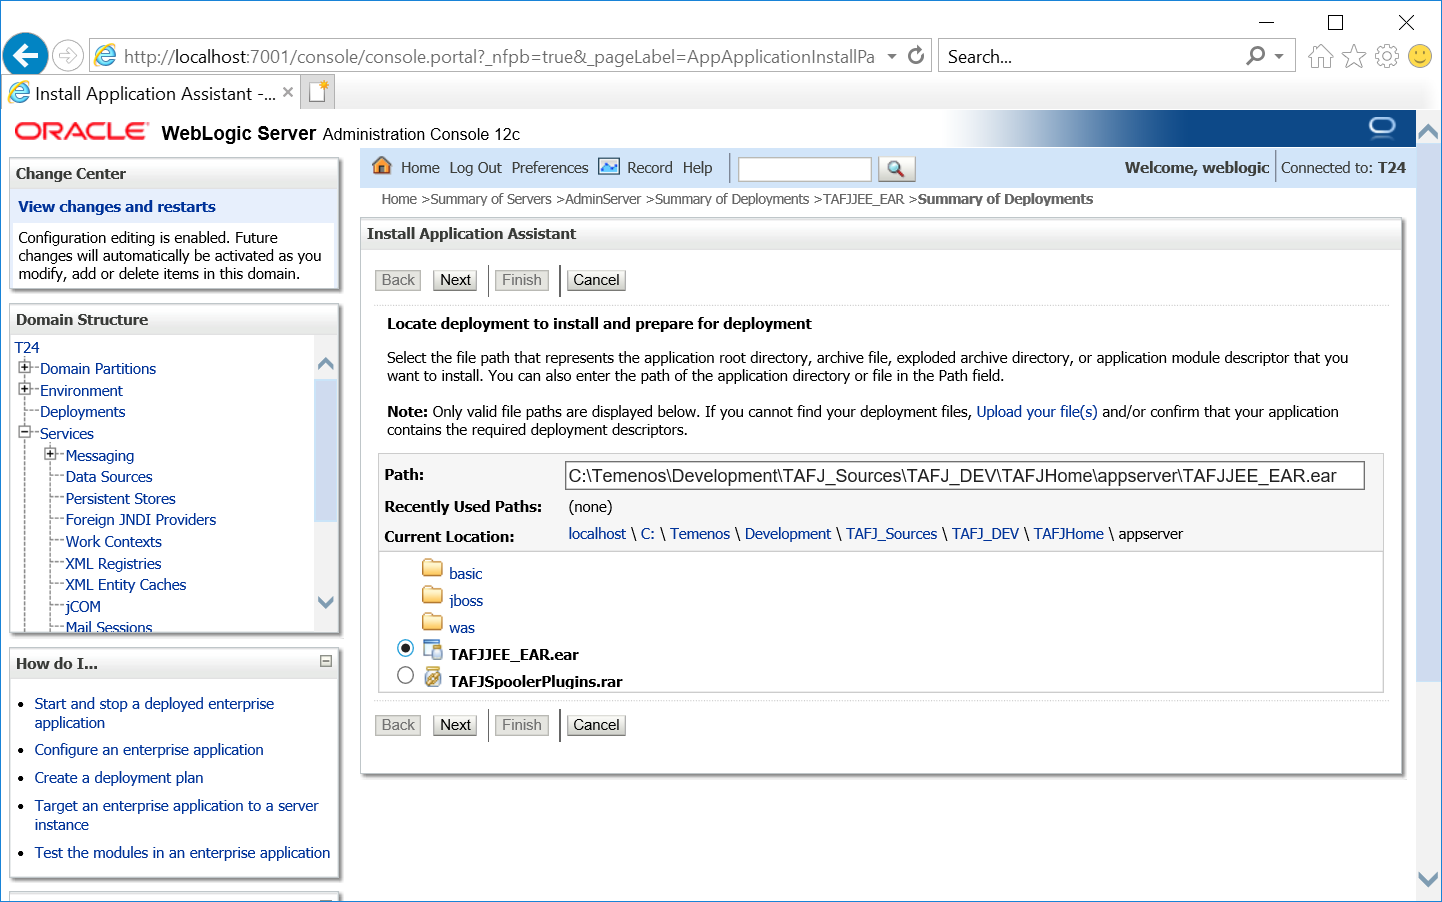
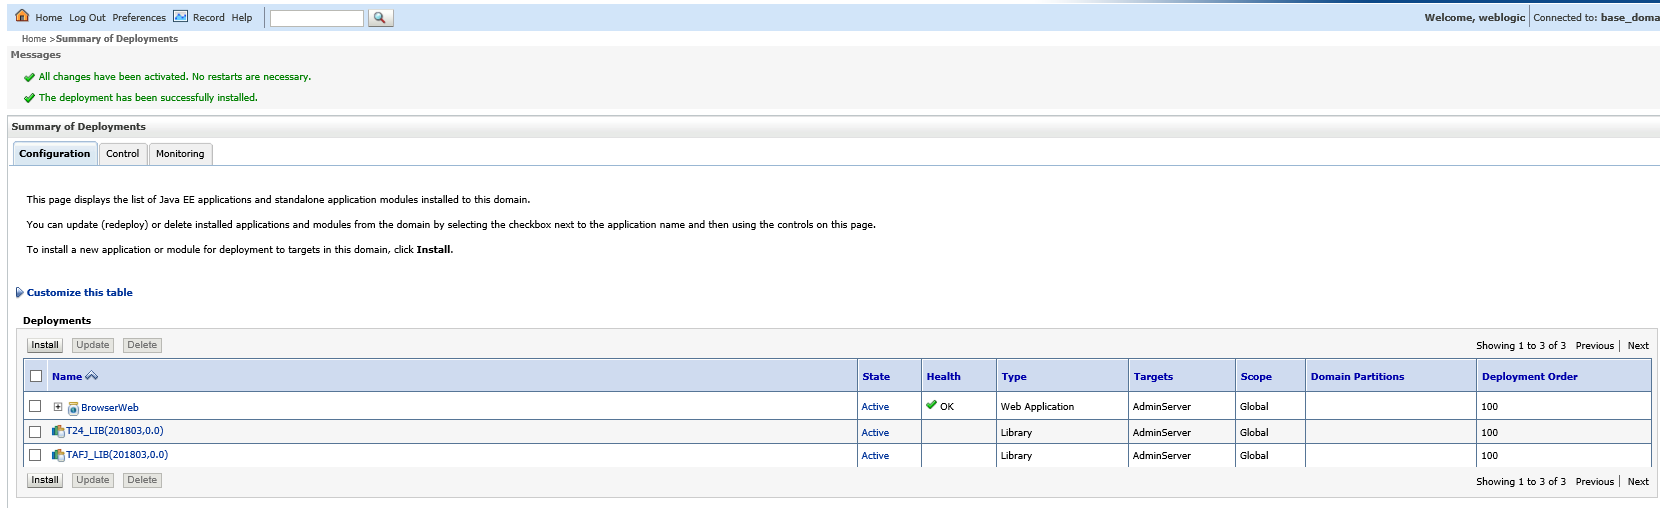
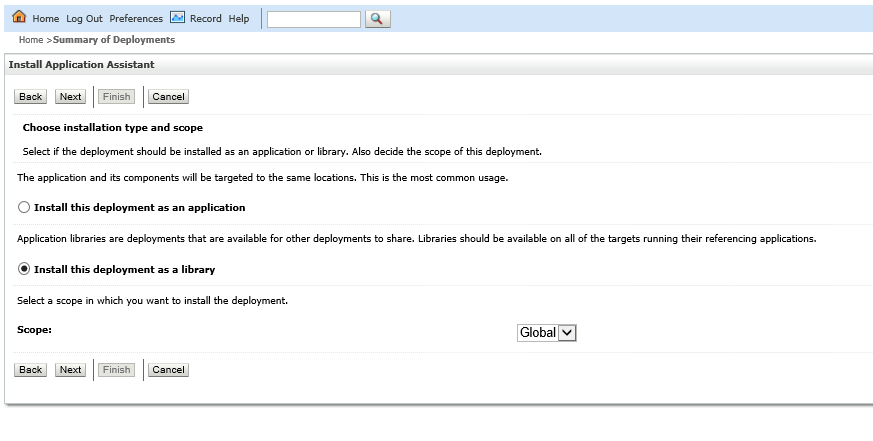
Deploy TAFJJEE_EAR.ear File (using Shared libraries)
To deploy TAFJJEE_EAR.ear using shared libraries,
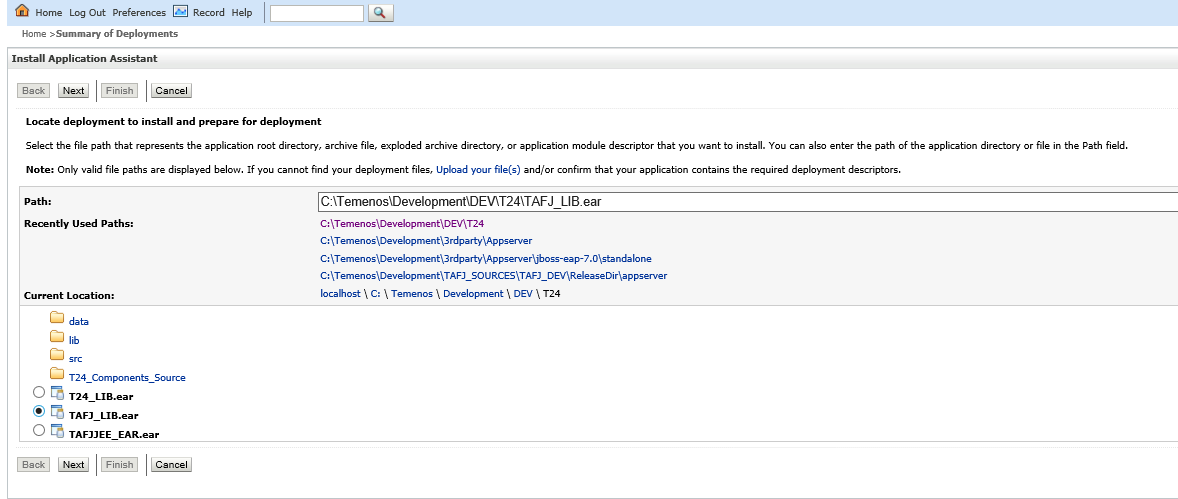
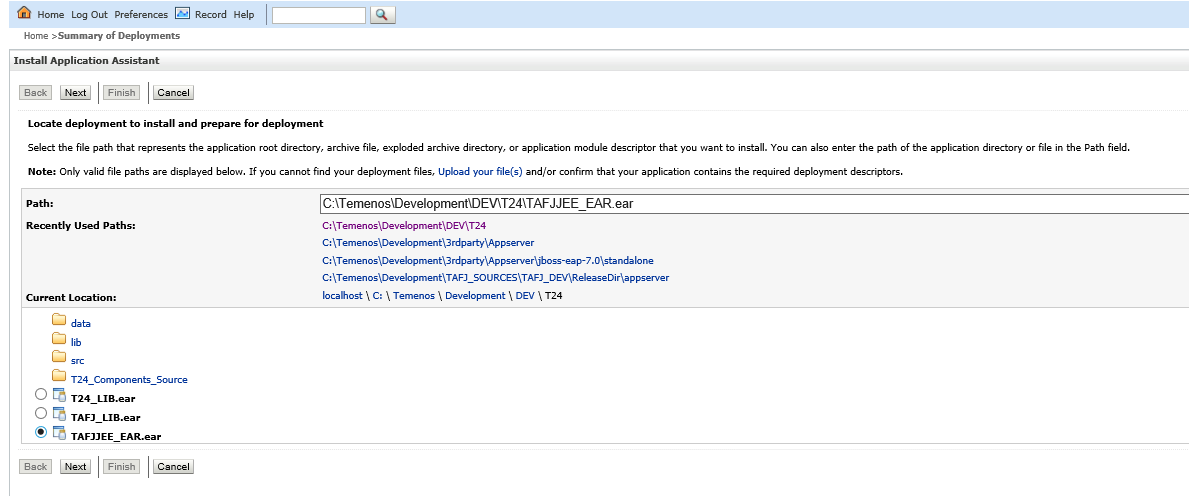
- In the WLS admin console, click Deployments.
- Choose Install and provide the appropriate path where the EAR files are available.
- Click Next.
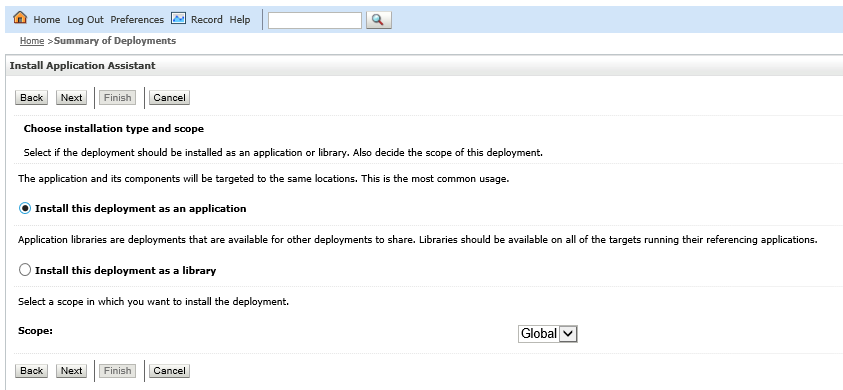
- Select the Install this deployment as a library radio button and click Next.
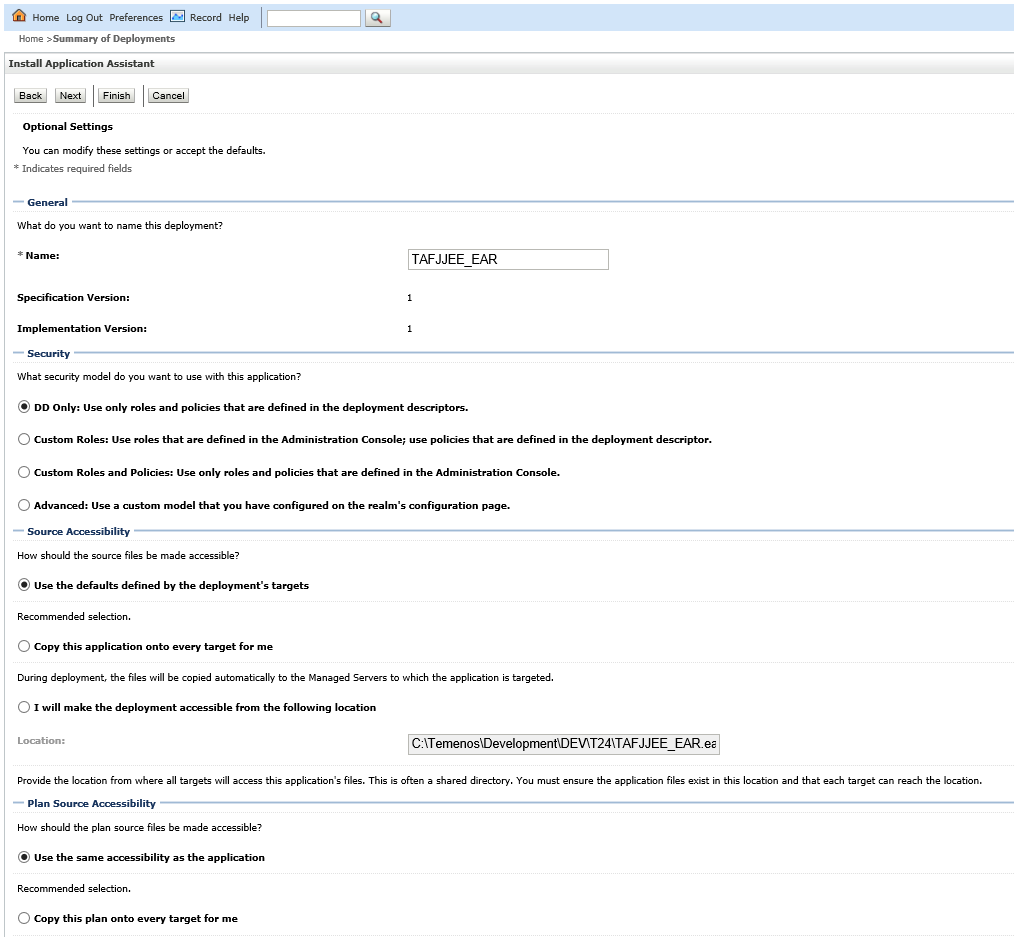
- Specify a name for the deployment.
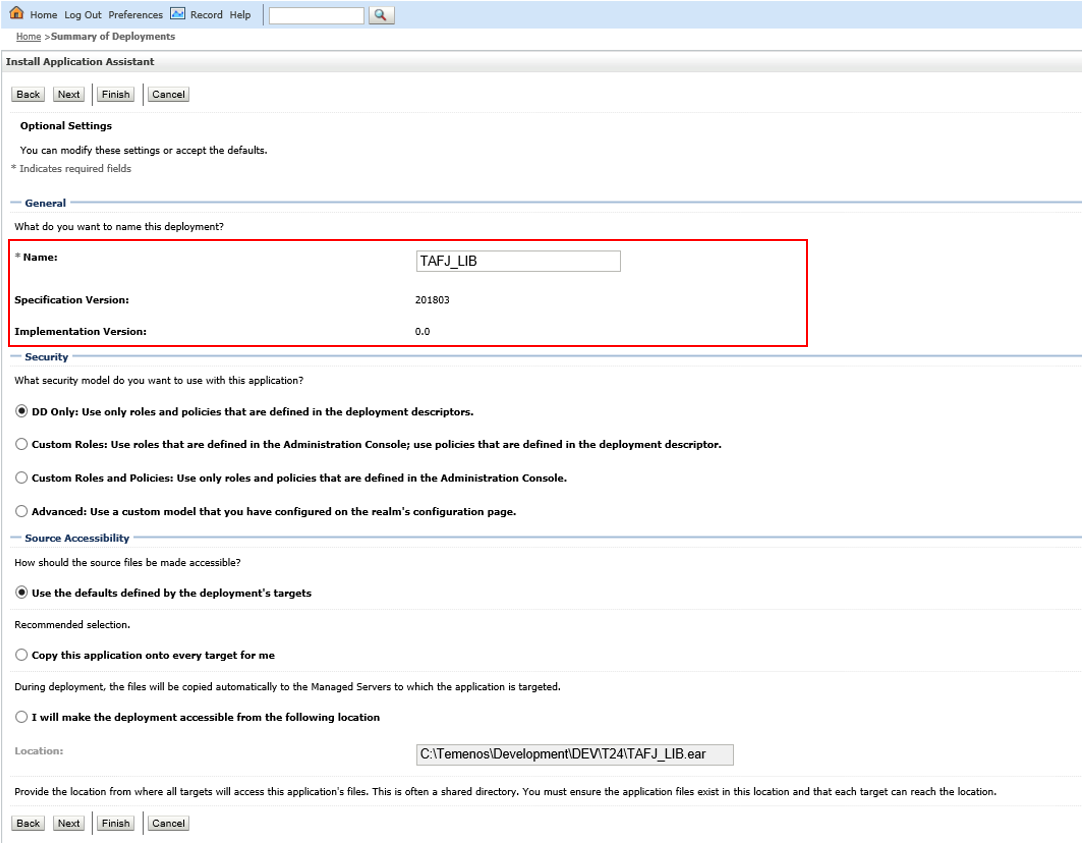
- Click Finish.
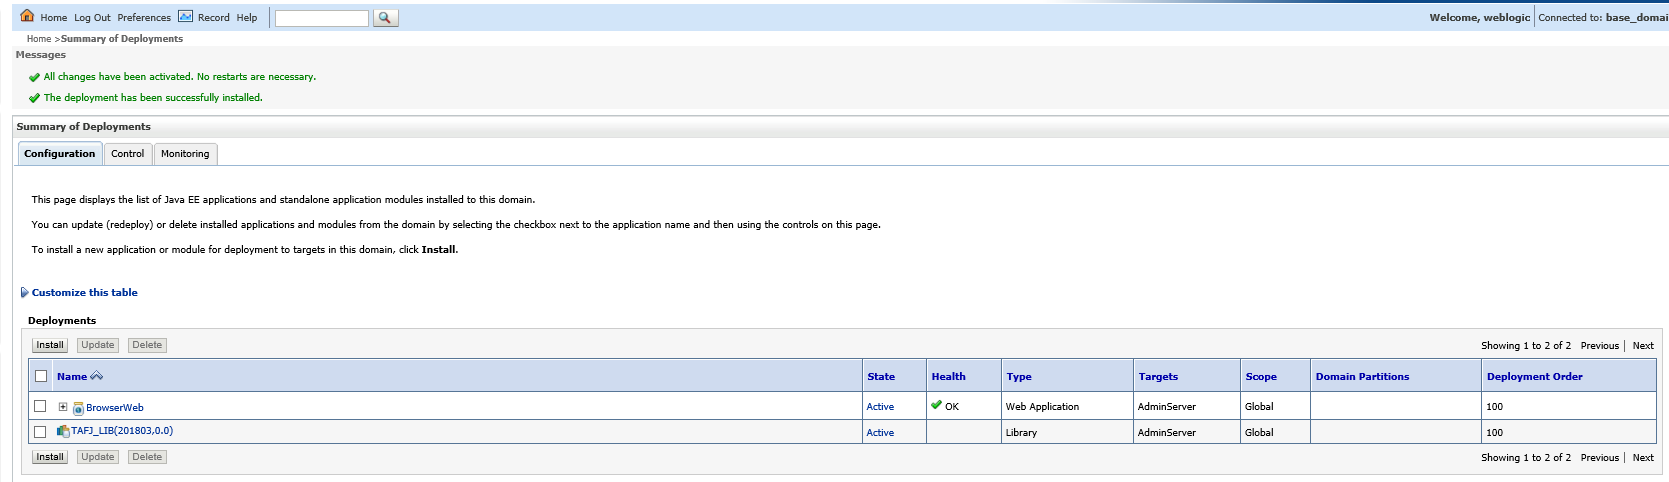
- Repeat steps 1 to 5 for the T24_LIB EAR file.
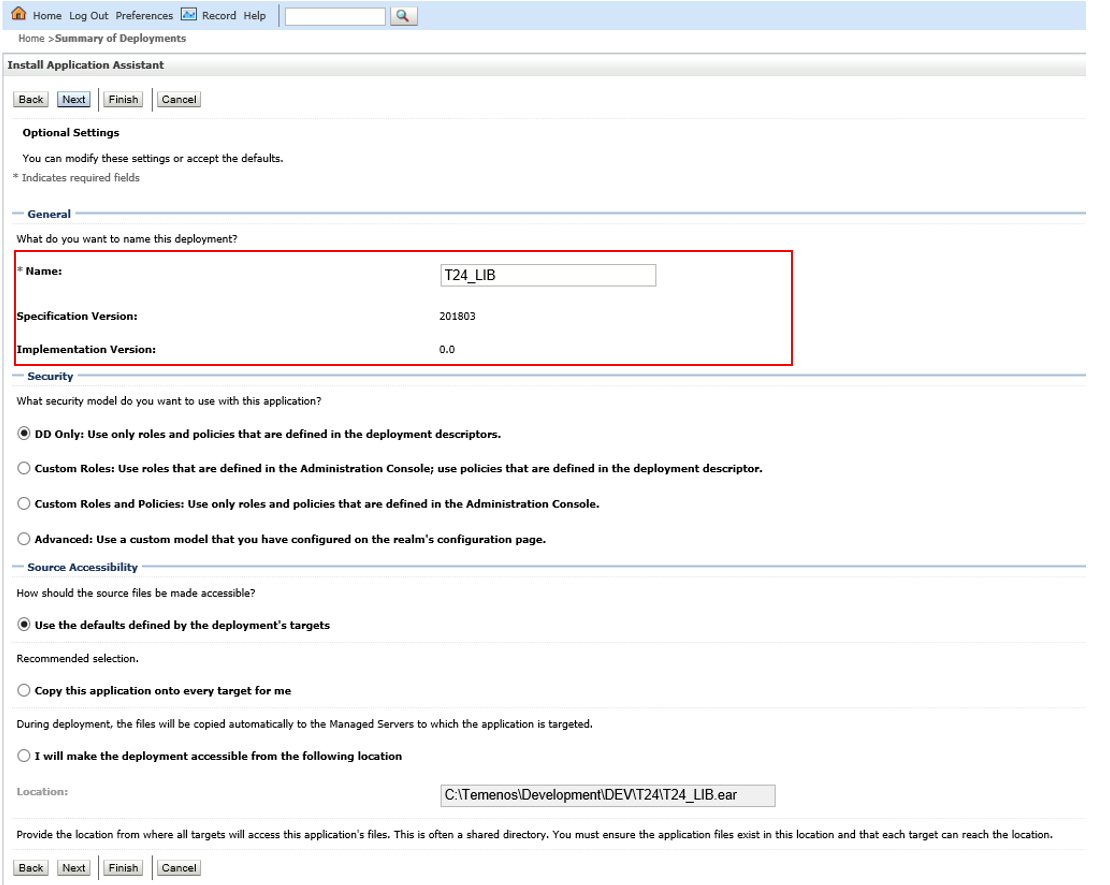
- Click Finish.
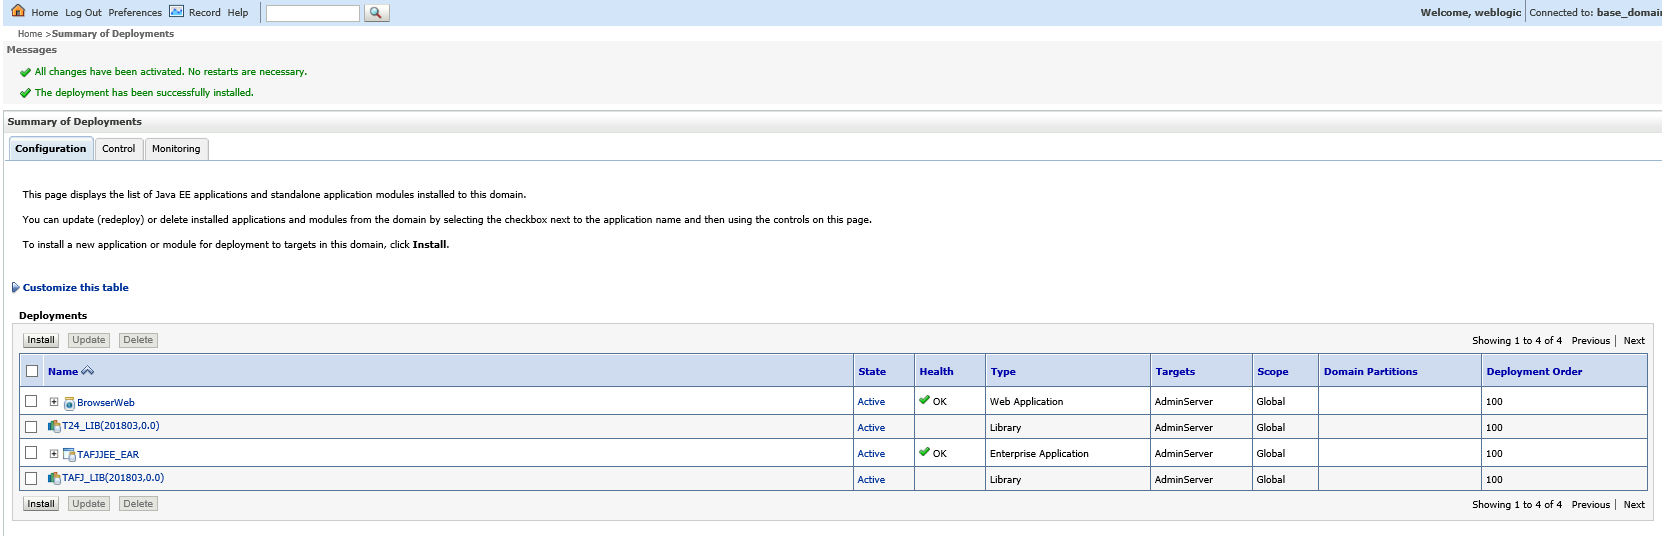
Now, you need to make certain changes for an existing TAFJJEE_EAR.ear file referencing the above deployed TAFJ_LIB and T24_LIB shared libraries along with their respective specification and implementation versions.
- In the TAFJJEE_EAR.ear file, under META-INF/weblogic-application.xml, add the following as referencing libraries.
- xmlns:wls="http://xmlns.oracle.com/weblogic/weblogic-application"
- xmlns:xsi="http://www.w3.org/2001/XMLSchema-instance"
- xsi:schemaLocation="http://java.sun.com/xml/ns/javaee http://java.sun.com/xml/ns/javaee/javaee_5.xsd http://xmlns.oracle.com/weblogic/weblogic-application http://xmlns.oracle.com/weblogic/weblogic-application/1.6/weblogic-application.xsd">
- Save the file.
- Try to deploy the TAFJJEE_EAR.ear file in the WebLogic admin console. Click Deployments.
- Select TAFJEE_EAR.ear and click Next.
- Select the Install this deployment as an application radio button.
- Click Next.
- Specify the name of the deployment.
- Click Finish.
<?xml version="1.0" encoding="UTF-8"?>
<wls:weblogic-application
<wls:library-ref>
	<wls:library-name>T24_LIB</wls:library-name>
	<wls:specification-version>201803</wls:specification-version>
	<wls:implementation-version>0.0</wls:implementation-version>
</wls:library-ref>
<wls:library-ref>
	<wls:library-name>TAFJ_LIB</wls:library-name>
	<wls:specification-version>201803</wls:specification-version>
	<wls:implementation-version>0.0</wls:implementation-version>
</wls:library-ref>
	<wls:prefer-application-packages>
		<wls:package-name>antlr.*</wls:package-name>
		<wls:package-name>org.apache.log4j.*</wls:package-name>
	</wls:prefer-application-packages>
</wls:weblogic-application>
In this topic