Event Framework
R24 AMR | Min(s) read
Deploying Inflow_EE.ear
Inflow_EE.ear is the runtime artefact that contains the Inflow_REST.war, Inflow_Listener.war, Inflow_STREAM.war and Inflow _MDB.jar files. Inflow_EE.ear needs to be deployed in an application server to process the inflow messages posted to a queue.
Deploying in JBoss
To deploy Inflow_EE.ear, copy this file to the deployments directory.
Deploying in WebSphere Application Server
Follow the steps below to deploy Inflow in Websphere application server.
- Log into the WebSphere administration console.
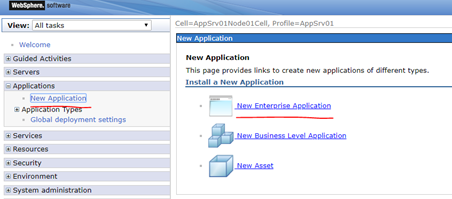
- In the menu on the left, expand Applications and click New Application. The New Application wizard screen opens.
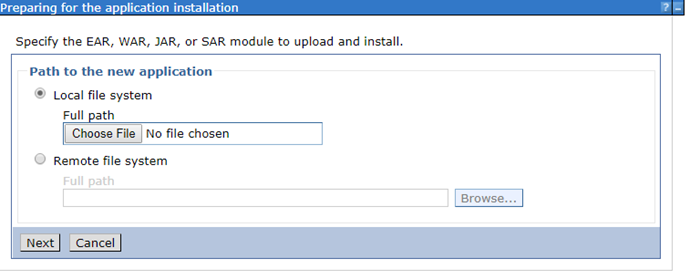
- Click Choose File, select the Inflow_EE.ear file and click Next.
- Select Detailed Installation and click Next.

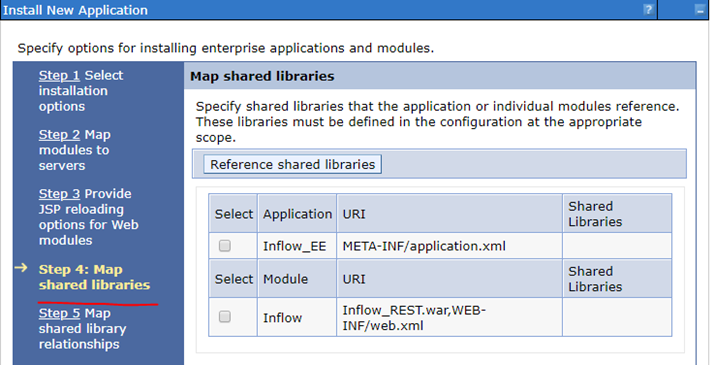
- Go to step 4 directly to add shared libraries to the application that you are about to install.
- Select one check box and click Reference shared libraries to add the configured Transact libraries to the WebSphere Application Server.
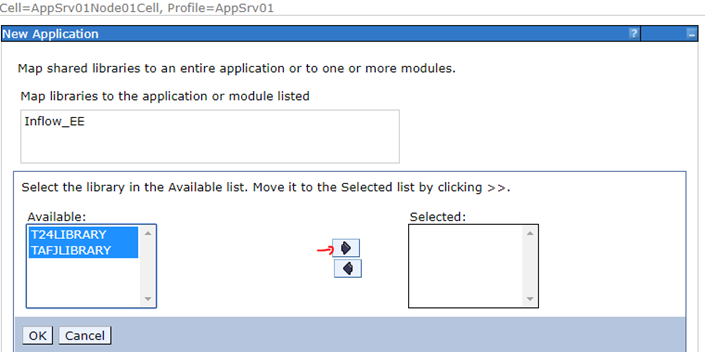
- Select the available libraries, click the right pointing arrow and then click OK.
- Similarly, do the same for the other module.
- Select one check box and click Reference shared libraries to add the configured Transact libraries to the WebSphere Application Server.
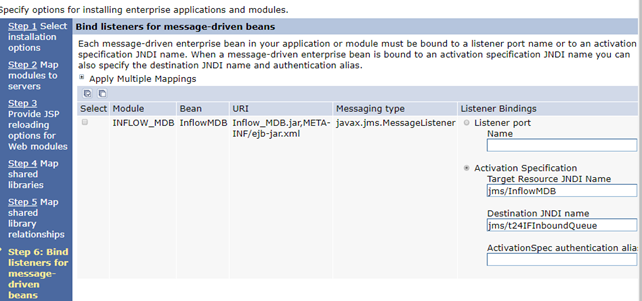
- In step 6, verify the activation specification JNDI binding values.
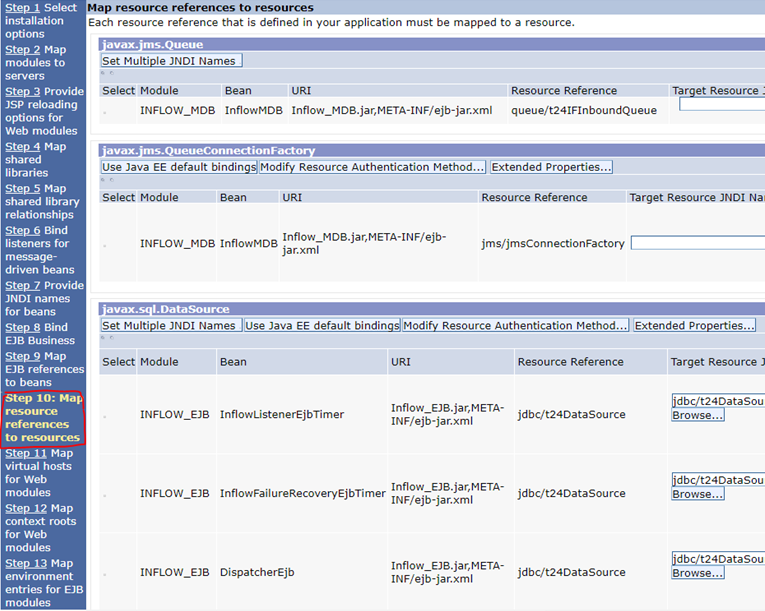
- Click Next until you reach Step 10 where you must map resource references to each of the modules available in the application that is being installed. (In this case, Inflow_EE.ear contains an EJB, MDB, and a WAR file.)
- Click the Next till you reach the summary page. The Inflow_EE.ear file is now installed in WebSphere Application Server 9.
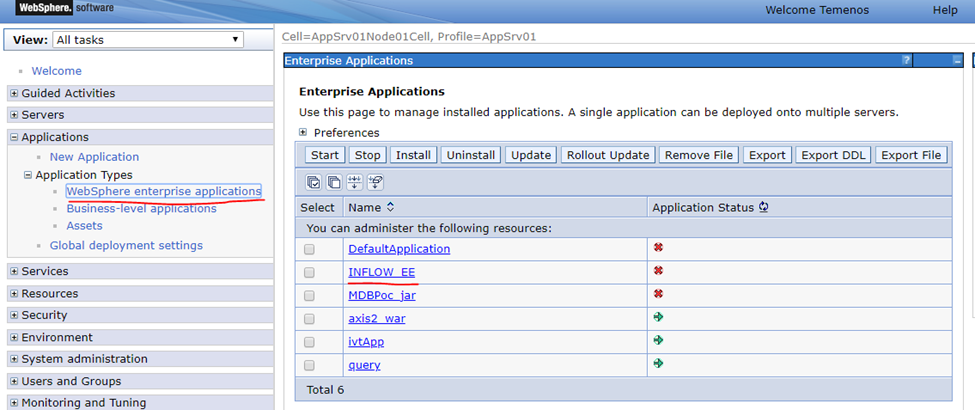
- Under the application tab, click WebSphere enterprise application to see the installed application.
- Select Inflow_EE and click Start. Check the logs for deployment status.
Deploying in WebLogic
Before you begin
You must do all the queue configurations, JMS connection factories and database configurations according to the configuration provided in the Inflow_EE.ear file.
Follow the steps below to deploy in Weblogic.
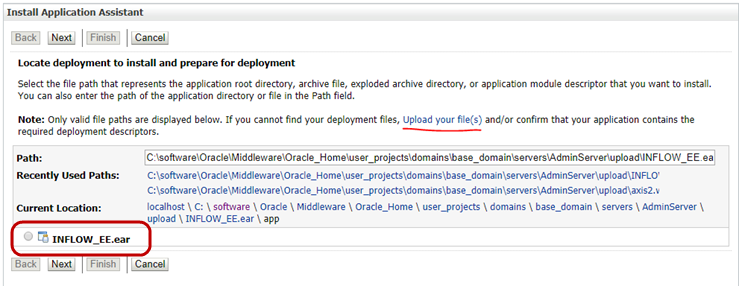
- In the left navigation menu of the WebLogic admin console, click Deployments.
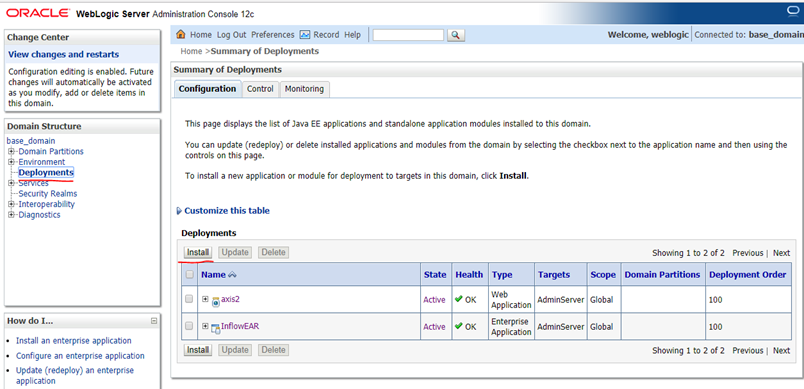
- Click Upload your file(s) to select the Inflow_EE.ear file.
- Click Choose File under the Deployment Archive option.
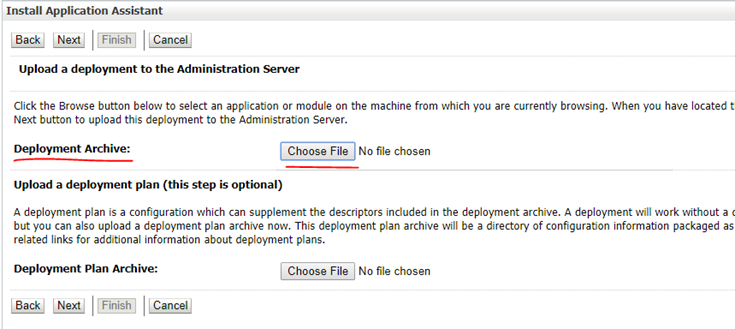
- Click Next to get this message.

- Click Next again.
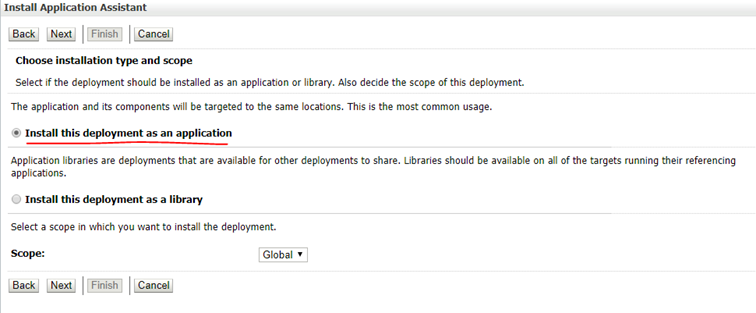
- Select the Install this deployment as an application option under the installation type and set Scope to Global.
- Click Next several times until you see the last window to apply the default settings and click Finish to install the application.
- Under the summary of deployment check the state and health of the deployed application.
In this topic