Regular Expression
Regular Expression functionality helps to validate Transact API payload. It loads all the values from the config microservices and place it in the cache before invoking the Transact API request.
This section explains how to create a new Regular Expression validation, search, edit and package an existing Regex.
Refer Regex Validation for Version Fields to know more about configuration of Microservice generic config and IRIS setup.
Creating and Editing Regular Expression
This section details about creating and editing Regular Expression.
Creating Regular Expression
To create a Regular Expression,
-
Navigate to Extensions > Regular Expression, on the dashboard left pane.
-
Click Add Regular Expression button on the Search page.
-
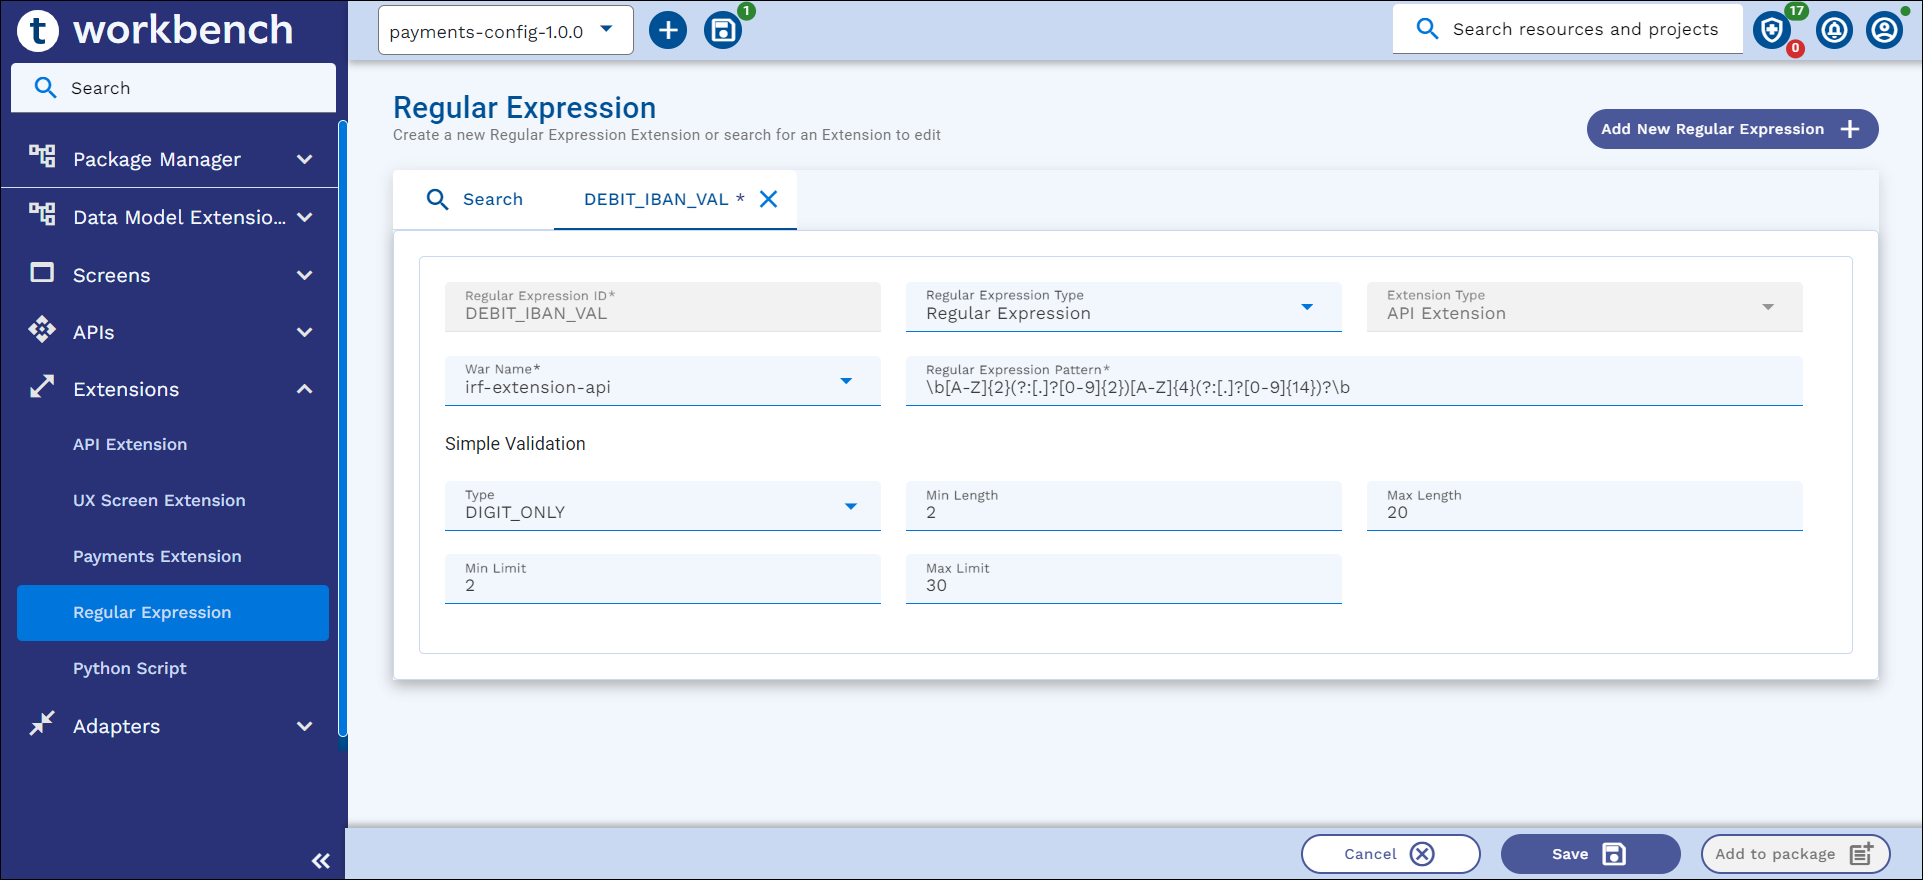
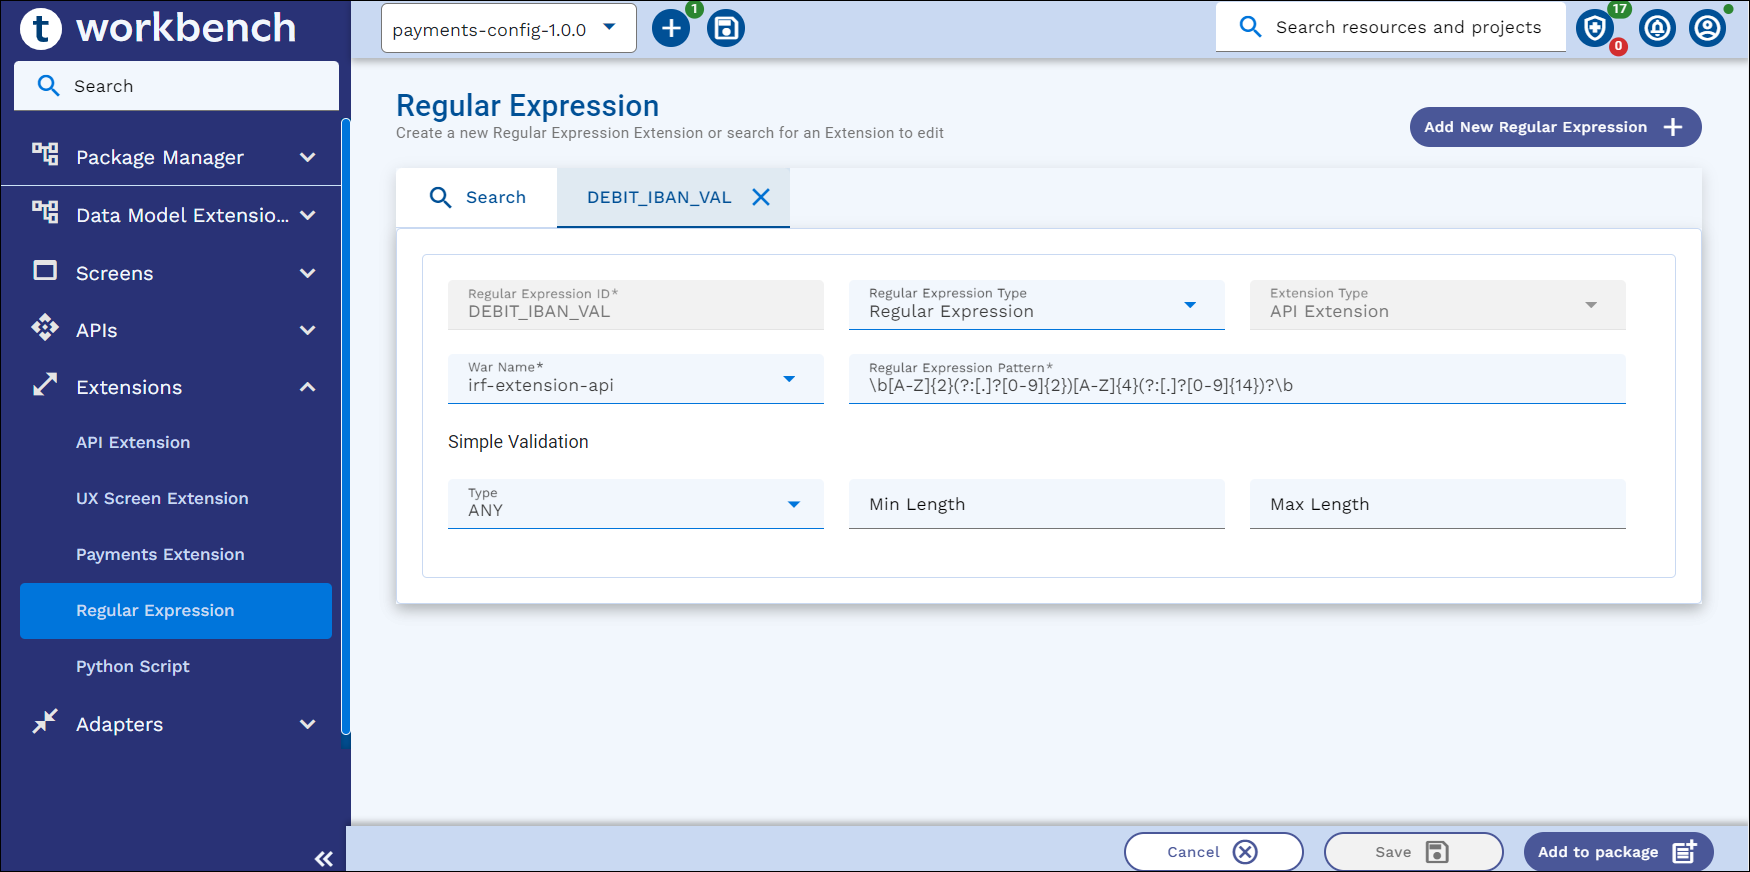
Enter the following details in the New regular Expression screen.
Field Action Mandatory – YES/NO Default Value Regular Expression ID Enter a unique regex ID. YES Regular Expression Type Select type of regex validation you are trying to do on an API field.
There are 3 types of Regex Validation:
- Regular Expression
- Date Format
- Simple ValidationBased on type selected, rest of the fields given in the table are displayed.
YES Regular Expression Extension Type Select the type of Extension
-
API Extension
-
UX Resource Extension
YES API Extension War Name Select the relevant war in which the Transact API is bundled. NA when the Extension Type is “UX Resource Extension” YES (for API Extension type) First value in the list Date Format Validates the date. This field is displayed when Regex type isDate Format. List of values includes:
- mm/dd/yyyy
- dd mmm yyyy
- dd-mm-yy
- dd/mm/yyyy
- yyyymmdd
- yyyy-mm-dd
mm/dd/yyyy Regular Expression Pattern Enter regular expression pattern to be matched. This field is displayed when Regex type is Regular Expression.
Samples:- \b[A-Z]{2}(?:[.]?[0-9]{2})[A-Z]{4}(?:[.]?[0-9]{14})?\b
- A-Z
YES Simple Validation It is an alternative for regex or can be combined with regex for more detailed configuration.
This section is displayed when Regex type is Regular Expression or Simple Validation.
NO Type Select one of the following from the dropdown:
- DIGIT_ONLY – for digits. If selected, Min Length, Max Length, Min Limit and Max Limit fields are displayed.
- ALPHA_ONLY – for alphabets. If selected, Min Length and Max Length fields are displayed.
- ANY – for alphanumeric. If selected, Min Length and Max Length fields are displayed.
NO ANY Min Length Enter the minimum API payload field length NO Max Length Enter the maximum API payload field length NO Min Limit Enter the minimum API field limit (Applicable when Type is DIGIT_ONLY) NO Max Limit Enter the maximum API field limit (Applicable when Type is DIGIT_ONLY) NO - Enter the mandatory fields and any one of the Regular Expression Type validations, that is, Regular Expression, Date Format or Simple Validation.
Regular Expression with API Extension Type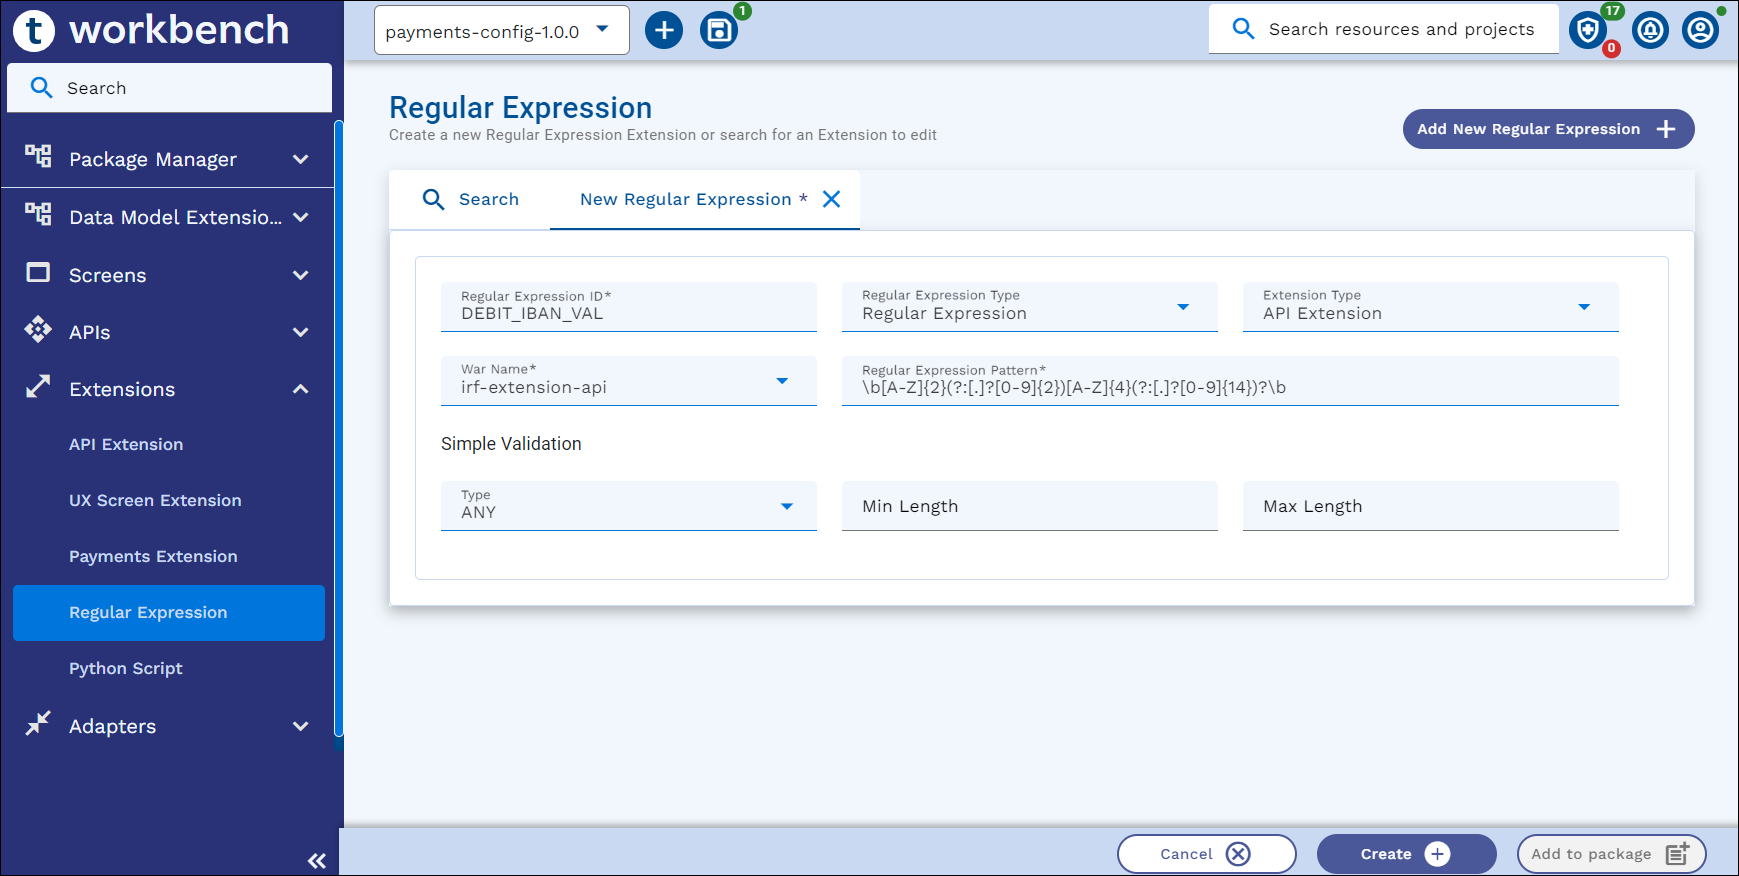
Regular Expression with UX Resource Extension Type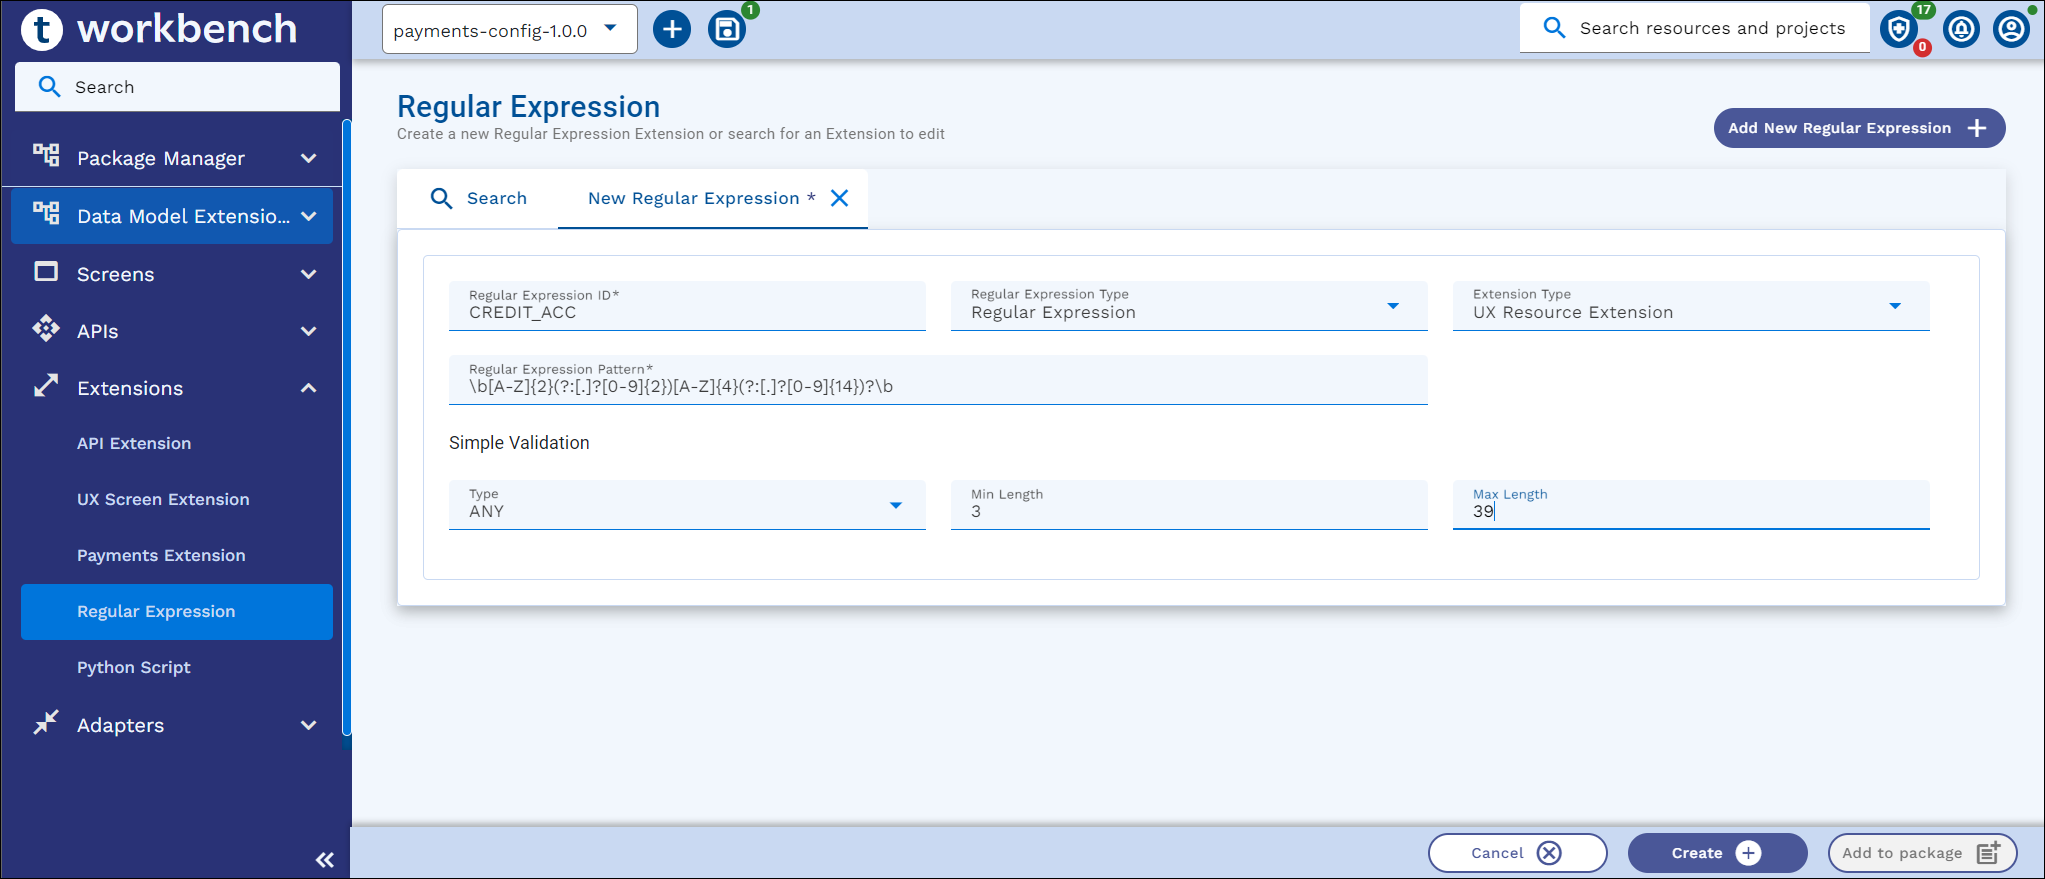
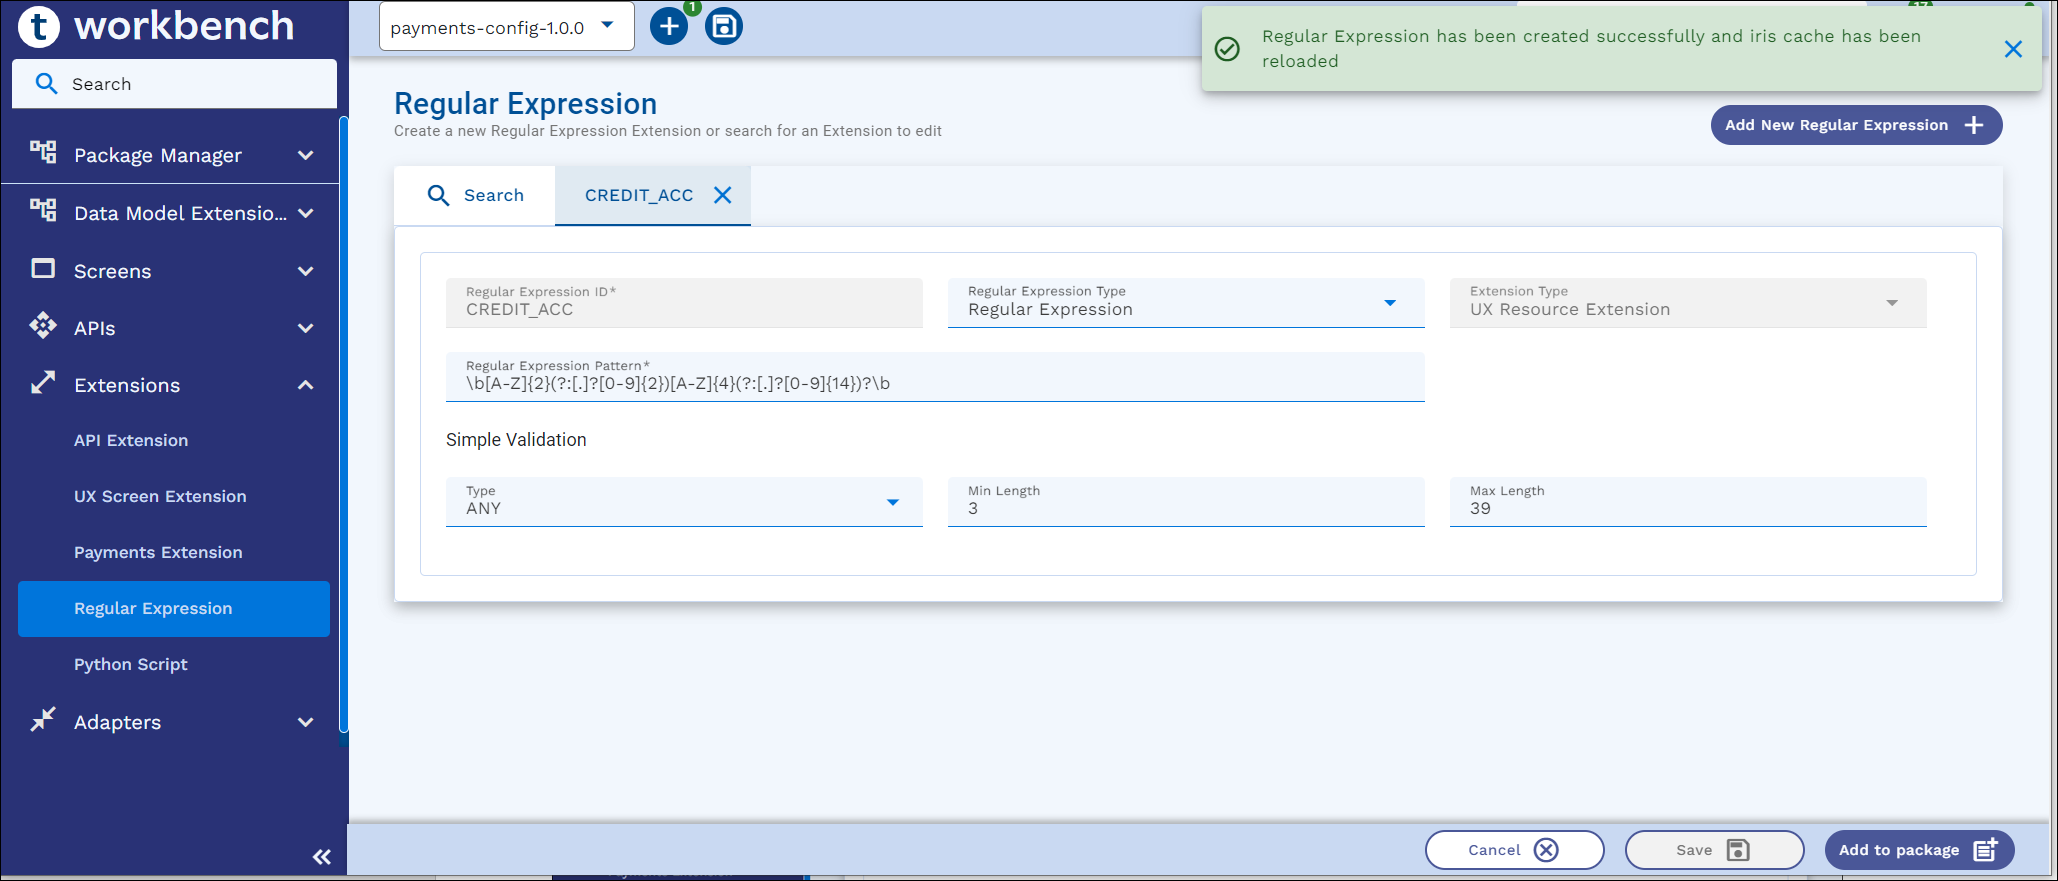
- Click Create to create and store the Regular Expression rule in Generic Configuration Microservice.
Editing Regular Expression
To edit an existing Regular Expression,
- Navigate to Extensions > Regular Expression, on the dashboard left pane.
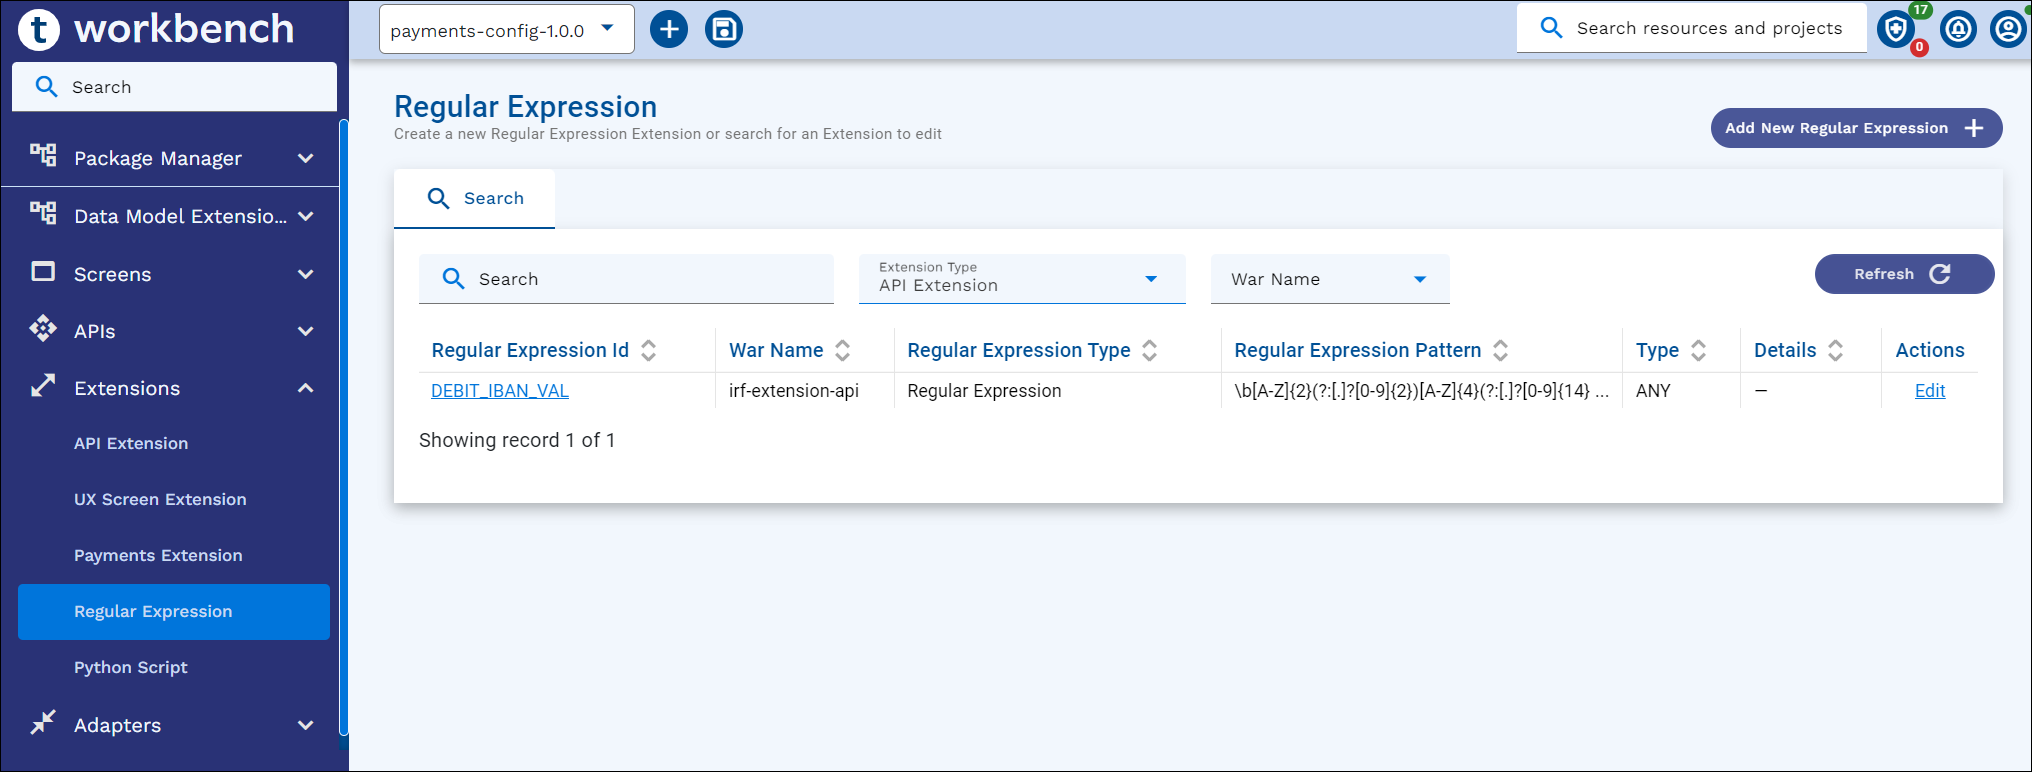
- Search for the Regex ID record and click Edit.
- Update and click Save.
Packaging Regular Expression
As a prerequisite, Extension configuration for Regular Expression must be defined as System properties. Read the Configuration Parameter Reference section for more information.
-
If Workbench is configured with non-Git mode, Add to Package button is available in all the screens.
-
If Workbench is configured with Git mode, Add to Project button is available in all the screens.
To Package an existing Regular Expression,
-
Navigate to Extensions > Regular Expression, on the dashboard’s left pane.
-
Search for a Regular Expression record and click Edit.
- Select a package or project from the top app bar and,
- Click Add to Package or Add to Project.

- On the appbar, click the ‘+’ icon and click either Add to Package/Add to Project, or Add All to add Regular Expressions to the package or project.
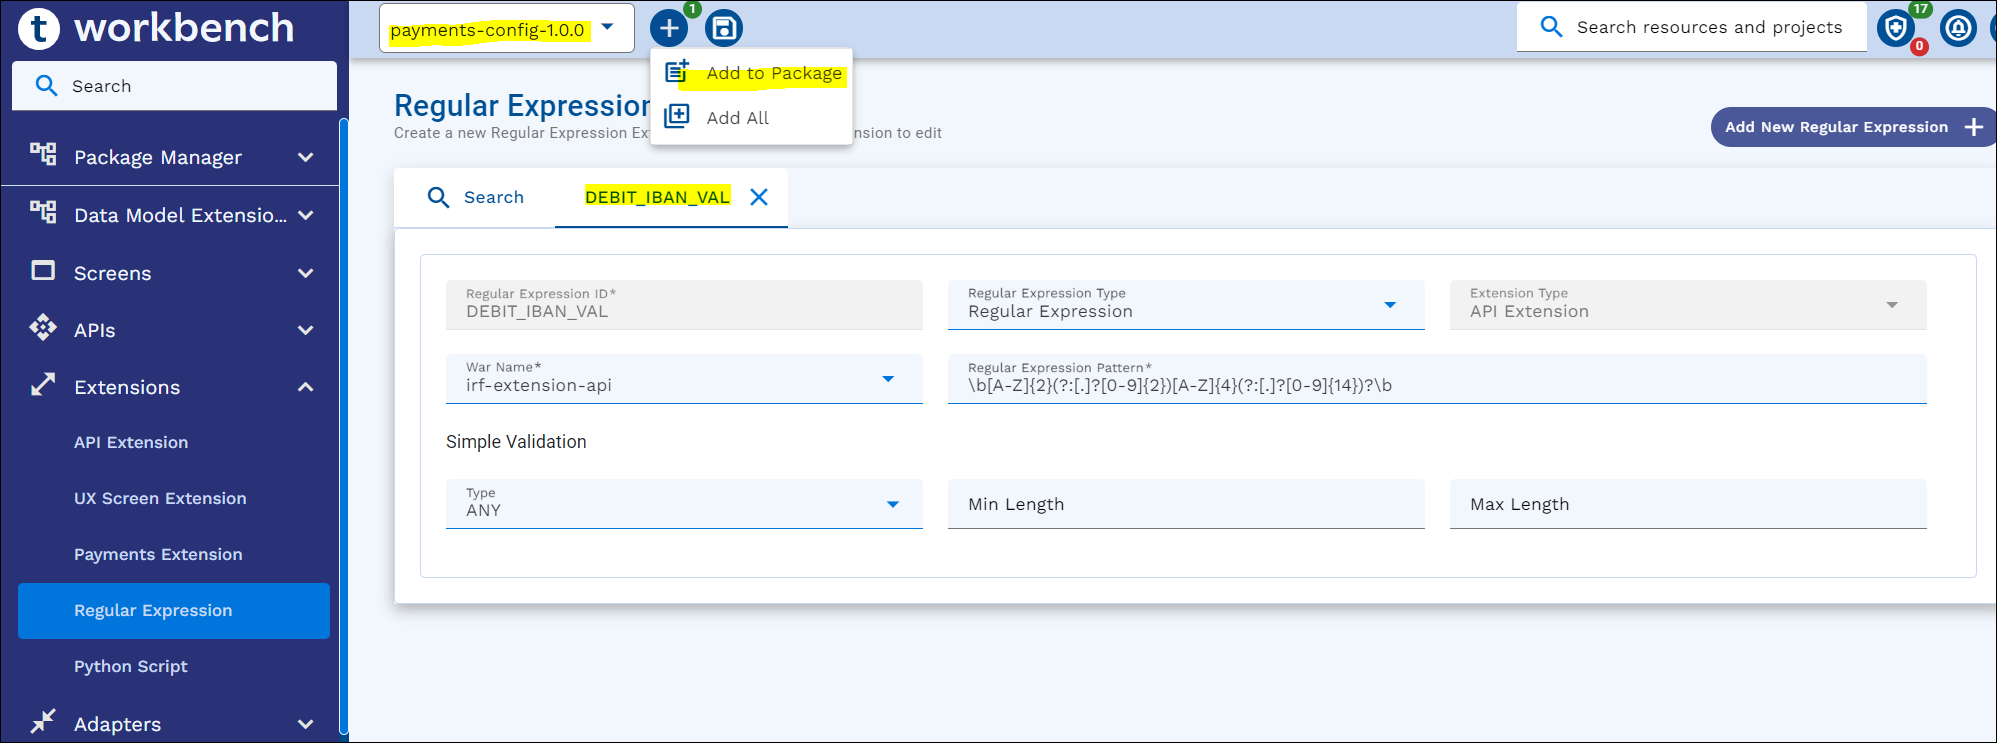
- Click Add to Package or Add to Project.
In this topic