Configuring Clearing Directory
This section helps the user to understand the configuration of Clearing Directory.
Upload of Clearing Directory
The user needs to perform the following:
- To configure a record, go to Admin Menu > CRM Administration > Insight Upload Parameter > Upload Type.
- In the
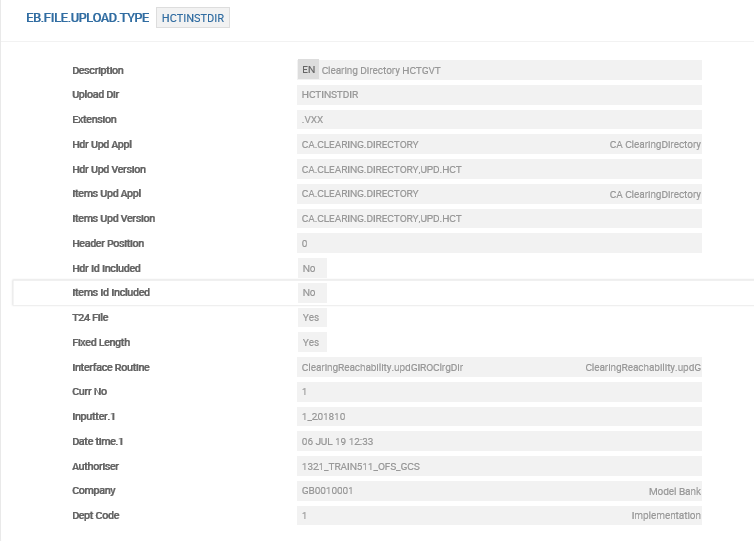
EB.FILE.UPLOAD.TYPEtable, enter the required details in the following fields: - In the
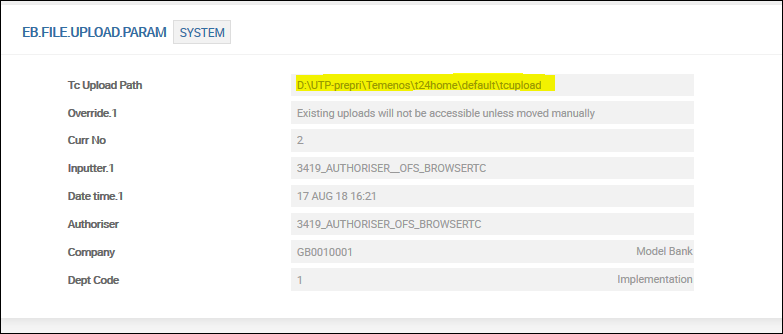
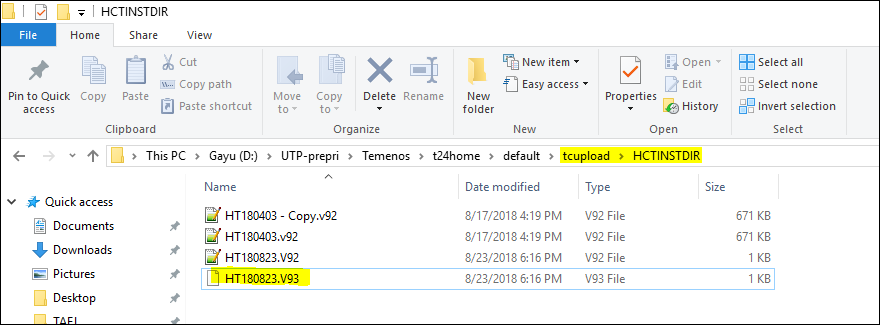
EB.FILE.UPLOAD.PARAMtable, enter the required details in the following field: - Create an input file folder with the same name as defined in Upload Dir in
EB.FILE.UPLOAD.TYPEtable in the directory mentioned inEB.FILE.UPLOAD.PARAMtable. - To enable automatic upload of the clearing directory, create an information file (text file with any filename, for example, UKDIR.XML) in the ‘tcupload’ folder of
EB.FILE.UPLOAD.PARAMtable.
| Field | Description |
|---|---|
| Interface Routine | Upload API for the directory The logic to upload the directory file is defined in the API specific for each directory file. |
| Extension | File extension of the directory file to be uploaded The system performs validation on the file extension during the upload process. |
| Upload Dir | Name of the input folder |
| TC Upload Path | Path for system record in EB.FILE.UPLOAD.PARAM table |
| Field | Description |
|---|---|
| TC Upload Path | Path for system record in EB.FILE.UPLOAD.PARAM table |

The reachability key performs the reachability check, which is a combination of the following parameters:
| BIC | Bank Identifier Code to identify the participant bank |
|---|---|
| BIC | Bank Identifier Code that to identifies the participant bank |
| NCC | National Clearing Code or Sort Code to identify the participant bank |
| Channel | Specific channel defined in the system for the clearing |
| Scheme | Clearing Transaction Type (Local instrument code or Proprietary value) |
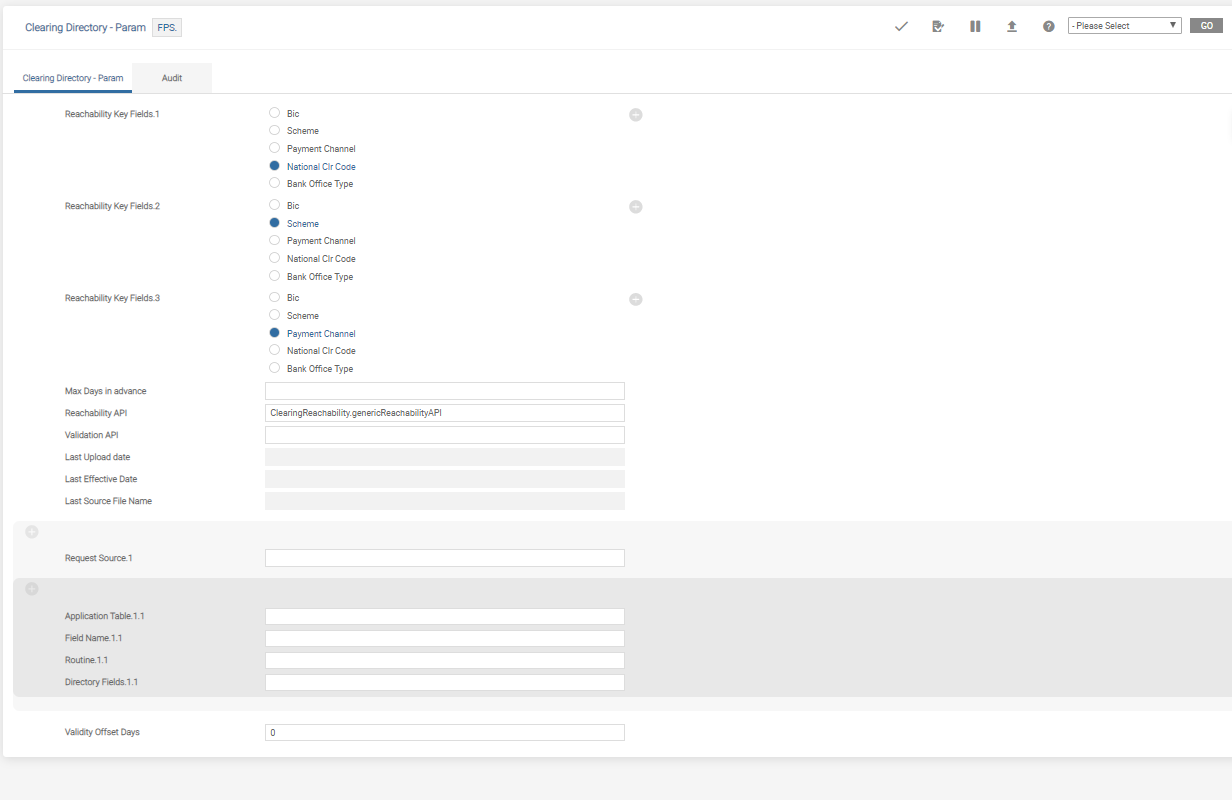
- To configure reachability key to perform reachability check, go to Admin Menu > Framework Parameter > Clearing Directory > Clearing Directory Parameter.
- Enter the required details in the following fields:
- BIC
- Scheme
- Payment channel
- National Clearing Code (NCC)
- Last Upload Date
- Last Effective Date
- Last Source File Name
- To configure additional parameters to form the reachability key, define the source application, table name and field name in Request Source, Application Table and Field Name fields, respectively.
- If the defined key is directly matched from the Clearing Directory table, define the field name in the Directory Field field.
- Enter the required details in the following fields:
- If the value of the field is set to blank, the specific key is applied to all calling applications.
- Lt – Lesser than
- Le – Lesser than or Equal to
- Gt – Greater than
- Ge – Greater than or Equal to
- Eq – Equal to
| Field | Description |
|---|---|
| Reachability Key | Combination of any of the following by multi-valuing this field: |
| Max Days in Advance | Maximum number of days to be added to the creation date, to determine the effective month of the directory records |
| Reachability API | Name of reachability API to perform reachability check If a Reachability API is not configured, REA invokes the generic reachability API as default, and GRA performs reachability check based on BIC or NCC, payment date, scheme and payment channel. |
| Field | Description |
|---|---|
| Request Source |
Calling or source business application |
| Application Table | Table name from which Field Name value is fetched |
| Field Name | Field in table to be used as key |
| Routine | Custom routine used to fetch multi-level fields as key This field can be utilised locally. |
| Directory Field | Define the field name if the key needs to match directly with a record in the directory record |
| Validity Offset Days | Number of days to be added to the start date to determine the end date of the directory record |
| Operand |
Compares the actual value defined in the actual field (Field Name) of the Application Table with the Directory Field field. The values that can be defined are: If the payment amount defined in actual field (FIELD.NAME) deviates the conditions, the reachability fails. This is applicable only when threshold amount for the participant is defined in the clearing directory file.
|
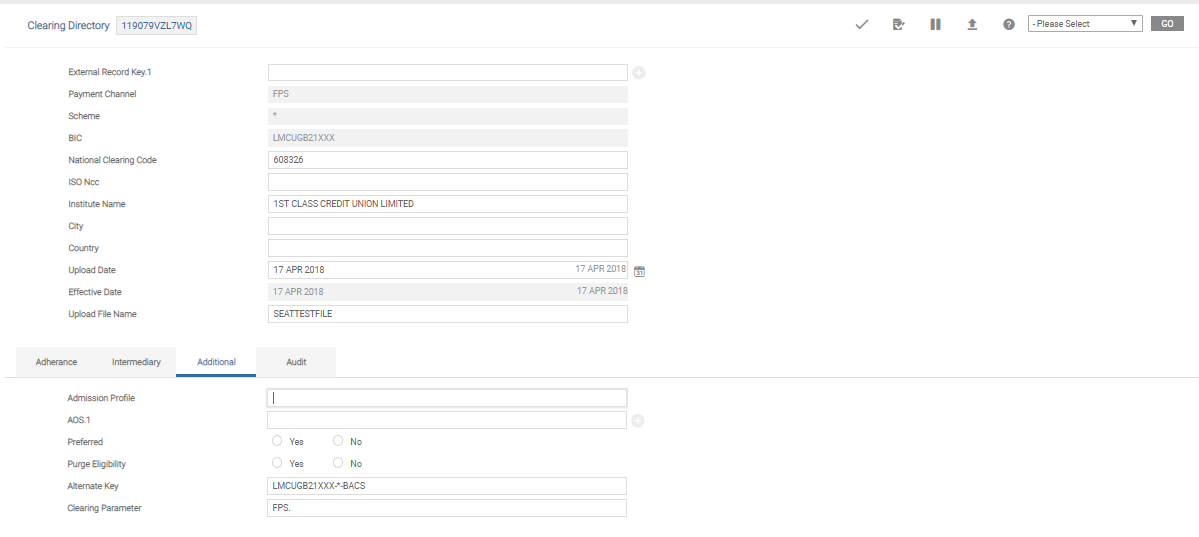
Bank user can purge any existing clearing directory record in the system. This can be performed when adding a new record or for an existing record.
- To configure, go to Admin Menu > Framework Parameter > Clearing Directory > Search Clearing Directory.
- Select the record and click
 .
. - In Purge Eligibility field, perform one of the following:
- To enable the purge ability for a record, set as Yes.
- To disable the purge ability for a record, set as No.
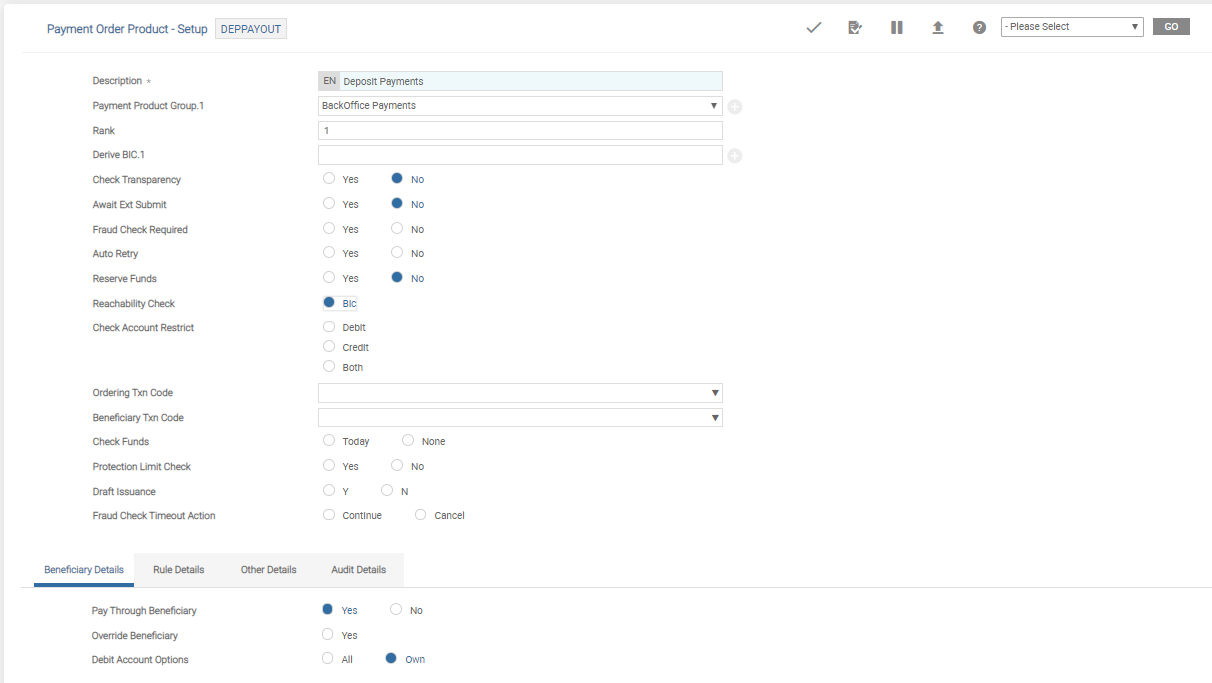
Bank user can enable reachability check in PAYMENT.ORDER application and Temenos Payments.
- To enable reachability check from
POapplication, go to Admin Menu > Payment Hub > Payment Order Admin Menu > Payment Order Product Setup. - Select an appropriate Payment Order Product record and click
 .
. - In the Reachability Check field, do one of the following:
- To enable reachability check, set as BIC.
- To disable reachability check, leave it blank.
- To commit and authorise the changes, click
 .
.
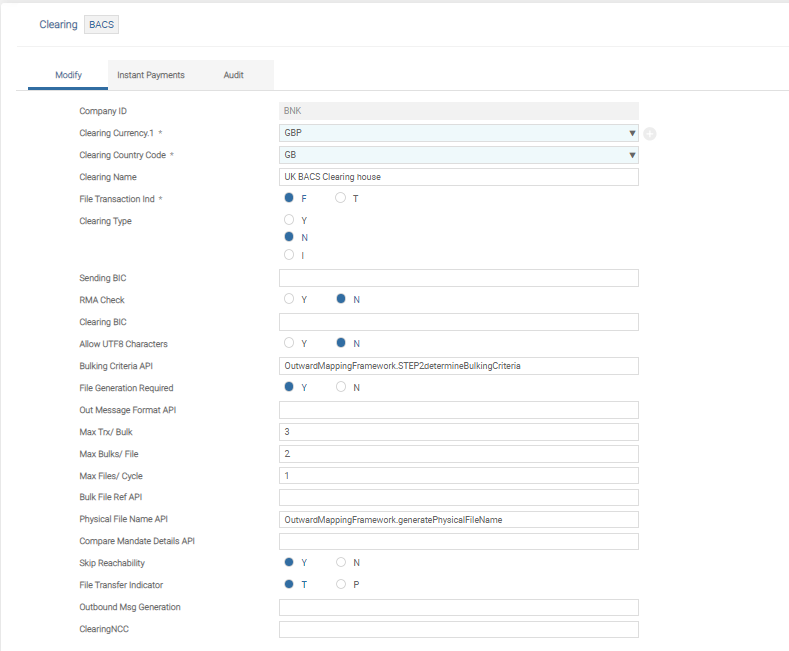
- To enable reachability check from Temenos Payments, go to Admin Menu > Payment Hub > Local Clearing > Clearing.
- Select the appropriate clearing record and click
 .
. - In the Skip Reachability field, perform one of the following:
- To enable reachability check, set as N.
- To skip reachability check, set as Y.
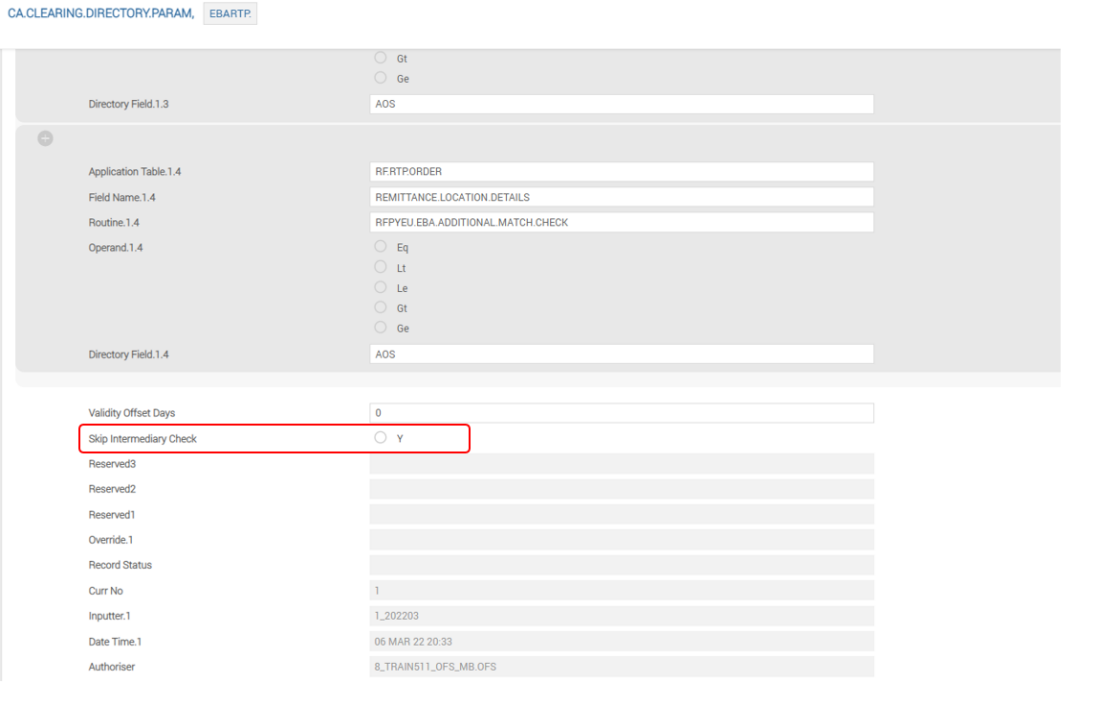
Temenos Payments can apply or skip the reachability check on an intermediary institution in a payment based on the configuration in CA.CLEARING.DIRECTORY.PARAM.
To enable or disable reachability check on an Intermediary Institution, go to Admin Menu > Framework Parameter > Clearing Directory > Clearing Directory Parameter and set the Skip Intermediary Check field as follows:
- When set as Blank, Temenos Payments checks whether the intermediary institution is a participant in Clearing
- When set to Yes, Temenos Payments skips the Reachability check for the Intermediary institution.
In this topic