Install and Configure Alfresco
Real Time Engagement uses content from a CMS repository when defining campaigns, templates and reusable resources. Real Time Engagement is delivered with an out of the box CMS Project, named CDA.
In order to be able to define campaign messages, templates and reusable resources with content coming from the CMS repository, you need to install and configure Alfresco.
The Live CMS features of User Experience Platform enables users to design, create and manage content in real-time. Content items such as text, rich-text and images can be created and stored in real-time and saved into an enterprise content management system (CMS) system, for example Alfresco.
The Alfresco platform can run on a number of different application servers and databases. In the next section we will use the freely available community version of Alfresco running on Tomcat server and PostgressSQL.
Alfresco Community Installer
The Alfresco Community installer is a wizard-oriented application that allows you to install Alfresco Community edition, additional software, and modules so you will be able to use the out of the box CDA User Experience Platform project as a content repository for Real Time Engagement.
The following steps show you how to install Alfresco.
- Click the Installer .exe file to start the Alfresco installer. The Language Selection dialog is displayed.
- Click on the OK button and the Welcome screen is displayed.
- Click on the Next button and the Installation Type screen is displayed.
- Mark the Advanced option.
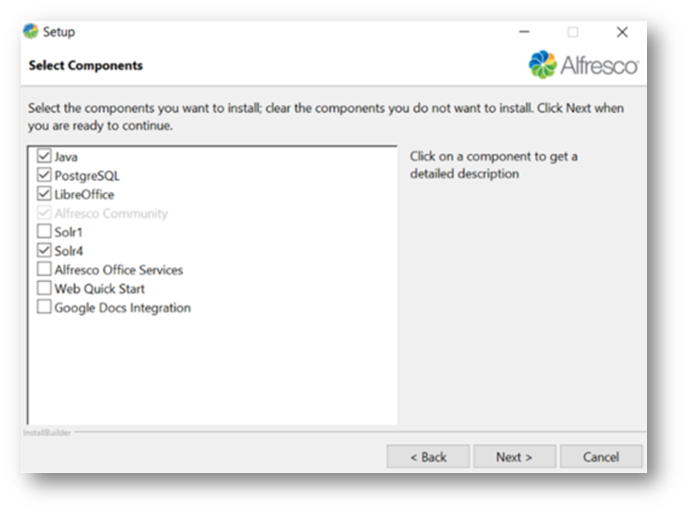
- Click on the Next button and the Select Components screen is displayed.
- Mark the following components.
- Java.
- PostgreSQL.
- LibreOffice.
- Solr4.
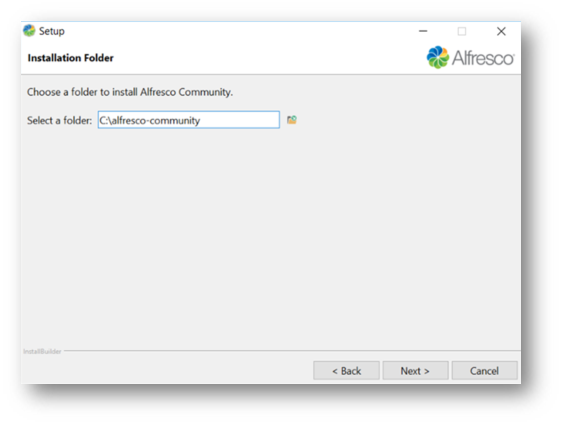
- Click on the Next button and the Installation Folder screen is displayed.
- Enter the folder name: C:\alfresco-community.
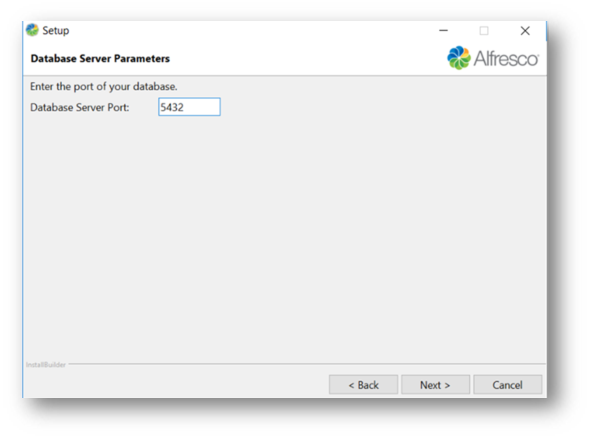
- Click on the Next button and the Database Server Parameters screen is displayed.
- Enter Database Server Port.
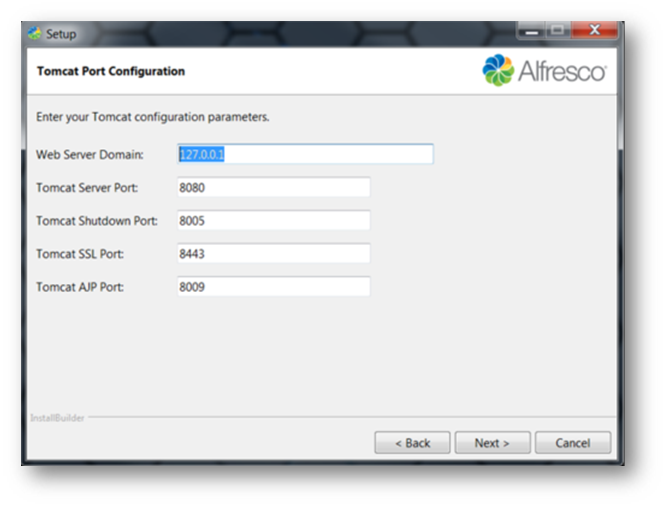
- Click on the Next button and the Tomcat Port Configuration screen is displayed.
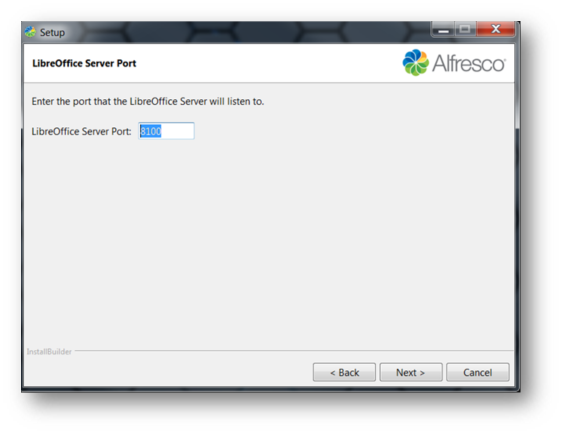
- Click on the Next button and the LibreOffice Server Port screen is displayed.
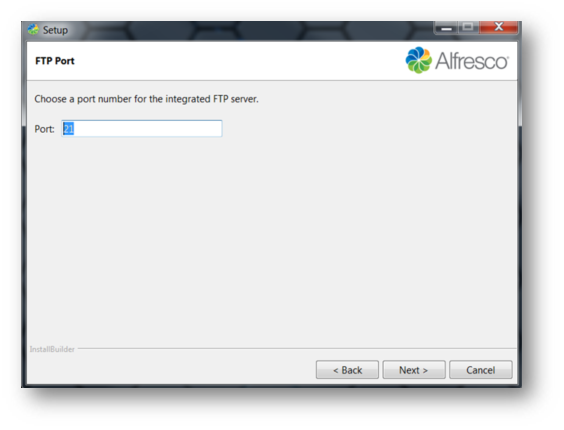
- Click on the Next button and the FTP Port screen is displayed.
- Click on the Next button and the Admin Password screen is displayed.
- Enter the Admin Password.
- Enter Repeat Password.
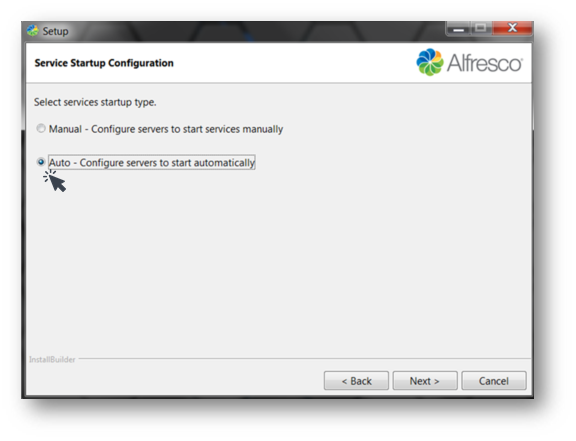
- Click on the Next button and the Service Startup Configuration screen is displayed.
- Mark the Auto option.
- Click on the Next button and the Ready to Install screen is displayed.
- Click on the Next button and the Installing screen is displayed.
- Once completed, the Install Complete screen is displayed.
- Unmark the View Readme File option.
- Unmark the Launch Alfresco Community option.
- Unmark the Show next steps option.
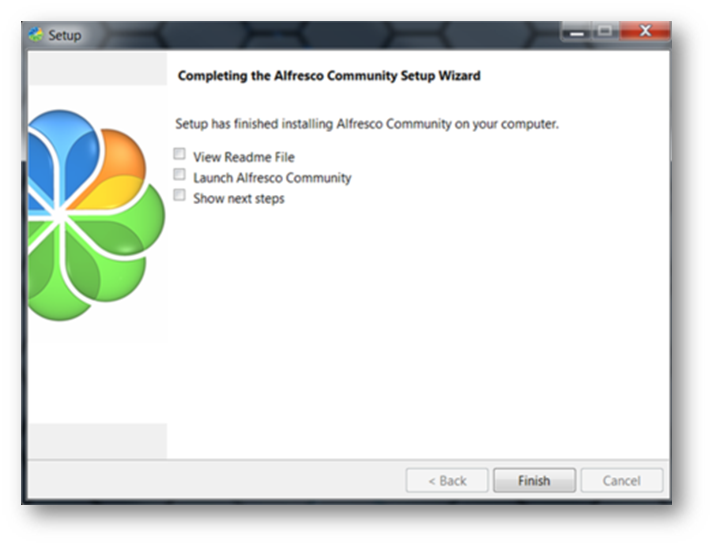
- Click on the Finish button.
Add an Alfresco Module Package (AMP)
The following steps show you how to add an Alfresco Module Package (AMP). The AMP enables custom file type creation and specifically the use of article types and placeholders within the Alfresco repository.
Before you start to install the AMP file you must make sure that Alfresco database is shutdown. The following steps show you how to check that the status of Alfresco Tomcat application server.
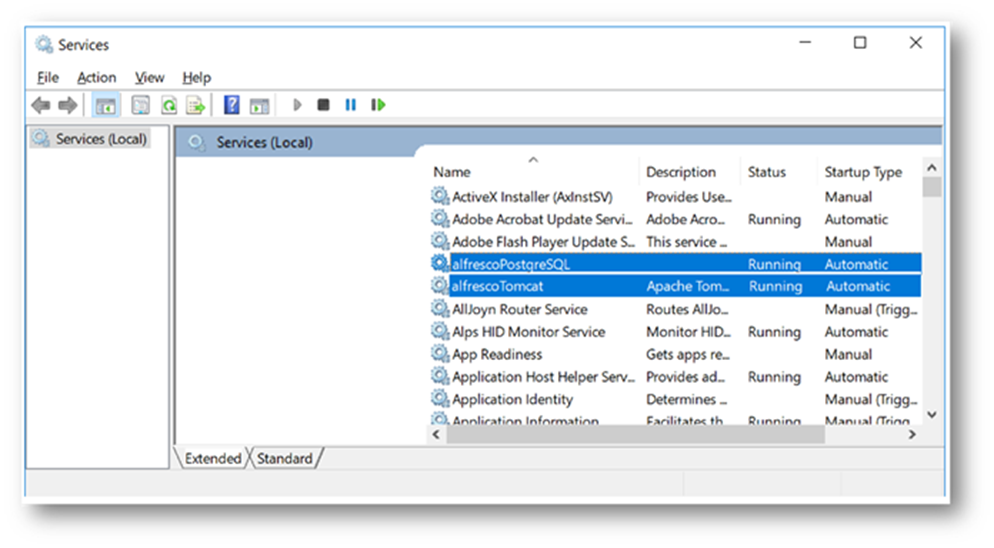
- Click on the Start button and search for Services.
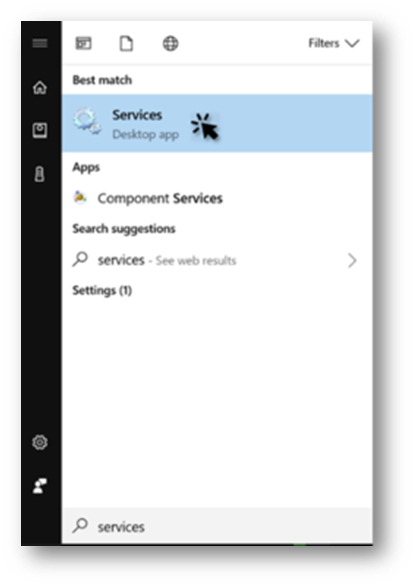
The Services screen is displayed.
- Confirm that the following services are not running.
- alfrescoPostgress.
- alfrescoTomcat.

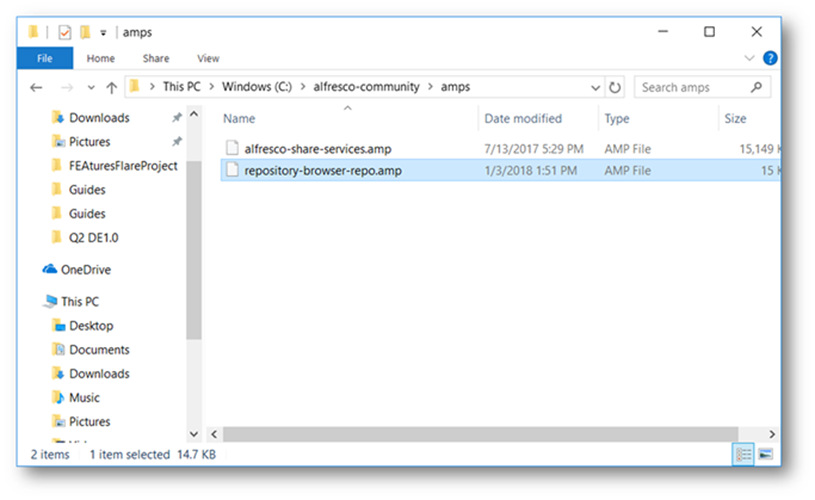
The AMP file is located in the installed UXP folder > IDE > cms-support > repository-browser-repo.amp.
- Copy the AMP file to your alfresco-community/amps folder.
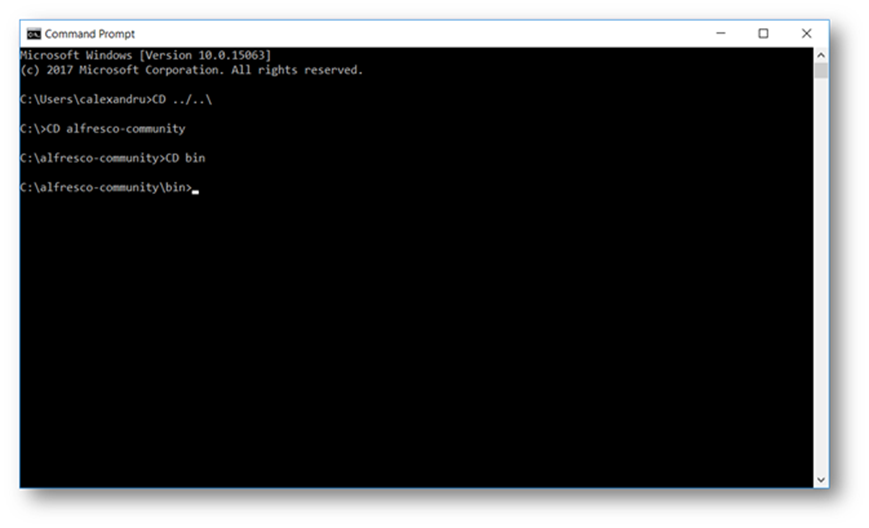
- Click on the Start button and search for cmd.
- Select » Run as Administrator.
- Enter command: CD ../..\
- Press Enter.
- Enter command: CD alfresco-community
- Press Enter.
- Enter command: CD bin
- Run a Batch File to install the AMP. Enter command: apply_amps.bat
- Press Enter.

- Press Enter.
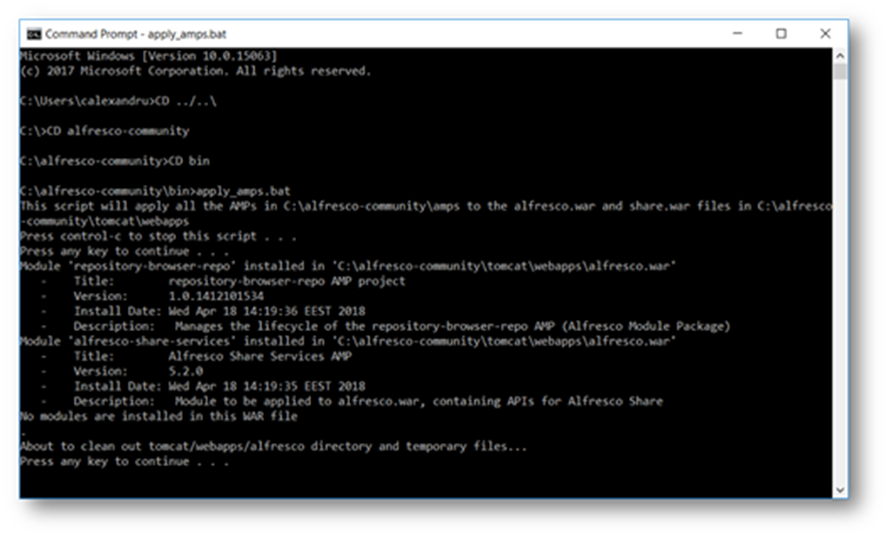
- Press Enter again .
- Close command screen.
Now let’s start the services.
- Click on the Start button and search for Services. The Services screen is displayed.
- Start the following services.
- alfrescoPostgress.
- alfrescoTomcat.
- Confirm they are Running.
Add a PostgreSQL Database and User for Alfresco
The following steps show you how to use the PostgreSQL pgAdmin III application to add a database and user that will be used by the CDA UXP project to store the content structure of the project (for example article structure, placehoders etc.). The out of the box alfresco database will be used to store the actual content (images, text, rich text).
- Navigate to the following location.
C:\alfresco-community\postgresql\bin
- Double click on the pgAdmin3.exe file. The pgAdmin III screen is displayed.
- Right-click PostgreSQL 9.4 (localhost:5432) > Connect.
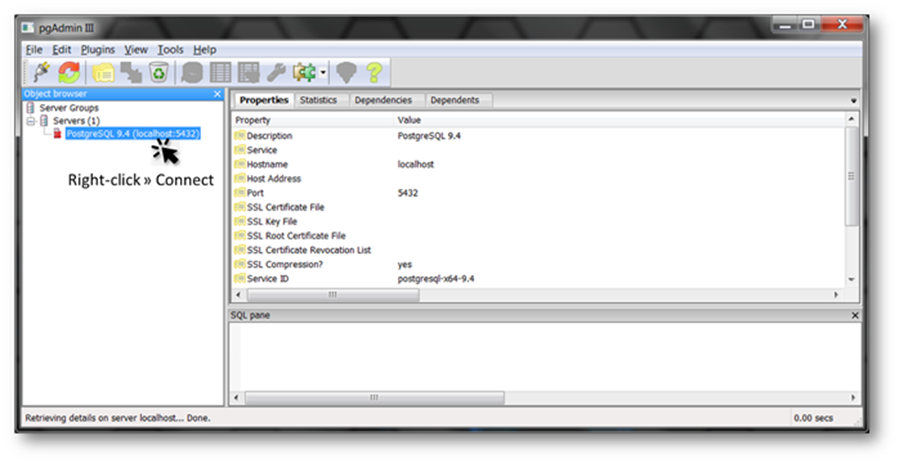
The Connect to Server dialog is displayed.
- Enter Password: alfresco.
- Mark the Store password option.

- Click on the OK button. A Guru Hint dialog may be displayed.
- Click on the OK button.
Next step is to add a user.
- Right-click Login Roles > New Login Role.
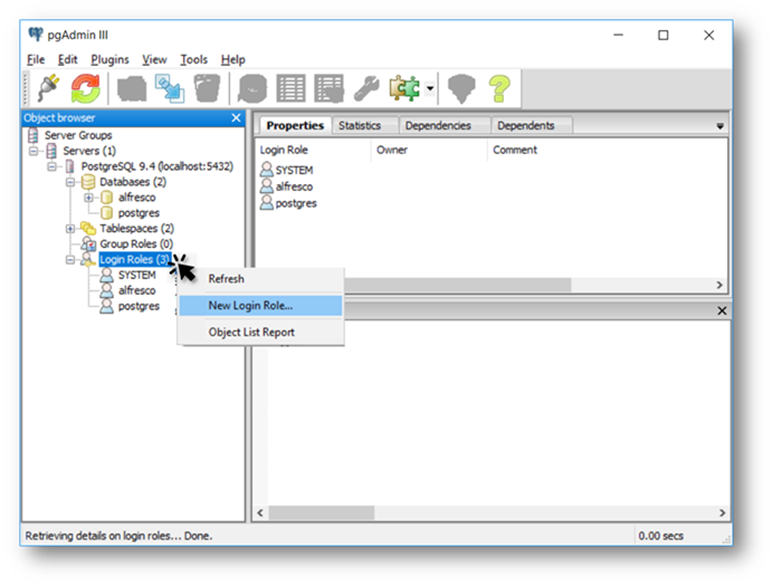
The New Login Role dialog is displayed.
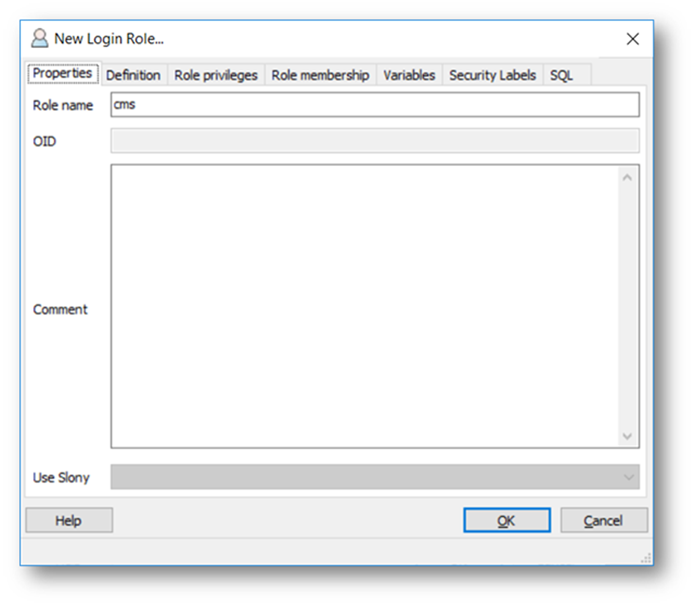
- Select the Properties tab.
- Enter Role name: cms.
- Select the Definition tab.
- Enter Password: cms.
- Enter Password (again): cms.
- Select Role privileges tab.
- Mark the Superuser option.
- Mark the Can create databases option.
- Mark Can create roles option.
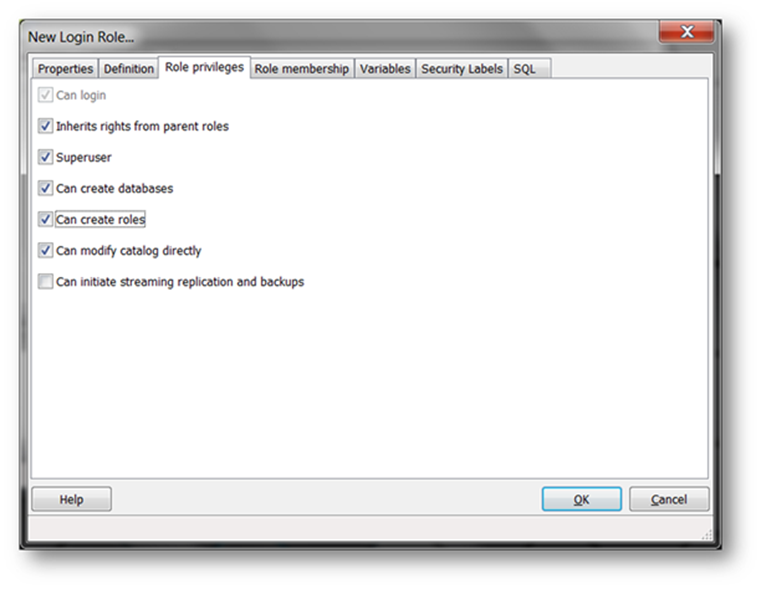
- Click on the OK button to close the New Login Role dialog.
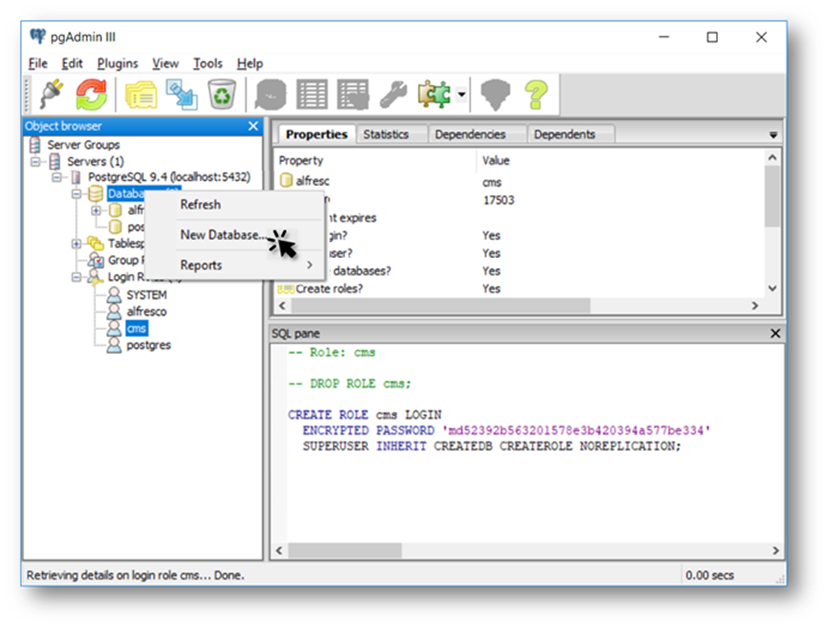
The pgAdmin III application is displayed. Next, we can add a new database and assign it to the user.
- Right-click on the Databases and select New Database. The New Database dialog is displayed.
- Enter the Name: cms.
- Select Owner: cms.
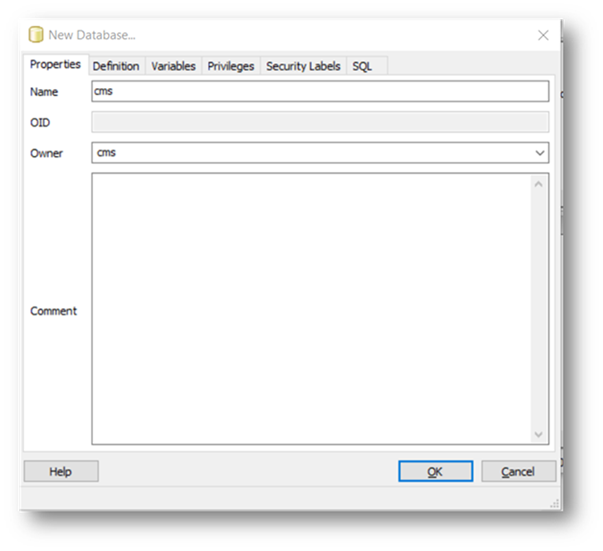
- Click on the OK button to close the New Database dialog. The pgAdmin III application is displayed.
- Confirm that the new Database exists: cms.
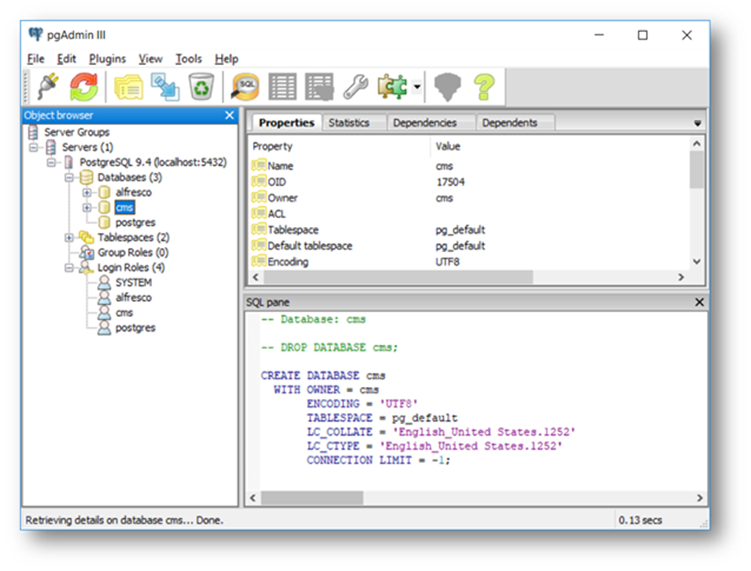
- Select File menu > Exit.
Setup Permissions for Live CMS
When you start to work with CDA project you will be saving content into a folder in the Alfresco repository root folder. The folder name was defined in the connection properties when the content data source was created in the Integration editor for the CDA project.
In order to use the CDA project to define new articles you will need to modify the permissions for the project folder directly on the Alfresco server to correctly setup the CMS user roles to create (contributor or collaborator) and publish (coordinator) content. In the example below there is only 1 role (admin) that has the coordinator role assigned.
The following steps show how to set coordinator permissions for the admin user on the folder /cmisprojects. You will then be able to login to CMS with this user and define and publish content that you will then be able to use in campaigns.
- Open a browser window.
- Enter the CDA URL: http://localhost:9089/CDA/cms_login.html.
- Enter username: admin
- Enter password: alfresco
- The CDA Live CMS interface is displayed.
- Now the CDA repository folder is created in Alfresco repository.
- Logout.
Now let’s assign contributor role to the admin user.
- Enter the URL: http://localhost:8080/share/.
- Enter username: admin.
- Enter password: alfresco.
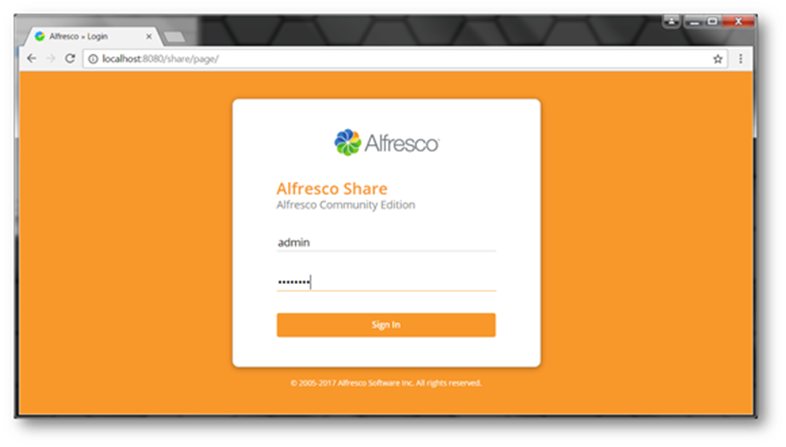
- Click on the Sign In button and the Alfresco Administrator dashboard is displayed.
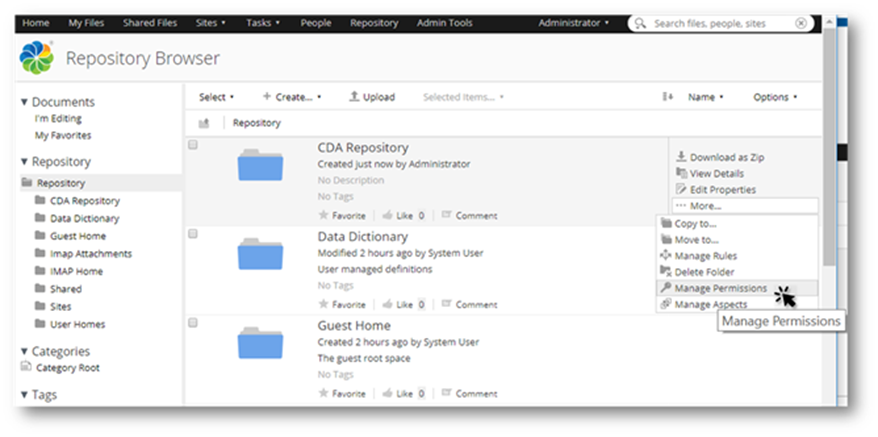
- Click on the Repository tab.
- Move the cursor onto the CDA repository folder but do not click to open.
- Click on the …More button and select Manage Permissions.
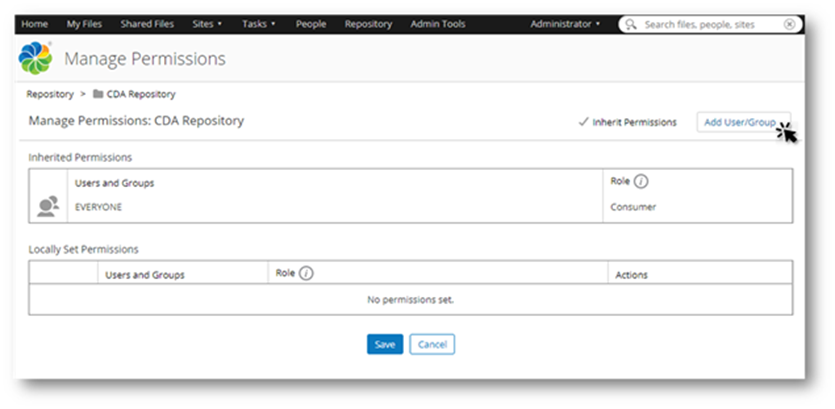
- Click on the Add User/Group button.
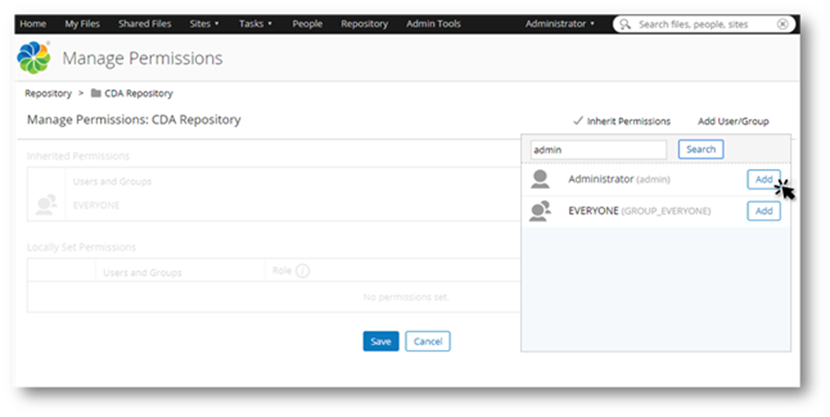
- Enter admin in the Search window to bring up the correct user role (Administrator) then click on the Add button.
- Click on the Consumer role and select Coordinator from the list. This will ensure that the admin user in CDA project has all the required actions to create and publish content.
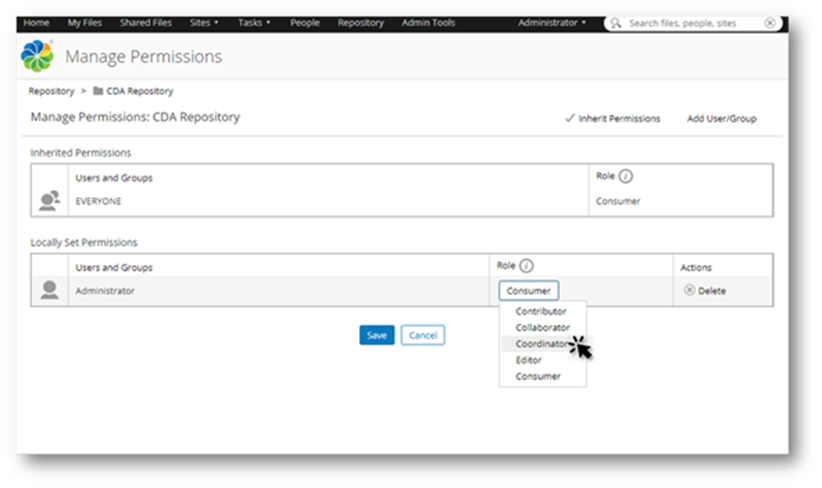
- Click on the Save button to finish.
- Select the Administrator menu and click on the Logout button to close the Alfresco Administrator dashboard.
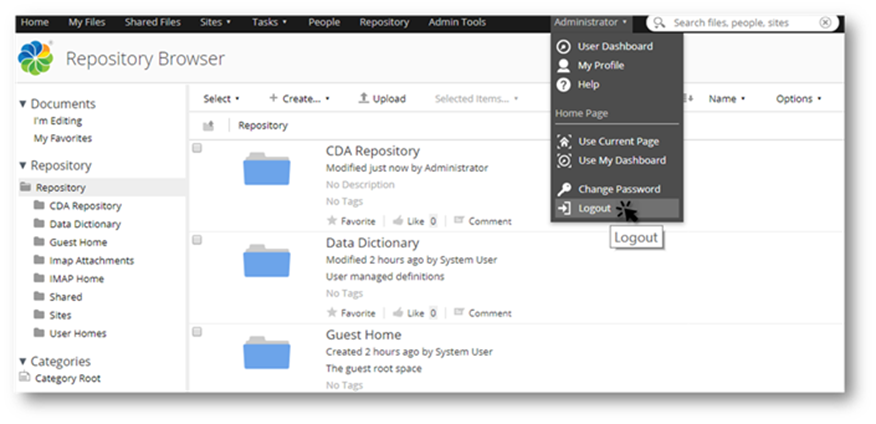
- Close browser.
In this topic