GIRO Header & Alias Installation Guide
This document aims at explaining the installation procedures required to install the GIRO Inbound and outbound bar file for generation of GIRO xml through Inbound flow along with jPTM logging functionality and routing the messages from StandIn to respective StandIn queue.
The scope of the document is to cover the deployment of the bar file of the GIRO Inbound and outbound flow.
System Requirements
The following are the pre-requisites for installing this package.
- UTP 201812.
- IIB version 10.0.0.11 & above.
- Jdk 11.
- WebSphere MQ 8.0 & above.
- T24IIBAdapter-201810.0.0.
- TPH necessary setup for processing the PACS and CAMT xml.
General Considerations
When using another T24 UTP version have the T24IIBAdapter version greater or equal to the version of the UTP.
There are 2 flows in GIRO_Inbound.bar file named: InbMsgFlow and InbMsgFlowOFSRequest.
InbMsgFlow is responsible for adding the header to the PACS or CAMT xml and giving the respective output. This message flow will also form the OFS message and will place the same message in a guard queue, which will be the Inqueue for InbMsgFlowOFSRequest flow.
There is 1 Inqueue and 3 Outqueue for InbMsgFlow. By default the Inqueue name is POR.QUEUE and 1 st Outqueue name for GIRO XML staging response to GIRO is INSTANT.OUT.QUEUE, 2 nd Outqueue name for OFS Request flow is INSTANT.OFS.GUARD.QUEUE and 3 rd Outqueue name for GIRO XML response to StandIN is StandIn.
InbMsgFlowOFSRequest will pick up the message from the guard queue and is responsible to connect to Temenos Transact through the Temenos Transact Outbound adapter and update the PSM.BLOB and PPT.SENTFILEDETAILS application. In case the requirement is not there to update the application, then this message flow can be stopped.
There is 1 Inqueue and 1 Outqueue for InbMsgFlowOFSRequest. By default the Inqueue name is INSTANT.OFS.GUARD.QUEUE and Outqueue name is INSTANT.OFS.RESPONSE.
- To change it to the user defined queues use the following code in the IBM Integration console:
- mqsireadbar -b "<<location-of-bar-file>>" –r
- Make changes in the Properties files of the GIRO_Inbound.
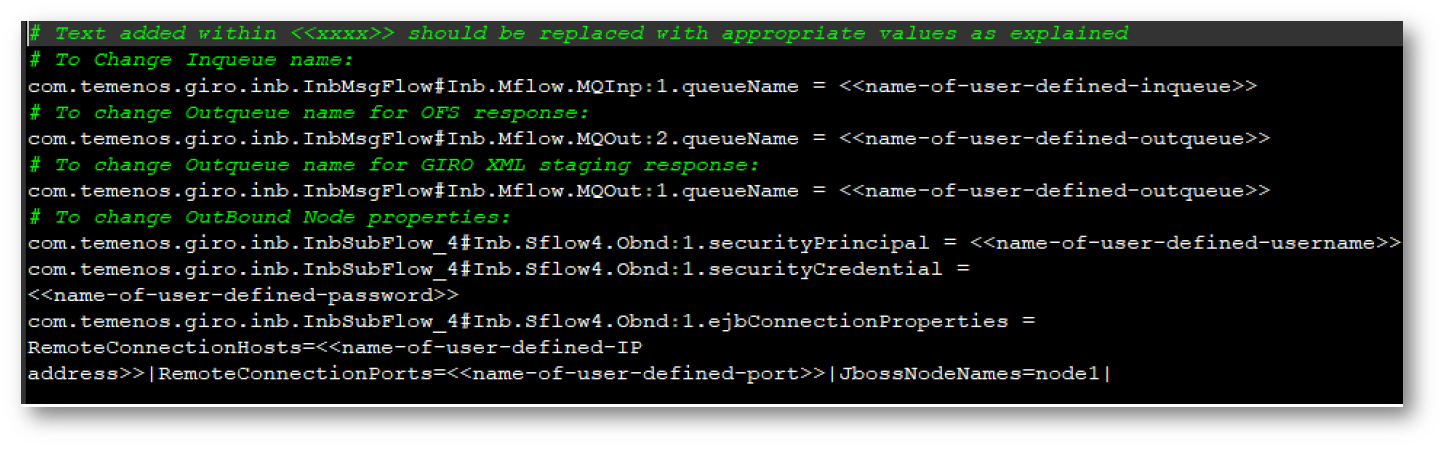
mqsiapplybaroverride -b "<<location-of-bar-file>>" -k GIRO_Inbound -p "<<location-of-Inbound-Properties-file>>"
The Outqueue is named GIRO.ADAPTER.GUARD.QUEUE which acts as a Guard queue for GIRO_InboundPolling BAR file 2 nd InQueue.
The Inbound Adapter Polls out NRINST xml messages and stage the xml message in the outQueue, which will be picked up by GIRO_InboundPolling BAR file for further process.
The Outqueue name of GIRO_InboundAdapterPoll BAR file for Inbound Adapter flow and 2 nd Inqueue name of GIRO_InboundPolling BAR file has to be the same.
- To change it to the user defined queues use the following code in the IBM Integration console:
- mqsireadbar -b "<<location-of-bar-file>>" –r
- Make changes in the Properties files of the GIRO_InboundAdapterPoll.
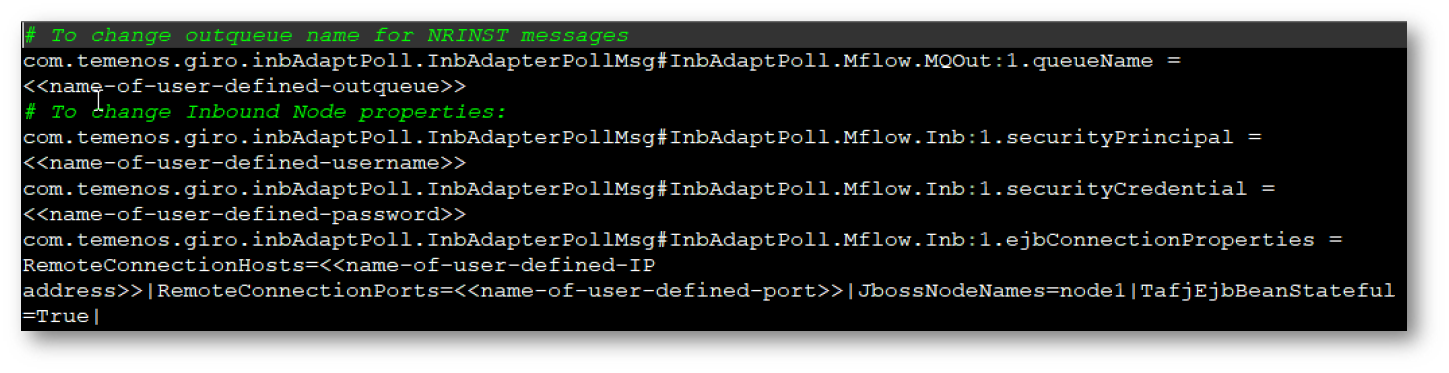
mqsiapplybaroverride -b "<<location-of-bar-file>>" -k GIRO_InboundPolling -p "<<location-of-InboundPolling-Properties-file>>"
The Outqueues are named PRIORITY.INSTANT.QUEUE, NONPRIROITY.INSTANT.QUEUE, NRINSTANT.QUEUE by default to get the IF events from TPH.
The Inqueue that acts as destination queue for Instant Payment Raw xml is named INBOUND.IF.EVENT.QUEUE and another InQueue named GIRO.ADAPTER.GUARD.QUEUE which picks up the InboundAdapter IF events from the Guard OutQueue of the GIRO_InboundAdapterPoll bar file.
- To change it to the user defined queues use the following code in the IBM Integration console:
- mqsireadbar -b "<<location-of-bar-file>>" –r
- Make changes in the Properties files of the GIRO_InboundPolling.
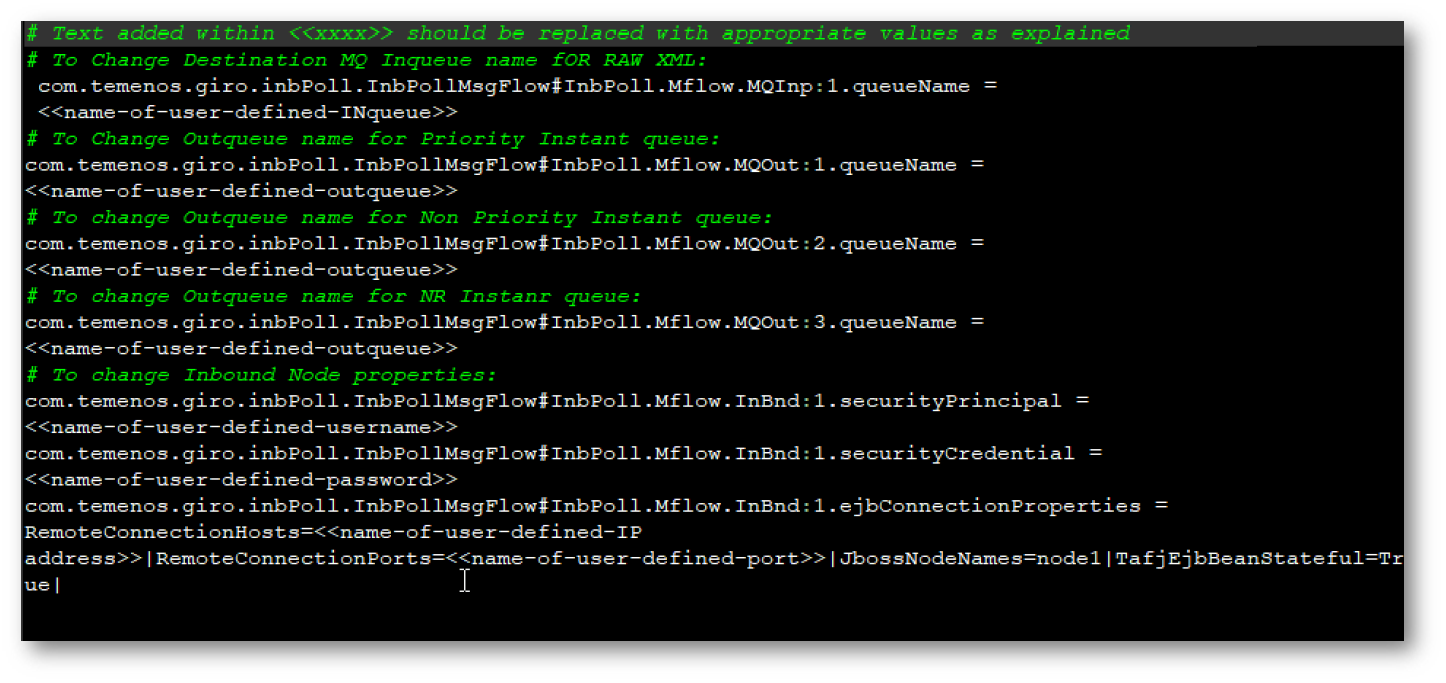
mqsiapplybaroverride -b "<<location-of-bar-file>>" -k GIRO_InboundPolling -p "<<location-of-InboundPolling-Properties-file>>".
There are 2 flows in GIRO_Outbound.bar file named: OutbMsgFlow and OutbMsgFlowToJMS.
The OutbMsgFlow is responsible for removing the header data and forming the TPH generic XML and place the same in the Outqueue.
There is 1 Inqueue and 2 outqueue for OutbMsgFlow. First Outqueue is responsible to have PACS.008 xml and second outqueue stage all other PACS and CAMT xml other than PAS.008. By default the Inqueue is named as Giro.Outbound.Inqueue and 1 st Outqueue is named OUTBOUND.GIRO.JMS.QUEUE and 2 nd Outqueue is named T24.TWS.QUEUE.
OutbMsgFlowToJMS is responsible for sending the XML from OutbMsgFlow to JMS Queue.
The Inqueue is named OUTBOUND.GIRO.JMS.QUEUE by default for OutbMsgFlowToJMS.
- To change it to the user defined queues use the following code in the IBM Integration console:
- mqsireadbar -b "<<location-of-bar-file>>" –r
- Make changes in the Properties files of the GIRO_Outbound.
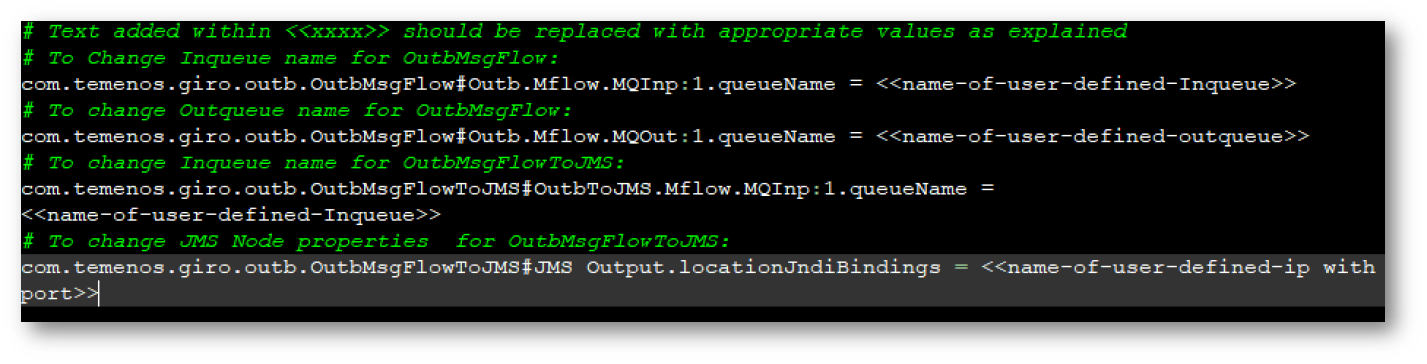
mqsiapplybaroverride -b "<<location-of-bar-file>>" -k GIRO_Outbound -p "<<location-of-Outbound-Properties-file>>".
There are 2 flows in GIRO_OutboundStandIN.bar file named: OutbStdInMsgFlow and OutbStdInMsgFlowToJMS.
OutbStdInMsgFlow is responsible for removing the header data and forming the TPH generic XML and place the same in the Outqueue.
There is 1 Inqueue and 2 outqueue for OutbStdInMsgFlow. First Outqueue is responsible to have PACS.008 xml and second outqueue stage all other PACS and CAMT xml other than PAS.008. By default the Inqueue is named as Giro.StandInOutbound.Inqueue and 1 st Outqueue is named STANDINOUTBOUND.GIRO.JMS.QUEUE and 2 nd Outqueue is named STANDIN.T24.TWS.QUEUE.
OutbStdInMsgFlowToJMS is responsible for sending the XML from OutbStdInMsgFlow to JMS Queue.
The Inqueue is named STANDINOUTBOUND.GIRO.JMS.QUEUE by default for OutbMsgFlowToJMS.
- To change it to the user defined queues use the following code in the IBM Integration console:
- mqsireadbar -b "<<location-of-bar-file>>" –r
- Make changes in the Properties files of the GIRO_OutboundStandIN.
mqsiapplybaroverride -b "<<location-of-bar-file>>" -k GIRO_OutboundStandIN - p "<<location-of-Outbound-Properties-file>>"
- Catch handler mechanism logs the error both in Local user trace and in the local file system. Change the directory and file name properties of the local directory using the commands below.
- Use the command below to change Outqueue name for ERROR handling response of GIRO_Inbound BAR.
- mqsiapplybaroverride -b "<<location-of-bar-file>>" -k GIRO _Inbound -m “com.temenos.giro.inb.InbSubFlow_5#Inb.Sflow5.MQOut:1.queueName= <<name-of-user-defined-outqueue>>”
- Use the command below to change Outqueue name for ERROR handling response of GIRO_Outbound BAR:
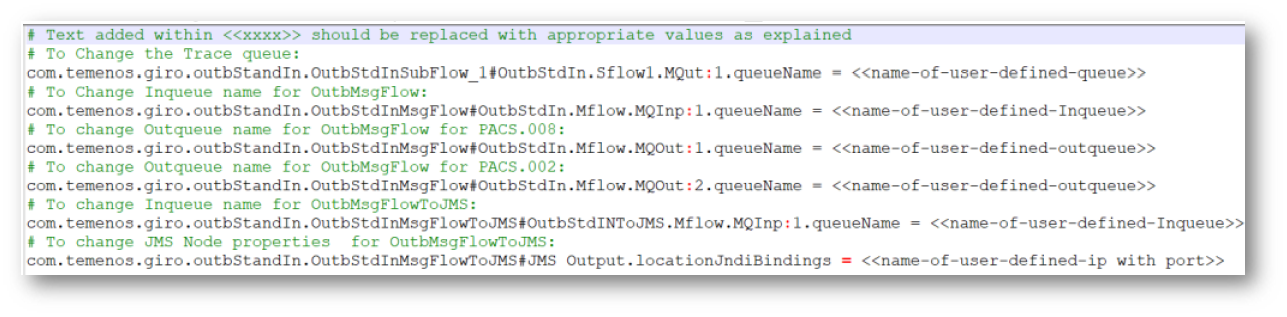
- mqsiapplybaroverride -b "<<location-of-bar-file>>" -k GIRO _Outbound -m “com.temenos.giro.outb.OutbSubFlow_1#Outb.Sflow1.MQut:1.queueName= <<name-of-user-defined-outqueue>>”
Text added within <<xxxx>> should be replaced with appropriate values as explained.
Contents of the Package
IIB Components:
- GIRO_Inbound.bar.
- GIRO_Outbound.bar.
- GIRO_OutboundStandIN.bar.
- GIRO_InboundPolling.bar.
- GIRO_InboundAdapterPoll bar.
Steps for Deploying the Bar File
Follow the steps below to deploy the bar file.
Placement of Log4j, PPINST_InstantOutwardXML and JPTM JAR file at IIB workpath
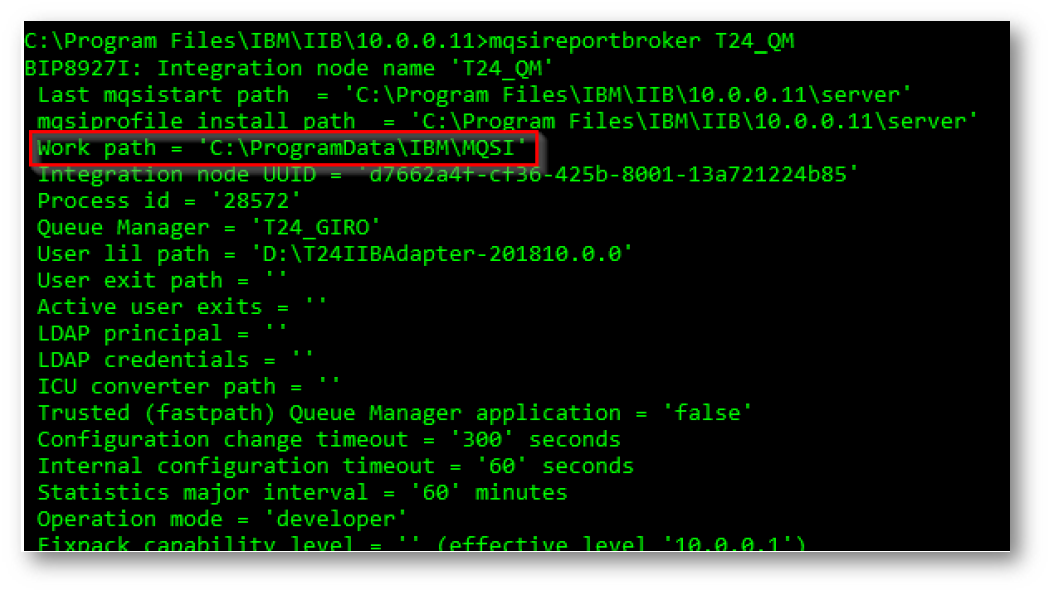
- The Log4j, JPTM and PPINST_InstantOutwardXML JAR files has to be placed at IIB WORKPATH which can be know through the below command in IIB console: mqsireportbroker <<broker-name>>.
- Navigate to the below folder directory in IIB workpath: <<workpath-of-IIB>>\MQSI\config\<<broker-name>>\shared-classes.
- Place the log4j, PPINST_InstantOutwardXML and JPTM JAR files in the directory.
- Restart the broker.
Placement of Log4j properties file.
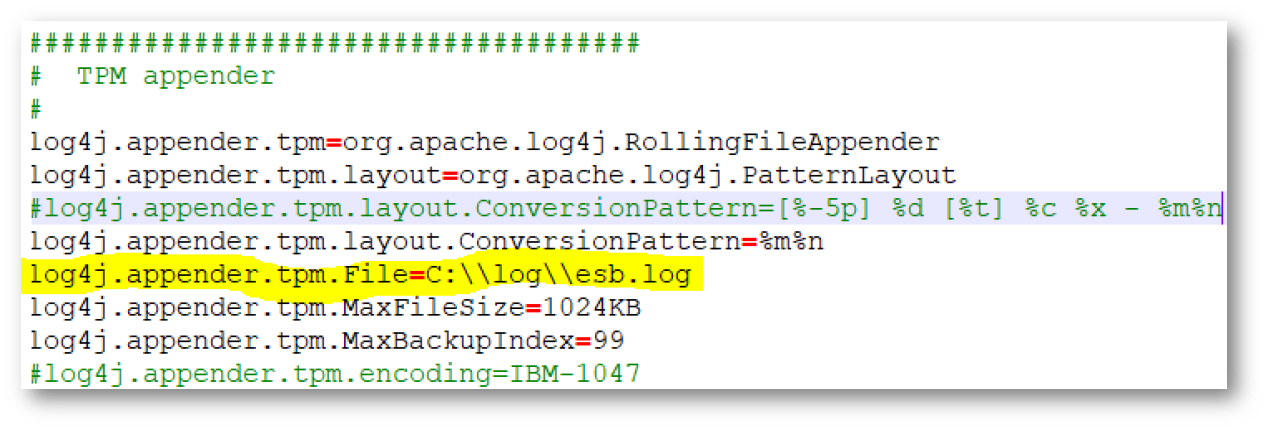
- The properties file “log4j.properties” needs to be placed at: <<workpath-of-IIB>>\MQSI\common\wsrr.
- The location of Log file needs to be specified in the “log4j.properties” file.
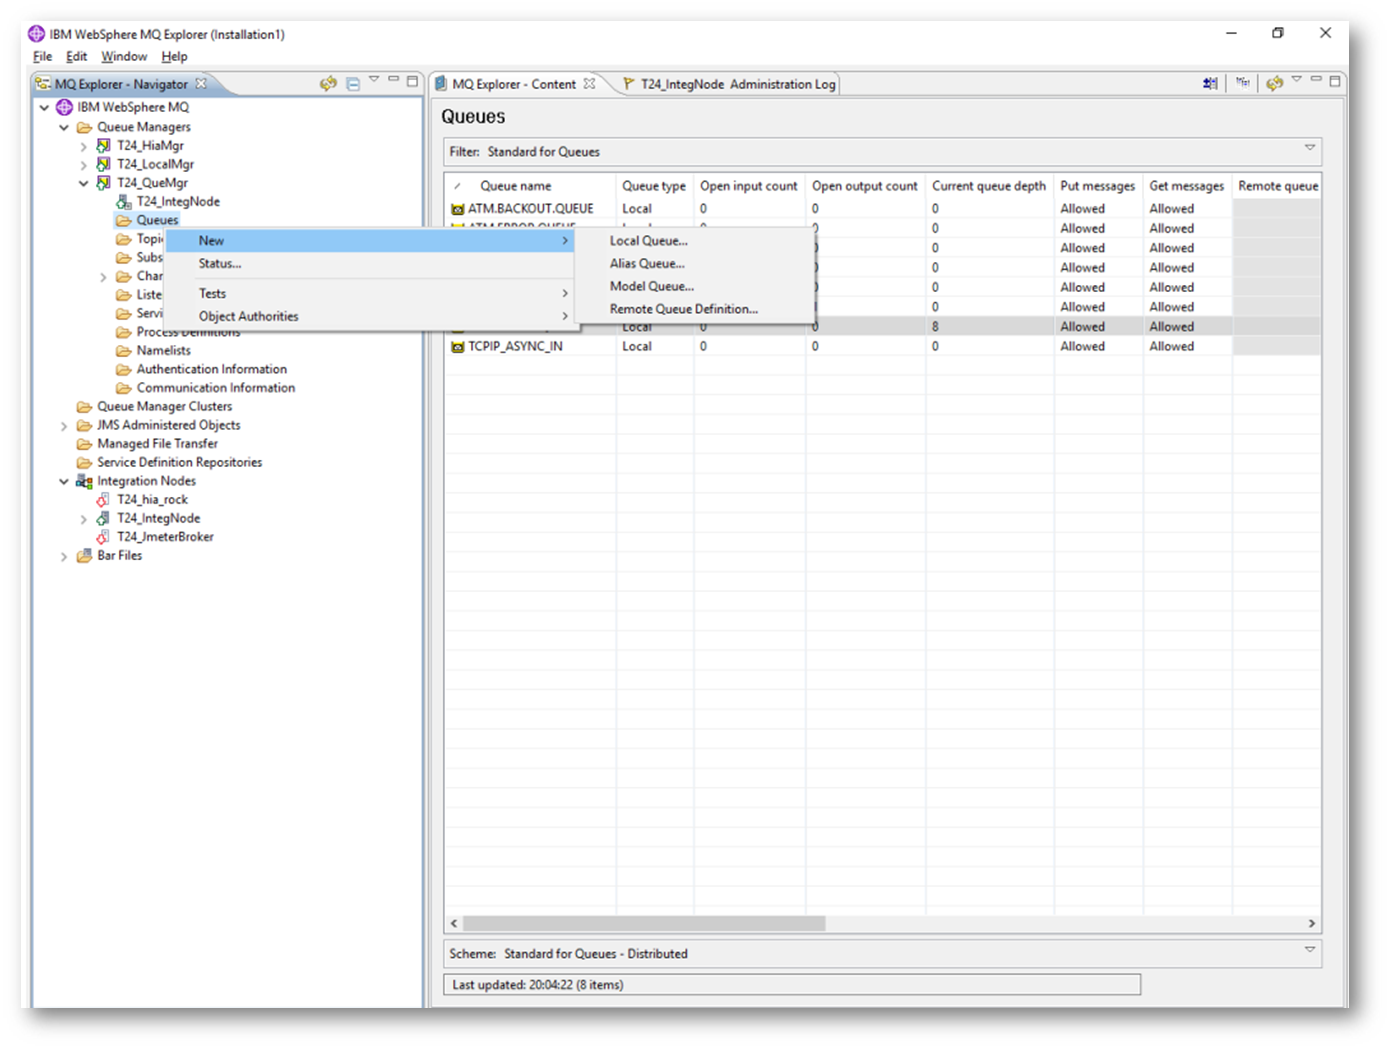
Creation of Broker,Queue Manager, Inqueue and Outqueue.
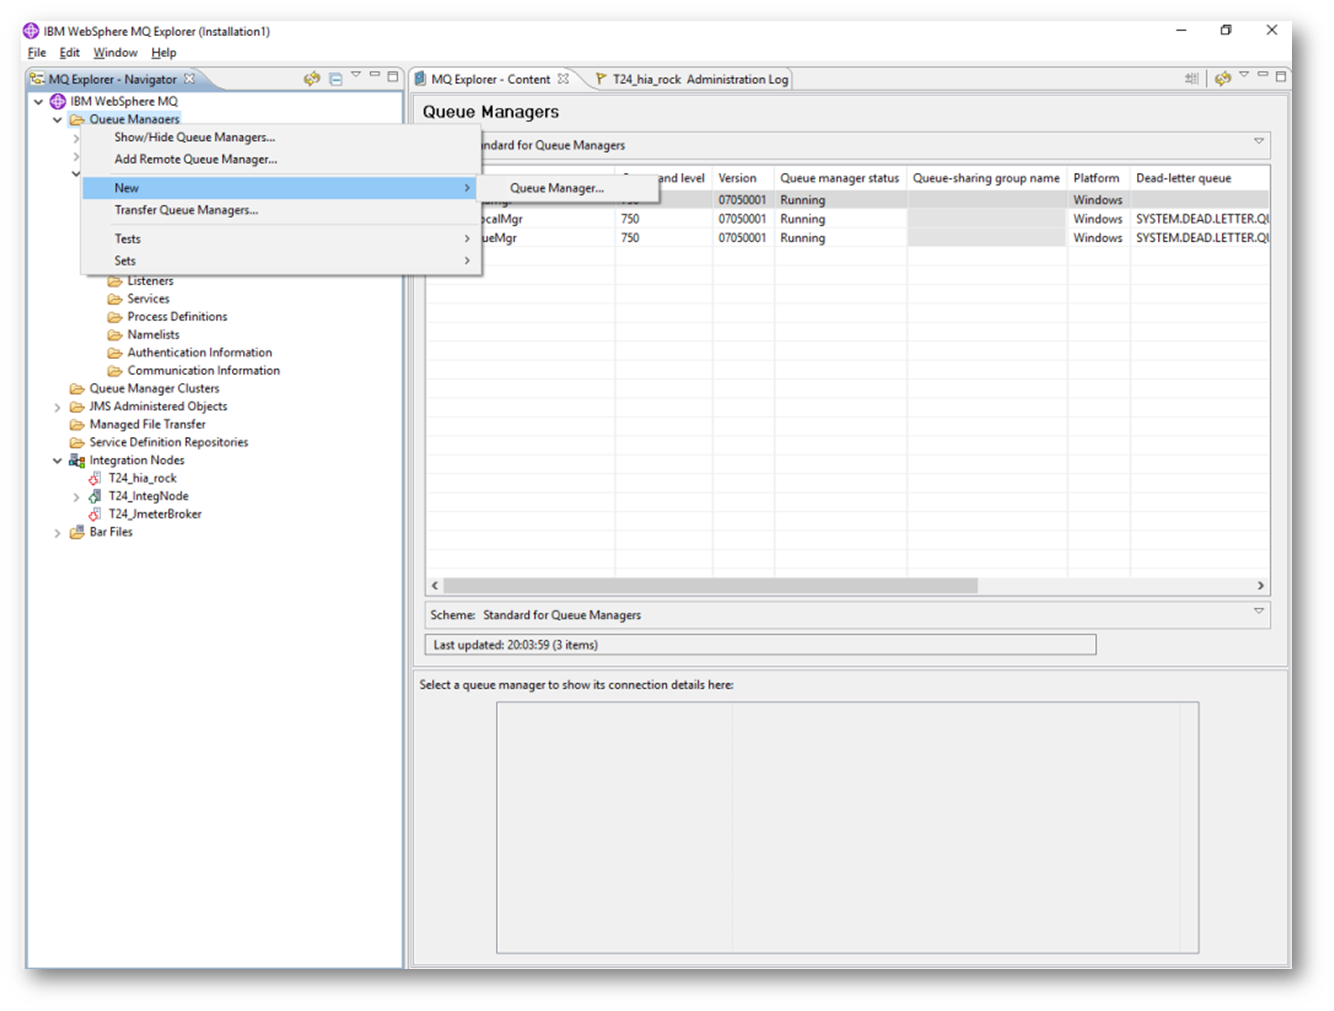
- Create a Queue Manager in the Websphere MQ.
- Create a Broker in IIB console windows: mqsicreatebroker “<<Broker Name>>” -i LocalSystem -q <<Queue Manager Name>>.
- Create local Inqueue and Outqueue in the Websphere MQ.
- Make sure Payment Polling application are not deployed in the Integration so that there is no confusion among the GIRO bar and TPH bar to poll the xml from the EXIT events.
- Upon successful creation of Integration Node and Queue Manager, Temenos TransactIIB Adapter should be configured at IIB node level (using MQSICHANGEBROKER command to set the .PAR file for that particular broker). Sample command given below to setup Temenos TransactIIB adapter for runtime.
- Mqsichangebroker <<Integration_node_name>> -l “<<path-where-par-file>>”
Deployment Steps
Follow the steps below to deploy the Bar file.
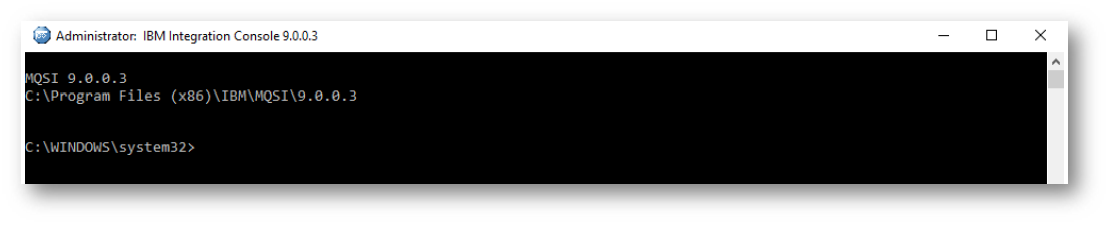
- Open the IBM Integration Console 10.0.0.11.
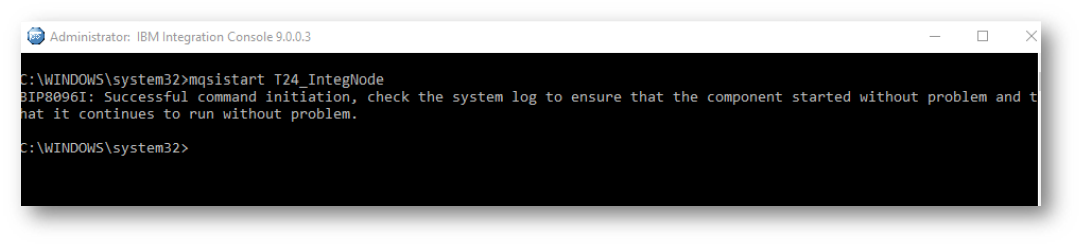
- Start the Broker with the command:
mqsistart “<<brokername>>”.
- Deploy the GIRO_Inbound and GIRO_Outbound bar file with the following command:
mqsideploy “<<Broker-name>>” –e “<<execution-group-name>>” –a “<<bar-file- location>>”.

- To verify the deployed BAR file and the properties, please run the below command:
mqsireadbar –b "$BARFILELOCATION/GIRO_Inbound.bar" –r
mqsireadbar –b "$BARFILELOCATION/GIRO_Outbound.bar" –r
Post-Deployment Steps
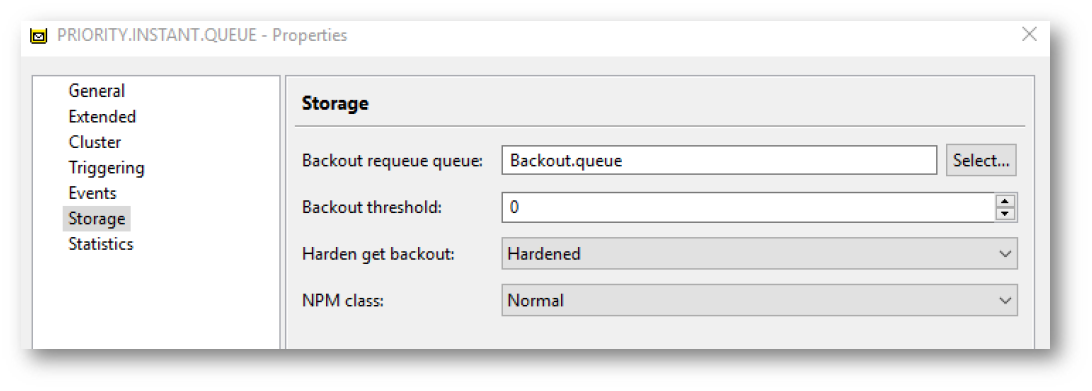
The Queue created has to be associated with back out queue so that in case of message failure the xml is not lost and gets staged in the BACKOUT queue.
- Kindly use the previous GIRO_Inbound.bar and GIRO_Outbound.bar file having all the previous properties changes made.
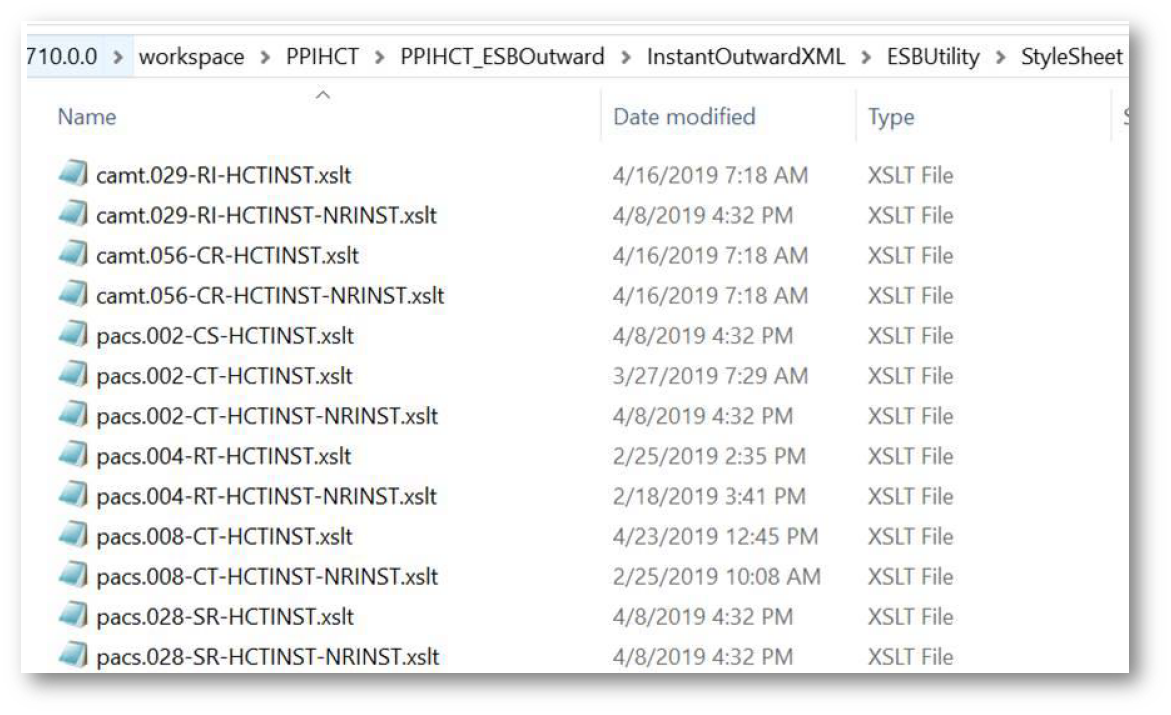
- Name of L1 Outbound XSLT’s:
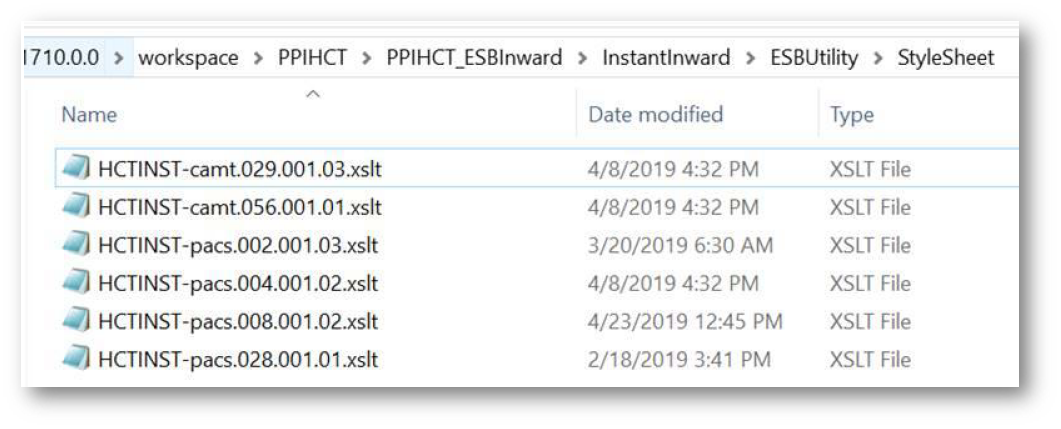
- Name of L1 Inbound XSLT’s:
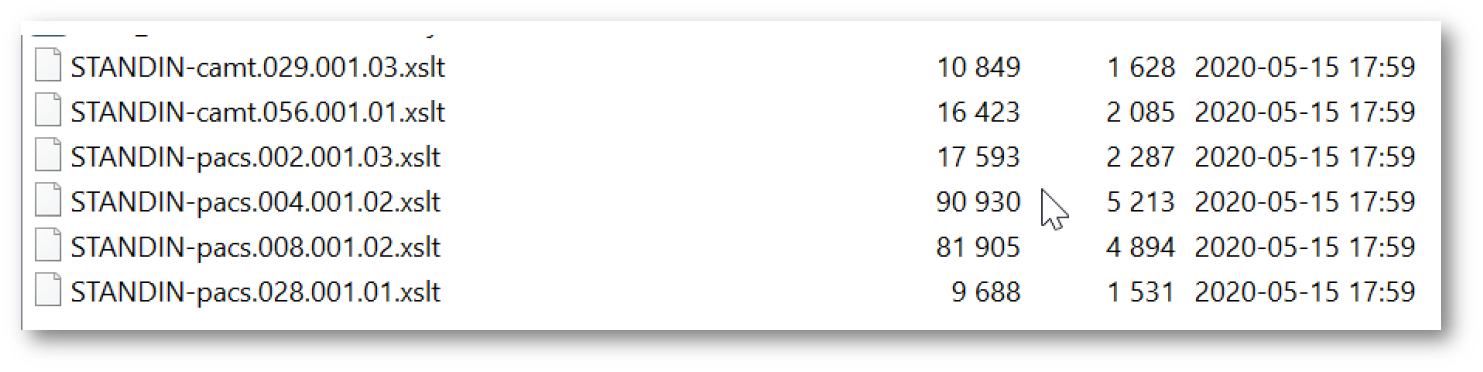
- Name of L1 OutboundStandIN XSLT’s:
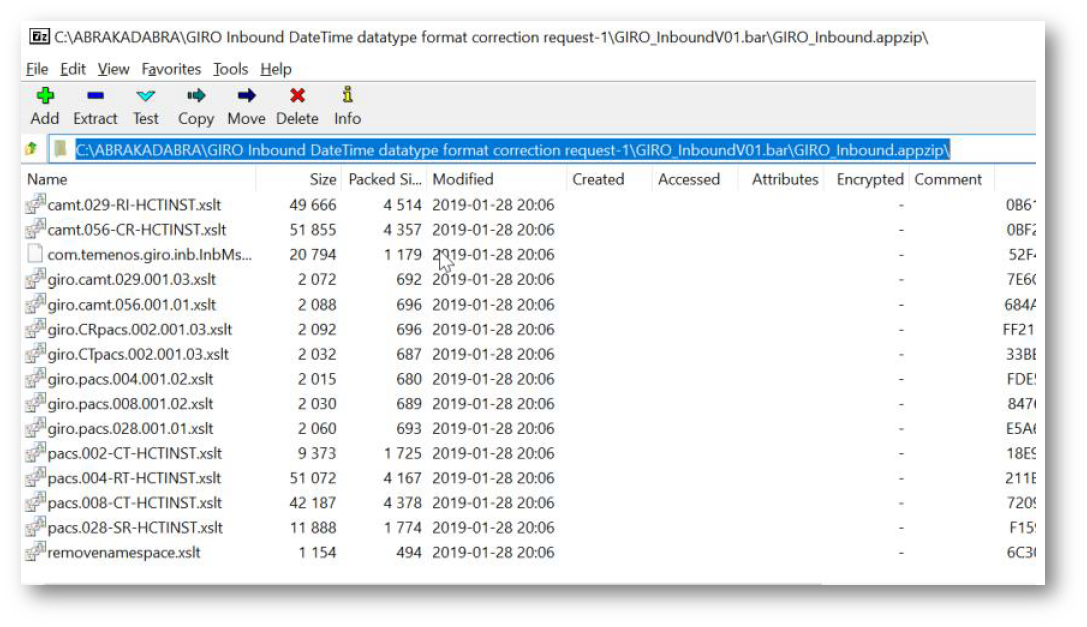
- Open the Bar file in archive and navigate to location as shown below and only place all the XSLT as shown in 3 point in the said location:
<<path-tobar-file>>\GIRO_InboundV01.bar\GIRO_Inbound.appzip\
- Open the Bar file in archive and navigate to location as shown below and only place all the XSLT as shown in 2 point in the said location:
<<path-tobar-file>>\GIRO_OutboundV01.bar\GIRO_Outbound.appzip\

- Replace the pacs XSLT file in the location above with the XSLT file received from the L1 as mentioned in 2 and 3 points.
Configuring the System
For configuring Temenos Transact Adapter in AppServer and IBM Integration Bus go here.
Temenos Transact IIB Adapter should be part of Integration Framework (Technology).
For internal Temenos use, go here to download the 201810 IIB Adapter:
The R18 Adapter can be downloaded from here.
In this topic