Guides
R24 AMR | Min(s) read
Installing DES on OpenShift
This section explains the steps to install DES on OpenShift.
To install DES on OpenShift,
- Run the below command from the developer’s command line application to login to OC.
oc login –token=sha256~16fE_oS1ASiURrP7sq5ZEjqpbo0XB-THHDHCBBSrQjM –server=https://api.ocp.mehmail.loc:6443

- Run the below command to create DES project.
oc new-project reh-des

- Run the below command to install the Helm charts.
helm install des ./helm/des_chart

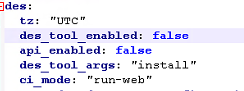
After the first Helm installation, change the value of the des_tool_enabled parameter from ‘true’ to ‘false’ in the values.yaml file as shown in the below screen shot.
- Run the below command to check if the pods are installed.
oc get pods

- Ensure that the following pods have their status as ‘Running’,
- des-config-installer
- des-event-cleanup
- des-event-processor
- des-event-pull-adapter
- des-event-router
- Ensure that the des-tool pod has its status as ‘Completed’.
- Invoke the DES or meta or health API to ensure the status of the pods.


In this topic