Install Live Content Management System (CMS)
Please find below the Installation Guide for Live Content Management System (CMS).
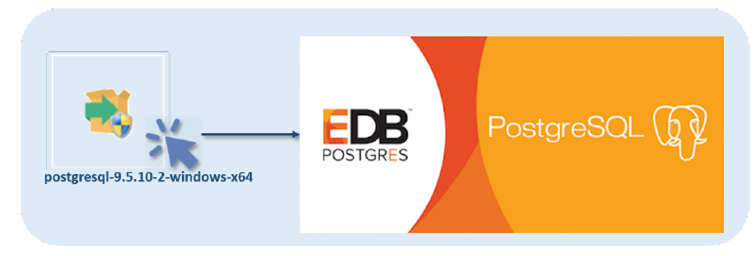
Install PostgreSQL
The following steps show you how to install PostgreSQL.
- Click the Installer EXE file to start the PostgreSQL Installer.
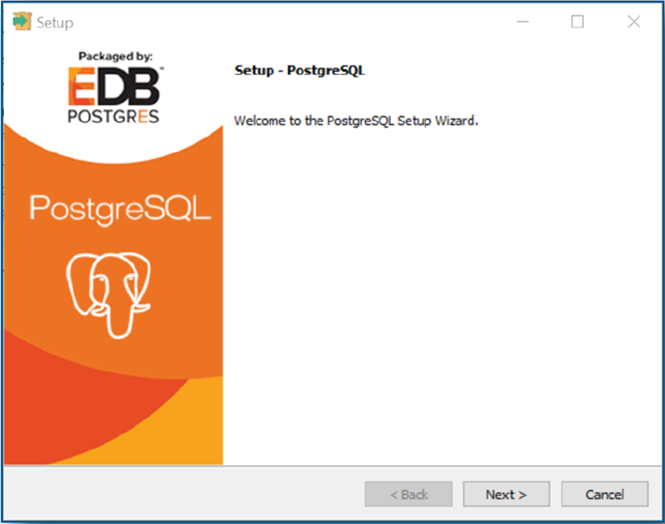
- The Welcome Screen is displayed.
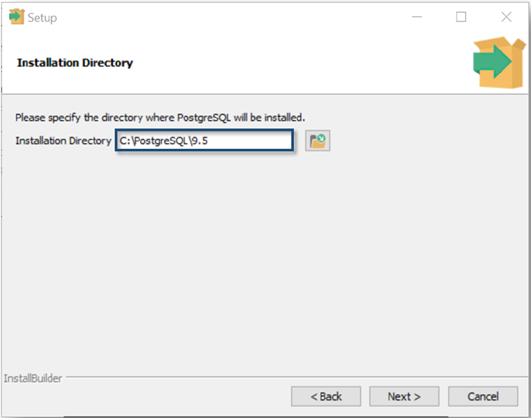
- After you click Next button the Installation Directory Screen is displayed.
-
Remove “Program Files\” from Installation Directory Path. (This simply makes PostgreSQL easier to find).
C:\Program Files\PostgreSQL\9.5
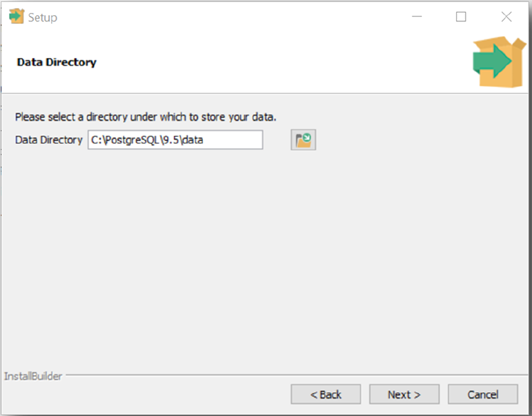
- Click Next button. The Data Directory Screen is displayed.
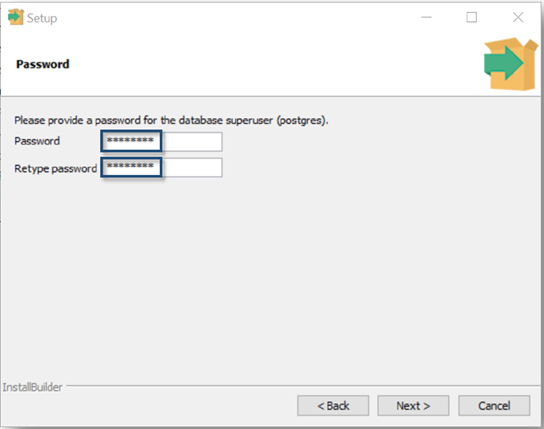
- Click Next button. The Password Screen is displayed.
- Enter Password.
alfresco
-
Enter Retype password.
alfresco
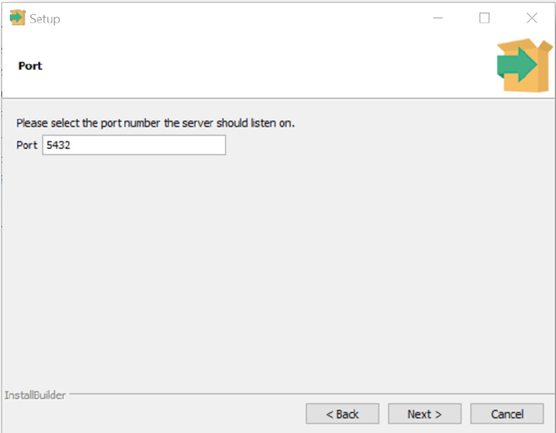
- Click Next button. The Port Screen is displayed.
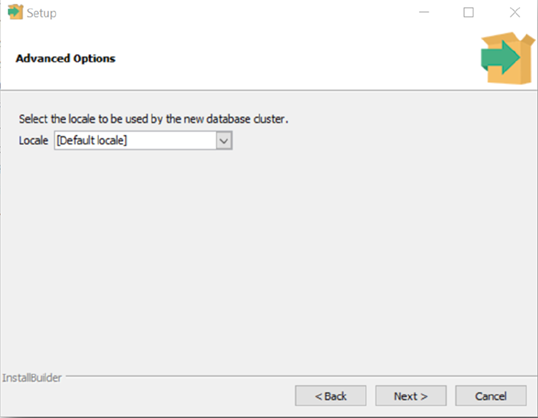
- Click Next button. The Advanced Options Screen is displayed.
- Click Next button. The Ready to Install Screen is displayed.
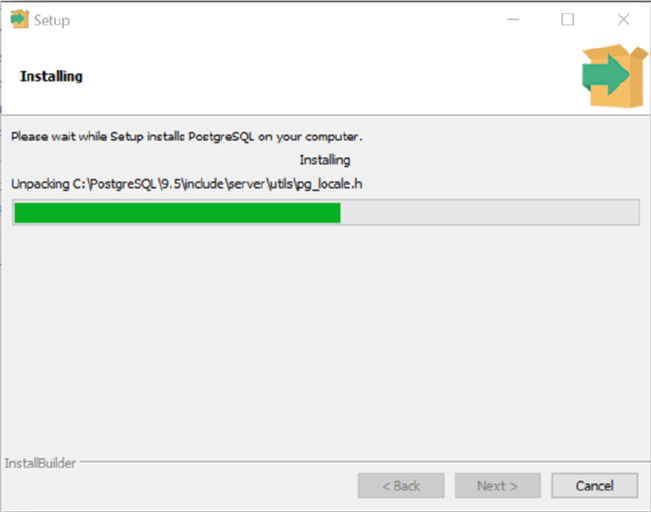
- Click Next button. The Installing Screen is displayed.
- The Install Complete Screen is displayed.
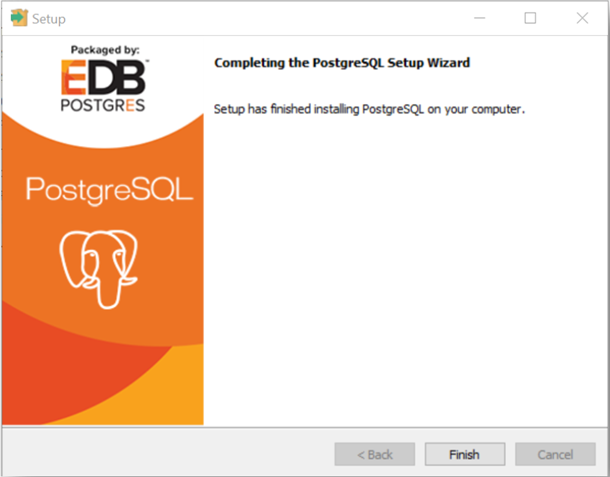
- Click Finish button.
Set PostgreSQL Maximum Connections for Alfresco
The following steps show you how to edit the PostgreSQL max_connections property to prepare PostgreSQL for use with Alfresco.
- Open Windows Explorer.
- Navigate to folder.
C:\PostgreSQL\9.5\data
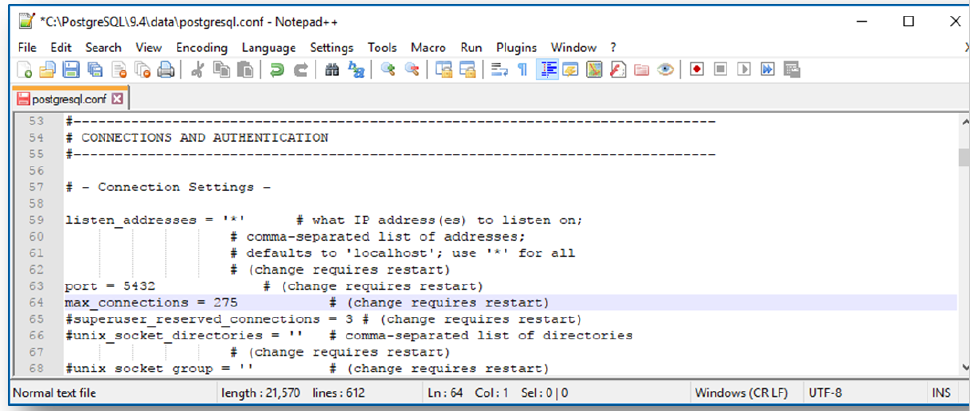
- Right-click postgresql.conf » Edit with Notepad++.
- Edit property max_connections.
275
- Select File menu > Save.
- Select File menu > Exit to close Notepad++.
- Close Windows Explorer.
To force this change to take effect we just need to restart the PostgreSQL Windows Service.
- Select Start Button > Control Panel > Administrative Tools > Services.
- Right-click postgresql-x64-9.4 Windows Service > Restart.

- Close Services window.
- Close Administrative Tools window.
- Close Control Panel window.
Add a Alfresco Database and User
The following steps show you how to use the PostgreSQL pgAdmin III application to add a Database and User for use with Alfresco.
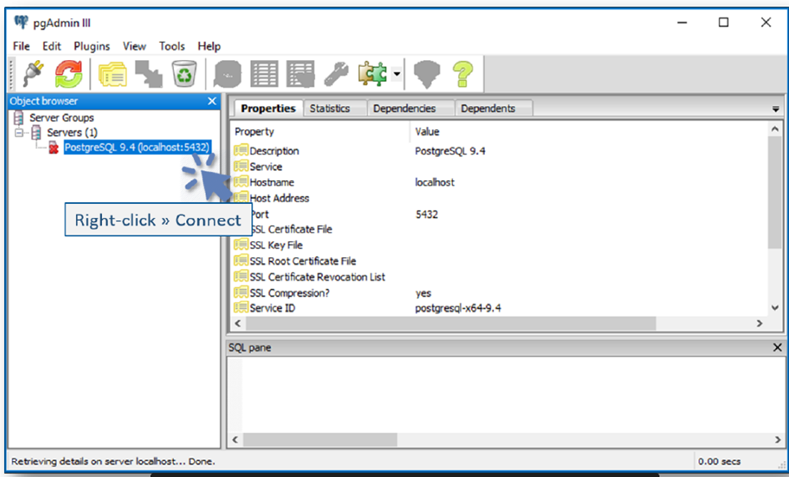
- Start pgAdmin III application.
Windows Start Button > All Programs > PostgreSQL 9.5 > pgAdmin III
- Right-click Server PostgreSQL 9.5 (localhost:5432) > Connect.
- The Connect to Server dialog is displayed.
- Enter Password.
alfresco
- Mark Store password.
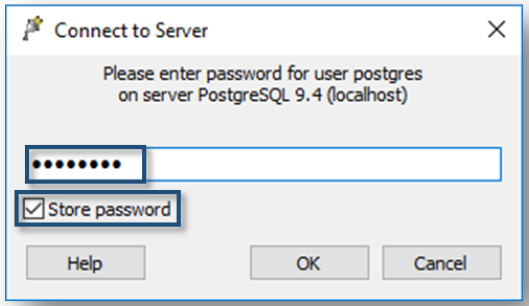
- Click OK. A Guru Hint dialog may be displayed.
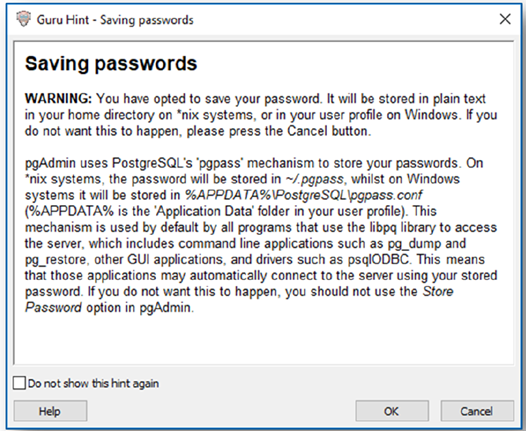
- Click OK.
- Right-click Login Roles > New Login Role.
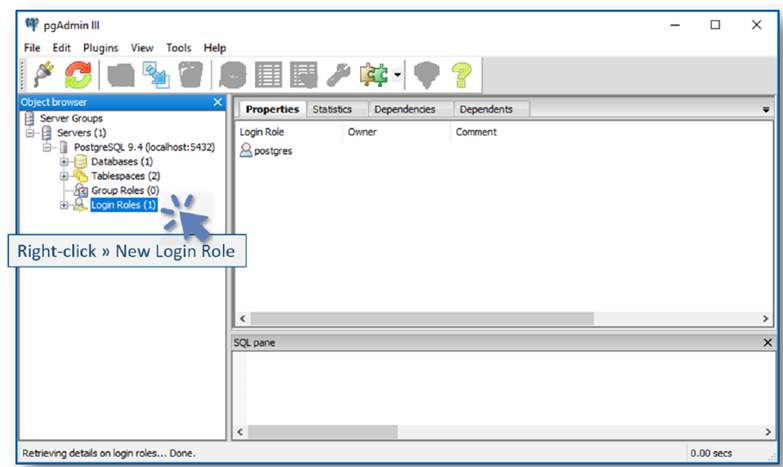
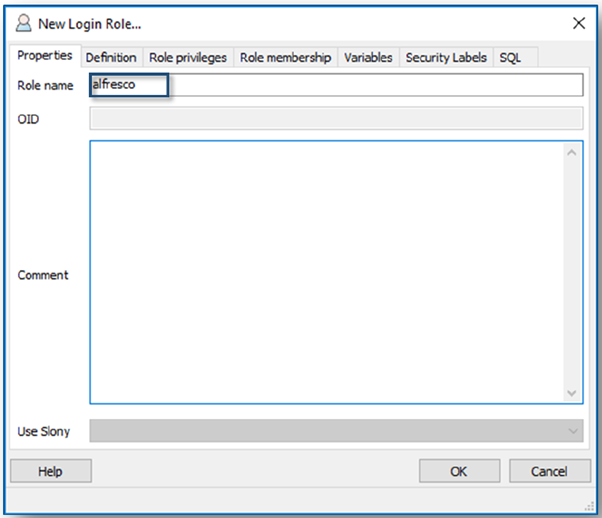
The New Login Role dialog is displayed.
- Enter Role Name.
alfresco
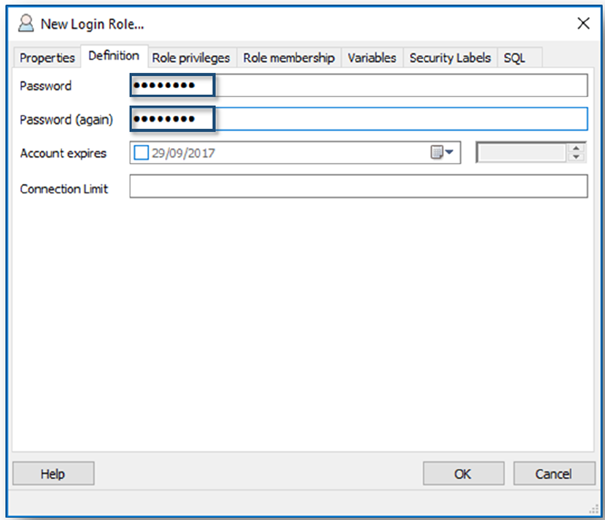
- Select Definition tab.
- Enter Password.
alfresco
- Enter Password.
alfresco
- Select Role privileges tab.
- Mark Superuser
- Mark Can create databases
- Mark Can create roles
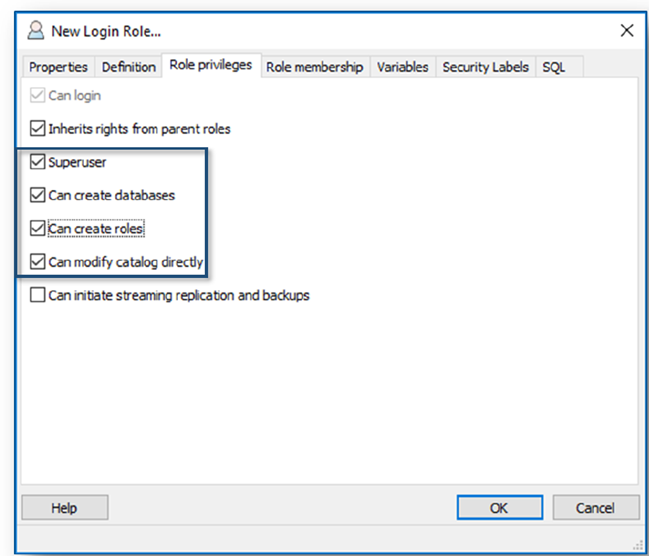
- Click OK to close the New Login Role dialog. The pgAdmin III application is displayed. We can then add a new Database and assign it to the User.
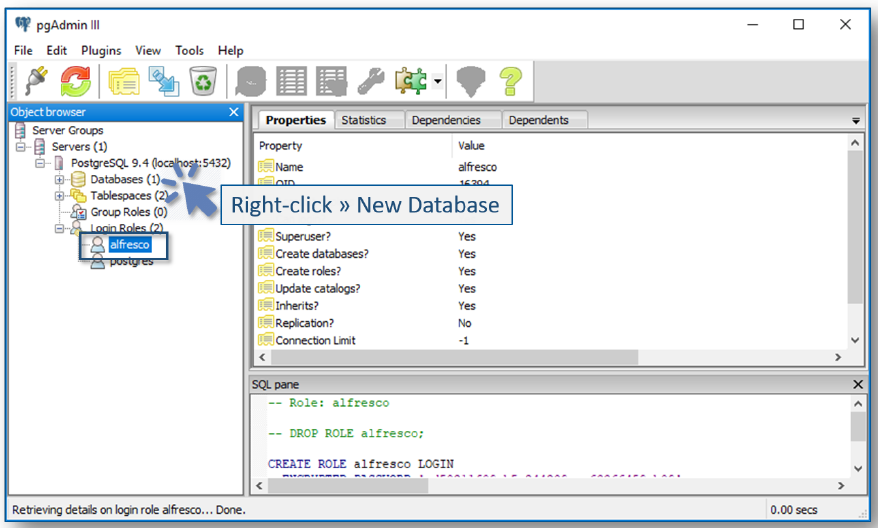
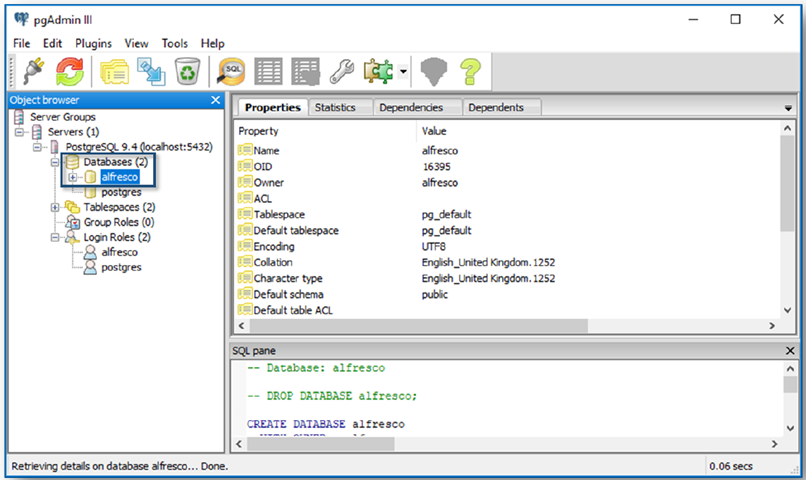
- Confirm that the new User (or Login Role) exists.
alfresco
- Right-click Databases > New Database.
The New Database dialog is displayed.
- Enter (Database) Name.
alfresco
- Select Owner.
alfresco
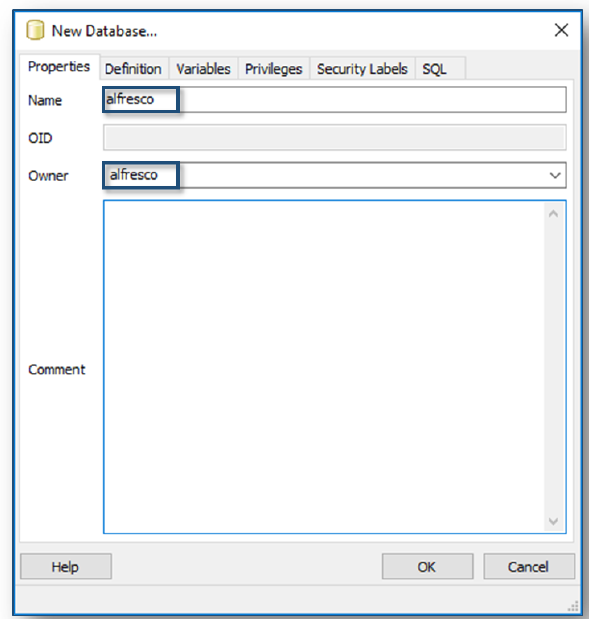
- Click OK to close the New Database dialog. The pgAdmin III application is displayed.
- Confirm that the new Database exists.
alfresco
- Select File menu > Exit.
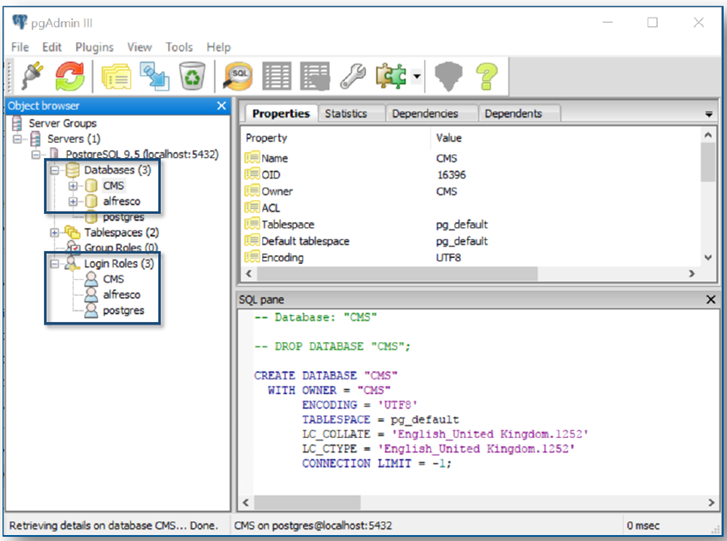
Add a CMS Database and User
An additional Database/User also need to be added to support CMS:
- User: CMSRole: Superuser (Can create databases and can create roles).
- Database: CMSOwner: CMS
Install PostgresSQL Driver in Temenos UXP
For Temenos UXP to be able communicate with the PostgresSQL database a suitable driver must be added to the UXP Library and a reference to the file needs to be added to the Developer LAX configuration.
If you are following the course in a Training Classroom or as Self-study, you will find the necessary JAR find in your Student Course Materials. If you are building your environment you will able to easily download the appropriate driver for the Java version from the https://jdbc.postgresql.org/download.html
The PostgreSQL Database Driver for the 6.2 Release working with Java 1.8+.
When you click to save the file it is saved as a .jar file with the file name: postgresql-42.2.2.jar.
Once you have downloaded and located the file of your system you should now:
- Copy the postgresql-42.2.2.jar to the following location:
C:\UXP\UXP6_2_1_0\lib\
- Locate the Developer.lax file in the following location:
C:\UXP\UXP6_2_1_0\IDE\
- Edit the Developer.lax file and add the following reference at the end of the #LAX.CLASS.PATH section:
/../lib/GCL.jar;lax.jar;../lib/postgresql-42.2.2.jar;
- Save the File and Exit the Editor.
You are now ready to install Alfresco which is an example of a typical CMS system.
Community Installer
The Alfresco Community Installer is a wizard-oriented application that allows you to install all the Temenos UXP requirements to run Live CMS.
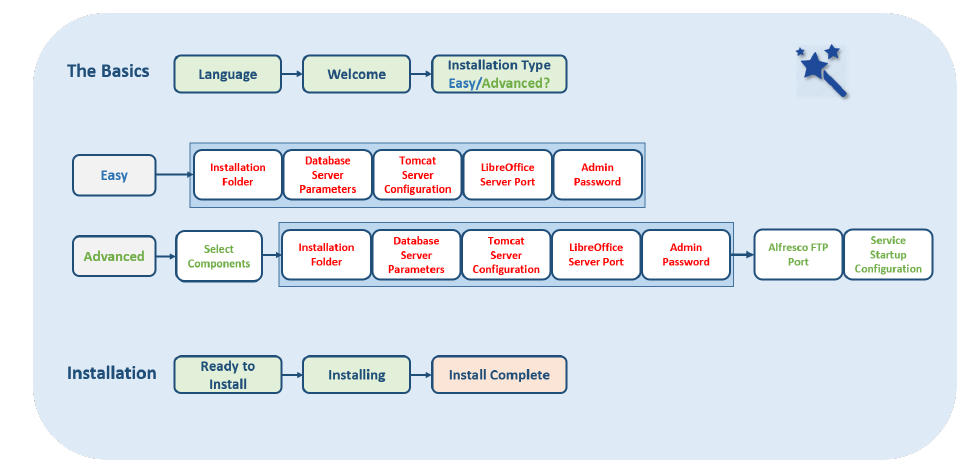
- Language: Select the installation language.
- Welcome: Displays “Welcome to the Alfresco Community Setup Wizard”.
- Installation Type: Select either ‘Easy’ or ‘Advanced’ setup process.
- Installation Folder: Select the installation folder.
- Database Server Parameters: Enter the database port number.
- Tomcat Port Configuration: Enter your Tomcat configuration parameters.
- LibreOffice Server Port: Enter the port that the LibreOffice will listen to.
- Admin Password: Specify a password for the Alfresco administrator account.
- Select Components: Select the components that you want to install.
- Installation Folder: Select the installation folder.
- Database Server Parameters: Enter the database port number.
- Tomcat Port Configuration: Enter your Tomcat configuration parameters.
- LibreOffice Server Port: Enter the port that the LibreOffice will listen to.
- Alfresco FTP Port: Choose a port number for the integrated Alfresco FTP server.
- Admin Password: Specify a password for the Alfresco administrator account..
- Server Setup Configuration: Select the services startup type.
- Ready to Install: Setup is now ready to begin installing Alfresco.
- Installing: Shows the progress of the installation.
- Install Complete: Shows that the installation has been completed.
Click the Installer EXE file to start the Alfresco Community Installer.
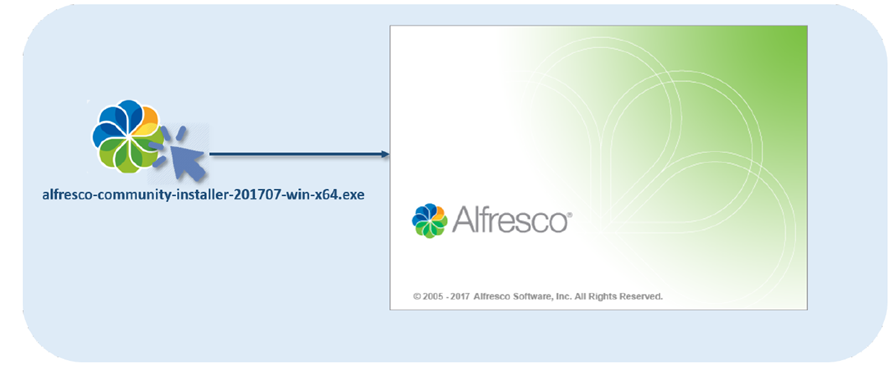
Make sure that you have the correct Alfresco Community Installer!
- What version do you have? The FEAtures Learning Platform currently uses Alfresco Community Installer alfresco-community-installer-201707- win-x64.exe.
- Does your computer have a 32-bit or 64-bit platform? You can install Alfresco on computers that have 32-bit and 64-bit platforms.
The Alfresco Community Installer is a wizard- oriented application that allows you to install Alfresco; an enterprise content management system that UXP Live CMS uses to manage live content.
Buttons located at the bottom of each screen enable navigation.
Next Screen Back to previous Screen Cancel installation.
Language Selection Dialog
The Language Selection Dialog allows you to select the installation language.
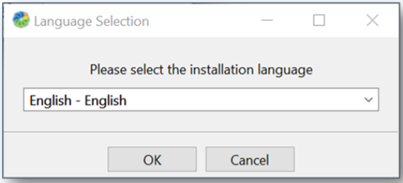
You can set the following options.
- Language List: Select the required Language.
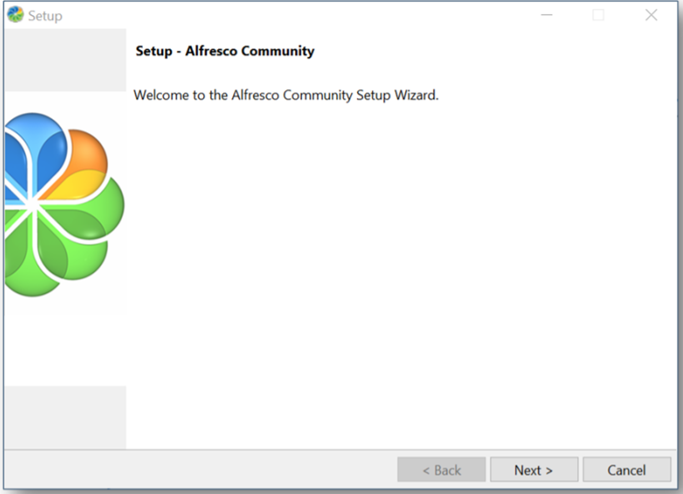
Welcome Screen
The Welcome screen displays a welcome message.
Installation Type Screen
The Installation Type screen allows you to choose how you want to use the setup wizard.
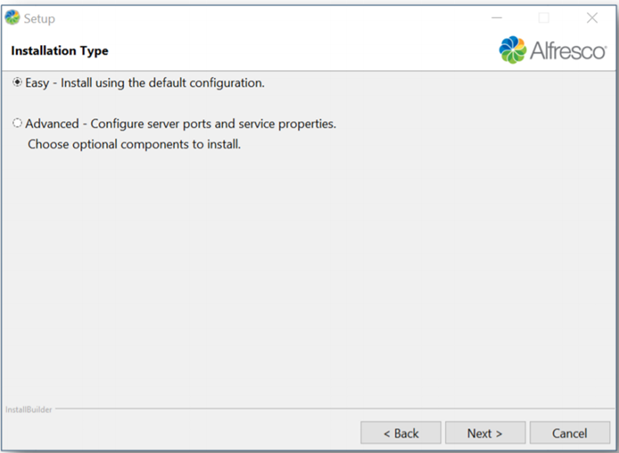
You can set the following options.
- Easy: Install Alfresco using default configuration settings.
- Advanced: Manually select server port numbers, service properties and third-party components before installing Alfresco.
Installation Folder Screen
The Installation folder screen allows you to select the Alfresco target installation folder.
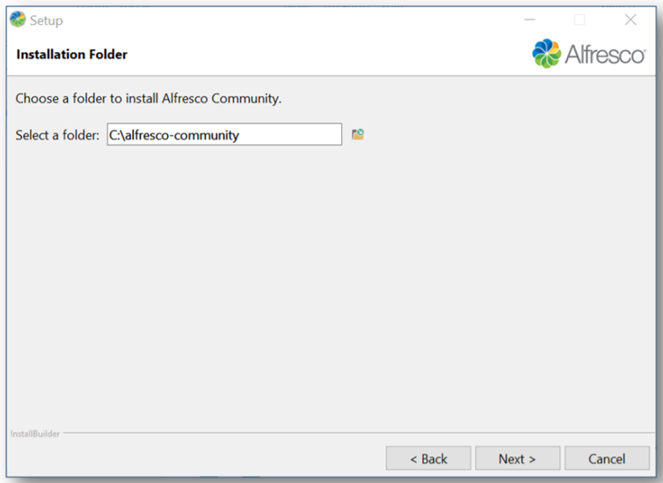
You can set the following options.
- Select a Folder: Click to display a Browse for Folder Dialog that allows you to select an installation folder.
The installation folder path must not contain space characters.
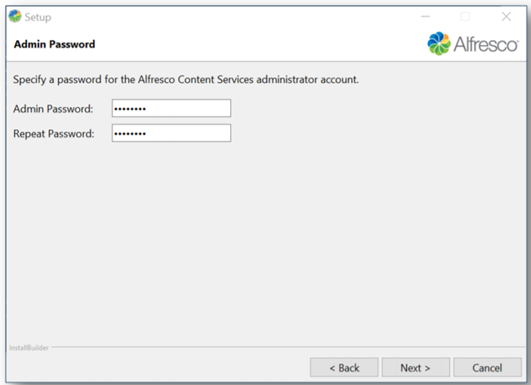
Admin Password Screen
The Admin Password screen allows you to specify a password for the Alfresco administrator account.
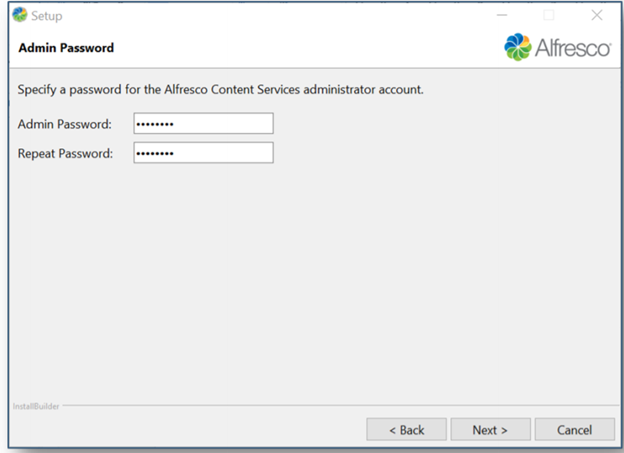
You can set the following options.
- Admin Password: Enter a password for the Alfresco administration account.
- Repeat Password: Repeat the password.
The password must be at least 3 characters long.
Ready to Install Screen
The Ready to Install screen informs you that the setup is ready to install Alfresco Community on your computer.

Installation Type Screen
The Installation Type screen allows you to choose how you want to use the setup wizard.
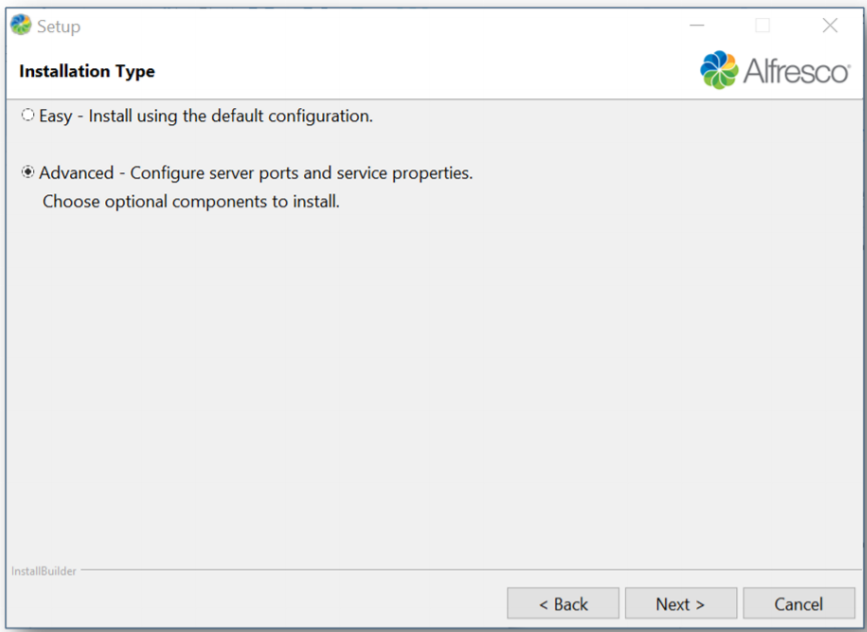
You can set the following options.
- Advanced: Manually select server port numbers, service properties and third-party components before installing Alfresco.
Select Components Screen
The Select Components screen allows you to select the components you want to install and clear the components youdon’t want to install.
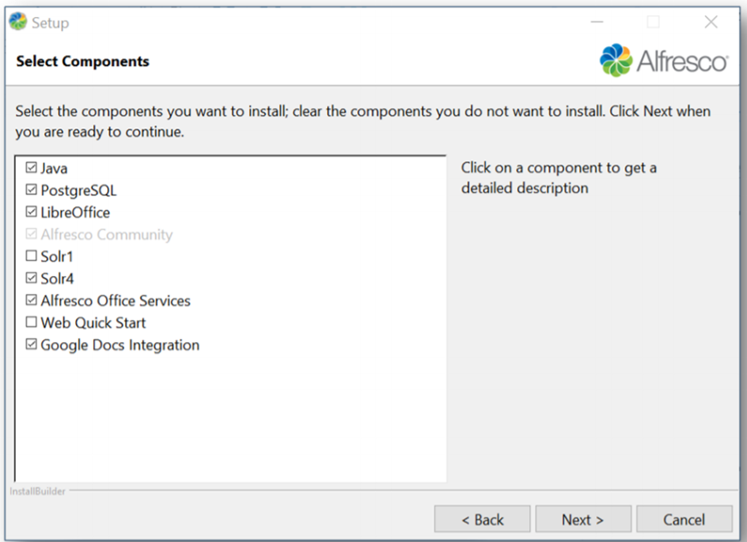
You can set the following options.
- Java - install JRE only.
- PostgreSQL- install PostgreSQL.
- LibreOffice - install LibreOffice.
- Solr1 - install Solr1 (only required for compatibility to older versions of Alfresco).
- Solr4 - install Solr4.
- Alfresco Office Services - install Alfresco Office Services.
- Web Quick Start - install Web Quick Start.
- Google Docs Integration - install Google Docs Integration.
Installation Folder Screen
The Installation folder screen allows you to select the Alfresco target installation folder.
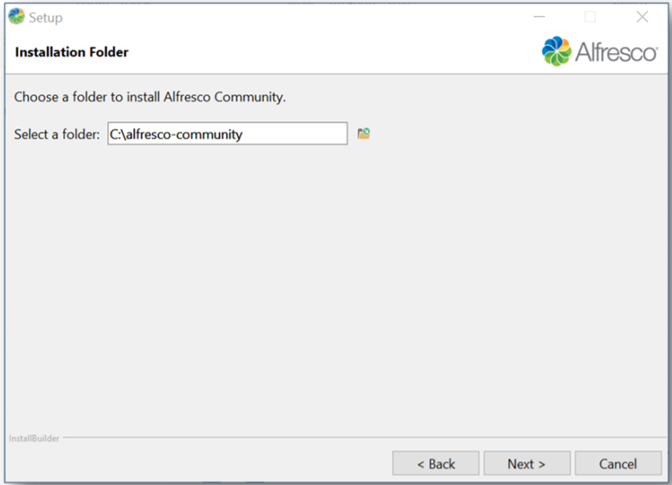
You can set the following options.
- Select a Folder: Click to display a Browse for Folder Dialog that allows you to select an installation folder.
The installation folder path must not contain space characters.
Database Server Parameters Screen
The Database Server Parameters screen allows you to enter the port number of the database that Alfresco will use.
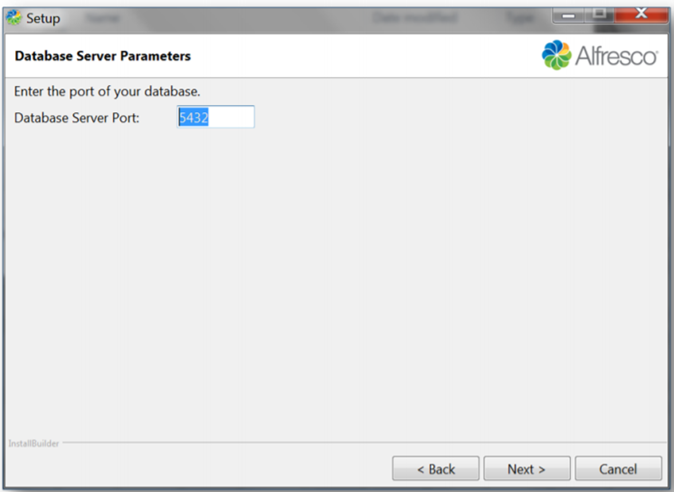
You can set the following options.
- Database Server Port: Enter the port number of the database Alfresco will use.
Tomcat Port Configuration Screen
The Tomcat Port Configuration screen allows you to enter Tomcat Application Server port numbers.
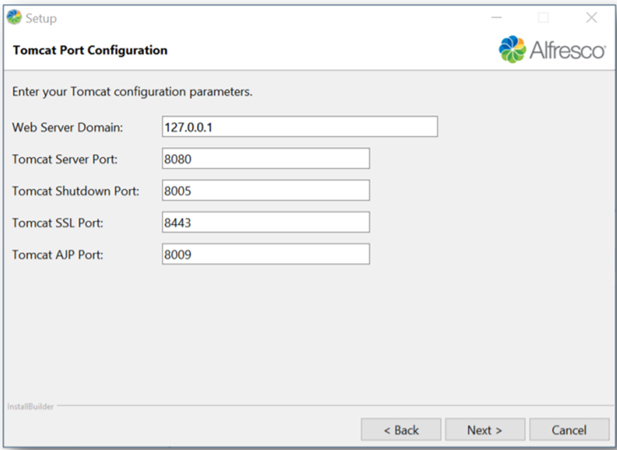
You can set the following options.
- Web Server Domain: Enter the Web Server Domain URL. For example, if the Web Server Domain is localhost then the URL http://localhost:8080/share is based on the web server domain and the Tomcat port number that you specify on the Tomcat Port Configuration window.
The localhost Web Server Domain can be used on this machine to verify that Alfresco is running successfully. However, it is not an externally addressable URL, so it is not possible for other users to access this URL. To make sure that other users can access Alfresco, you need to define and create a publicly addressable name.
- Tomcat Server Port: Default is 8080.
- Tomcat Shutdown Port: Default is 8005.
- Tomcat SSL Port: Default is 8443.
- Tomcat AJP Port: Default is 8009.
LibreOffice Service Port Screen
The LibreOffice Server Port screen allows you to enter the port number on which the LibreOffice server will listen.
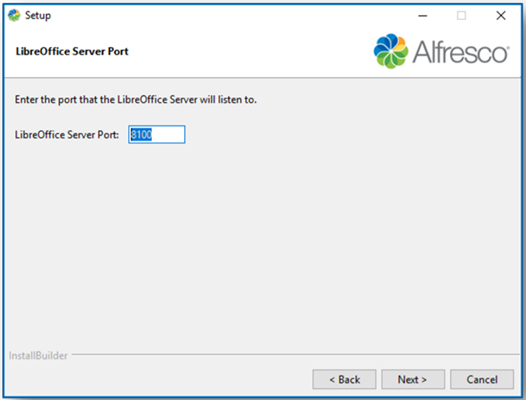
You can set the following options.
- LibreOffice Server Port: Enter a port number on which the LibreOffice server will listen.
FTP Port Screen
The FTP Port screen allows you to enter the port number of the integrated FTP server.
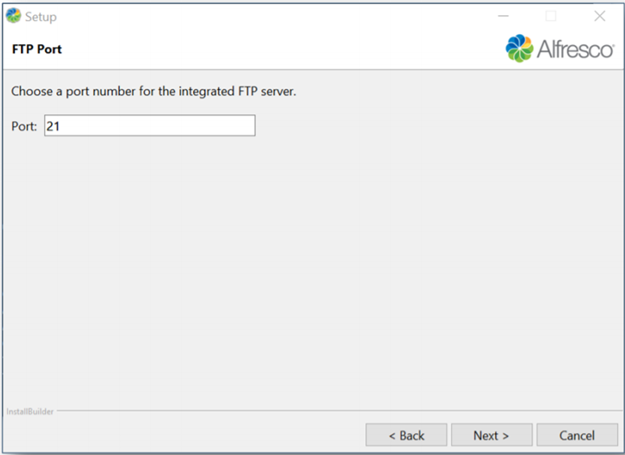
You can set the following options.
- FTP Port: Enter the port number. Default is 21.
Admin Password Screen
The Admin Password screen allows you to specify a password for the Alfresco administrator account.
You can set the following options.
- Admin Password: Enter a password for the Alfresco administration account.
- Repeat Password: Repeat the password.
The password must be at least 3 characters long.
Service Startup Configuration Screen
The Service Startup Configuration screen allows you to select if you want services used by Alfresco such as Tomcat Server to start automatically or if you want to start these manually.
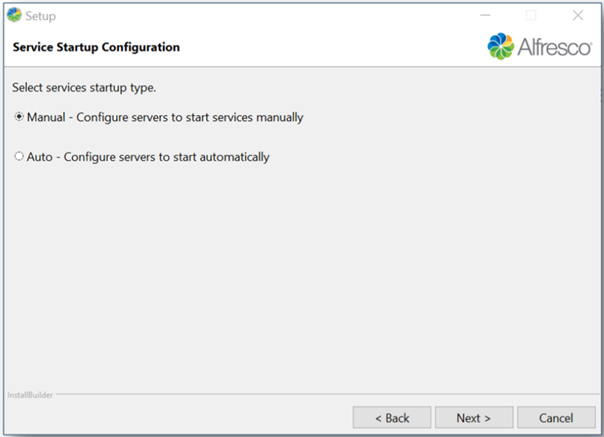
You can set the following options.
- Manual
- Auto
Ready to Install Screen
The Ready to Install screen informs you that the setup is ready to install Alfresco Community on your computer.
Installing Screen
The Installing screen displays installation progress.
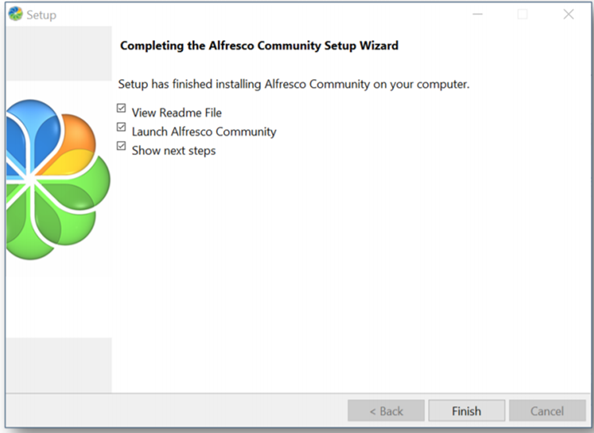
Install Complete Screen
The Completing the Alfresco Community Setup Wizard screen allows you to close the Alfresco Community Setup Wizard.
The following steps show you how to add an Alfresco Module Package (AMP). The AMP enables custom file type creation and specifically the use of Article Types and Placeholders within the Alfresco repository.
An Alfresco Module Package (AMP) is a bundle of code, content model, content, and the directory structure that is used to distribute additional functionality for Alfresco. And is downloadable from the Alfresco web-site.
Before you start to install the AMP file you must make sure that Alfresco Database is shutdown.
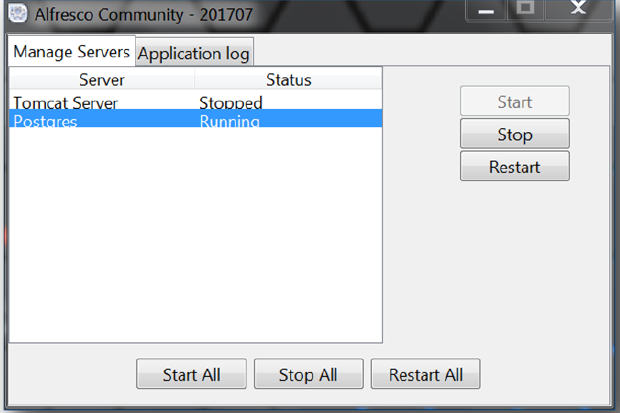
The following steps show you how to check that the status of Alfresco Tomcat Application Server.
- Select Microsoft Windows Start button » All Programs » Alfresco Community » Alfresco Community Manager Tool.
- Select Tomcat Server.
- Click Start button.
- Confirm that Tomcat Server Status is Stopped.
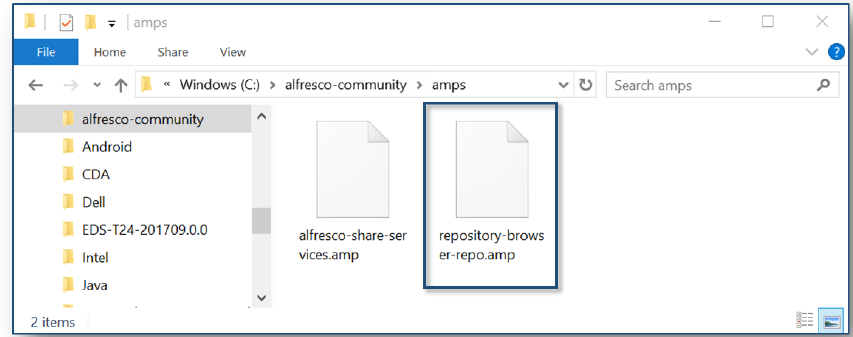
You are now ready to install the AMP file.
- Copy the AMP file to your alfresco-community/amps folder.
Run the AMPs batch file
- In the Windows Explorer window hold <SHIFT> and right-click the amps folder.
- Select Open Command Window Here.
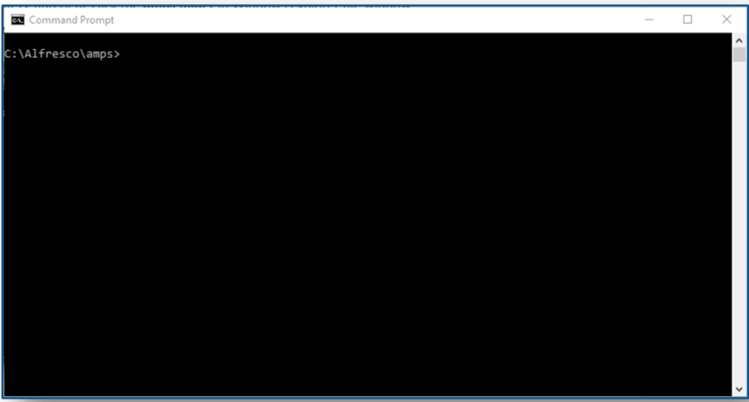
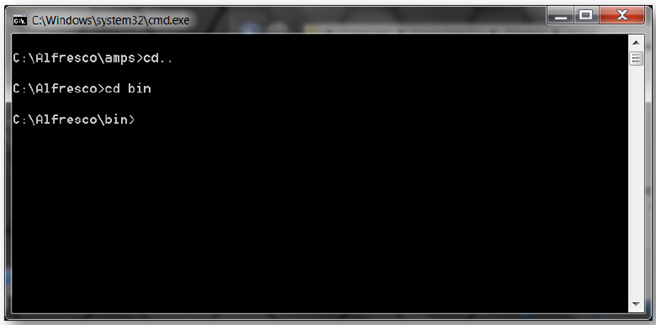
- Navigate to the Alfresco bin folder.
- Enter the command and press <ENTER>.
cd..
- Enter command (and press <ENTER>).
cd bin
- Run a Batch File to install the AMP.
- Enter command (and press <ENTER>).
apply_amps.bat
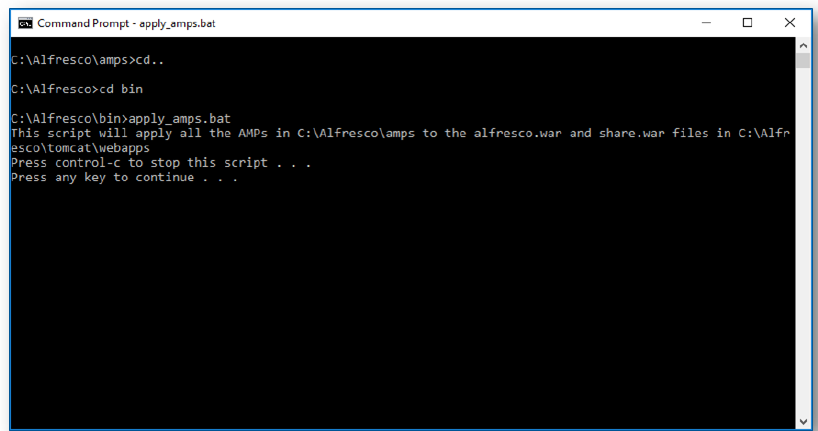
- Press <ENTER>
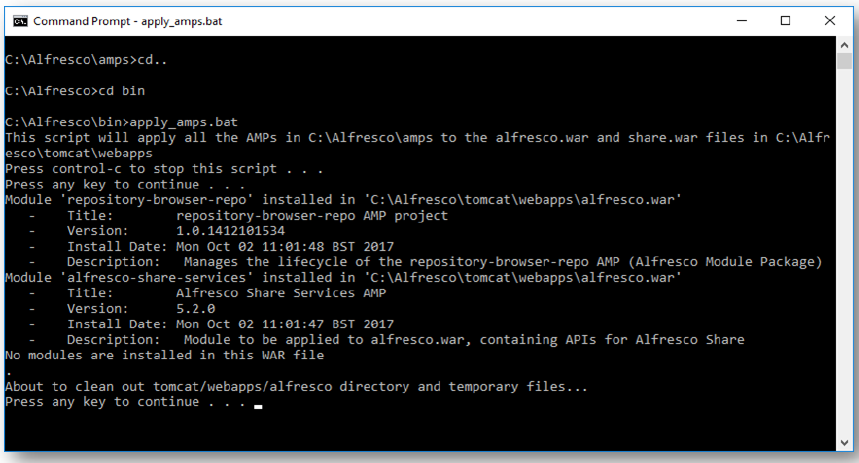
- Press <ENTER> again.

- Close Command Window.
- Close Windows Explorer.
Test Alfresco
The following steps show you how to start the Alfresco Tomcat Application Server and to confirm that Alfresco can communicate with PostgreSQL and will fully work with Live CMS.
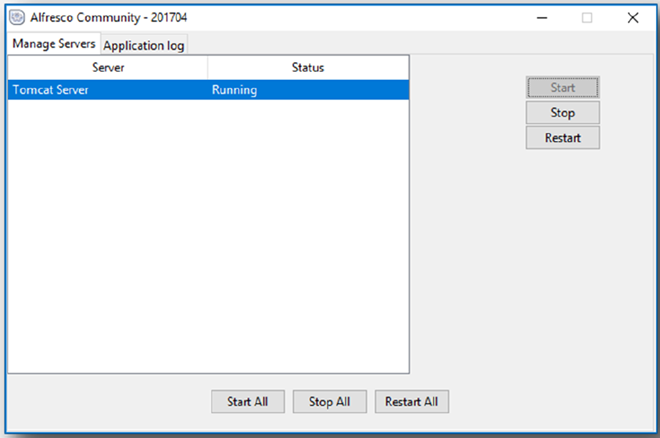
- Select Microsoft Windows Start button > All Programs > Alfresco Community > Alfresco Community Manager Tool.
- Select Tomcat Server.
- Click Start button.
- Confirm that Tomcat Server Status is Running.
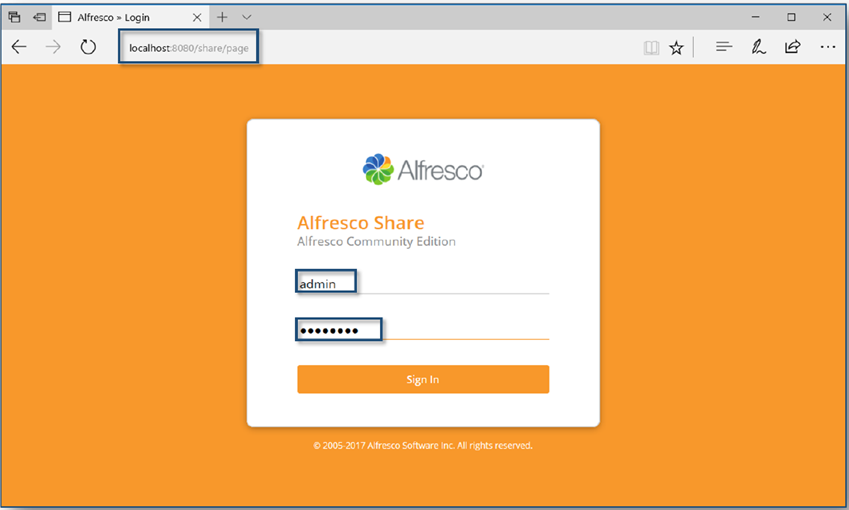
- Open a browser window.
- Enter URL.
http://localhost:8080/share/
- Enter User Name.
admin
- Enter Password.
alfresco
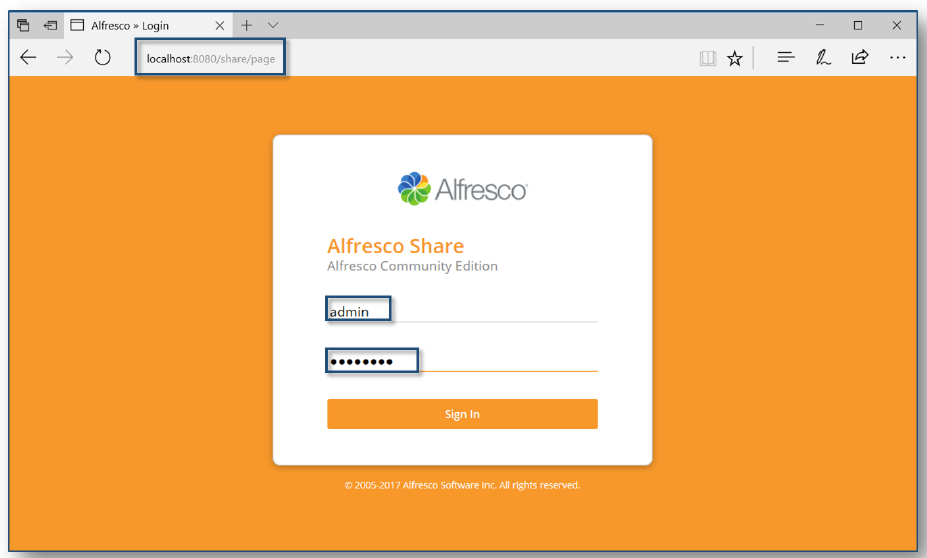
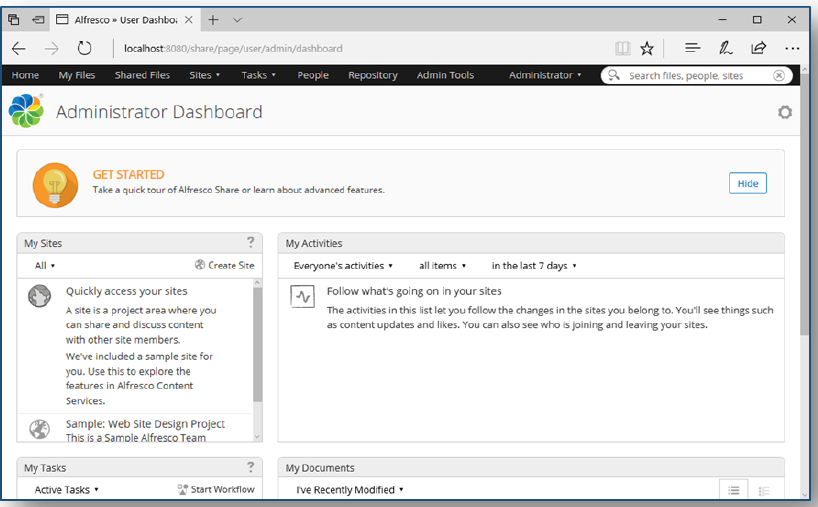
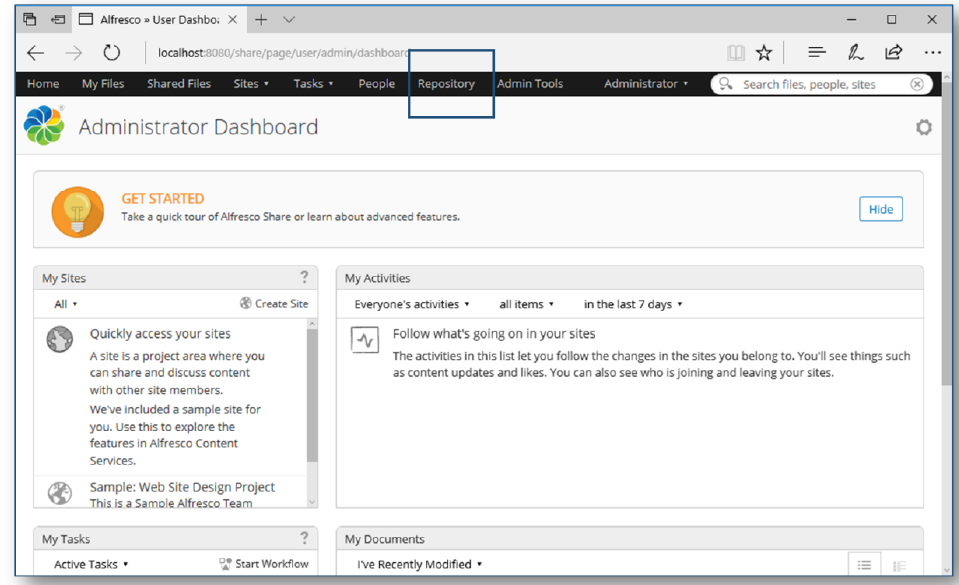
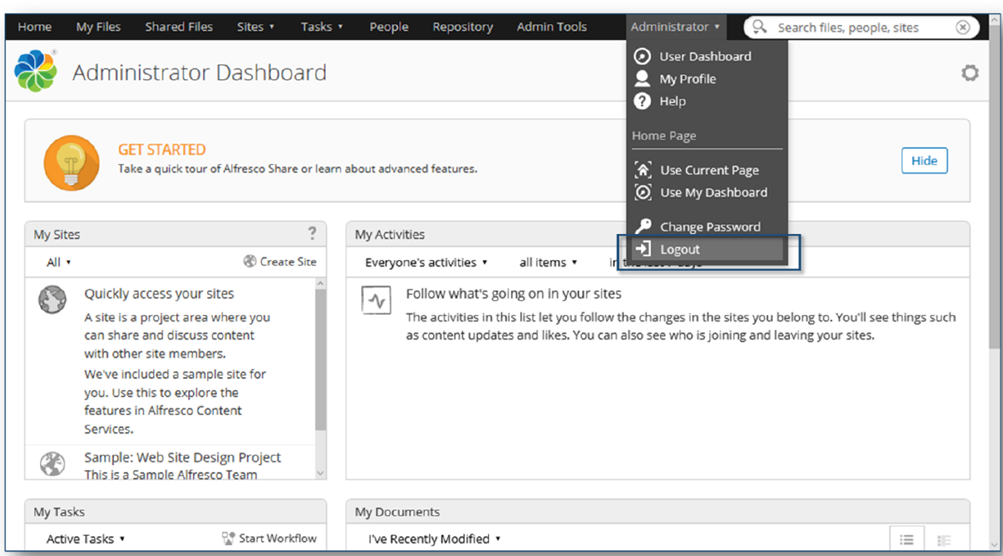
- Click Sign In button. The Alfresco Administrator Dashboard is displayed. This confirms that Alfresco is able to talk to PostgreSQL.
- Select Administrator menu > Logout to close the Alfresco Administrator Dashboard.
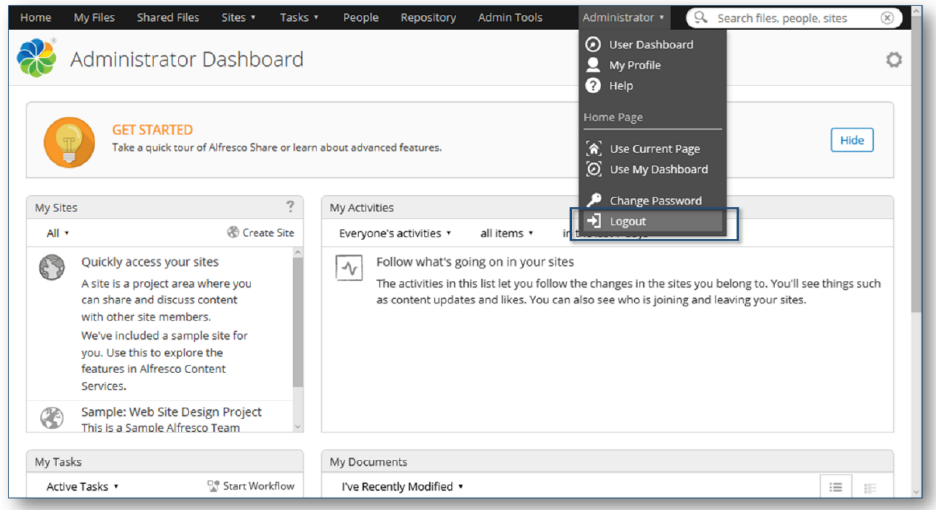
- Close browser.
Setup Permissions for Live CMS
When you start to work with Live CMS on a project you will be saving articles into a folder in the Alfresco Repository Root Folder. Typically, you would have a different named folder setup to support each project. The folder name is defined in the connection properties when a Content Data Source in created in the Integration editor.
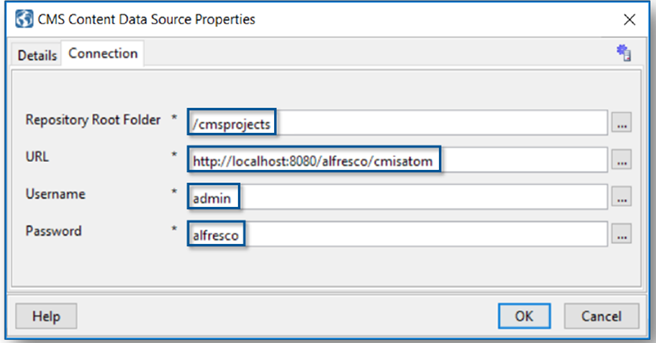
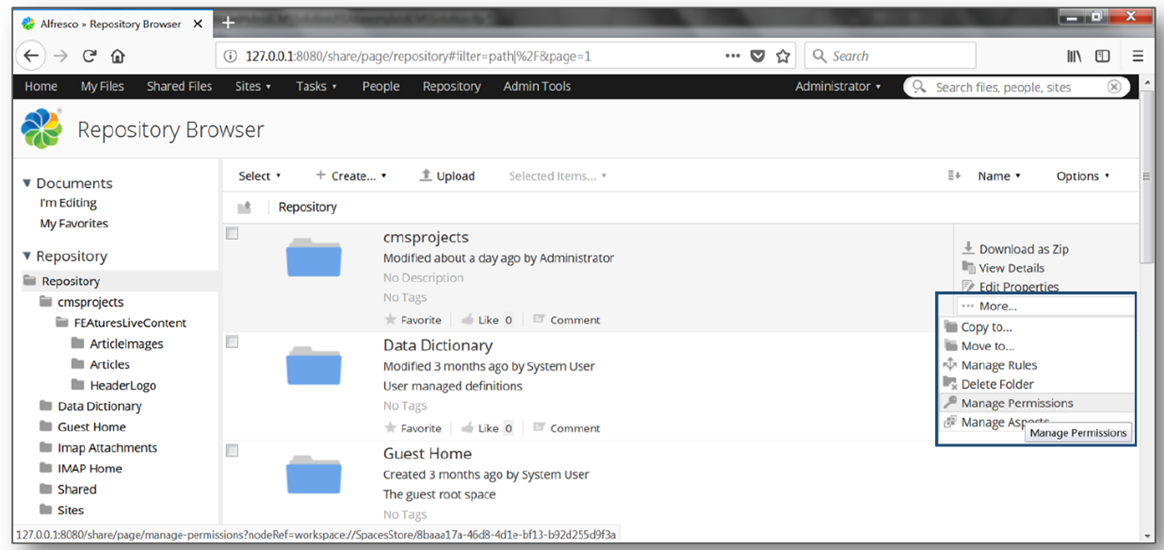
For example, the /cmisprojects folder above is then created under the Alfresco Repository Root Folder when you first run Live CMS.
To use Live CMS to create folders and Articles you will then need to modify the permissions for the folder directly on the Alfresco Server to correctly setup the correct Live CMS user roles to create (Contributor/Collaborator) and publish (Coordinator) content.
The following pages show how to set permissions for the ‘admin’ user on the folder /cmisprojects and to add a new user called ‘coordinator’. You will then be able to login to Live CMS with these user names and create and publish Live CMS articles.
- Open a browser window.
- Enter URL.
http://localhost:8080/share/
- Enter User Name.
admin
- Enter Password.
alfresco
- Click Sign In button.
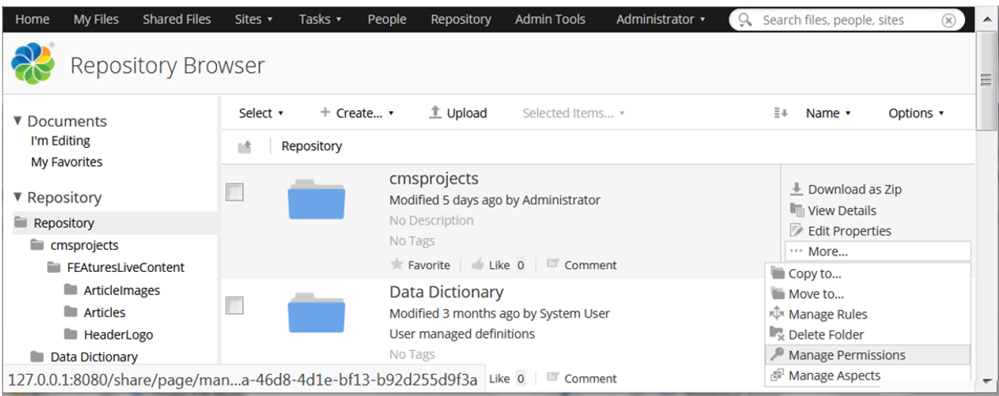
- Click on the Repository Tab.
- Move the cursor onto the /cmsprojects folder but do not click to open.
- Click on the More button and select manage Permissions.
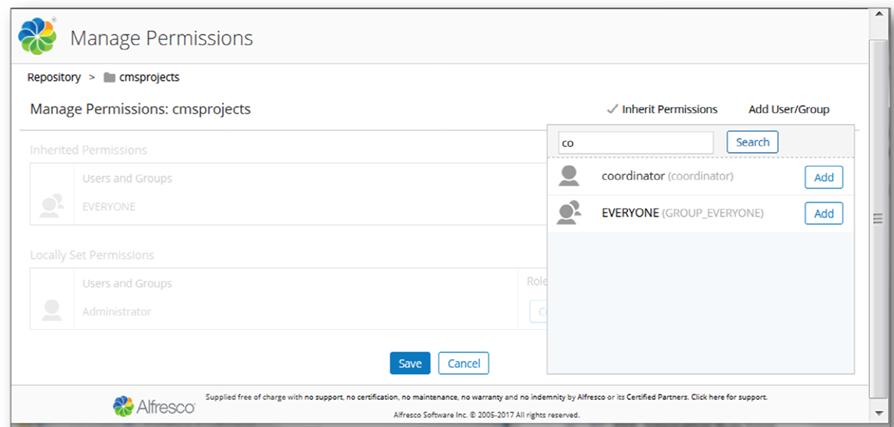
- Click on the Add User/Group Button.
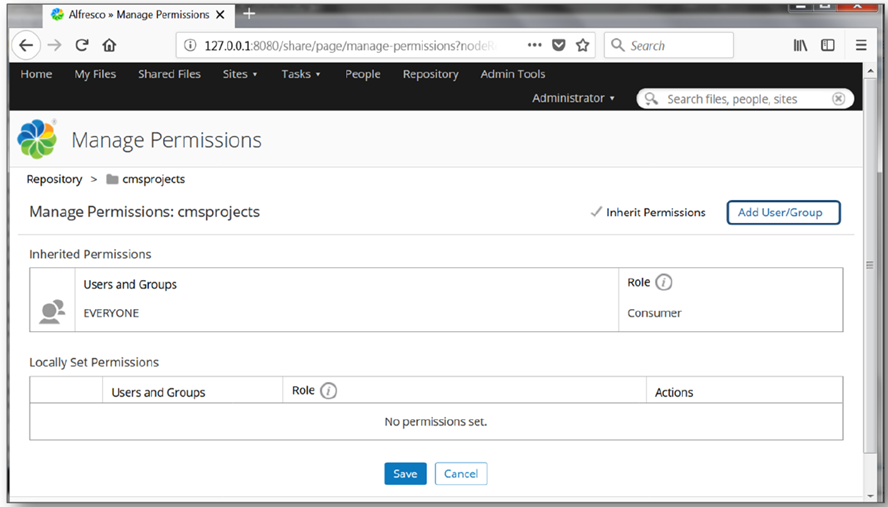
- Enter admin in the Search window to bring up the correct user role (Administrator) then click on the Add button.
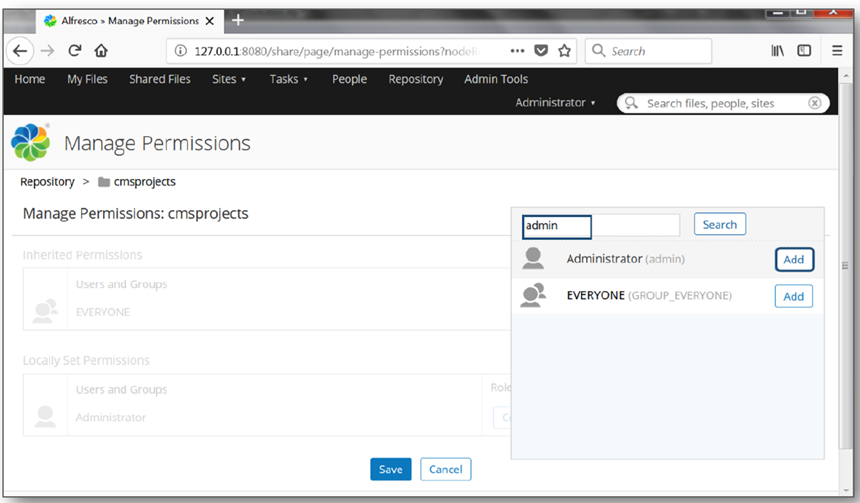
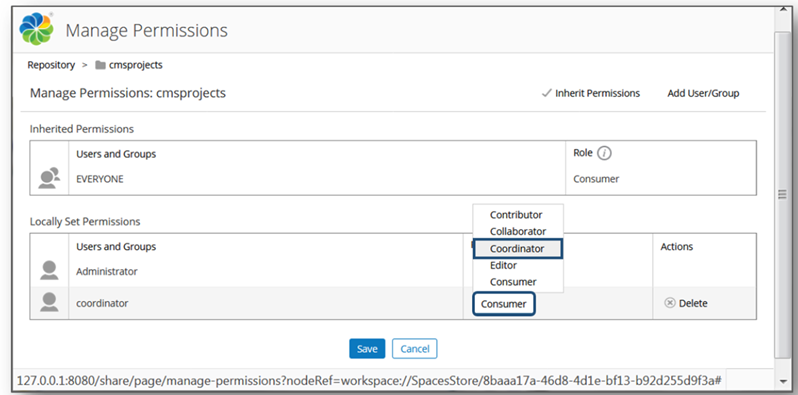
- Click on the default Consumer role and select Contributor from the list. This will ensure that the admin user in Live CMS has all the required actions to create content for Live CMS will be supported in Alfresco.
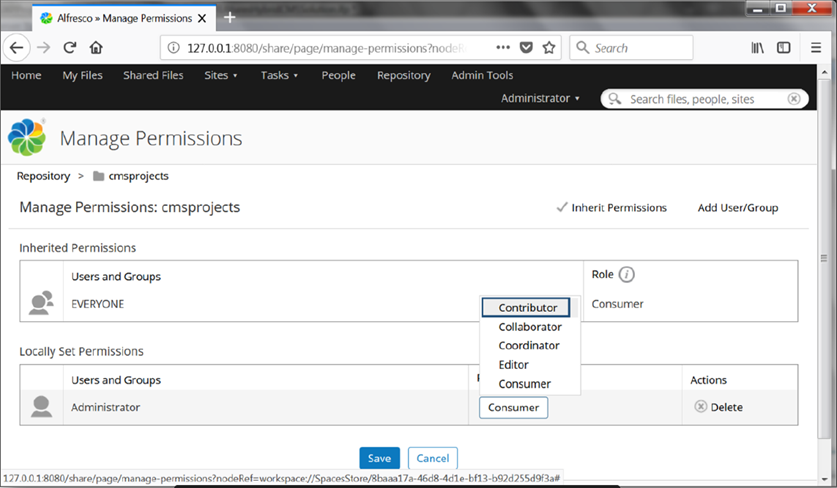
- Click Save to finish.
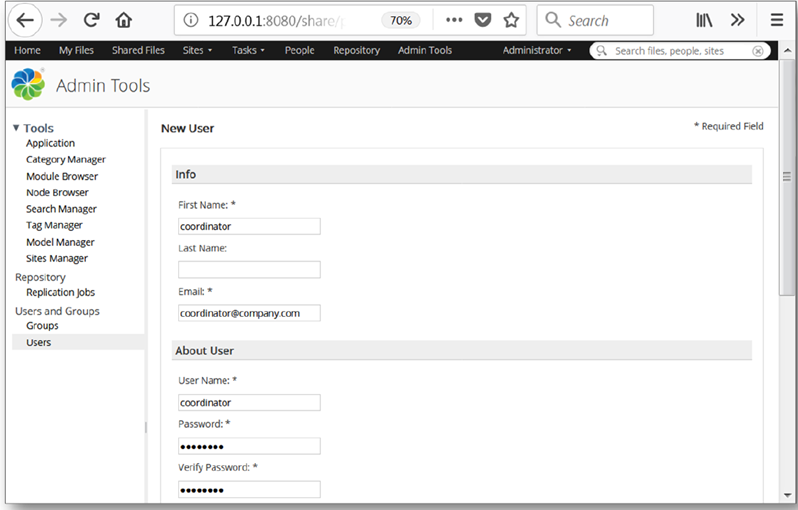
- Select the Admin Tools from the main menu, then Users.
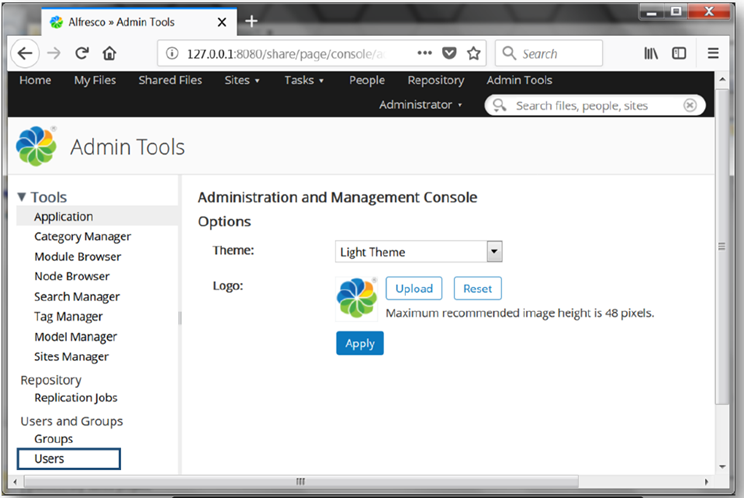
- Select the New User option.
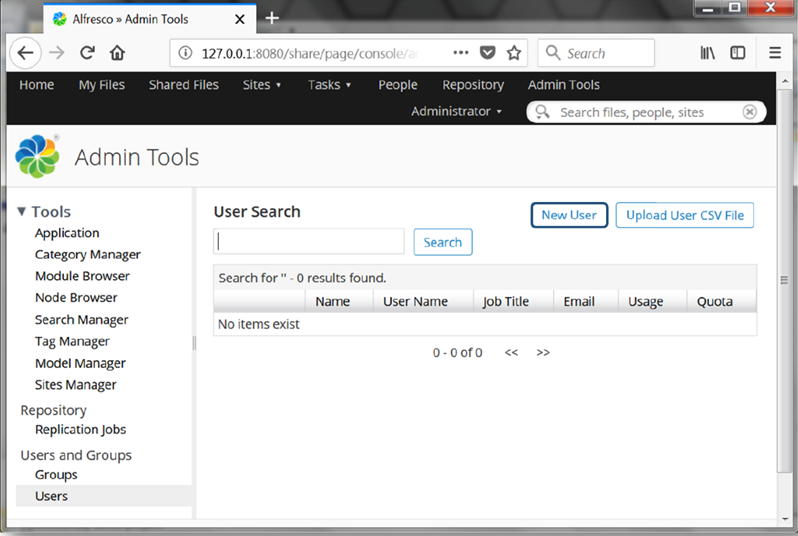
- Enter appropriate information for all mandatory fields. You will use the User Name and Password to login to Live CMS but the fields for First Name and Email address although mandatory for the platform are not used by Live CMS.
- Select Create User and after confirmation that the coordinator user has been created, select the Repository tab. With the folder cmsprojects highlighted, click More then select Manage Permissions.
- Select Add User/group, enter the first two letters of your new user (CO) and select Search.
- Select Add coordinator.
- Select the default Consumer role and choose Coordinator from the drop down list, then select Save to finish.
- Select Administrator menu > Logout to close the Alfresco Administrator Dashboard.
- Close browser.
In this topic