Custom Views
The custom view feature enables an authorized user having access to the custom views feature to create and manage custom views for the dashboard. Using the custom views, a user can view the subsets of own accounts on the dashboard based of the selection of accounts apart from the standard views available in the accounts list filter. Authorized users can edit or delete the custom views.

A business user can create custom views for the accounts to which the user has access to organize and categorize accounts for a preferred viewing purpose. The user can also create, edit, and delete the custom views if the user has the necessary permissions.
- The Custom View option will be available to the user in the account dashboard and filters if "Custom View" permission is enabled.
- The logged-in business user can create, edit, and delete a custom view if "Create/Manage Custom View" action feature under Custom View is enabled.
Menu Path:
- Online Banking: Dashboard > Accounts list filter > Custom Views section
- Mobile Banking: Menu > Dashboard > Accounts list filter > Custom Views section
UX Overview
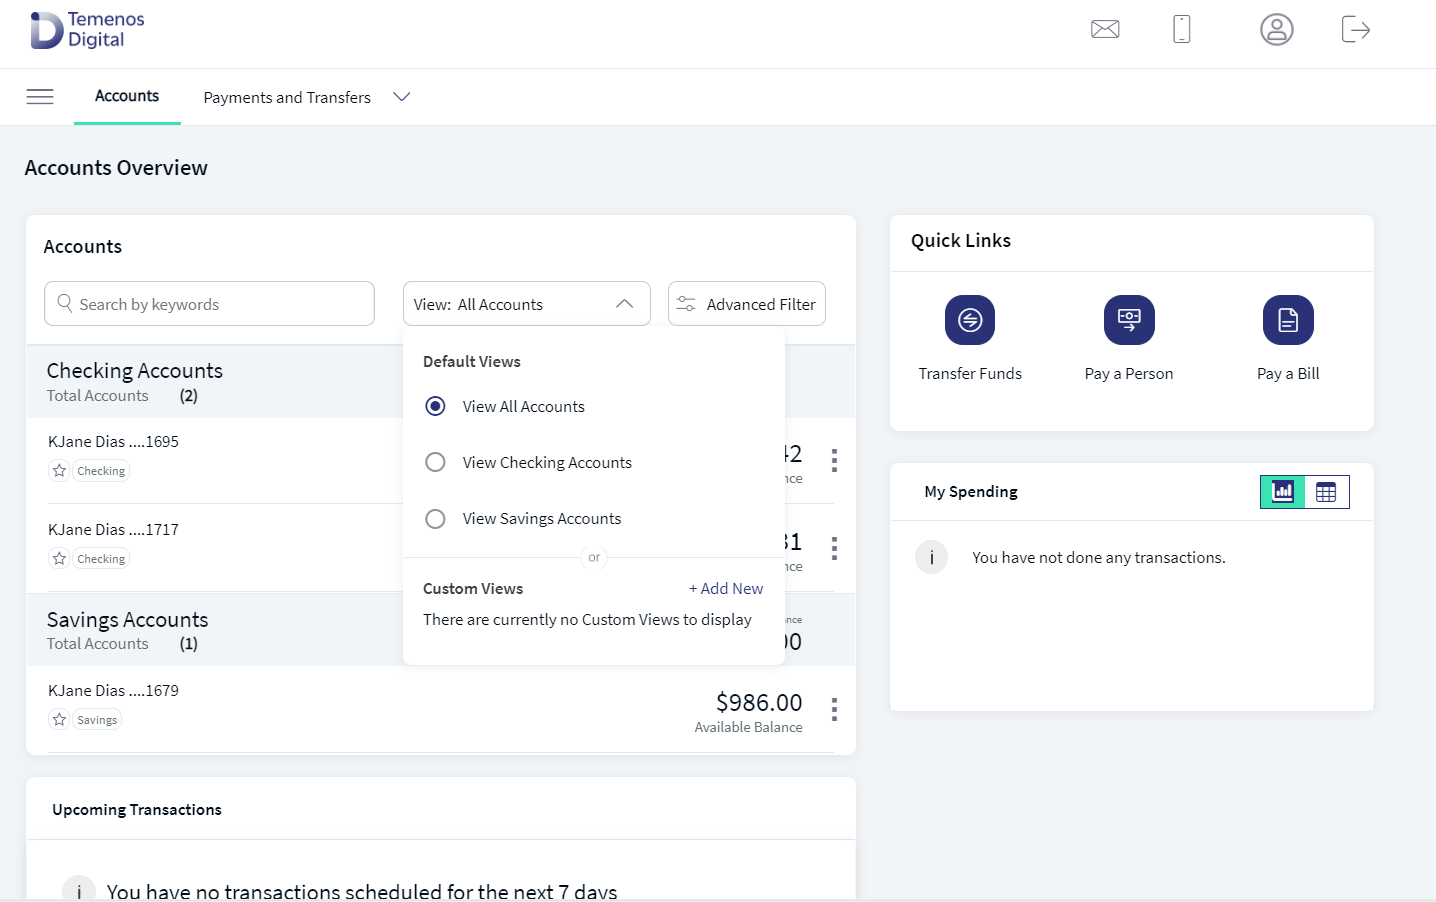
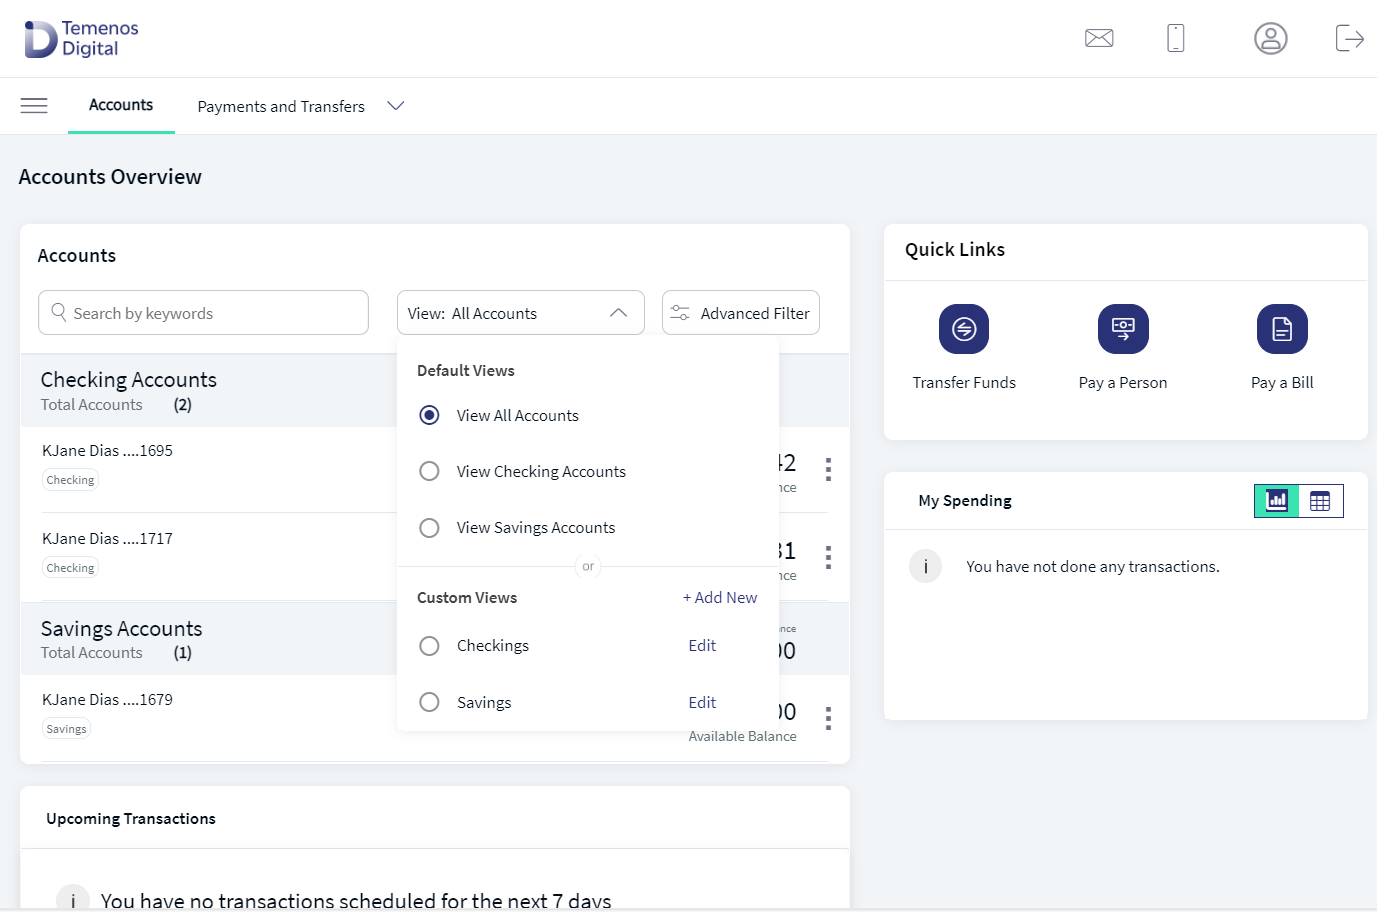
The application displays the accounts list filter with the list of custom views already created. The custom views are in addition to the already available default views provided in the application. The custom views are ordered alphabetically by the name and a user can click a custom view to apply them to the dashboard.
The application provides option to add new custom views and edit the already created views and displays an appropriate message if there are no custom views available to display.
Do any of the following:
- Select to apply a custom view from the list
- Create a custom view
- Edit or delete a custom view
Business Process Diagram - View Accounts using Custom View and Filters
Apply a Custom View from the List
Use the feature to apply a custom view from the list of views already created. After applying a view, the user views the subsets of own accounts on the dashboard apart from the standard views available in the accounts list filter.
Menu Path:
- Online Banking: Dashboard > Accounts list filter > Custom Views section > Select a view
- Mobile Banking: Menu > Dashboard > Accounts list filter > Custom Views section > Select a view
To apply a custom view, follow these steps:
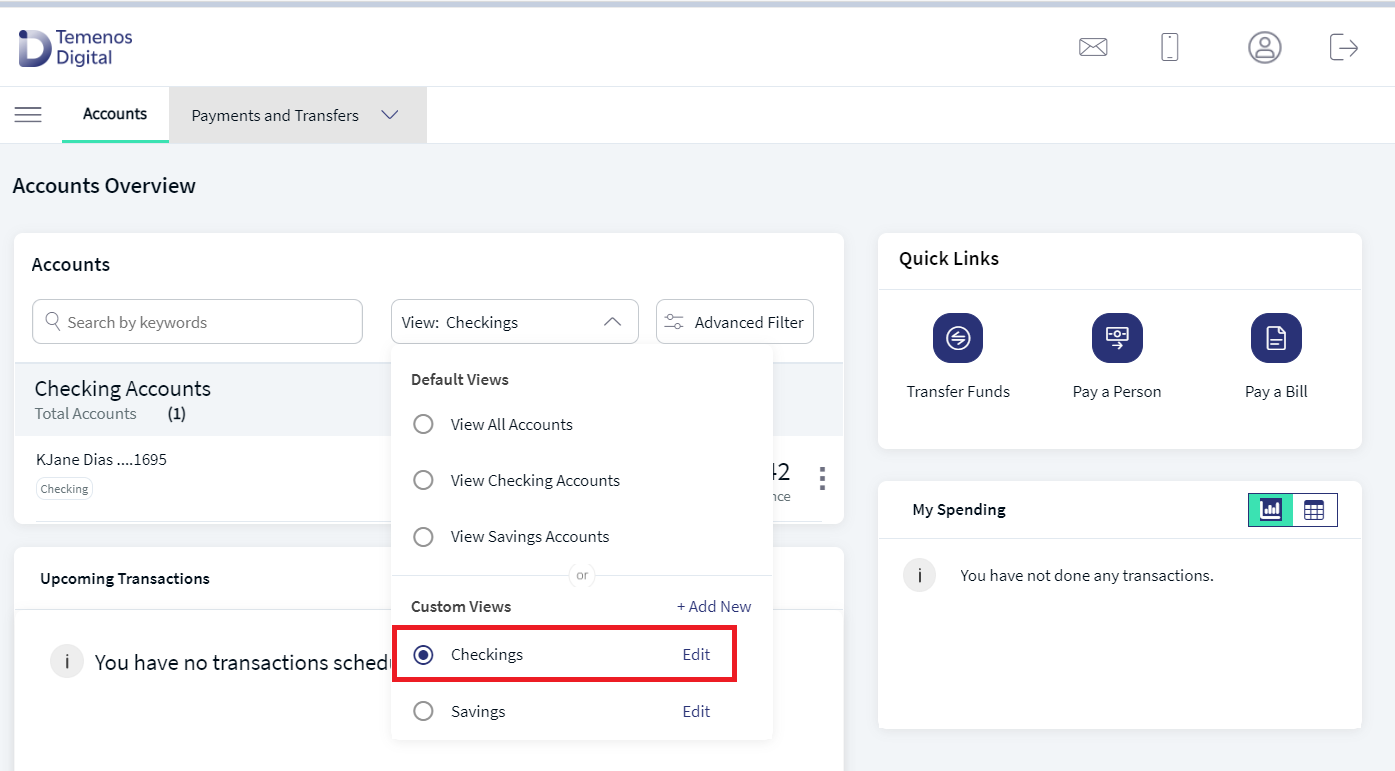
- From the Custom Views section, click the required view to be applied. For mobile banking, select the view and tap Apply Filter. The view is applied.
- Only those accounts that were selected while creating the view is displayed.
Create a Custom View
The custom view feature enables an authorized user with necessary permissions to create a custom view. Using the custom views, a user can view the subsets of own accounts on the dashboard based of the selection of accounts apart from the standard views available in the accounts list filter.
Menu Path:
- Online Banking: Dashboard > Accounts list filter > Custom Views section > Add New
- Mobile Banking: Menu > Dashboard > Accounts list filter > Custom Views section > Manage
To create a custom view, follow these steps:
- From the Custom Views section, click + Add New. The application displays the Create Custom View screen.

- Name Your Custom View. Enter a unique custom view name. It is mandatory. There is an indication to let the user know if a valid name has been entered.
- Select the accounts. Select the required accounts. It is mandatory to select at least one account. Only the selected accounts will show in the custom view.
- The display of the accounts in the drop-down list depends on the permission given to the user, (a) for a user with access to only one Customer ID, the accounts are grouped by account type such as Savings, Checking and more, (b) for a user with access to personal accounts and multiple Customer IDs, the accounts are grouped by personal accounts followed by Customer ID names and their respective accounts, and (c) for a user with access to multiple Customer IDs, the accounts are grouped by Customer IDs.
- The user can distinguish between the retail and business accounts.
- Use the search option to search by account name or account number to search for specific accounts. Enter the search keyword in full or in part.
- To select all the accounts, use the Select All check box.
- Use the
 up and
  down arrows to collapse or expand the accounts list.
 - If there are no accounts to show under a specific section, the section header is not shown.
- Click Create & Apply. The button is enabled only if at least one account is selected.
- The custom view is applied.

Cancel the activity any time if required. The changes are not saved.
Mobile Banking
To add a custom view, follow these steps:
- On the Custom Views section, tap Manage.
- The application displays the list of views already created. Tap the + icon to add a view.
- Select the required accounts. It is mandatory to select at least one account. Only the selected accounts will show in the custom view.
- For a business user, the application displays all business accounts that the business user has been given access. For a combined user, the application displays all business and personal accounts that the user has been given access.
- The user can distinguish between the retail and business accounts.
- Use the search option to search by account name or account number to search for specific accounts. Enter the search keyword in full or in part.
- To select all the accounts, use the Select All check box.
- Use the up and down arrows to collapse or expand the accounts list.
- If there are no accounts to show under a particular section, the section header is not shown.
- Tap Continue. The button is enabled only if at least one account is selected.
- The application displays the account type and the number of accounts selected in the type.
- Enter the Custom View Name.
- Tap Confirm & Create Custom View.
- The application displays an acknowledgment screen that the view is created successfully. Do any of the following:
- Tap Apply & View Accounts. The custom view is applied on the dashboard.
- Tap Back to manage Custom View to navigate to the list of custom views where you can add another view or manage the views.


Edit a Custom View
Use the feature to edit the details of a custom view. A business user who has access to the custom views feature can edit or delete custom views that have been created and saved by the user.
Menu Path:
- Online Banking: Dashboard > Accounts list filter > Custom Views section > Edit
- Mobile Banking: Menu > Dashboard > Accounts list filter > Custom Views section > Manage > Select a view > Edit
To edit a custom view, follow these steps:
- From the Custom Views section, click Edit. The application displays the Edit Custom View screen. The screen is like the one while you create a custom view.

- Modify any or a combination of the following as required.
- The custom view name. The new name will replace the old one. There is an indication to let the user know if a valid name has been entered.
- Select or clear the account check boxes to add or remove accounts respectively. The accounts that are already part of the custom view are marked as selected.
- Use the search option to search by account name or account number to search for specific accounts.
- Use the Select All check box to select all the accounts under the account type or business sections.
- Click Update & Apply. The button is enabled only if any modification is done on the screen.

- The changes are updated.
- Click Delete to remove the view from the custom views list.
- Cancel the activity any time if required. The changes are not saved.
Mobile Banking
To edit a custom view, follow these steps:
- On the selected custom view, tap Edit.
- Modify any or a combination of the following as required one by one.
- Edit custom view name. The new name will replace the old one. There is an indication to let the user know if a valid name has been entered. Tap Save & Update. The button is enabled only if any modification is done on the screen. The application displays an acknowledgment screen.
- Remove existing accounts. The accounts that are already part of the custom view are only displayed. Select the account check boxes to remove accounts. Tap Remove. The button is enabled only if any modification is done on the screen. The application displays a confirmation screen. Tap Yes to remove the selected accounts. The application displays an acknowledgment screen.
- Add more accounts. The application displays accounts that are not already part of the custom view. Select the account check boxes to add accounts. Tap Add Account. The button is enabled only if any modification is done on the screen. The application displays a confirmation screen. Tap Yes to add the selected accounts. The application displays an acknowledgment screen.
- Use the search option to search by account name or account number to search for specific accounts.
- Use the Select All check box to select all the accounts under the account type or business sections.
- Edit custom view name. The new name will replace the old one. There is an indication to let the user know if a valid name has been entered. Tap Save & Update. The button is enabled only if any modification is done on the screen. The application displays an acknowledgment screen.


Delete a Custom View
Use the feature to delete a custom view. A business user who has access to the custom views feature can edit or delete custom views that have been created and saved by the user.
Menu Path:
- Online Banking: Dashboard > Accounts list filter > Custom Views section > Edit screen> Delete
- Mobile Banking: Menu > Dashboard > Accounts list filter > Custom Views section > Manage > Select a view > Edit
To edit a custom view, follow these steps:
- From the Custom Views section, click Edit. The application displays the Edit Custom View screen.

- Click Delete. The application displays a confirmation screen to delete the view.

- Click Yes.
- On confirmation, the custom view is deleted, and the view is removed from the custom views list. If the deleted custom view was the applied view prior to deletion, then the dashboard defaults to the All Accounts view.
Mobile Banking
To delete a custom view, follow these steps:
- From the list of custom views, tap Edit.
- Tap Delete Custom View.
- The application displays a confirmation screen. Tap Yes to add the selected accounts. The application displays an acknowledgment screen.


Configuration
- The visibility of each feature is controlled through the permissions defined for the user.
- The elements on the dashboard depends on the permissions assigned to the user to access features and perform associated actions.
- The Custom Views is a configurable feature that can be turned on or off from the Spotlight application.
APIs
See Experience APIs documentation for more information on the APIs shipped as part of this feature.
In this topic