Add Recipients
The Add Beneficiary/ Recipient feature in the Make Payment module is implemented using the Add Beneficiary component in the Web Channel app. This component contains mainly two flow types. One for adding beneficiary and second for editing the details of an existing beneficiary.
Use the feature to add members as recipients to transfer funds.
Menu path: Web Channel > Transfers > Add Recipient
Menu path: Mobile Banking
From the Transfers screen, tap Make Transfer and select the required bank account type (other domestic or international account types) in the Transfer To screen. The app displays the To Account screen.

Multi Entity Support: Customers can view the dashboard, perform transfers, or view any request summary and submit requests against the entity associated with the customer during login. The feature is enhanced with Experience APIs to retrieve and post based on the Entity ID of the signed-in user.
- The Entity ID selected by the signed-in user flows through the application through the respective Experience API.
- For all fetch (GET) API calls, the system retrieves the results based on the Entity ID of the signed-in user.
- For all add/update/delete calls, the system passes and posts requests against the Entity ID of the signed-in user.
The feature supports the following modules:
| Authentication | Dashboard | Account Overview |
| Credit Card overview | Cheque Management | Card Management |
| Statements | Dispute Transactions | Service Requests |
| PFM | Savings Pot | Account Settings |
| Sign In Settings | Profile Settings | Consent Management |
| Unified Transfers | Manage Transfers | Manage Beneficiaries |
| Bulk Payments | Bill Payments | Foreign Exchange |
| Portfolio Management | WealthOrder | Approval Matrix |
Online Banking
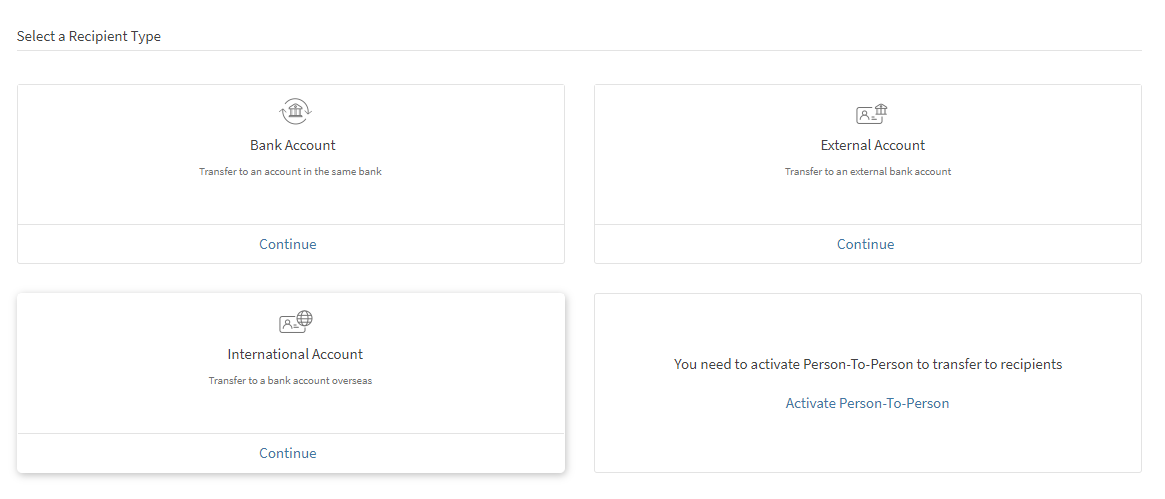
You can add the following recipient accounts:
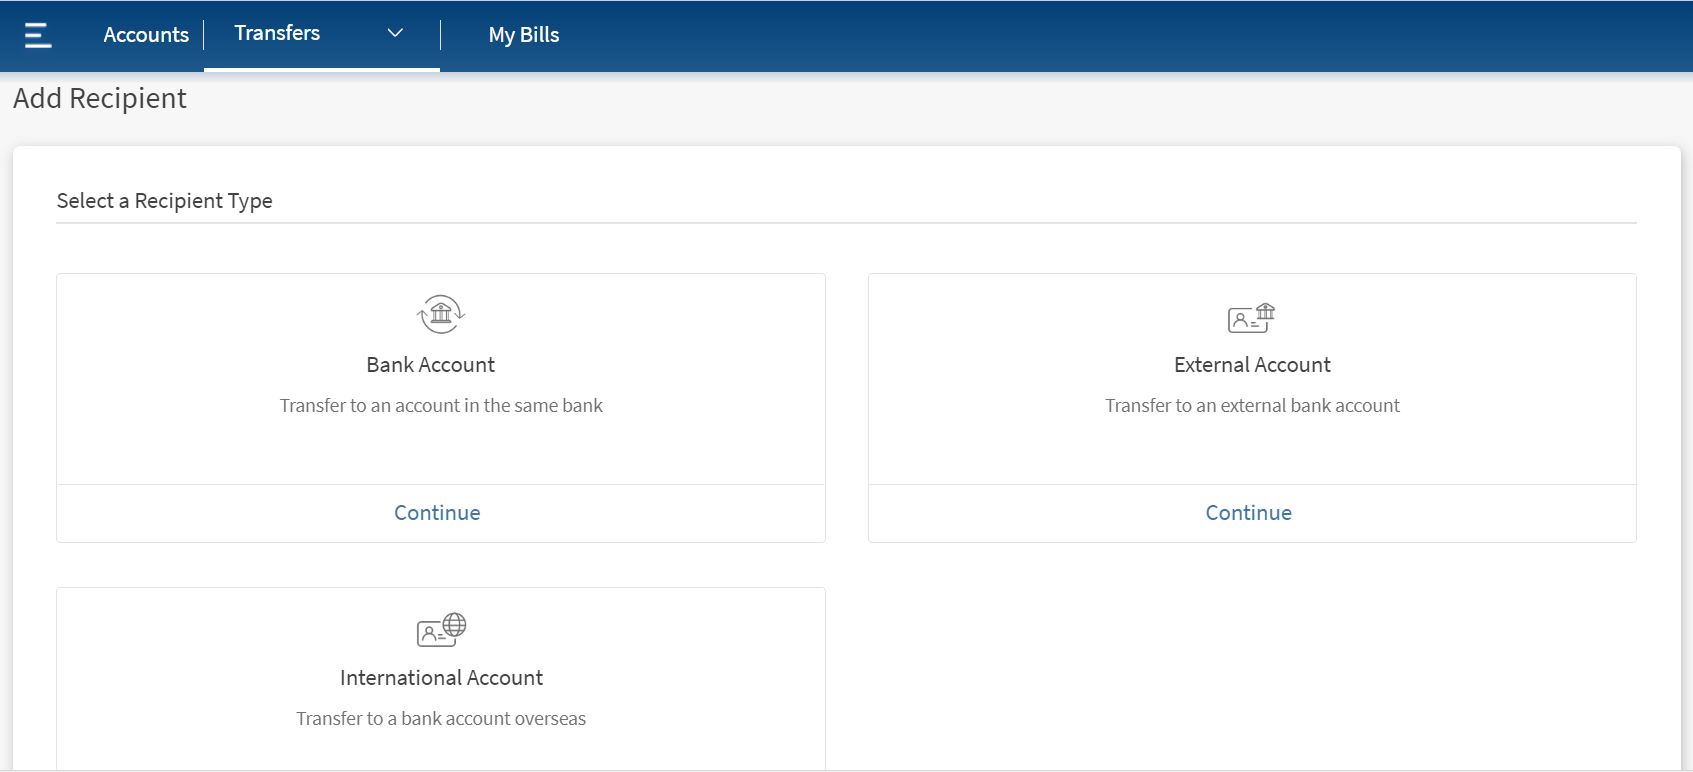
- Same Bank Account who has an account in the same bank.
- External Account who has a domestic account in another bank.
- International Account who has an account in an international bank.
- Person-to-Person Recipient to transfer money using the person's email ID or mobile number.
Add Same Bank Account
Use the feature to add a recipient who has an account in the same bank. Click Same Bank Account from Add Recipient screen.
The app displays the form to enter the account details.
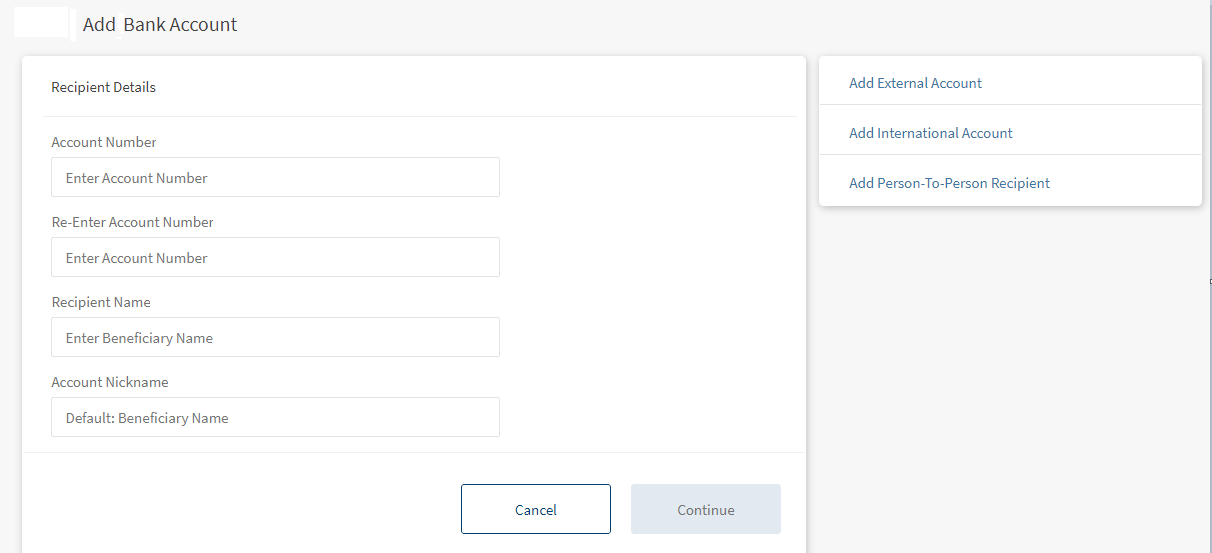
Enter the following details:
- Account Number. Enter the account number of the recipient.
- Re-Enter Account Number. Re-enter the account number provided in the previous field.
- Recipient's Name. Enter the name of the recipient.
- Account Nickname. Enter a nickname for the recipient.
- Enter the required information and click Continue. The app displays a confirmation screen.
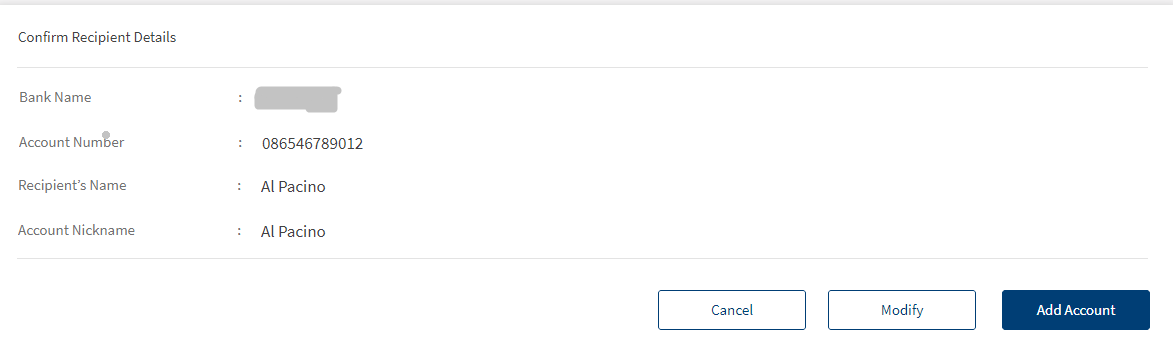
- You can Cancel the operation. In the pop-up that appears, confirm the cancellation to return to Add Recipient screen.
- You can Modify the details before adding the account.
You can also navigate to adding other recipient accounts by clicking the required option from the right pane of the screen.
- Verify the entered details and click Add Account to add the recipient.
The recipient details are verified on submission (not on client-side). The back-end service verifies the account number against the recipient name. In case they don't match, the app displays an error message requesting the user to correct the details and try again.
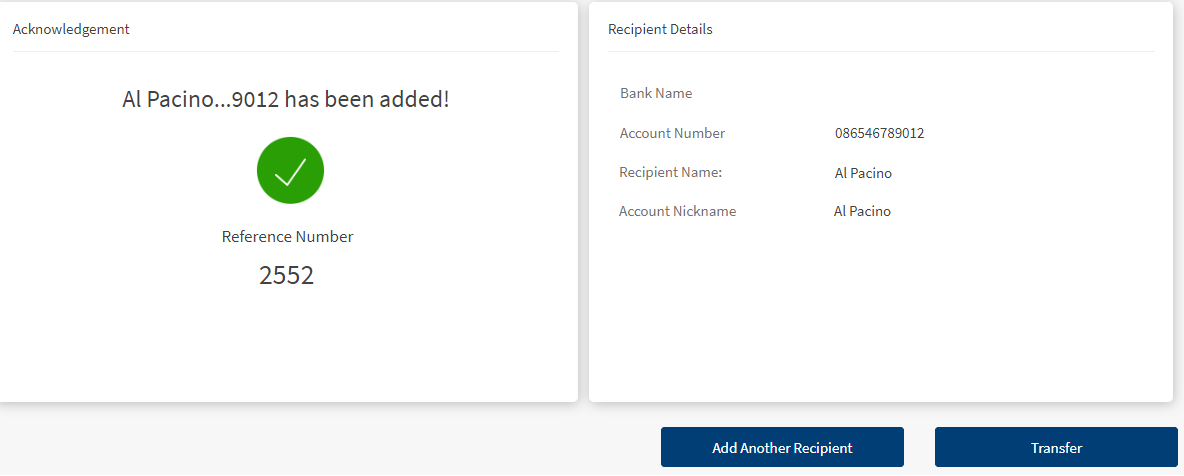
The app displays the acknowledgment screen with an acknowledgment message and account details confirming that the recipient has been added. The account is added to the list of accounts in the To list of the Same Bank transfer type on the Make Transfers screen.
The acknowledgment screen displays the transaction details, unique reference number to the transaction, and provision to do the following:
- Make a transfer
- Add another recipient
Add External Account
Use the feature to add a recipient who has an account in another bank (domestic account) or add your own account available in another bank by providing the required information. Click External Account from the Add Recipient screen.
The app displays the Domestic Account tab with a form to enter the account details.
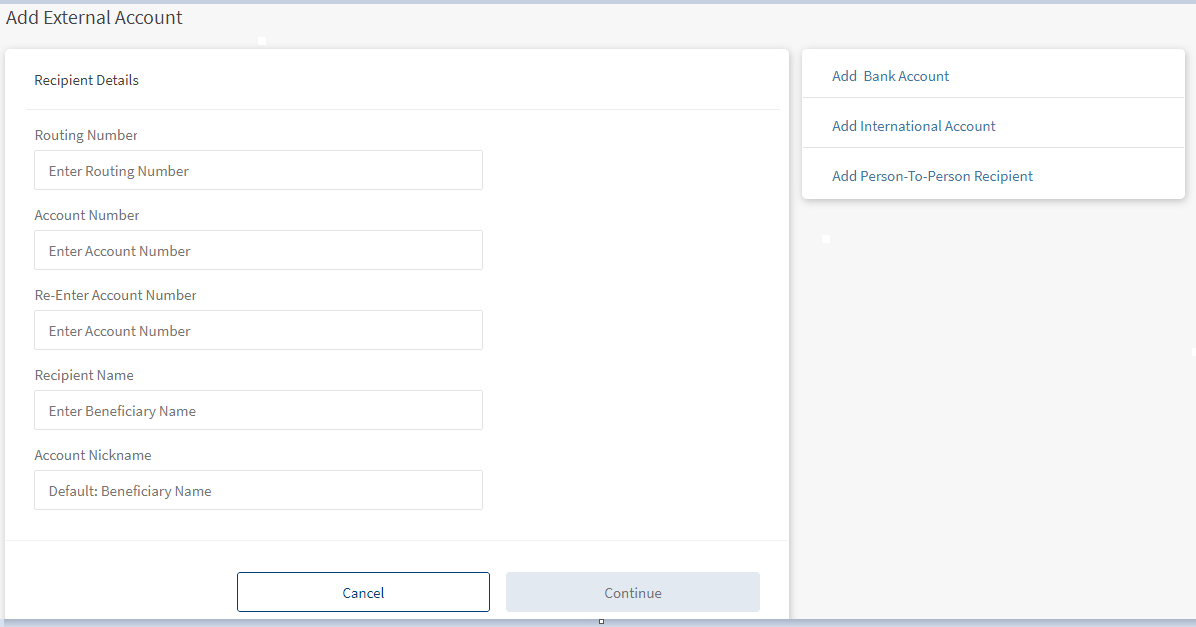
Fill the form by entering the details and click Continue.
- Routing Number: Enter the routing number of your bank's location from where the account is opened.
- Account Number: Enter the account number of the recipient.
- Re-Enter Account Number. Re-enter the account number provided in the previous field.
- Recipient's Name: Enter the name of the recipient.
- Account Nickname. Enter a nickname for the recipient.
- Enter the required information and click Continue. This navigates to Recipients Linked with screen.

- Select the account to which this beneficiary to be added and click Continue. The user has an option to select one or more than one account. Use Select All to select all the available accounts.
This is an additional customization added to the add new beneficiary flow, with this the new beneficiary displays in the selected accounts. - You can Cancel the operation. In the pop-up that appears, confirm the cancellation to return to Add Recipient screen.
- You can Modify the details before adding the account.
You can also navigate to adding other recipient accounts by clicking the required option from the right pane of the screen.
- Click Add Recipient. The app displays the acknowledgment screen with an acknowledgment message and account details confirming that the recipient has been added.
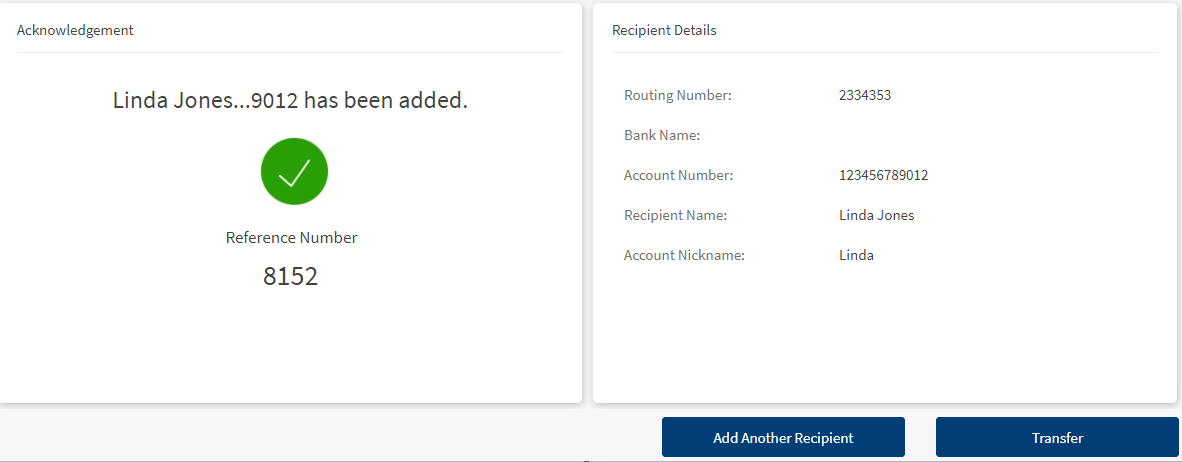
The account is added to the list of accounts in the To list of the Same Bank transfer type on the Make Transfers screen.
You can do the following:
- Make a transfer
- Add another recipient
Add International Recipient
Use the feature to add a recipient who has an account in an international bank or add your own account available in the international bank by providing the required information. Click Add International Account from Add Recipients screen
The app displays the International Account tab with a form to enter the account details.
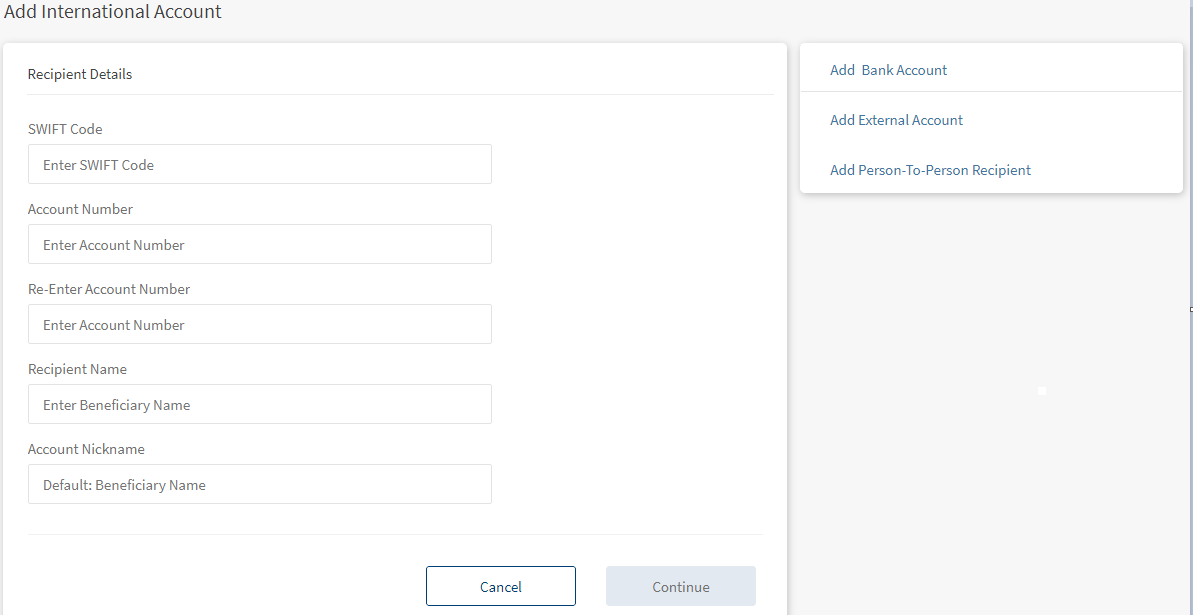
Fill the form by entering the following details and click Continue.
- SWIFT Code: SWIFT code is the international bank code. Enter the SWIFT code of your bank.
- Account Number: Enter the account number of the recipient.
- Re-Enter Account Number. Re-enter the account number provided in the previous field.
- Recipient Name. Enter the name of the recipient.
- Account Nickname. Enter a nickname for the recipient.
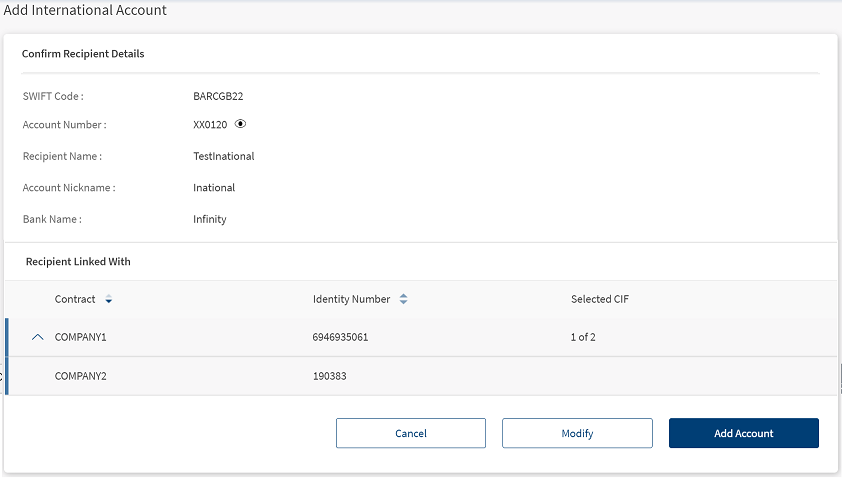
- Enter the required information and click Continue. This navigates to Recipients Linked with screen.
- Select the account to which this beneficiary to be added. The user has an option to select one or more than one account. Use Select All to select all the available accounts.
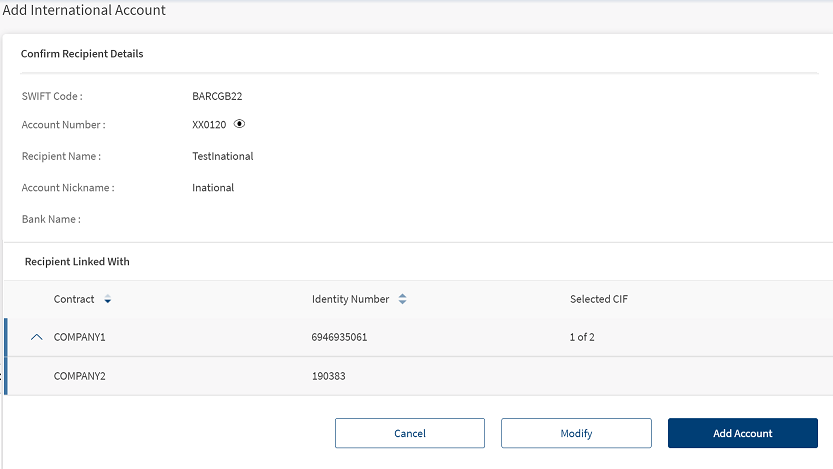
This is an additional customization added to the add new beneficiary flow, with this the new beneficiary displays in the selected accounts. - Click Continue. The app displays a confirmation screen.
- You can Cancel the operation. In the pop-up that appears, confirm the cancellation to return to Add Recipient screen.
- You can Modify the details before adding the account.
You can also navigate to adding other recipient accounts by clicking the required option from the right pane of the screen.
- Click Add Account. The app displays the verification screen with the details that you had entered.
The app displays the acknowledgment screen with an acknowledgment message and account details confirming that the recipient has been added. The account is added to the list of accounts in the To list of the Same Bank Members transfer type on the Make Transfers screen.
You can do the following:
- Make a transfer
- Add another recipient

Add Person-to-Person Recipient
Use the feature to initiate a P2P (person-to-person) transfer (for example, to send money to a friend) by using the recipient's mobile number or email ID.
Activate Person-to-Person
To perform a person-to-person transfer, you must activate the person-to-person feature.
To activate person-to-person, perform the following steps:
- Click Add Person-to-person recipient from the right pane of the transfers screen. You can also click Add Recipient from Transfers menu. The Add Recipient screen appears with an option to select the recipient type.
- Under Person-to-person, click Activate Person-to-Person.
- When you open the P2P screen for the first time, the app displays the terms and conditions for you to activate the P2P payment service.

- Click Proceed. The P2P screen appears with your account details.
- The app displays the following details:
- Your name
- Registered Phone
- Registered Email
- Default account for sending the amount
- Confirm the details to activate P2P payments, but you can also edit them if required.
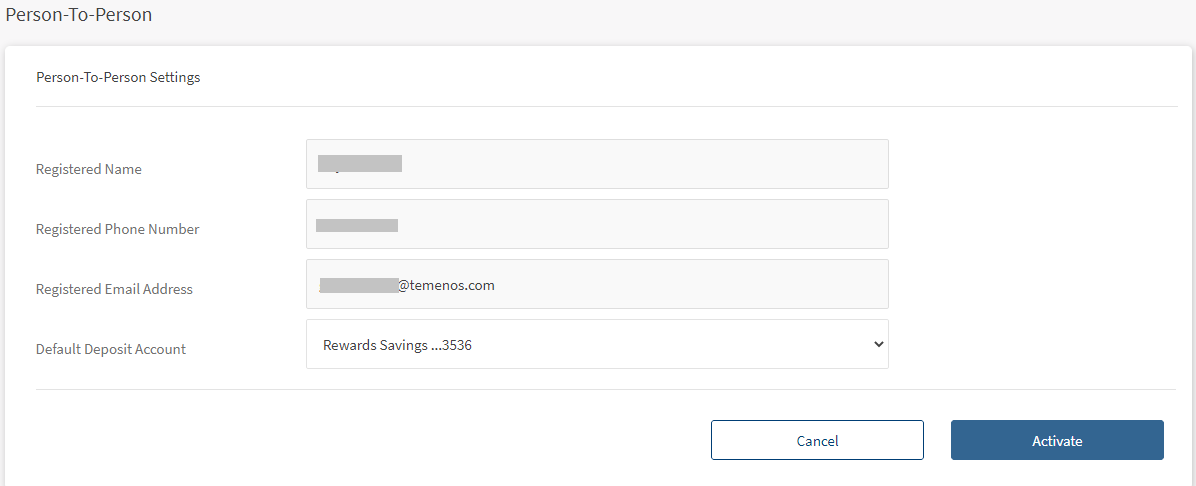
If you have multiple eligible accounts, you can select the preferred account for using the P2P payment service (for sending and receiving money).
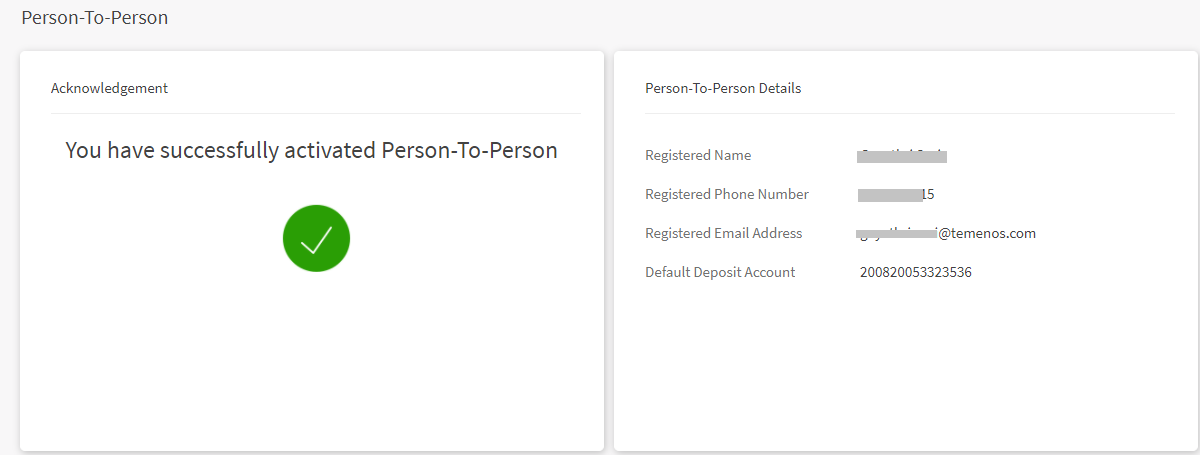
- Once P2P is activated, a confirmation message is displayed with your details. You can send and receive money via your email ID and mobile number.
|
Add P2P Recipient
From Add Recipients screen, click Person-to-Person Recipient. The app displays the form to enter the recipient details.
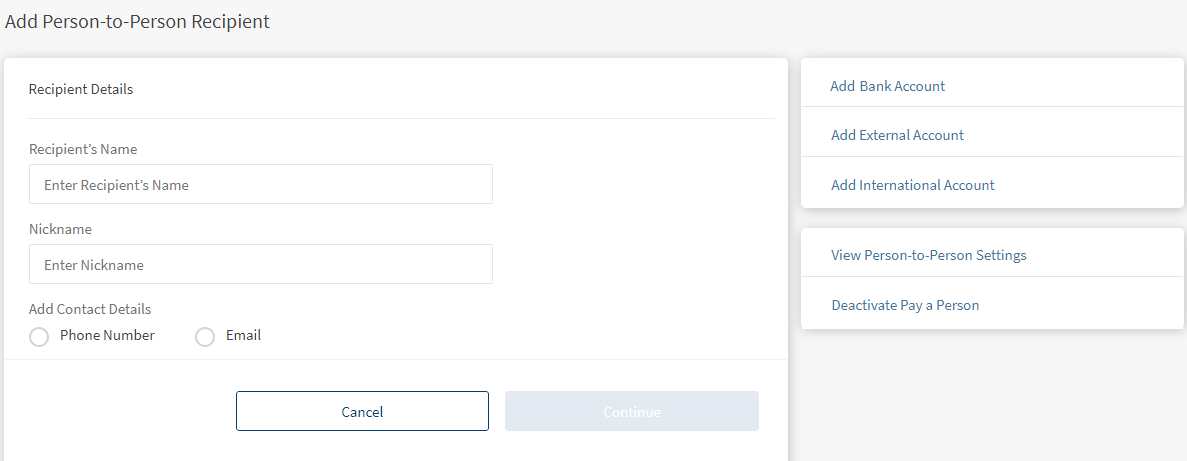
Enter the following details:
- Recipient Name. Enter the name of the recipient.
- Nick Name. Enter the nickname of the recipient.
- Contact Information Type (Phone Number or Email ID):
- Phone Number. Enter one or two phone numbers of the recipient.
- Email Address. Enter one or two email IDs of the recipient.
- Click Continue.
The app displays the confirmation screen where you can verify the details and modify them if required. - Click Add Recipient.
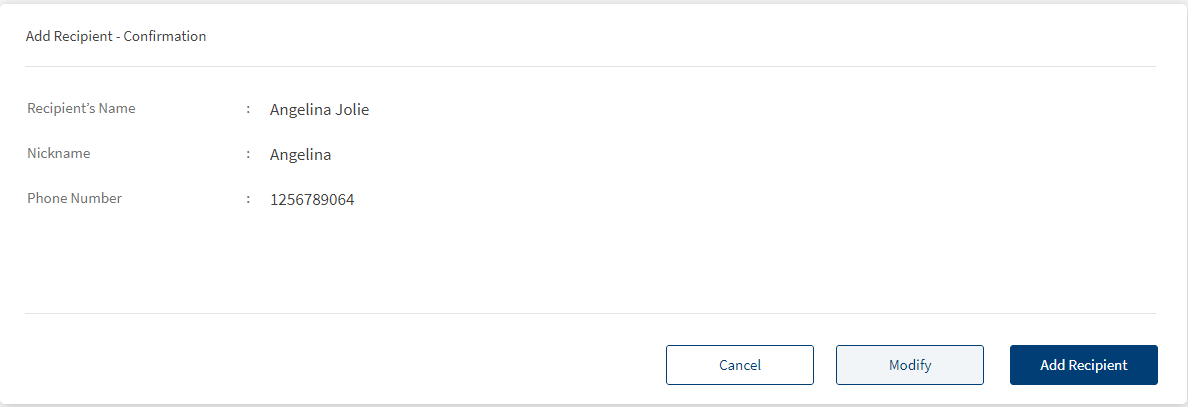
The app displays the acknowledgment screen with an acknowledgment message and account details confirming that the recipient has been added. The account is added to the list of accounts in the To list of the Same Bank Members transfer type on the Make Transfers screen. You can do the following:
- Make a Transfer
- Add Another Recipient

Add P2P Recipient in Mobile Banking
Below are the steps to add a new P2P recipient:
- Navigate Mobile Native > Manage Recipients > Person-To-Person Recipient. This opens the existing P2P recipients.
- Tap Add Recipient button to add new recipient.
There are two methods to add P2P recipient.- Adding P2P using Phone number
- From the Select Contact Type page, tap Phone Number.
- Either type the mobile number and tap Continue.
or- Tap on Choose from contacts.
- Search and tap the contact from your contacts.
- Automatically, the contact mobile number appears and tap Continue.
- Tap on Choose from contacts.
- From the Select Contact Type page, tap Phone Number.
- Adding P2P using Email
- From the Contact Type screen, tap Email.
- Either type the recipients email and tap Continue.
or- Tap on Choose from contacts.
- Search and tap the contact from your contacts.
- Automatically, the contact email appears and tap Continue.
- Tap on Choose from contacts.
- From the Contact Type screen, tap Email.
- Adding P2P using Phone number
- Enter the Recipient Name and tap Continue.
If you enter the email Recipient Name remains blank else contact name will be displayed. - Verify information, enter the Nickname and tap Confirm & Add Payee. This is an optional field .
- The success message screen as the P2P is added to your payee account.
Based on the requirement you can navigate to My Accounts or Transfer.
In this topic