Adding a New DMN Rule
A decision table can have one or more rules. Each rule consists of input and output entries. The input entries are input conditions, and the output entries are output conclusions of the rule. If an input condition is satisfied, then the output entry of that rule is the decision result. For more information about DMN, click here.
Considering a scenario that uses IDology for identity verification and authentication of applicants, an application of an applicant is approved only after authentication. However, in some cases, for demo purposes, you would want an application to be AutoApproved without depending on IDology’s decision. To avoid issues, configure a new DMN rule in Redhat to automatically move the application to the AutoApproved state.
Here are the steps for creating a user-defined rule for the application's Auto Approve Scenario, based on the applicant's first name:
- Login to RedHat Business Central.
- Navigate to Projects > SMH > Origination.
- Click on ApplicationRules.
- From the Decision Navigator, navigate to Decision Graphs > ApplicationRules > ApplicationStatus > Context. The Model view appears in the right pane.
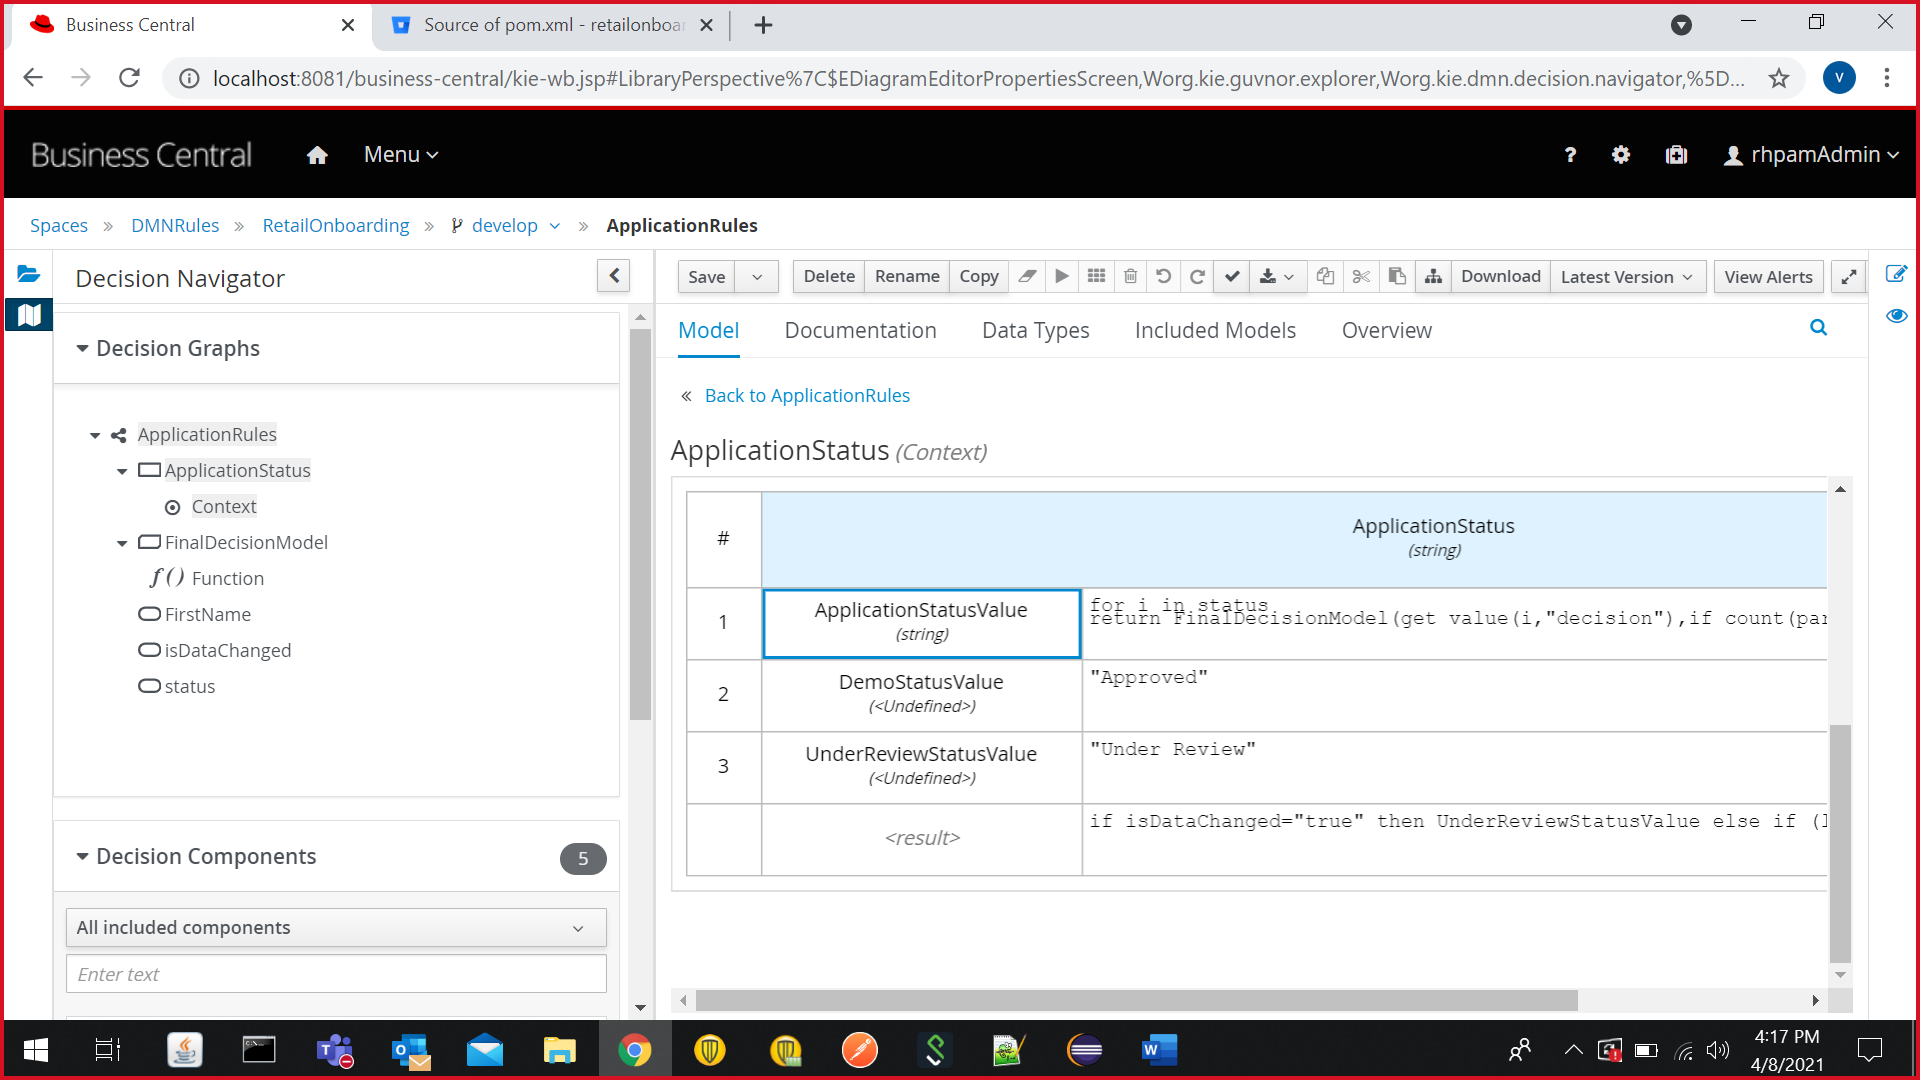
- In the ApplicationStatus decision table, go the <result> row. The existing value is:
if isDataChanged="true" then UnderReviewStatusValue else ApplicationStatusValue[-1]
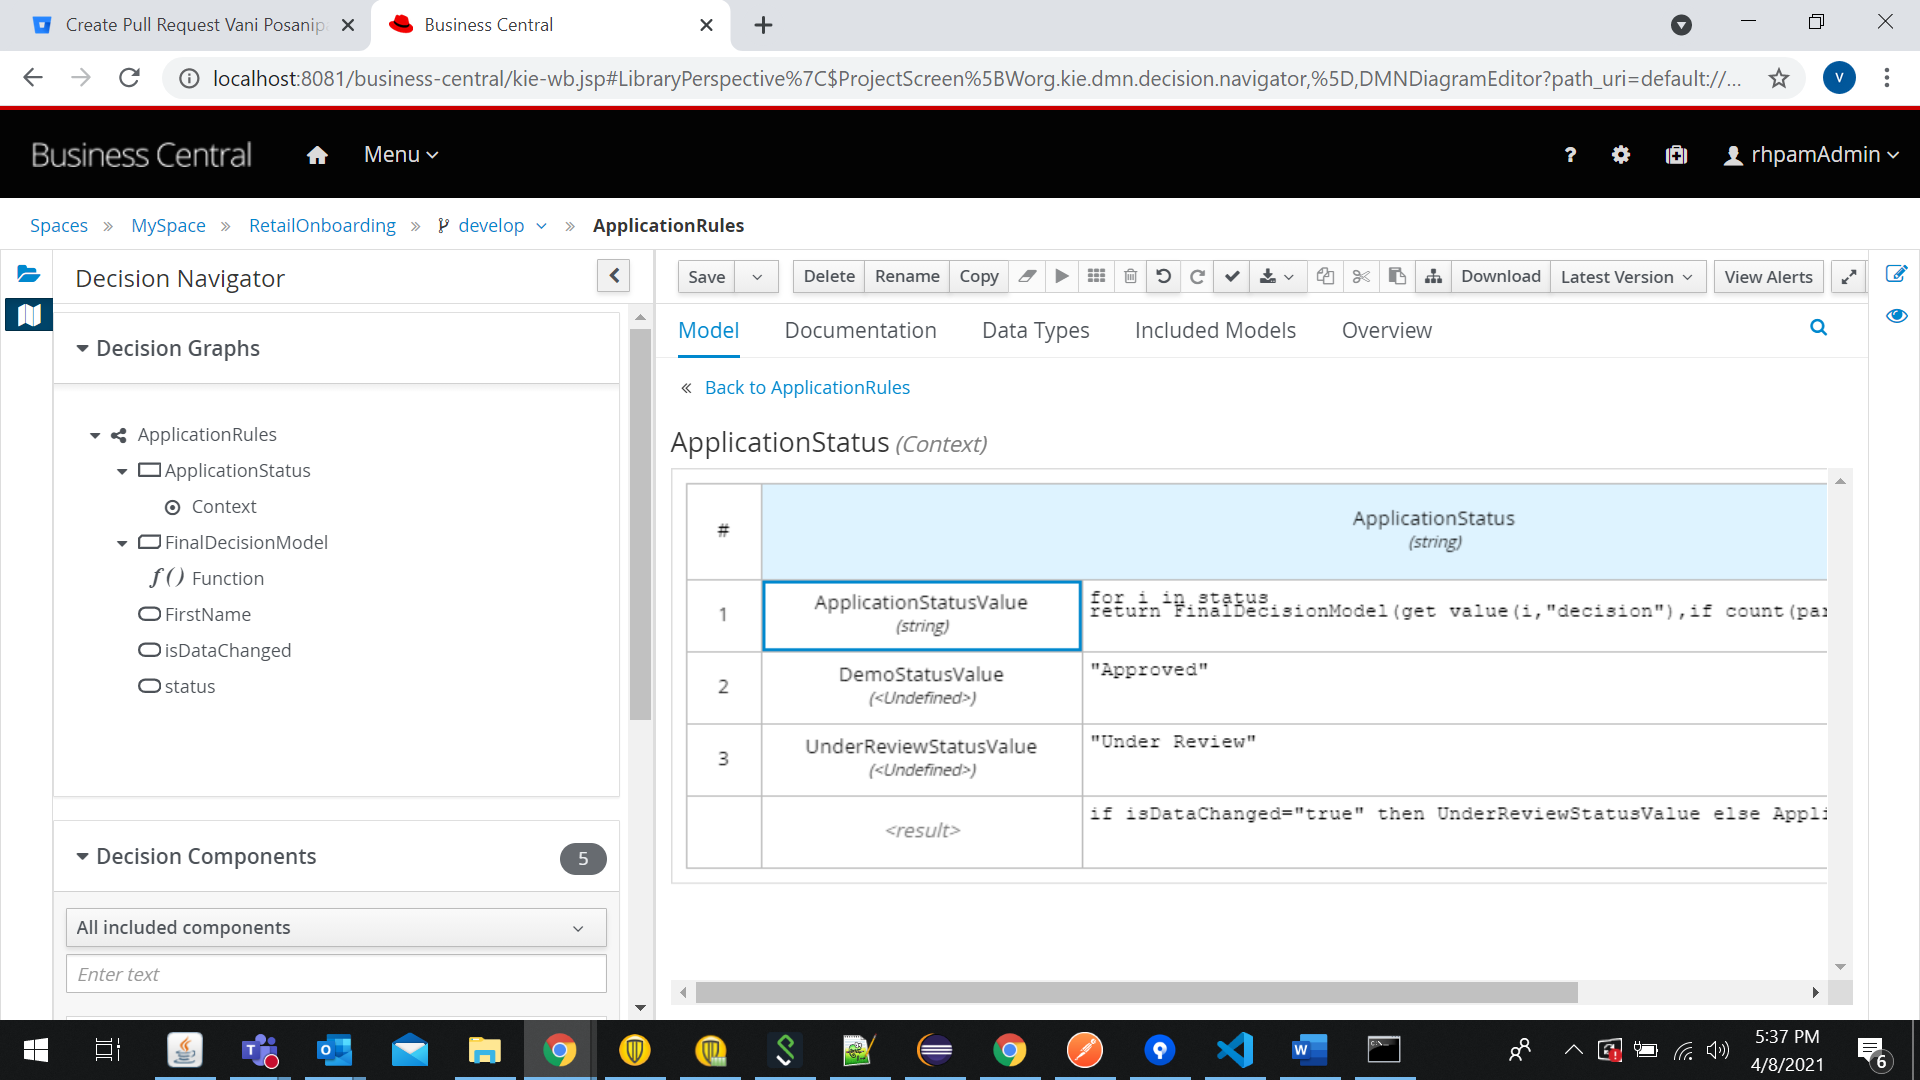
Modify the value to:
if isDataChanged="true" then UnderReviewStatusValue else if (list contains(["MAX","PAULO"],upper case(FirstName))) then DemoStatusValue else ApplicationStatusValue[-1]
The Auto Approve rule adds the first name(s) separated by a comma.
- Click on Save.
- From the breadcrumbs, navigate to the RetailOnboarding screen and click Deploy. You will see a notification that the deployment to the server configuration is successful.

In this topic