Manage Parties
Use the functionality to add an existing entity or a new entity as a related party to a request or facility.
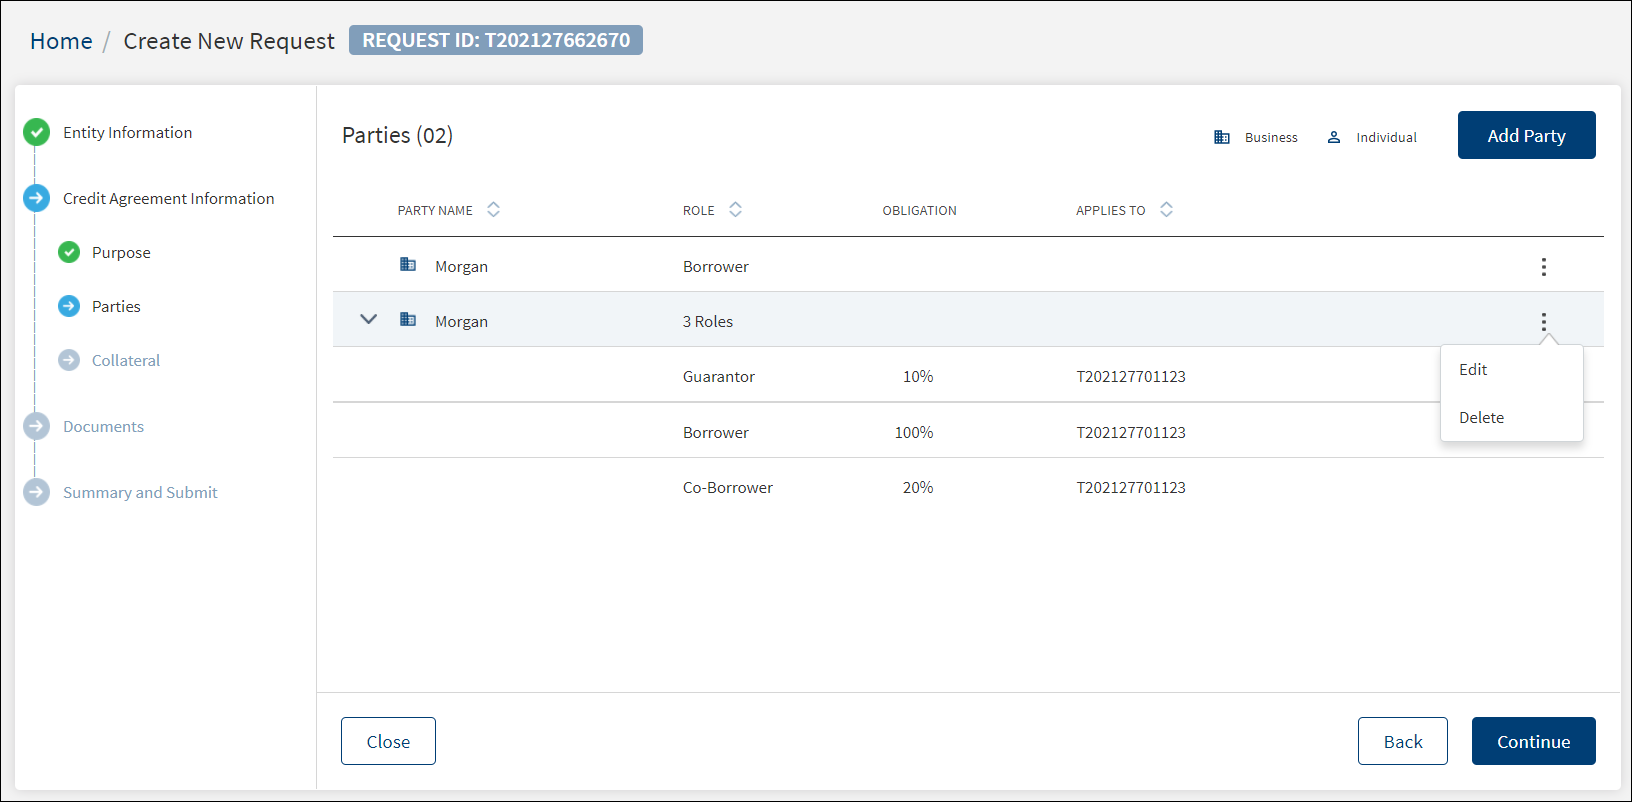
Party List
The application displays the related parties on the summary screen with the following details: Party Name, Role, Obligation, and Applies to which facility.
The parties (individual, business or group) are distinguished by different icons placed in front of the entity name. Click the arrow in front of the Party Name to view the list of roles created for the selected party.
Do any of the following:
- From the list of parties, click any row to view the party details.
- Click Add Party to add a new party.
- On the context menu ,
- Click Edit to modify the details.
- Click Delete to remove the party. On the confirmation pop-up that appears, click Yes to delete the record. The Delete option is available only when there are more than one party.
View Party Details
From the list of parties, click any row to view the details.

This section displays the following fields for Individual.
- Basic Information
- Entity ID
- Entity Type
- Entity Status
- First Name
- Middle Name
- Last Name
- Date of Birth
- National ID number
- Country
- Address Line 1
- Address Line 2
- City
- State
- Zip/Postal Code
-
Contact Information
- Email Address
- Contact Number

This section displays the following fields for Business.
- Basic Information(View Party)
- Entity ID
- Entity Type
- Entity Status
- Legal Name
- Company Type
- Industry
- Sub-Industry
- Registration ID
- Registration Date
- Country of Incorporation
- Years in Business
- Website Address
- Estimated Annual Revenue
- Employee Count
- Country
- Address Line 1
- Address Line 2
- City
- State
- Zip Code
- Phone number
- Primary Contact Information
- First Name
- Middle Name
- Last Name
- Job Title
- Phone number
- Email Address
- Click Edit to modify the details.
- Click the X icon to close the screen.
Add Party
Use the feature to add an existing entity or a new entity as related party. The parties that are added will function as the Borrower, Co-borrower, Guarantor and more.
A user can add an Individual, Business, or a Group as a party. These could be new or existing entities and in case of a group, it can be only from the existing group.

To add a party, follow these steps:
Until otherwise stated, information in all the fields are mandatory.
- From the list of parties, click Add Party.
- The application displays the list of existing entities with the following details: Entity name, Entity ID, Created on, and Address. The parties list is retrieved from the Party Microservice. Entities that are already a related party are not displayed in the list. The parties (Group, Individual, or Business) are distinguished by different icons
 placed in front of the entity name.
 - Do any one of the following:
- Click Select to add any entity or a group as a new party from the list of existing entities. Use the search bar to search for a specific party or group by entity name or ID. The search result fetches the matching individual and business parties and groups.
- Click Add New Party as an individual or as a business. note that while adding an entity, the individual and business segregation is not available.
- Click the Entity Name to view the details.
- Enter the required information.
- Click Add Party. The application displays a confirmation that the party is successfully added. The new party is added to the list.
Add Party from Existing Entities
Add any entity as a new party from the list. Use the search bar to search for a specific party.
- From the list of parties, click Add Party.
- The application displays the list of existing parties.
- Click Select to add any entity as a new party from the list of existing entities.
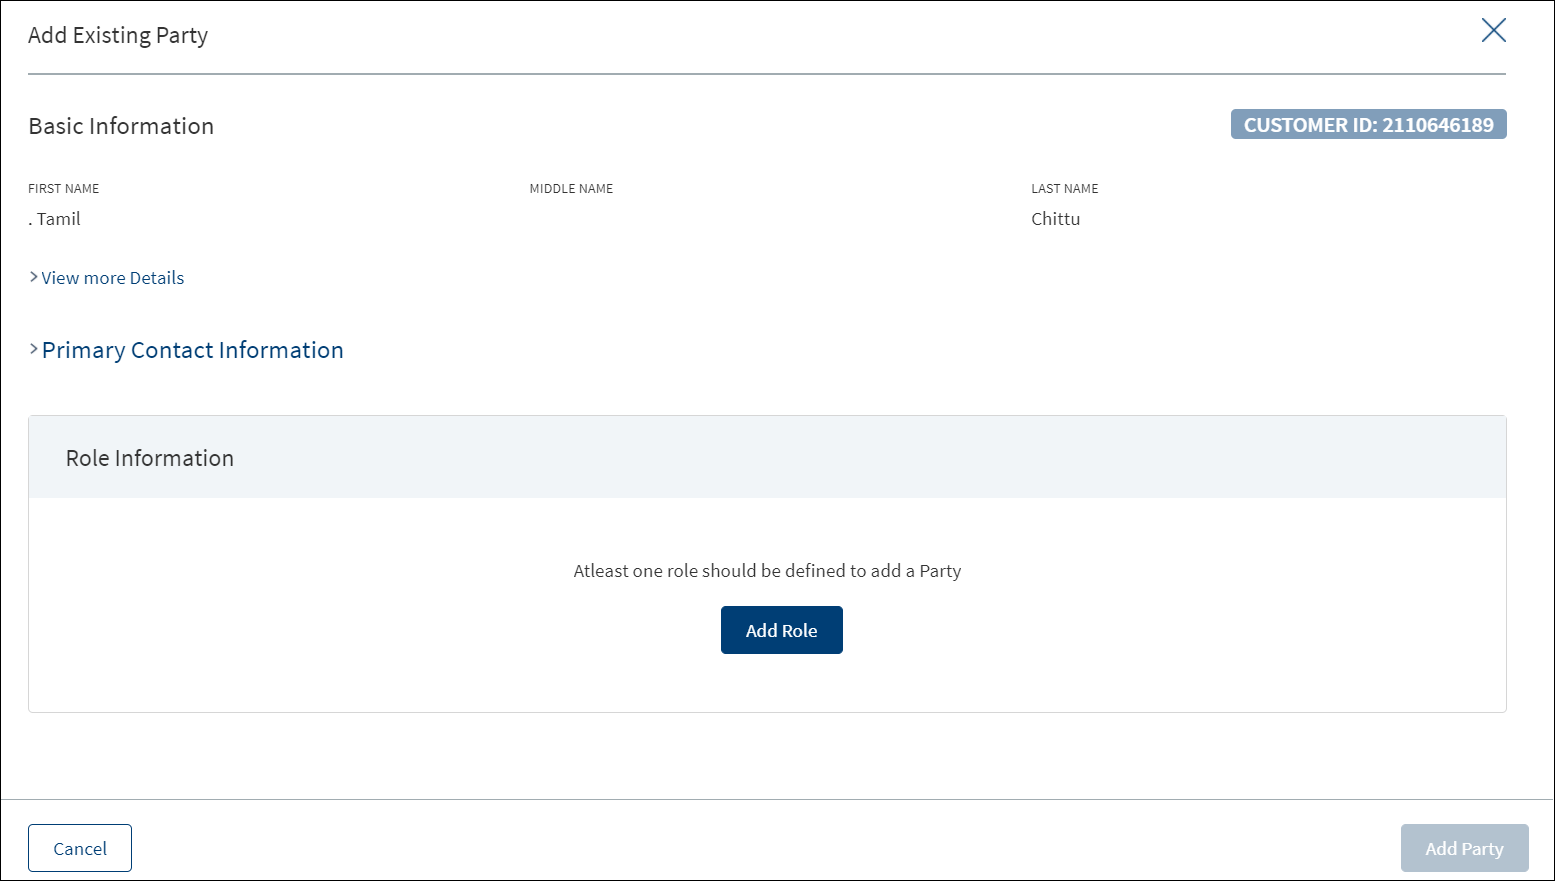
If the party is added from the entity overview screen, on clicking the Select button, the application adds the party and displays a confirmation message that the party is added successfully.
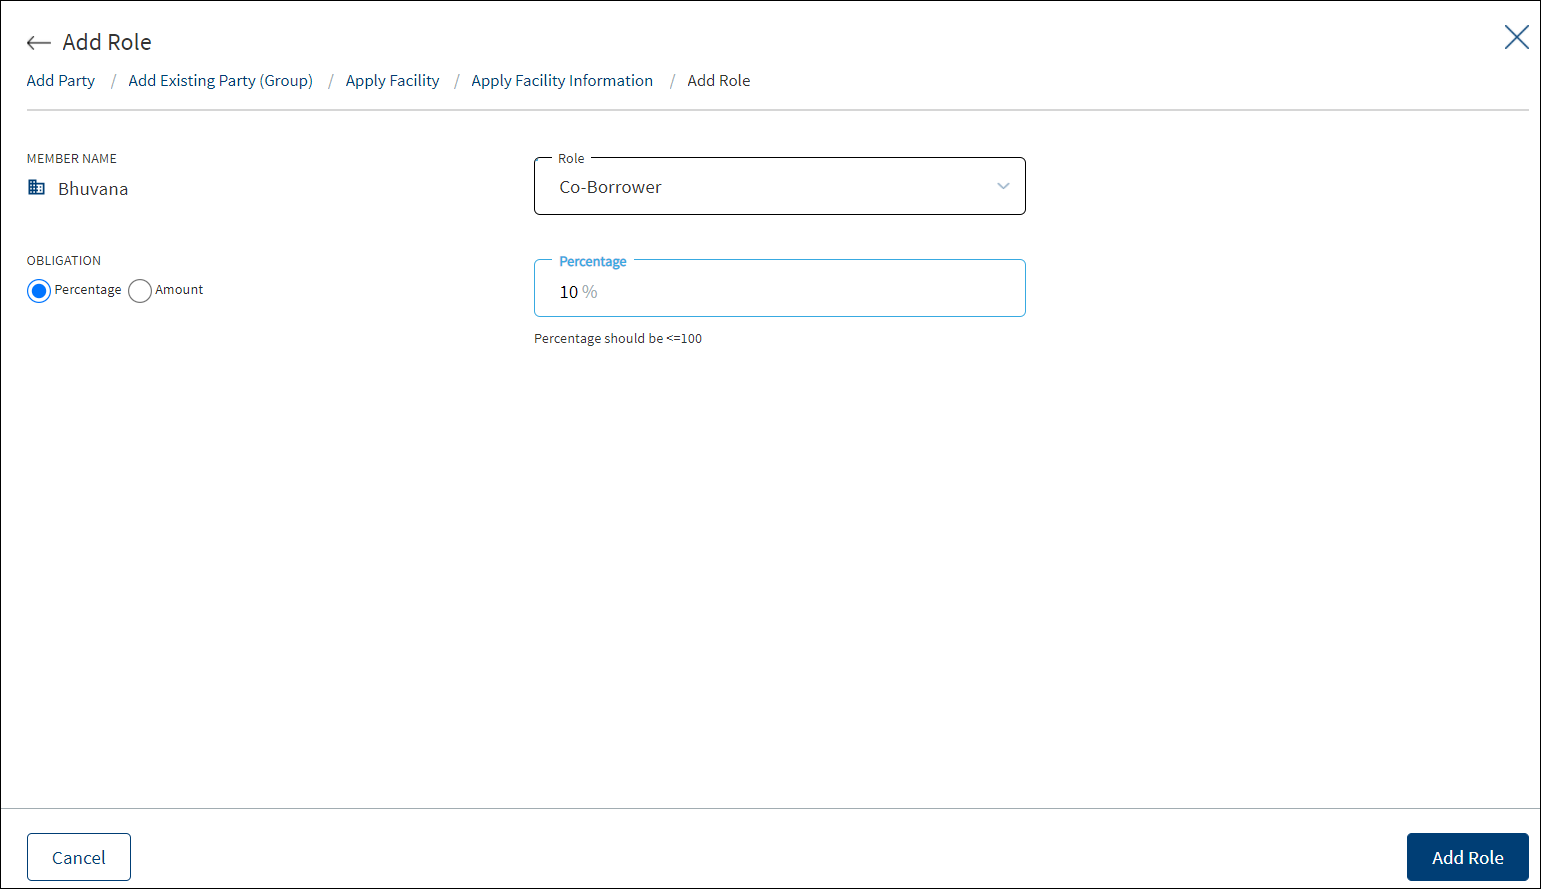
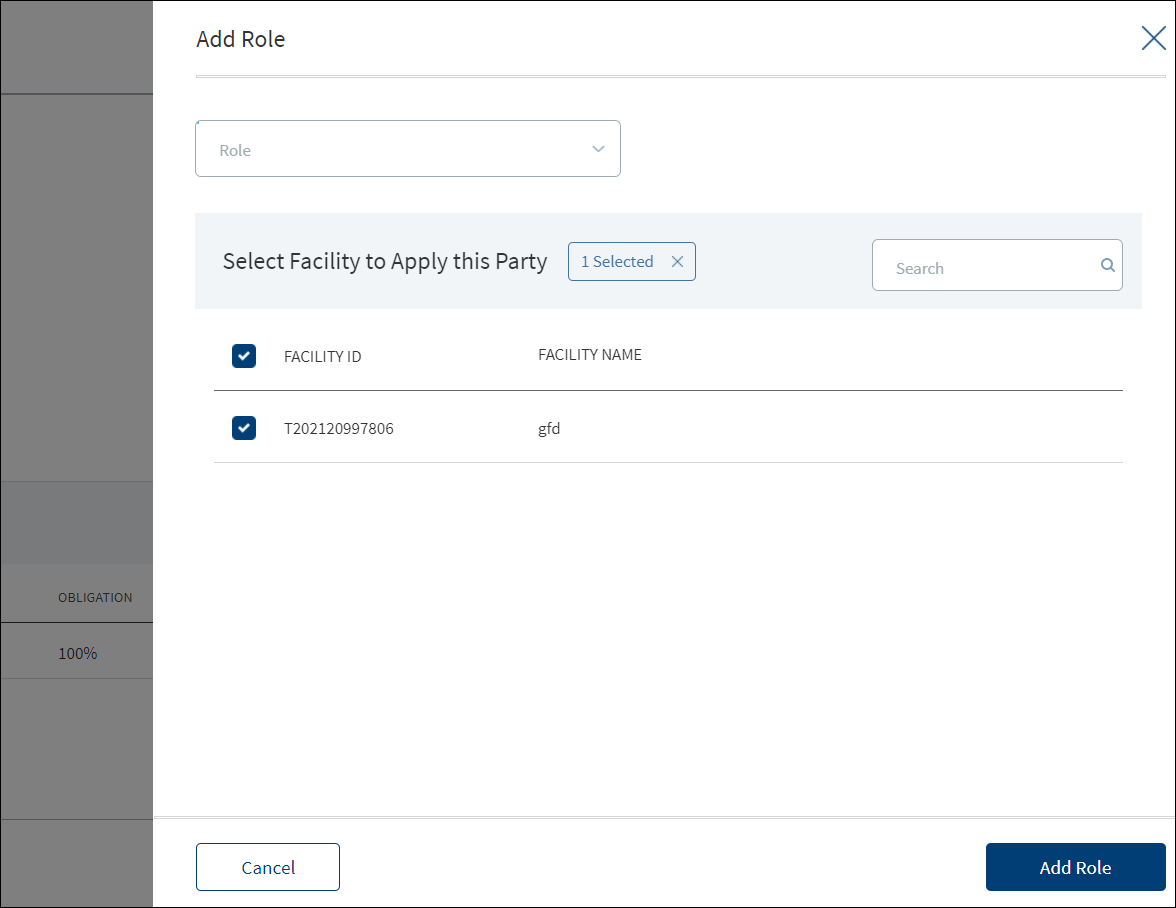
- Click Add Role. The application displays the Add Role screen.
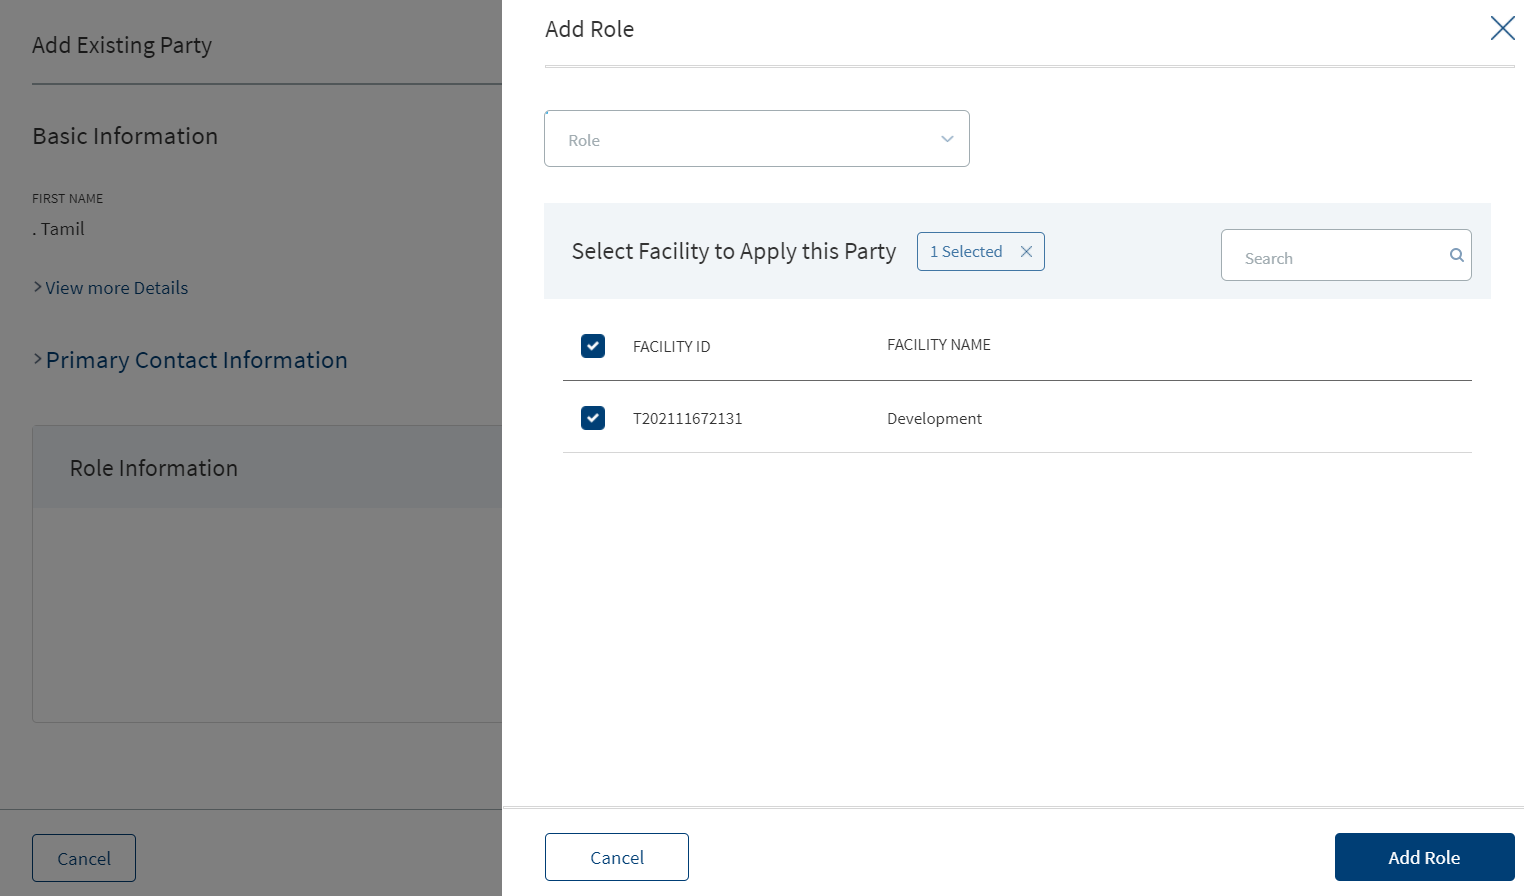
- Select the role from the list (for example - Borrower or Co-borrower). This field is not applicable when you add party from the entity overview screen.
- Select the obligation as a percentage or in amount. Enter the percentage or if it is an amount, select the currency from the list and enter the amount. The currency field has predictive search where you can enter your option in the box and select the required option from the matching result rather than scroll down the list to select a currency. The Obligation field is not applicable when you add the role as a Borrower.
- The application displays the associated facilities with the request. Select the facility from the list to apply the party.
- Click Add Role. The role of the party is added to the Role Information list. If required, use the context menu to edit or delete the role.
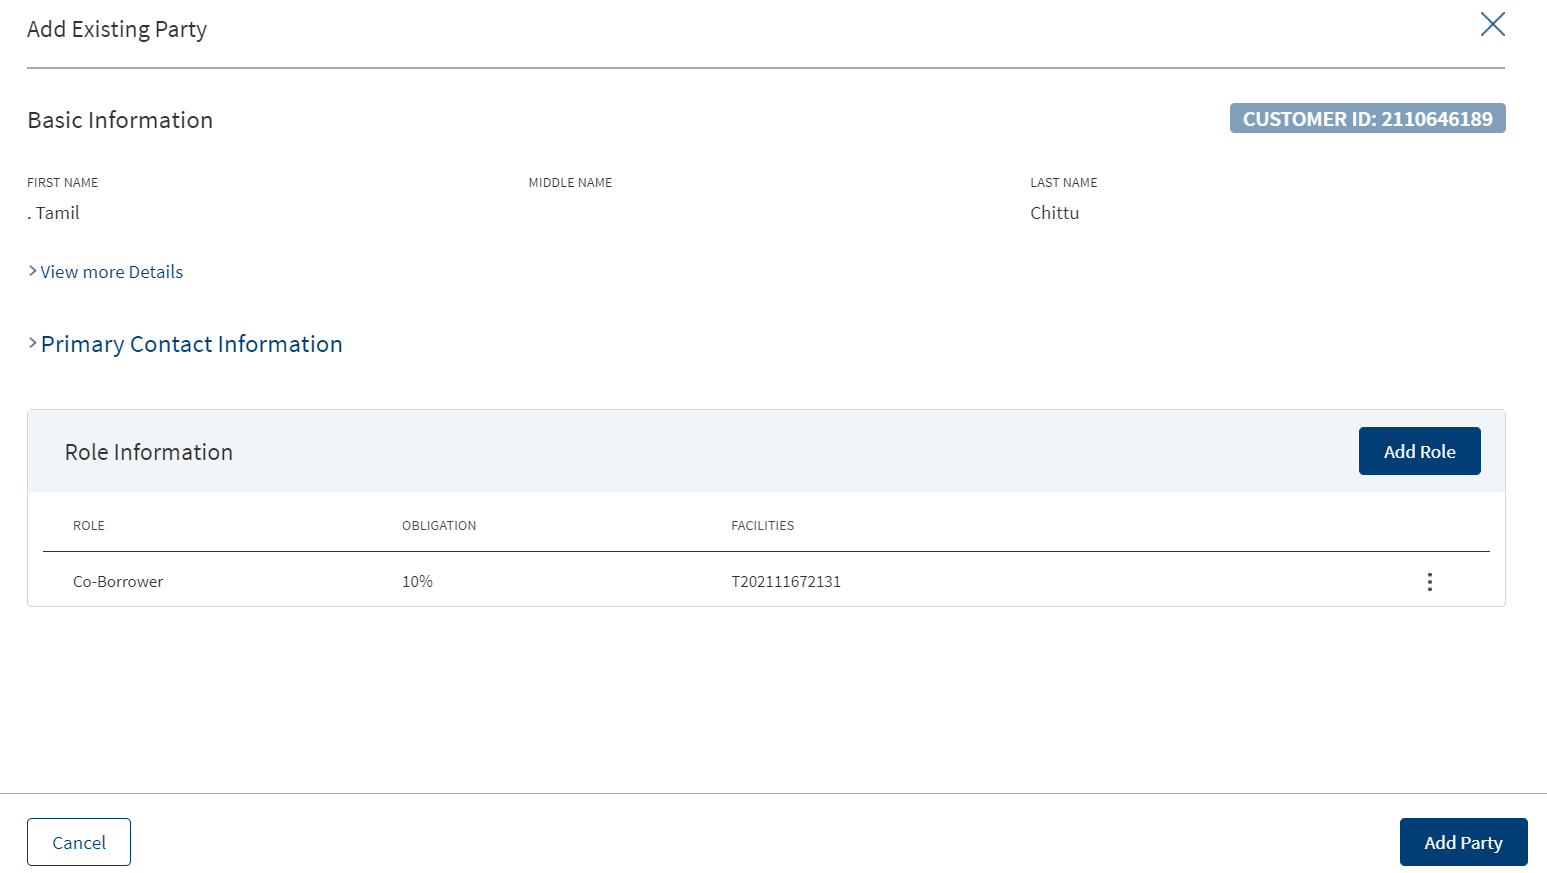
- Click Add Party. The new party is added to the party list and stored in the Party Microservice.
Add Party from Existing Entities - Group
Add any existing group as a new party from the list. Use the search bar to search for a specific group.
- From the list of parties, click Add Party.
- The application displays the list of existing groups by group name or ID.
- Click Select to add any group as a new party from the list of existing groups.
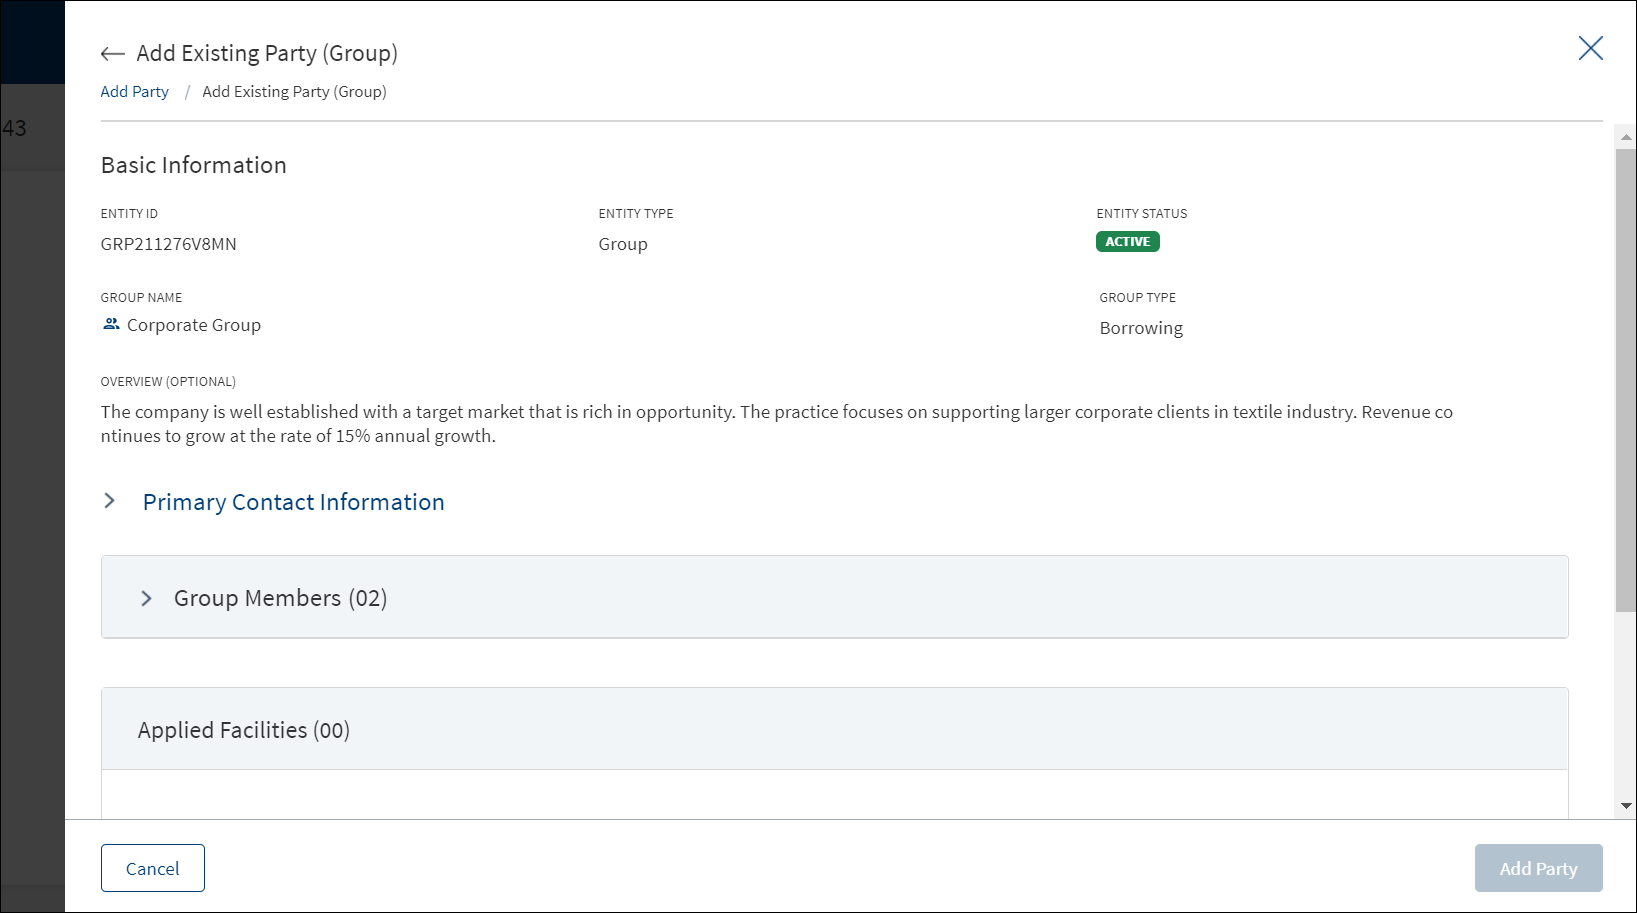
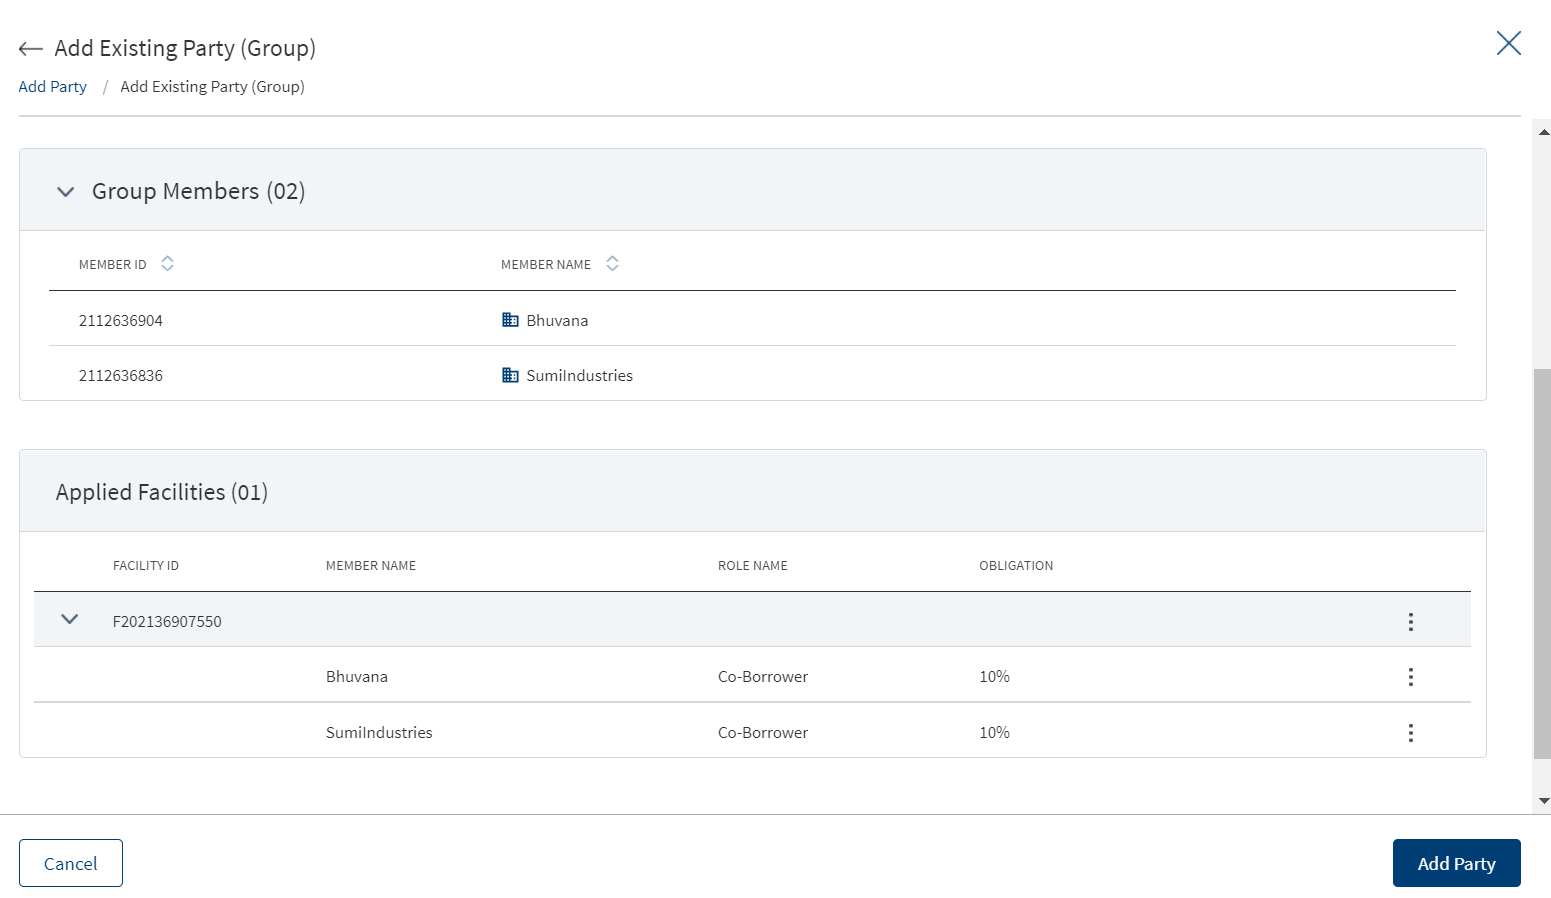
- The application displays the following information.
- Basic Information: Information such as Entity ID, Entity Type, Entity Status, Group Name, and a description of the group.
- Primary Contact Information
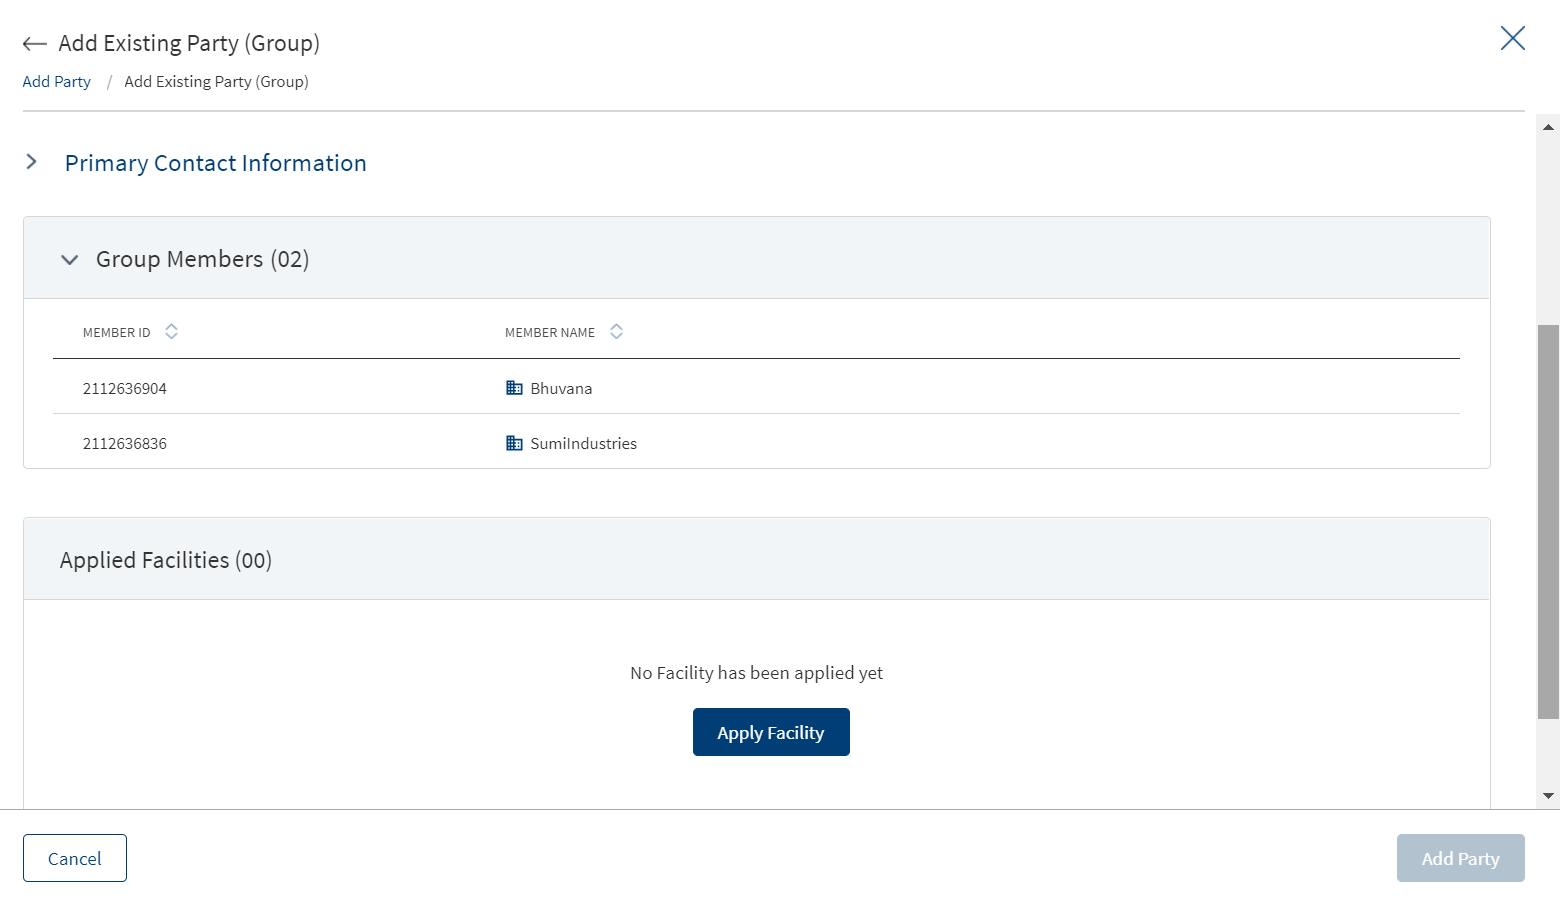
- Group Members: The list of members in the group with the count in parenthesis.
- Applied Facilities: The list of facilities applied to the group with the count in parenthesis.
- Under Applied Facilities, click Apply Facility.
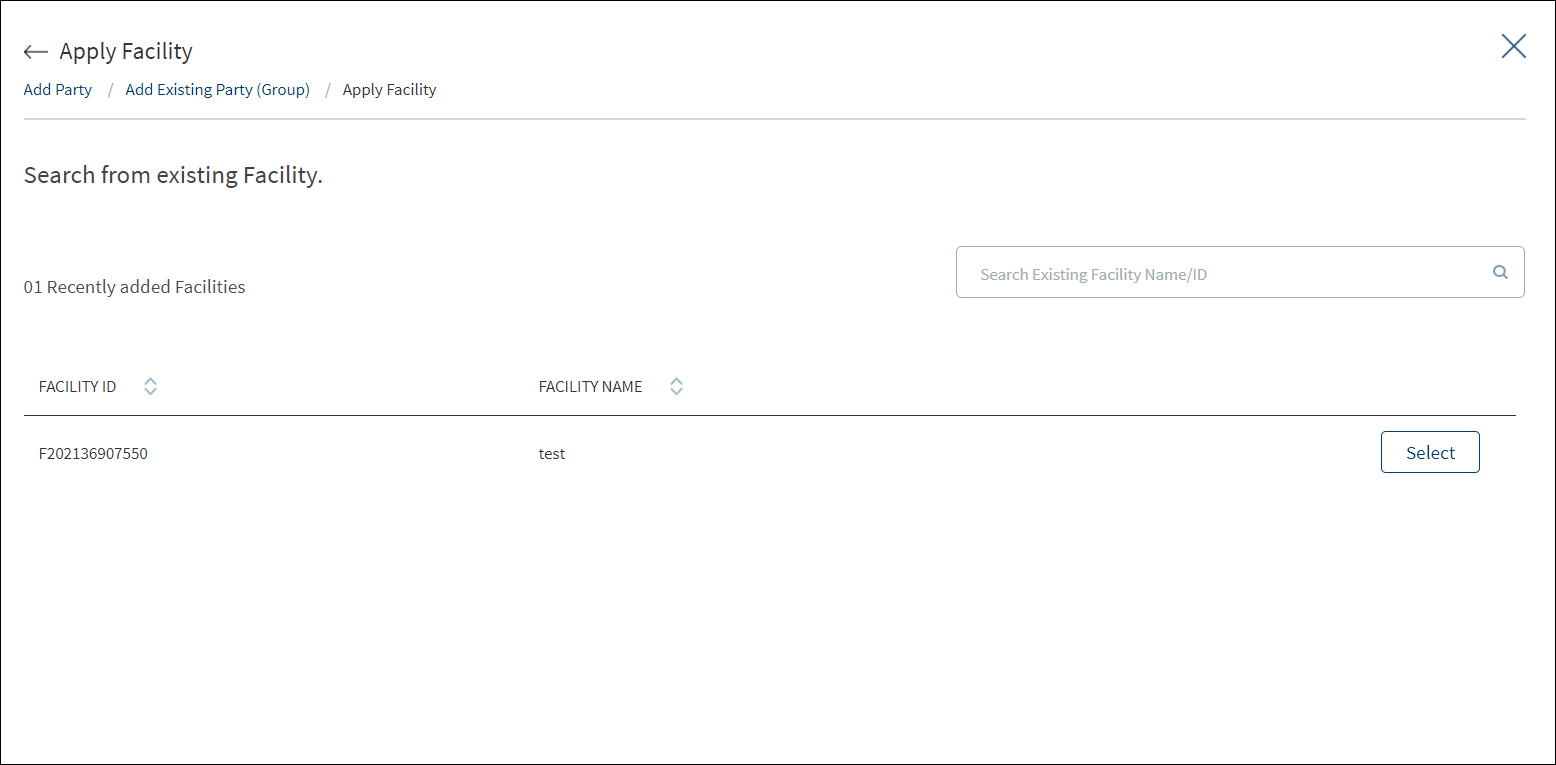
- The application lists the facilities with Facility ID and Facility name. Use the search bar to search for a specific facility. Select the required facility.
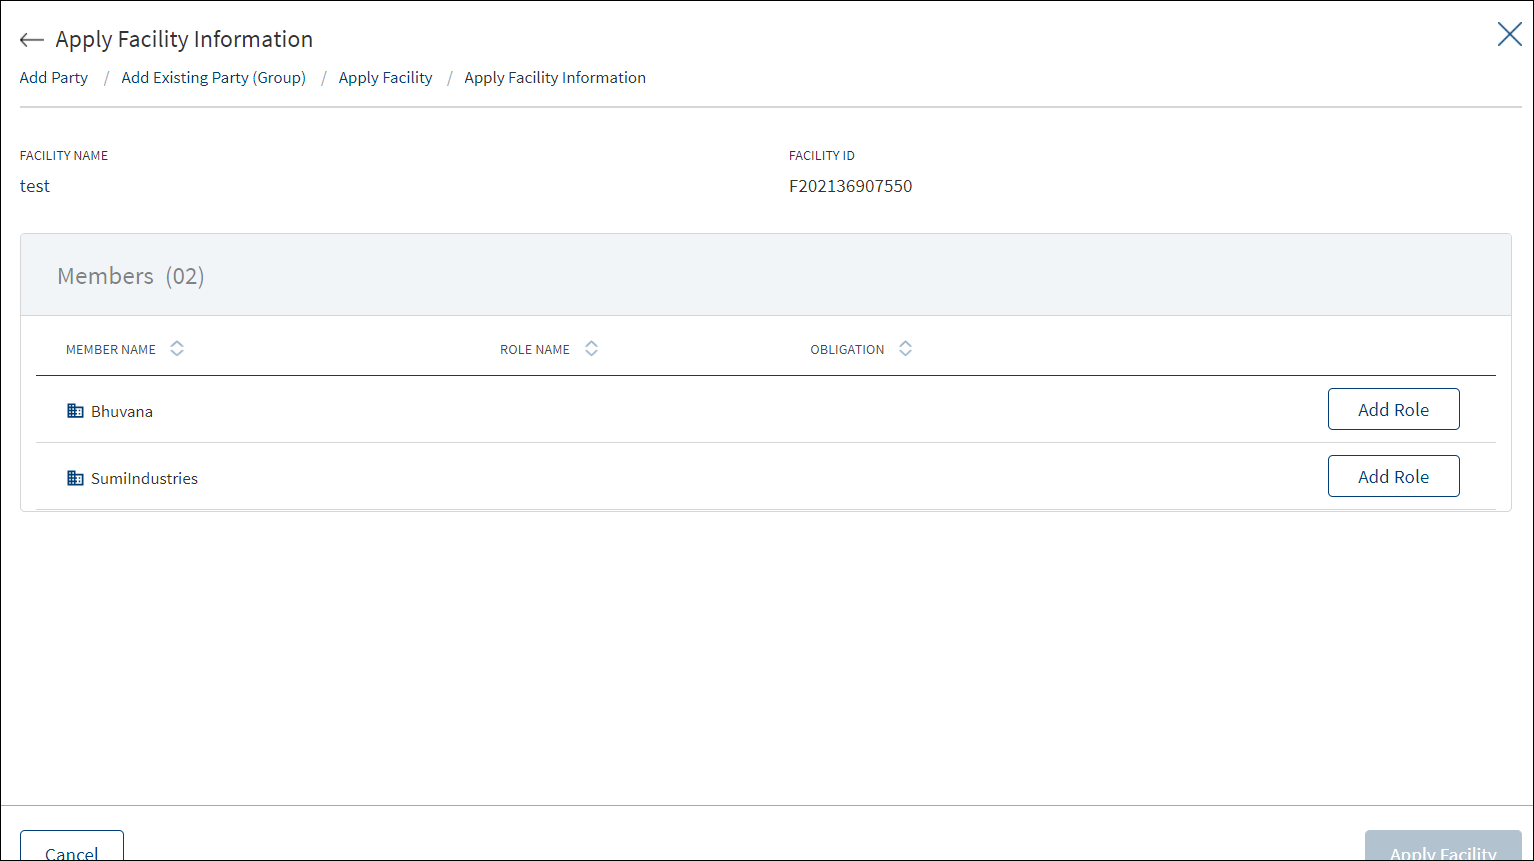
- The application displays the Members section to assign a role. Click Add Role to assign a role to the selected member.
- Select the role from the list (for example Borrower or Co-borrower). If the facility already has a borrower member, the other member should be co-borrower.
- Select the obligation as a percentage or in amount. Enter the percentage or if it is an amount, select the currency from the list and enter the amount. The currency field has predictive search where you can enter your option in the box and select the required option from the matching result rather than scroll down the list to select a currency. The Obligation field is not applicable when you select the role as Borrower.
- Click Add Role. Repeat the same for all members.

- The application displays the Role Name with Obligation Details for the members. Use the context menu to modify the details if required. Click Apply Facility.
- The application displays the Member Name with Role Name and Obligation Details for the facility. Use the context menu to modify the details if required.
- Click Add Party. The new party is added to the party list and stored in the Party Microservice.
Add New Party - Individual
On the Add New Party screen, click the Business option.

The application displays a screen to capture the basic and role information.
- Basic Information. Capture the following details. Until otherwise stated, information in all the fields are mandatory:
- Select the salutation from the list and enter the first name.
- Enter the middle name. The information is optional.
- Enter the date of birth in MM/DD/YYYY format.
- Enter the identification number.
- Select the country from the list.
- Enter the address details in line 1.
- Enter the address details in line 2. The information is optional.
- Enter the city name, state, and zip code.
- Contact Information
- Select the phone code and enter the phone number.
- Enter the email address. This field is optional.
- Role Information.
- Click Add Role. The application displays the Add Role screen.
- Select the role from the list (for example - Borrower or Co-borrower). This field is not applicable when you add party from the entity overview screen.
- Select the obligation as a percentage or in amount. Enter the percentage or if it is an amount, select the currency from the list and enter the amount. The currency field has predictive search where you can enter your option in the box and select the required option from the matching result rather than scroll down the list to select a currency. The Obligation field is not applicable when you select the role as Borrower.
- The application displays the associated facilities with the request. Select the facility from the list to apply the party. Multiple facilities can be selected. In case of multi–facility, a party can be added to different facilities with different/same role and each one of them will be displayed as a separate row in the summary page.
- Click Add Role. The role of the party is added to the Role Information list. If required, use the context menu to edit or delete the role.
- Click Add Role. The application displays the Add Role screen.
- Click Add Party. The new party is added to the party list and stored in the Party Microservice.
Add New Party - Business
On the Add New Party screen, click the Business option.

The application displays a screen to capture the basic, role and primary contact information.
- Basic Information. Capture the following details. Until otherwise stated, information in all the fields are mandatory:
- Enter the legal name of the entity or customer.
- Enter the registration ID of the entity. The information is optional.
- Select the company type from the list.
- Select the industry from the list.
- Enter the sub-industry information.
- Select the company registration date from the calendar. The information is optional.
- Enter the number of years in business. The information is optional.
- Select the currency from the list (for example - USD). This field has predictive search where you can enter your option in the box and select the required option from the matching result rather than scroll down the list to select a currency.
- Enter the estimated annual revenue amount.
- Enter the employee count in company. The information is optional.
- Enter the company website address. The information is optional.
- Select the country from the list.
- Enter the address details in line 1.
- Enter the address details in line 2. The information is optional.
- Enter the city name, state, and zip code.
- Select the phone code and enter the phone number.
- Enter the email address. The information is optional.
- Enter a brief overview on the company. The information is optional. When a lengthy comment or description is entered which does not fit the field, then the content moves to the next line of the field. The field accepts up to 1000 characters.
- Primary Contact Information. Capture the details of the primary contact for the business. All the fields are optional.
- Select the salutation or title from the list and enter the first name.
- Enter the middle name. The information is optional.
- Enter the last name.
- Enter the job title.
- Select the phone code and enter the phone number.
- Enter the email address.
- Role Information. Add a role as required (for example - Borrower).
- Click Add Role. The application displays the Add Role screen.
- Select the role from the list (for example - Borrower or Co-borrower). This field is not applicable when you add party from the entity overview screen.
- Select the obligation as a percentage or in amount. Enter the percentage or if it is an amount, select the currency from the list and enter the amount. The currency field has predictive search where you can enter your option in the box and select the required option from the matching result rather than scroll down the list to select a currency. The Obligation field is not applicable when you select the role as Borrower and the obligation will be defaulted to 100 percent.
- The application displays the associated facilities with the request. Select the facility from the list to apply the party. Multiple facilities can be selected. In case of multi–facility, a party can be added to different facilities with different/same role and each one of them will be displayed as a separate row in the summary page.
- Click Add Role. The role of the party is added to the Role Information list. If required, use the context menu to edit or delete the role.
- Click Add Role. The application displays the Add Role screen.
- Click Add Party. The new party is added to the party list and stored in the Party Microservice.
Edit Party
Use the feature to modify the party details. In the role information section while editing an existing party, a borrower record can be edited only until it is a single role. When other roles such as co-borrower or guarantor are also available, the borrower role cannot be edited. In case of a group, a user cannot add any new group member to an existing group, cannot edit the Borrower role associated with a facility, and the user can only edit /change the obligation of the co-borrower.
- On the context menu , click Edit. The application displays the screen to edit the party details. The screen is similar to the one while adding the party.
- Do as required.
- Edit a group
- On the Applied facilities list, click Edit on the context menu.
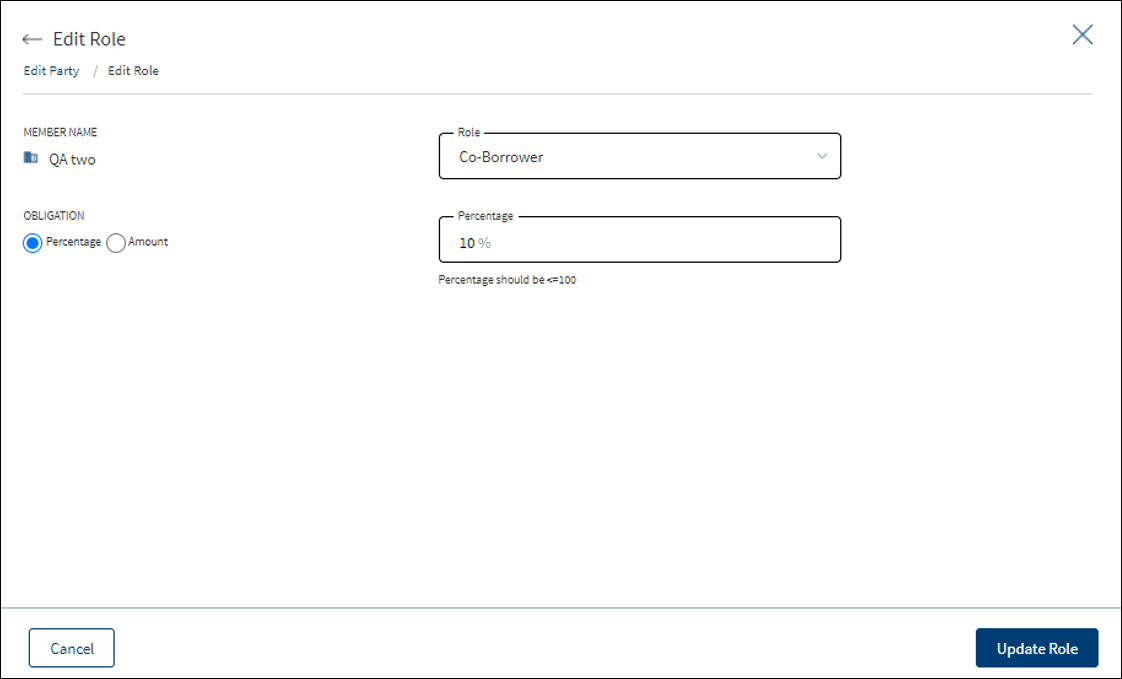
- Select the Role from the list. For example, Co-Borrower, Guarantor.
- Define the Obligation limit as a percentage or in amount. Enter the percentage or if it is an amount, select the currency from the list and enter the amount. The currency field has predictive search where you can enter your option in the box and select the required option from the matching result rather than scroll down the list to select a currency.
- Click Update Role.
- On the Applied facilities list, click Edit on the context menu.
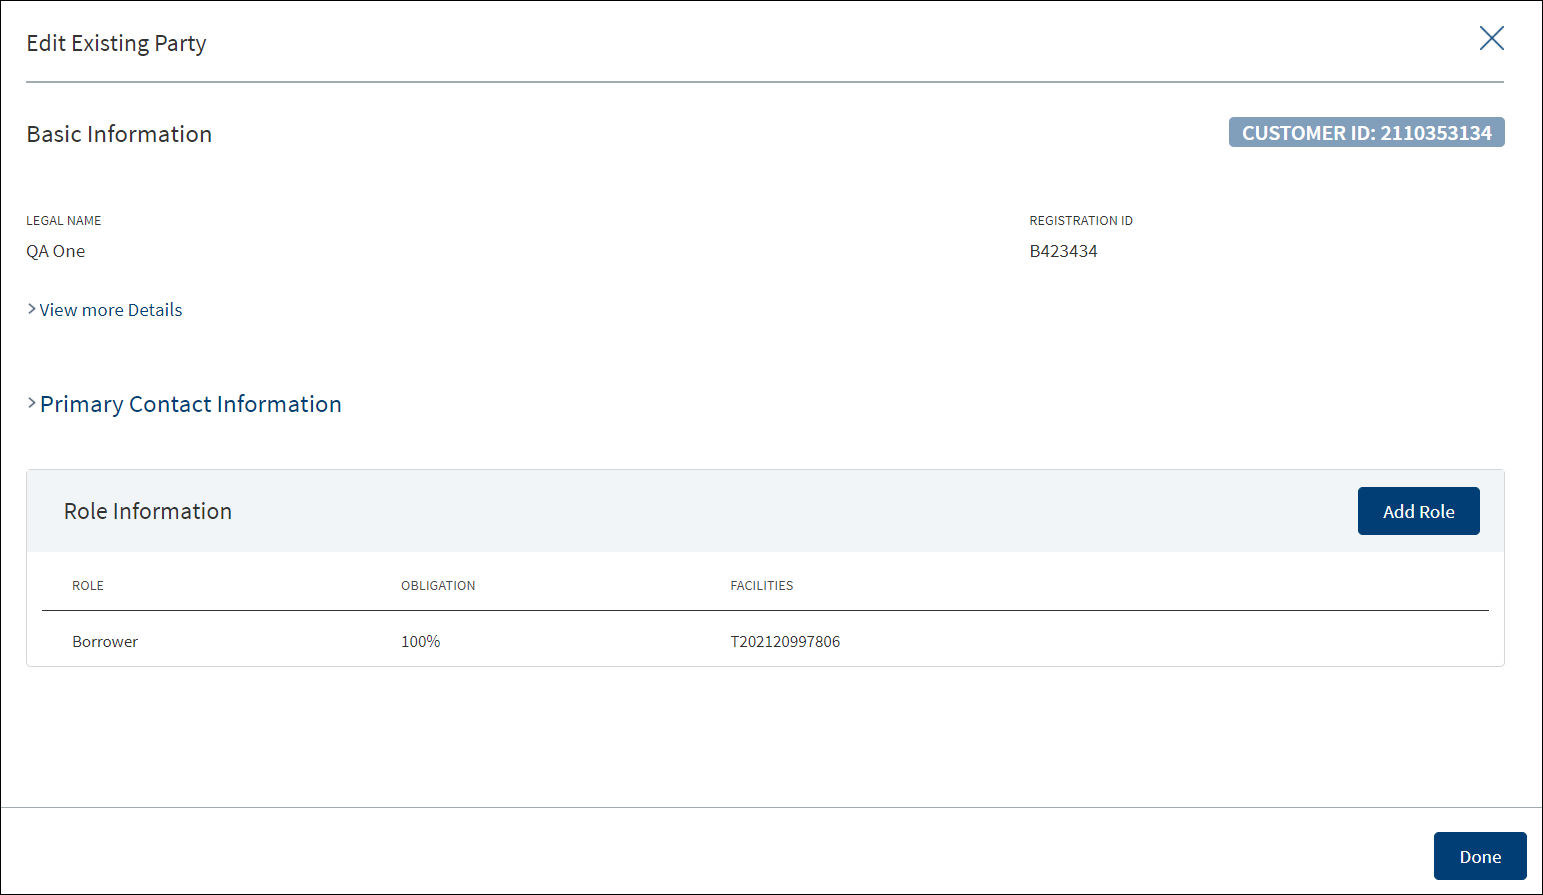
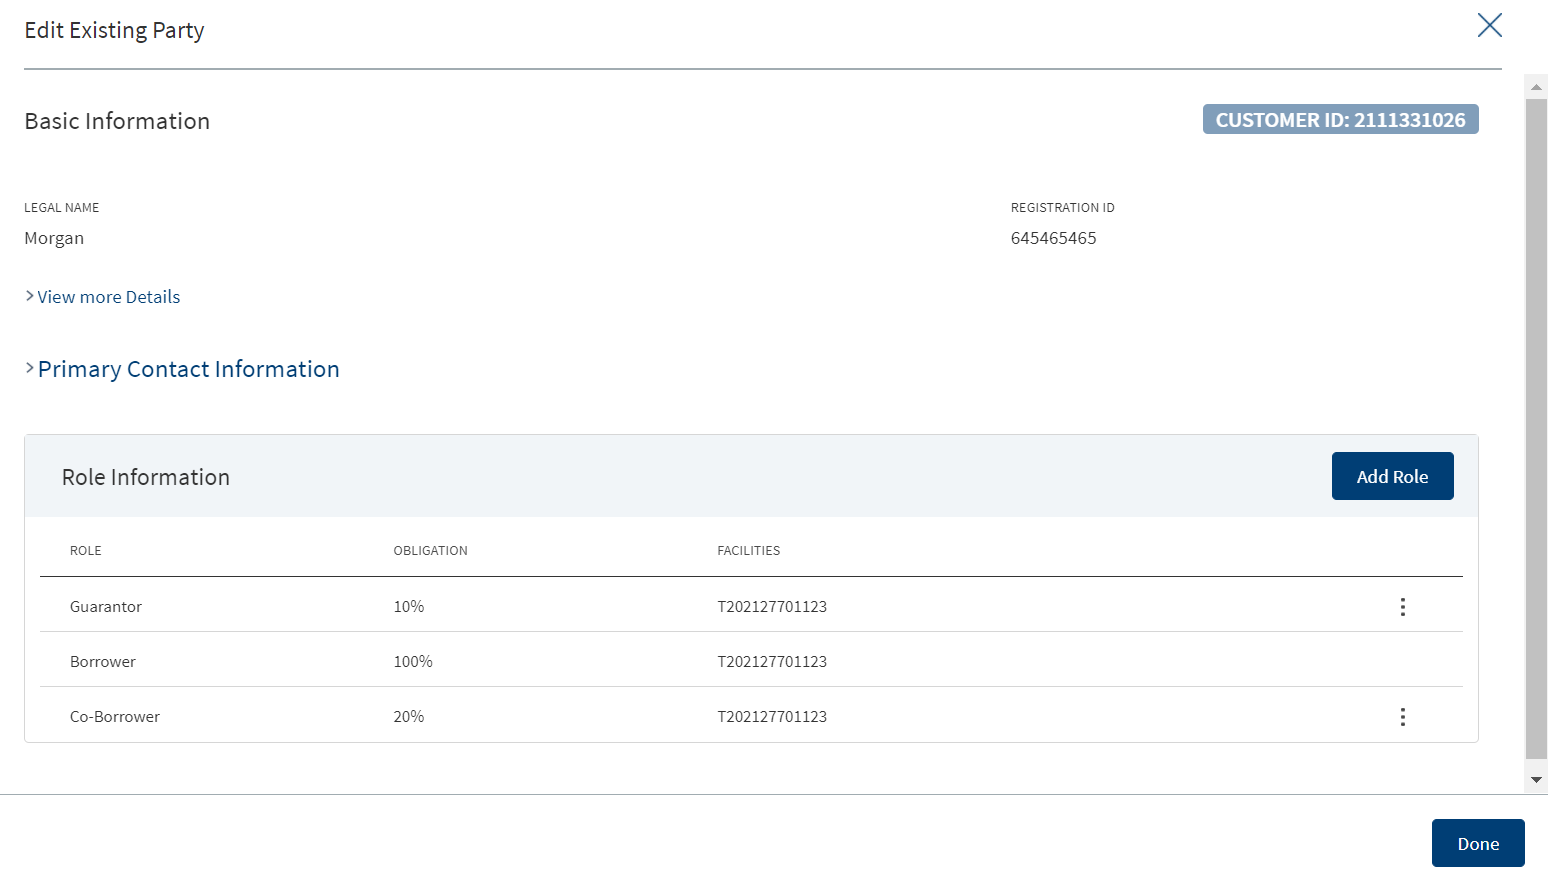
- Edit an existing party
- On the Role Information list, click Add Role if a new role such as a co-borrower or guarantor is required. The application displays the Add Role screen.
- Select the Role from the list. For example, Co-Borrower, Guarantor.
- Define the Obligation limit as a percentage or in amount. Enter the percentage or if it is an amount, select the currency from the list and enter the amount. The currency field has predictive search where you can enter your option in the box and select the required option from the matching result rather than scroll down the list to select a currency.
- The application displays the list of facilities associated with the entity with Facility ID and Facility Name. Use the search option to narrow down the search. Select the check box of the required facilities.
- Click Add Role. The role is added to the list.
- On the Role Information list, click Add Role if a new role such as a co-borrower or guarantor is required. The application displays the Add Role screen.
- Edit a group
- After making the required changes, click Done. The application displays a confirmation message that the record is updated successfully.
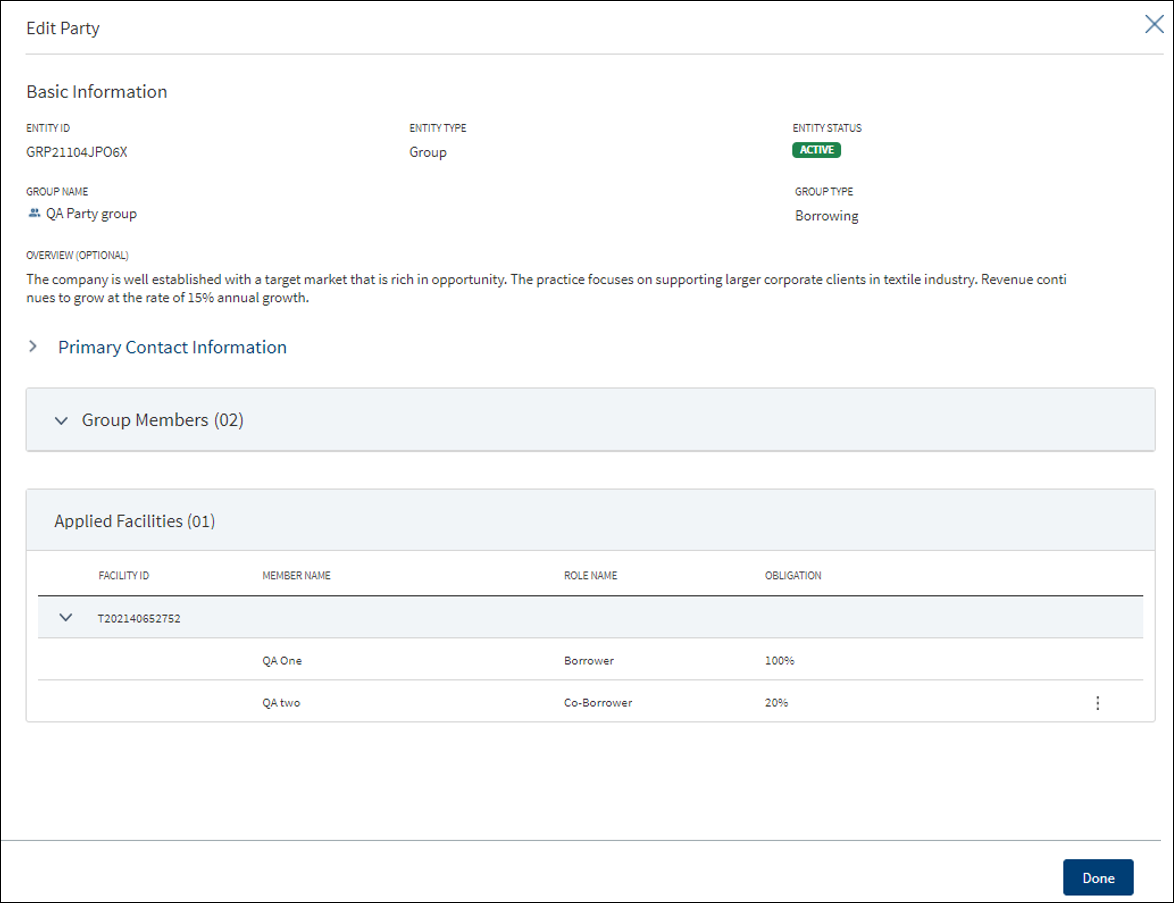
View Party

This section displays the fields in the view party screen.
- Basic Information(View Party)
- Entity ID
- Entity Type
- Entity Status
- Legal Name
- Company Type
- Industry
- Sub-Industry
- Registration ID
- Registration Date
- Country of Incorporation
- Years in Business
- Website Address
- Estimated Annual Revenue
- Employee Count
- Country
- Address Line 1
- Address Line 2
- City
- State
- Zip Code
- Phone number
- Primary Contact Information
- First Name
- Middle Name
- Last Name
- Job Title
- Phone number
- Email Address
In this topic